johnthepump
Part of the e-furniture
 Building 7 1/4"G Edward Thomas
Posts: 493 
|
Post by johnthepump on Jul 28, 2016 9:02:09 GMT
I was suggested recently that I should start a separate thread for the Pumphouse. As I became another year older on Tuesday I thought this would be a good as any time to start this thread. Well what a start last evening Wilf (uuu) arrived and with a present for the Pumphouse. This turned out to be once unwrapped and the box opened, a Myford Compatible Handwheel Dial, something I had not heard off. So first of all read the instructions and then set about removing the hand wheel, at this point Wilf started to make notes, why I asked? well said Wilf the man who he had spoken to when ordering this had been most helpful and said he would be pleased with any feed back on the installation instructions, well this was the first having removed the handwheel, the next job was to turn up a guide fixture to drill a 3.3mm hole up the handwheel shaft and then tap it 4mm. Now it would have been much easier to make the guide fixture before removing the handwheel and hence Wilf notes. The rest of the job proceeded without a hitch and the was completed with plenty of time in hand for us all to retreat to the local for a pint. My thanks to Wilf for his most generous gift. John. 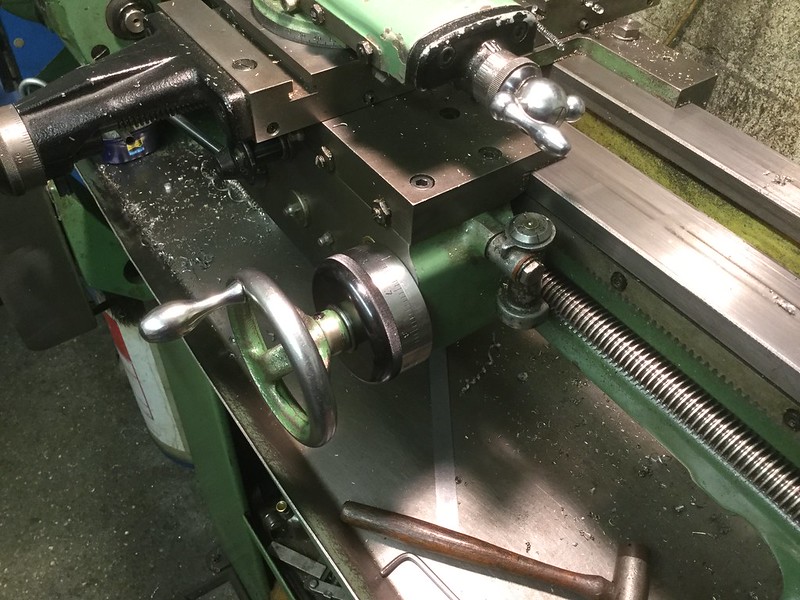 27.07.2016 27.07.2016 by John The Pump, on Flickr |
|
uuu
Elder Statesman
 your message here...
Posts: 2,807
|
Post by uuu on Jul 28, 2016 13:37:56 GMT
Nice to see your new thread starting up, John. You didn't mention that the hardest part of the whole job was getting the old handwheel off in the first place. It needed a three-leg puller, because the grubscrew had bruised the shaft so much. The supplied instructions were very comprehensive - which made the rest quite easy.
Anyone who would like details of the handwheel can PM me. Or Steve Tracey [Steve@SteveTraceyToolingServices.co.uk], who supplied it (I don't know him, except by this purchase).
Wilf
|
|
johnthepump
Part of the e-furniture
Building 7 1/4"G Edward Thomas
Posts: 493
|
Post by johnthepump on Jul 28, 2016 21:08:02 GMT
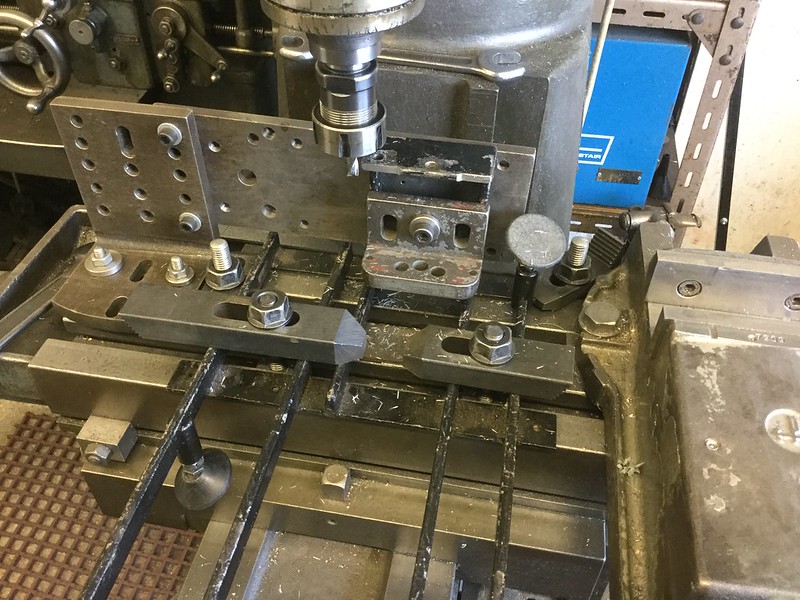
The new handwheel dial came in useful today, a friend asked me to make a few special spacer parts for a research project he is working on. The dial made machining the billets to length and boring the recess depth easy and repeatable. The tool I was going to use didn't have enough cutting length to face the 32mm dia. and as I wanted to chamfer the corners as well, I decided to grind the side of the chamfer tool to do the job with one tool, this saved tool changes. The photo show the tool stood on the job, this one is a reject because of chuck marks. John. 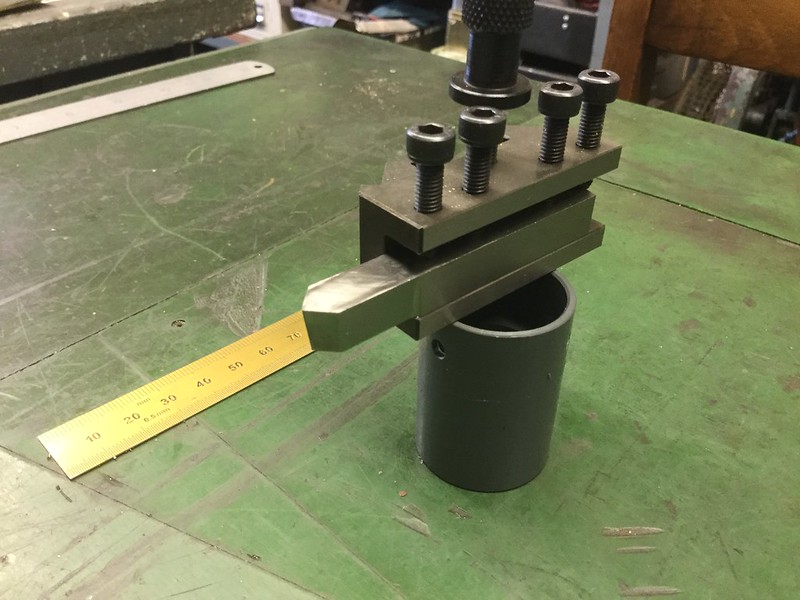 28.07.2016 28.07.2016 by John The Pump, on Flickr |
|
|
|
Post by Jim on Jul 28, 2016 21:40:14 GMT
Thanks John for starting what will be a very popular and informative thread. Happy birthday too from the other side of the world and may there be many more to come.
Jim
|
|
johnthepump
Part of the e-furniture
Building 7 1/4"G Edward Thomas
Posts: 493
|
Post by johnthepump on Jul 30, 2016 7:58:44 GMT
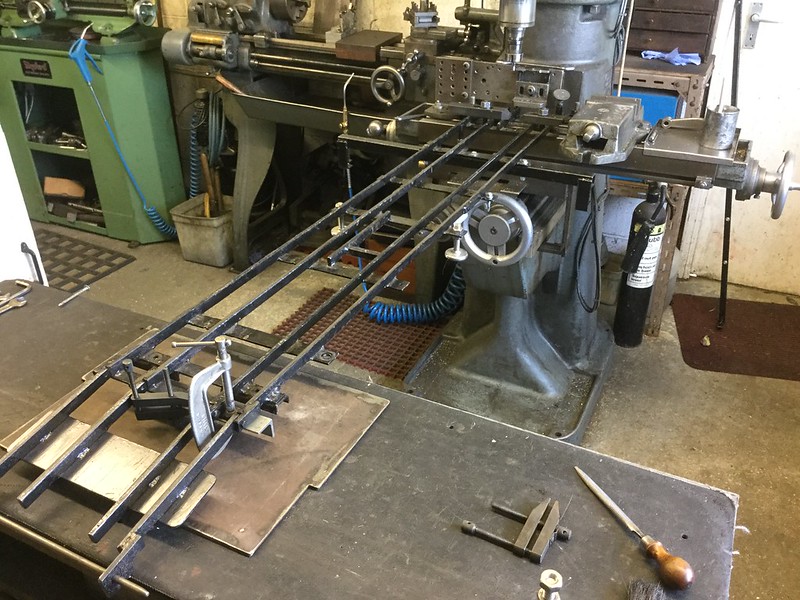
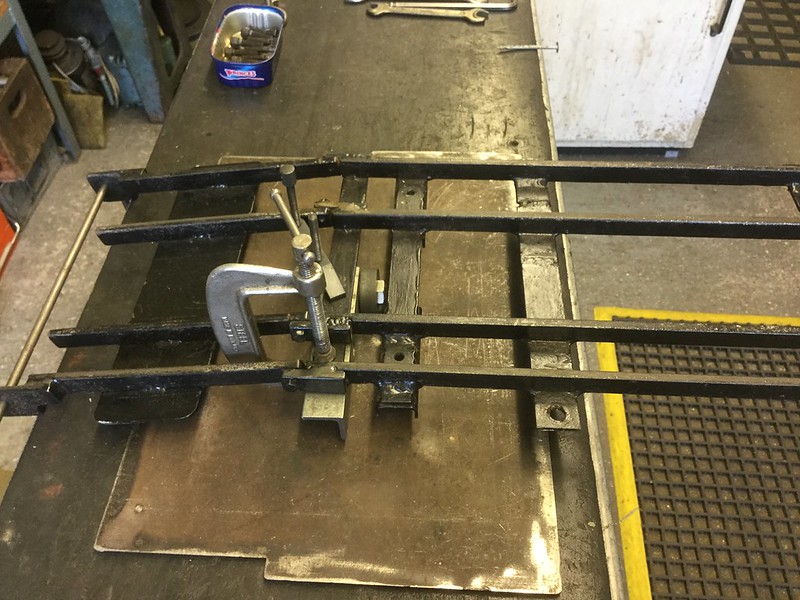
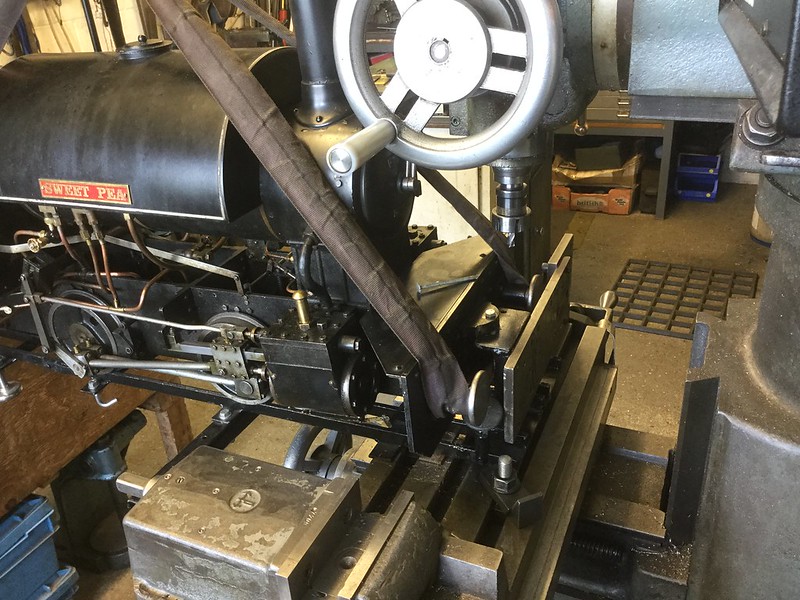
I took the fitted track out of my car the other day as I needed to use the rear seats, so I took the opportunity to modify the Loco locating plate. It suited the 5" steam outline battery loco that I use on portable track days, but the Sweet pea although it lined up I could only get a 4mm dia, clout head nail in the locating hole instead of the usual 6mm bolts. The mod required 2mm's removing from the front over the plate but leaving the central portion as was, the track panel being 1.5 Metres long needed a little support for the overhang, so a steel plate was put on the central bench and a ball raced plastic wheel attracted to the track panel. The end to be machined was clocked square and an assortment of brackets and plates were bolted in place to make the job rigid for machining. this job took much longer to set up than do, I can hear some of you saying why not just file or grind off, well this way gives a better job that fits. as the loco happened to be in the workshop on the side bench at the time I craned it over to check the fit before removing the job from the mill. We off to the Havenstreet Steam railway today to set up the portable track for their Railway Folk event this Sunday Monday & Tuesday.
John.
 29.07.2016 by John The Pump, on Flickr 29.07.2016 by John The Pump, on Flickr
 29.07.2016 by John The Pump, on Flickr 29.07.2016 by John The Pump, on Flickr
 29.07.2016 by John The Pump, on Flickr 29.07.2016 by John The Pump, on Flickr
 29.07.2016 by John The Pump, on Flickr 29.07.2016 by John The Pump, on Flickr |
|
|
|
Post by springcrocus on Jul 30, 2016 8:42:34 GMT
Ingenious.  Steve |
|
uuu
Elder Statesman
your message here...
Posts: 2,807
|
Post by uuu on Jul 30, 2016 8:59:08 GMT
It will be a comfort to know that your loco is properly bolted down behind you. And a life-saver if you hit something.
Wilf
|
|
uuu
Elder Statesman
your message here...
Posts: 2,807
|
Post by uuu on Aug 4, 2016 7:22:00 GMT
A quiet Wednesday evening. Just John and me for most of it.
But to recap where we are with John's loco:
The cast horns have been machined, so it's time to bolt them to the frames. With fitted bolts. But isn't it always the way that you get a good idea for something that needs doing first? John's capstan lathe had a toolpost he didn't like, so we've made a new one. It's smaller, and stiffer. But for some reason we miscalculated slightly so it ratcheted round a few thou out of square. So last night we made a shouldered index pin that got the whole thing straight.
Not in Roger's teeny-weeny category, but small enough. Hopefully now it's on to the bolts. Once the holes have been drilled and reamed. For which we need a reamer the right size. Isn't it always the way...
Wilf
|
|
uuu
Elder Statesman
your message here...
Posts: 2,807
|
Post by uuu on Aug 4, 2016 16:58:33 GMT
Since red/green colour blindness was mentioned on anther thread - I thought I'd add a trick we've used at the Pumphouse. The problem was a battery charger that had a red/green indicator. How do you tell what colour it is? Or more precisely how can John tell what colour it is?
You get a piece of red film and stick it over half the lamp. When it shines red, the light will pass through the film, and you see the whole disc. When it shines green the light won't pass through the film and you only see half the disc.
Wilf
|
|
steam4ian
Elder Statesman
One good turn deserves another
Posts: 2,069
|
Post by steam4ian on Aug 5, 2016 0:15:32 GMT
Wilf
How do you know you have a red film?
A while back I was investigating solar powered LED lighting for signal lanterns at a certain preserved railway. Some solar powered garden lights came on the market which included a focussing reflector so looked like they would do the job. They were inexpensive so not worth some vandal or collector stealing.
They used white and yellow LEDs to give what appeared to be a white light. This light source was weak in green and red wavelengths so as they stood they were unsuitable for signal use.
I replaced the LEDs with green and red LEDs and the green/red spectacle lenses acted as optical switches like you described. I made some brackets so the light packages could mount on the flat spigot of the signals and sent them off to the railway.
I don't think they were ever installed but I did gain a kerosene signal lamp, sans chimney, for my efforts; I probably should return it.
Ian
|
|
johnthepump
Part of the e-furniture
Building 7 1/4"G Edward Thomas
Posts: 493
|
Post by johnthepump on Aug 11, 2016 21:57:19 GMT
I said I was going to reserve Wednesday evenings to work on my own engine a 7 1/4"G. Edward Thomas and do club members work on Tuesday evenings. But like all things exceptions have to be made, our Secretary's B1 boiler had arrived on Tuesday evening for a Hydraulic test after he had rushed to put all the fittings the previous evening, unfortunately there was a leak from the regulator bush gasket, he had jammed the regulator, this was because he had not entered the steam pipe into the wet header bush in the correct position and as the bush was tightened the regulator pipe was jammed up against the back bush. This meant the super heaters had to be removed and the complete regulator assembly removed and new gaskets made. As the owner wants to have the boiler back in the loco for a steam test on Saturday, I once again put my own work to one side and allowed the B1 to take up Wednesday evening.
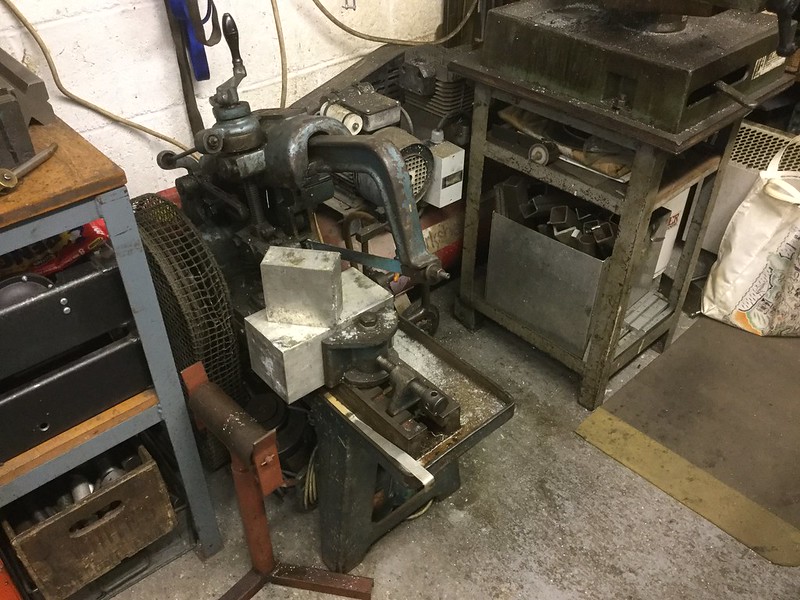
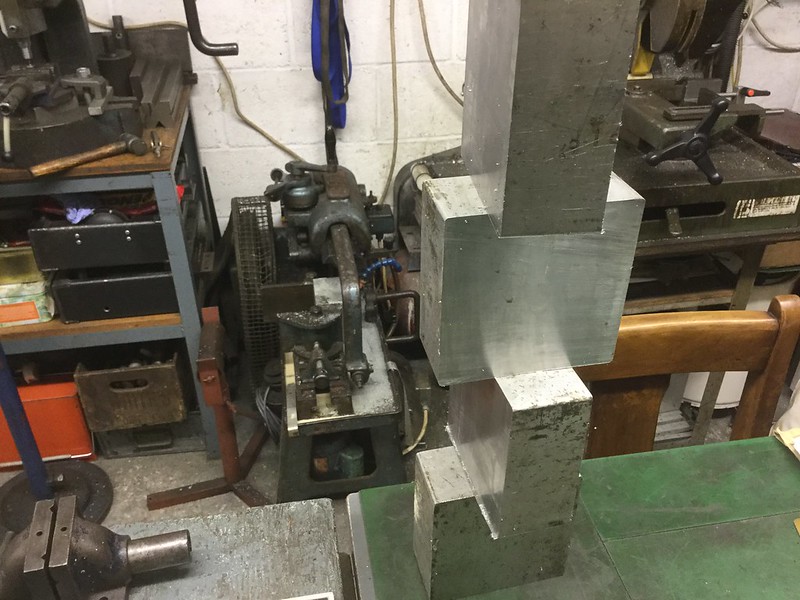
While this was going on I had dug out a billet of aluminium 4 1/2" square, which had been hiding under a bench for 10 Years or so waiting for someone who needed it for a project. Wilf had mentioned this requirement last week so I cut off 4 pieces 2" thick on my Ajax donkey saw taking 11minutes per cut.
In the mean time Martin had brought his Sweet pea fire box assembly wanting the burnt out front deflector plate partially replaced, a piece of 1/8 mild steel plate was marked out and a start was made on cutting it out with a hacksaw and fil. Martin will finish the shaping at home and bring it back next week for welding in place.
Next week is already sounding busy, a lubricator for another B1 has arrived and a bogey off one of the clubs 5"G. passenger trolleys needs new axles and bearings.
The boiler did pass its hydraulic test and as usual we retired to the local for a pint and a chat.
John.
 10.08.2016 by John The Pump, on Flickr 10.08.2016 by John The Pump, on Flickr
 10.08.2016 by John The Pump, on Flickr 10.08.2016 by John The Pump, on Flickr
|
|
uuu
Elder Statesman
your message here...
Posts: 2,807
|
Post by uuu on Aug 12, 2016 18:46:32 GMT
Well, I now have a bucket full of aluminium swarf. Nothing to show yet: just squaring them up. Although the saw had gone pretty straight anyway.
Wilf
|
|
|
|
Post by springcrocus on Aug 12, 2016 22:00:27 GMT
Well, I now have a bucket full of aluminium swarf. Nothing to show yet: just squaring them up. Although the saw had gone pretty straight anyway. Wilf It's about time you bought a camera, Wilf, so we can all see what you really get up to. What are you building with this ten-year-old lump of aluminium, if I may be so bold as to ask?  Steve |
|
johnthepump
Part of the e-furniture
Building 7 1/4"G Edward Thomas
Posts: 493
|
Post by johnthepump on Aug 13, 2016 8:50:54 GMT
Well, I now have a bucket full of aluminium swarf. Nothing to show yet: just squaring them up. Although the saw had gone pretty straight anyway. Wilf It's about time you bought a camera, Wilf, so we can all see what you really get up to. What are you building with this ten-year-old lump of aluminium, if I may be so bold as to ask? Steve Hi Steve, Wilf does have a camera and has put up some interesting photo's in a thread called " Another Jessy" John. |
|
|
|
Post by springcrocus on Aug 13, 2016 10:05:02 GMT
Ah! Found it in "Images", I remember seeing the safety valve cover thingy last year.
Steve
|
|
uuu
Elder Statesman
your message here...
Posts: 2,807
|
Post by uuu on Aug 13, 2016 10:35:04 GMT
The aluminium is for pedestals for a slate truck. I was foolish enough to bid on an ebay bargain, and found myself with a set of wheel castings. I'm starting at the bottom and working upwards.
Wilf
|
|
johnthepump
Part of the e-furniture
Building 7 1/4"G Edward Thomas
Posts: 493
|
Post by johnthepump on Aug 14, 2016 10:12:50 GMT
Yesterday we went up the club to do a steam test on the Secretary's (Roger S-R) B1, which I'm pleased to say passed. The loco ran very well and we are pleased to see it back on the track after its long overhaul, in the Pumphouse we had made a new back axle and bushed the back axle boxes, new pistons and rings the cylinders were rebored on the Le Blonde the same lathe that Julian referred to the other day in another thread recalling using it at Aptule works when he was 16.
The loco has a new boiler as the old one had done it time and had leaked around the foundation ring and then around the fire hole ring. As a point of interest Roger can get the boiler out of his loco and on the bench with the cladding removed in 45mins he has become so well practiced over the last 2 years, I hope for his sake he doesn't have to do it again any time soon.
The clubs Super Simplex had a steam test last week and the axle pump didn't work, the injector and hand pump were fine, the whistle valve stuck after a few laps of the track. I did strip the whistle valve and clean it after the loco cooled down and took the suction clack off the axle pump. This Loco was made be the members and as I recall Julian put the finishing touches to it and quietly sorted out any problems.
I steamed Super Simplex yesterday and the axle pump didn't work and once again the whistle valve stuck after being on the track for a while. So it has come to the Pumphouse for repairs as it is needed for a portable track event next weekend at the Isle of Wight Garlic Festival.
John.
 13.08.2016 by John The Pump, on Flickr 13.08.2016 by John The Pump, on Flickr |
|
uuu
Elder Statesman
your message here...
Posts: 2,807
|
Post by uuu on Aug 18, 2016 16:28:08 GMT
John may post pictures of progress, but I'll nip in with a description:
Martin came back with his Sweet Pea baffle plate, which he'd filed up to fit. So John put a set in it with the fly-press (the upper section is angled back from the tubes). And then welded it to the grate assembly.
Then, at last, we got stuck in to John's loco. Horns drilled though from the frames for rivets.
Yes, you heard right. Having made a new four-way tool-post for the lathe to help with making the fitted bolts, it turns out these are needed elswhere: This bit has rivets.
Wilf
|
|
johnthepump
Part of the e-furniture
Building 7 1/4"G Edward Thomas
Posts: 493
|
Post by johnthepump on Aug 18, 2016 21:39:04 GMT
As Wilf mentioned in the previous post, we got back to my loco and while I welded the part baffle plate into Martin's Sweet Pea grate/ash pan. Wilf and Martin set about stripping my frames down, so we could drill the horns for fixing by rivets and not fitted bolts as I had thought, so the diversion into making a new 4 way toolpost for the Atlas lathe was some what unnecessary although useful and has already been used to advantage. For the observant among you and before you ask the double row of holes each side of the front axle are a mistake from when we drilled the frames way back in 2004, it wasn't until we drilled the ones by the 2nd axle that we realised our mistake and went back and drilled them in the correct position. the wrong holes will get countersunk each side and filled with rivets. There is now all lot of rivets to go in on the frames and the buffer beams but before the top angle is riveted to the frames they will get bolted together and the inside of the horns milled to there final dimension. John. 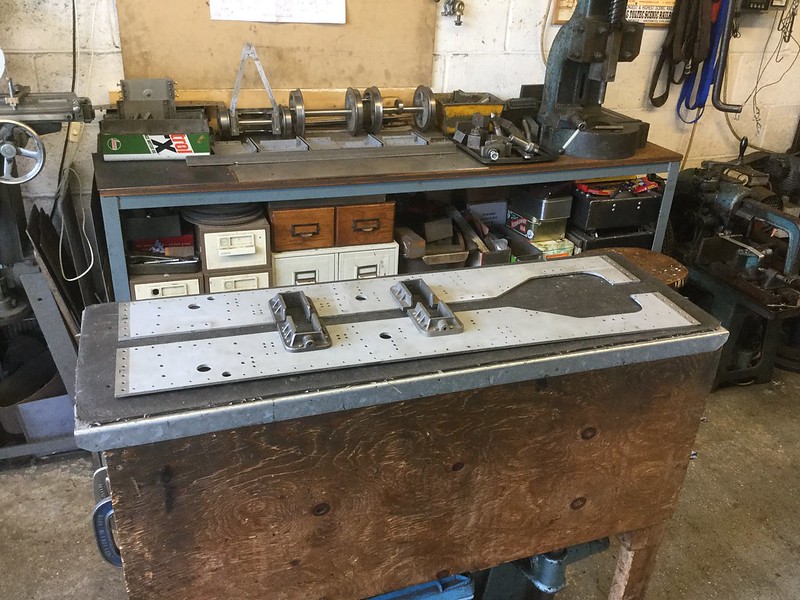 17.08.2016 17.08.2016 by John The Pump, on Flickr |
|
|
|
Post by jordanleeds on Aug 19, 2016 6:06:11 GMT
Excellent to see another edward thomas in build.. I shall have to get my one back out and start riveting shortly as when I bought it part built the original builder had insisted on using BA screws which where a poor fit
|
|


