|
|
Post by 92220 on Aug 4, 2016 11:43:04 GMT
I haven't been a member on here for long but I have been asked, by a number of others, to start a thread about the building of my loco. You will have seen model locos 'built to works drawings'. This statement is usually way off!! The heading of this thread really is true. Below, I have attached a photo of my drawings file which takes up the whole of the top drawer of my filing cabinet. I reckon it must be the longest build ever! I started it in 1969 by borrowing frame drawings and other assembly drawings, from the Science Museum in London. Looking at the fullsize copies I have, it amounted to 19 drawings. Yes, you read that right, I BORROWED the original British Railways drawings, from the Science Museum. At the time, I was a design draughtsman at a machine tool factory in Cheltenham. I offered to copy the B.R. paper drawings onto Melinex draughting film to make virtually indestructible copies that could be used to taking copies of the drawings, on our drawing office printer. They jumped at the chance of getting tracings that they could print from and sell the prints, and at the same time, preserve the paper drawings they had. Maybe this is where the idea of the NRM Copy Service came from. Well I can dream, can't I !! From these copy drawings I made up the frames.
My next job was to locate the correct colour. All I knew was that it was Green! I spent over 6 months ringing around until finally I located the company that had made the paint for Evening Star's repaint after she was brought out of storage in Brighton Works.
In those days I had no idea how complicated it was to build a model steam loco. I didn't even have a workshop! Anyway, I just HAD to have the correct colour paint so I found out the paint company had 3 x 5 litres tins of the original batch left on the shelf. I bought one 5 litre tin for £10 (costs a bit more these days!!! When it arrived, I thought, "This is daft. I need it in small tins. I managed to scrounge 20 x 250mls new tins from the firm I worked for, and decanted the paint into them. I didn't need 20 tins of paint so the next meeting of the Cheltenham Model Engineers, I took 19 tins down to the meeting to sell and get some of my money back. I think I had those tins of paint in my possession for 3 minutes!! THAT made me think - there's a business here if I can get some samples of railway colours and get paint made. That's how Precision Paints came about - one 5 litre of Authentic railway colour paint and a lot of research! I spent all my spare time researching British railway liveries and finally started Precision Paints Co. in 1972.
The loco took a back seat, with only the frames assembled, for the next 30+ years, while I learned to colour match, and then how to make paints from raw materials. During this learning phase, the paints were made for me by Joseph Mason Paints of Derby. They were a major supplier of paint to the pre and post Grouping companies, as well as to British Railways, in the early days of Nationalisation.
While I ran the business I assembled a workshop that was used for servicing the company machinery (Well that was my excuse). In 2004 I had to retire on health grounds (nothing to do with the paints, which were all manufactured to Toy Spec, though not certified as such. That would have cost £100 for every batch of paint made. An un-necessary expense as toys were definitely not our interest!!
When I retired, the workshop equipment had been almost written off by the Tax Man, and he let me have the entire workshop for a VERY reasonable price. I was set up to get back to making bits for the loco. From the day I retired I started to collect a set of detail drawings from the NRM Copy Service. I first got hold of copies of the BR drawing registers for Brighton, Derby, Doncaster and Swindon. I have managed to collect what I think is a complete set of all available detail drawings of standard 9F locos. I now have almost 600 drawings.
Unfortunately I didn't keep a proper photographic record of the makings because I didn't know that there would be any interest in the project. I do have photos but not from the early days of the frames. Anyway, I have been asked to try and show how things have been made so here goes with some of the photos I do have:-
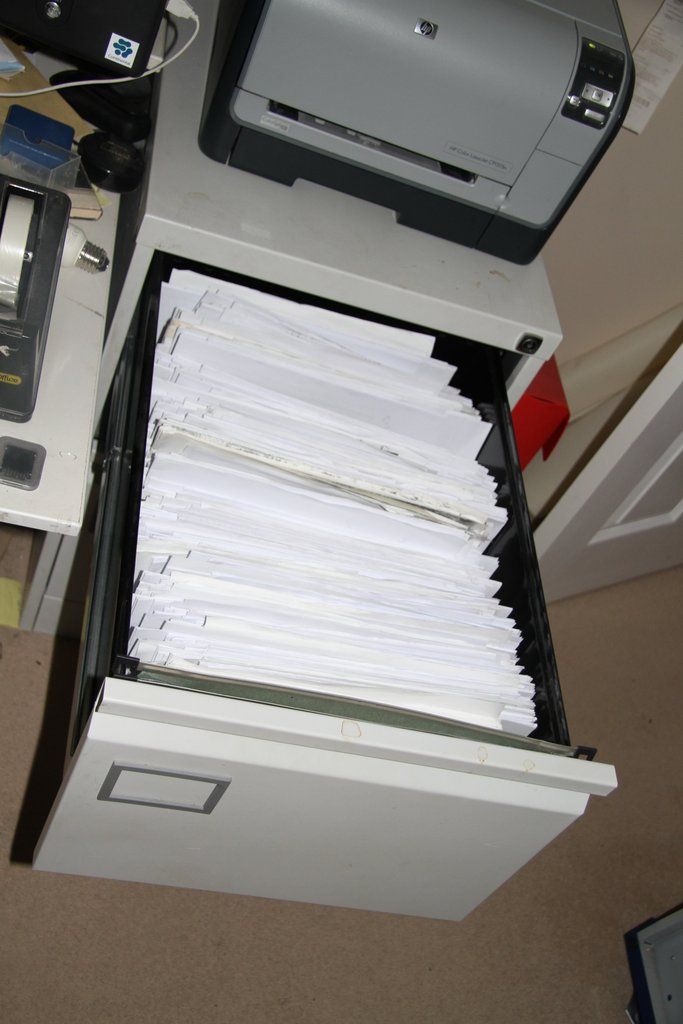
My drawings file.
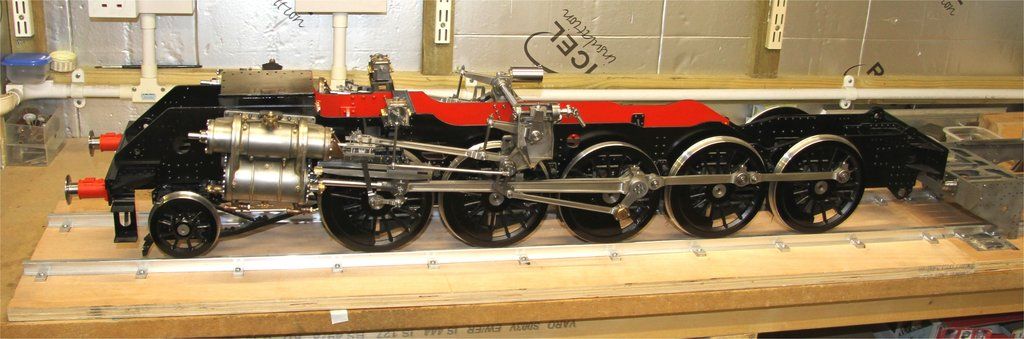
As at 4.8.16
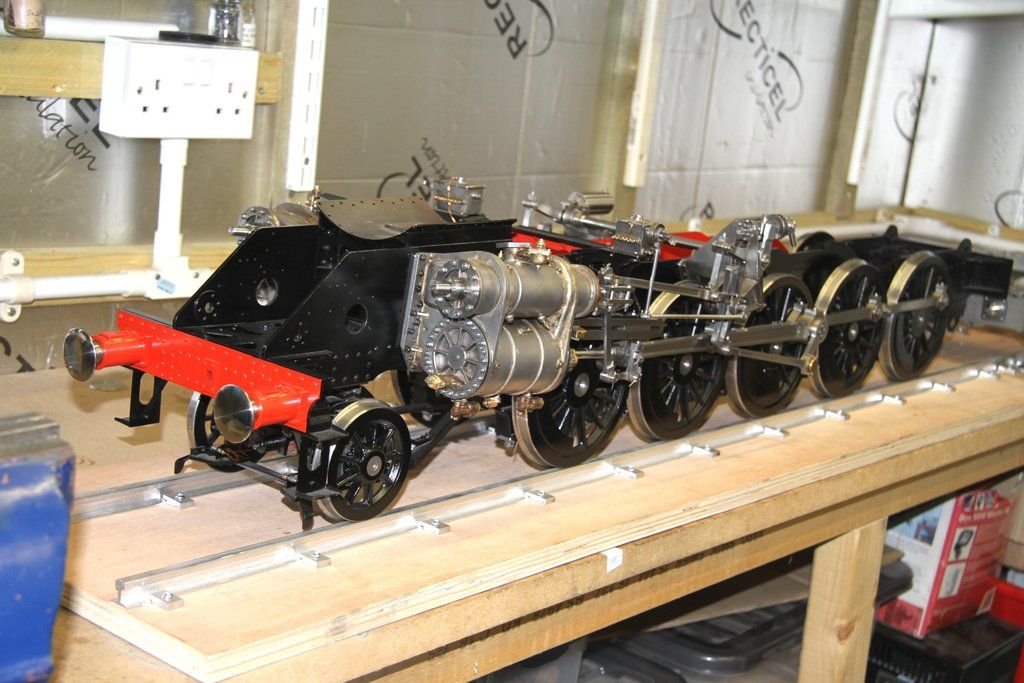
As at 4.8.16
Currently I'm working on the tender to bring it up to the same stage as the loco. I will try and show the progress of the tender as it goes along. As far as is physically possible within the constraints of scale it will be an exact replica of the fullsize tender.
|
|
|
|
Post by Deleted on Aug 4, 2016 12:18:43 GMT
That looks a very fine model sir....I for one will look forward to future updates....
Pete
|
|
|
|
Post by Rex Hanman on Aug 4, 2016 14:26:58 GMT
Fantastic! I look forward to seeing and reading more.
|
|
|
|
Post by gall335i on Aug 5, 2016 9:47:07 GMT
Looks good Bob, are the cylinders fabricated?? Would you be willing to share your design for them so I could scale them up for mine??
Andrew.
|
|
|
|
Post by 92220 on Aug 5, 2016 11:46:12 GMT
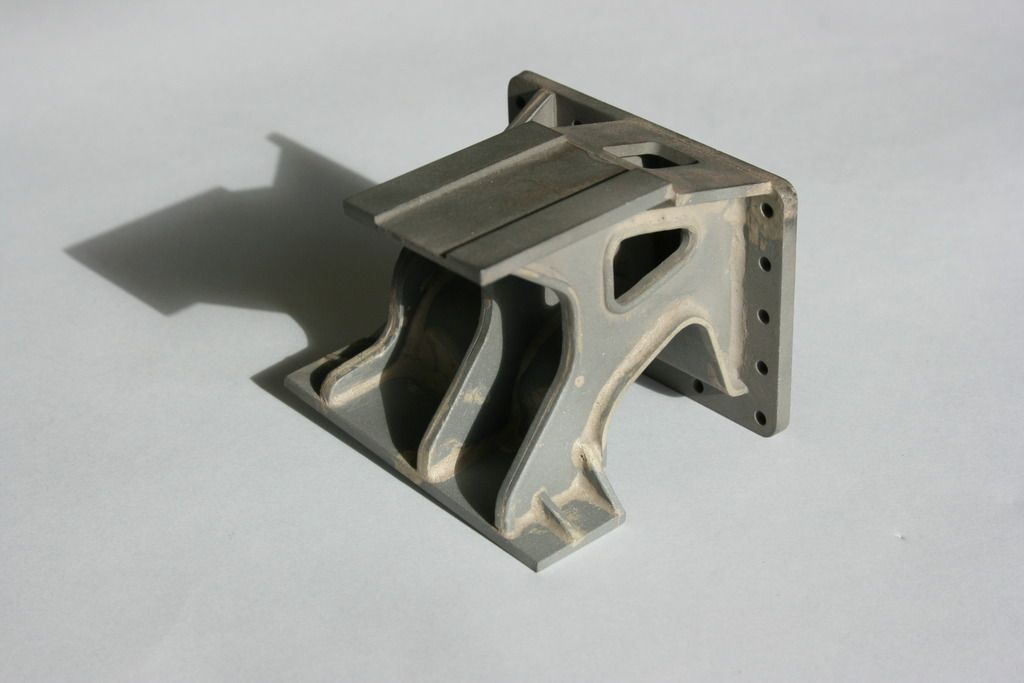
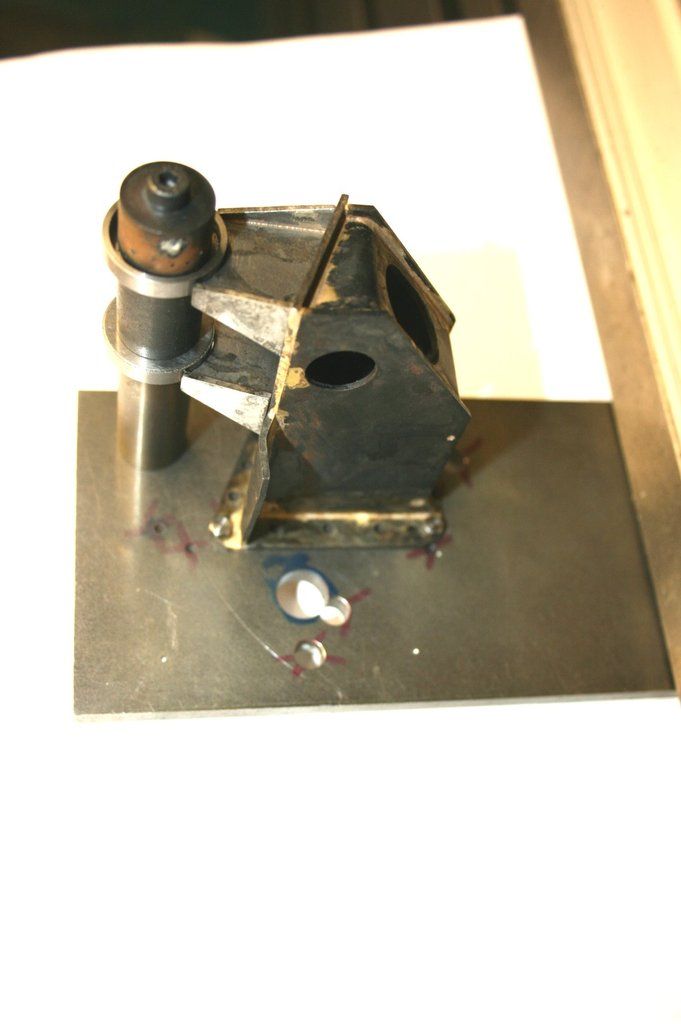
I wish I'd taken photos of the frames, for a record, while making them. These are the earliest photos I've got of the build:
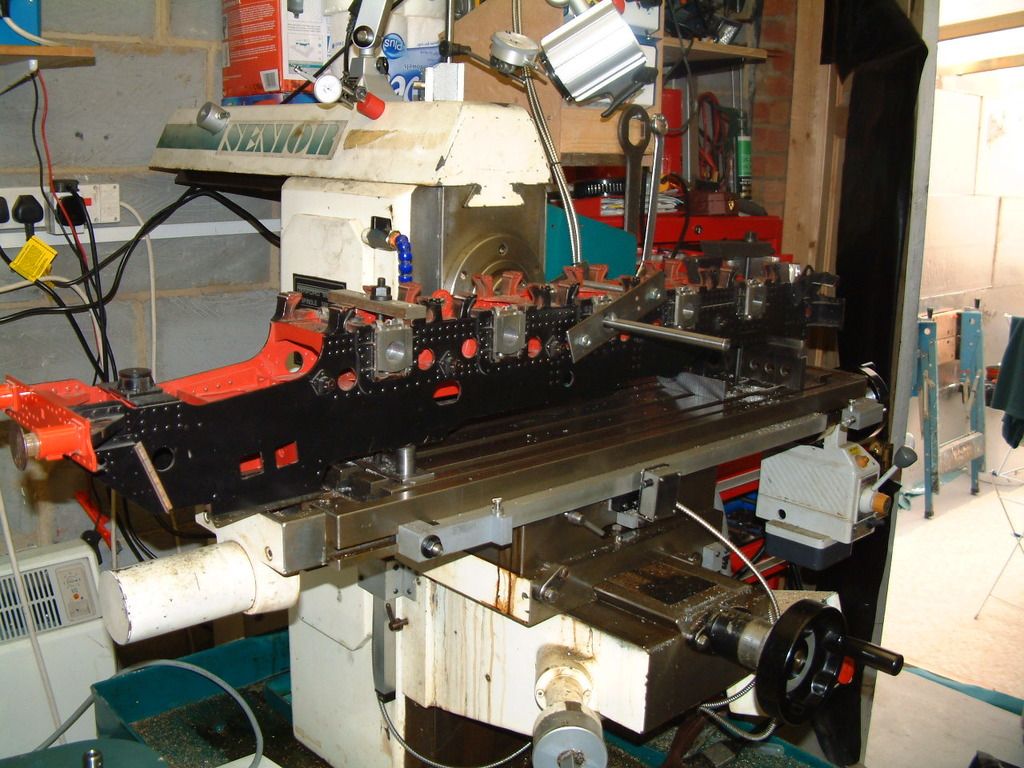
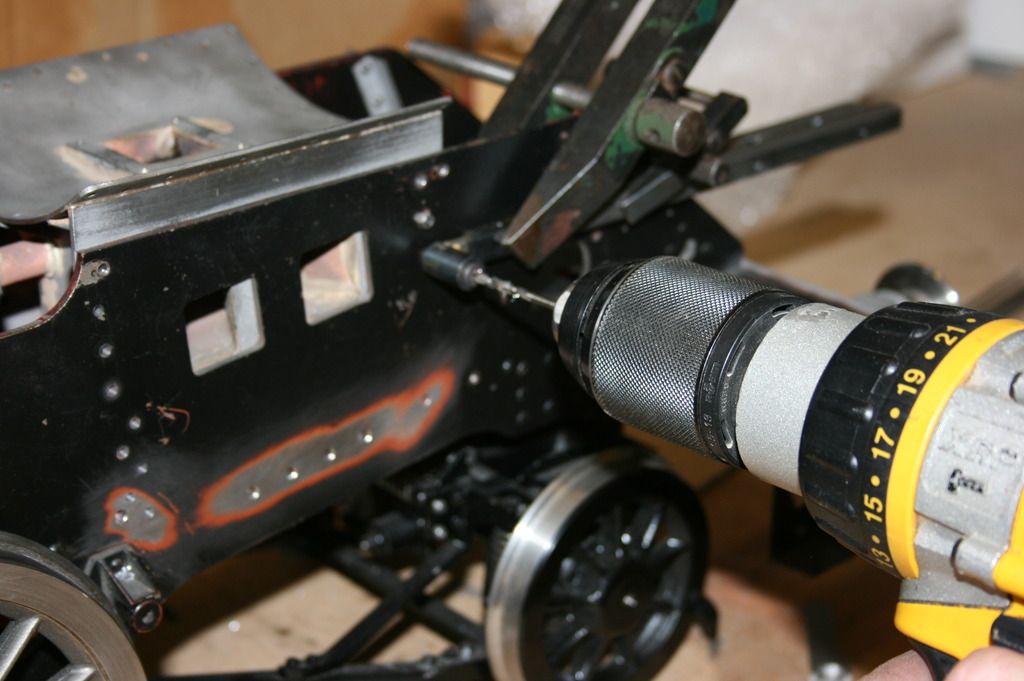
This is the frames being set upon the mill to line bore the axleboxes.
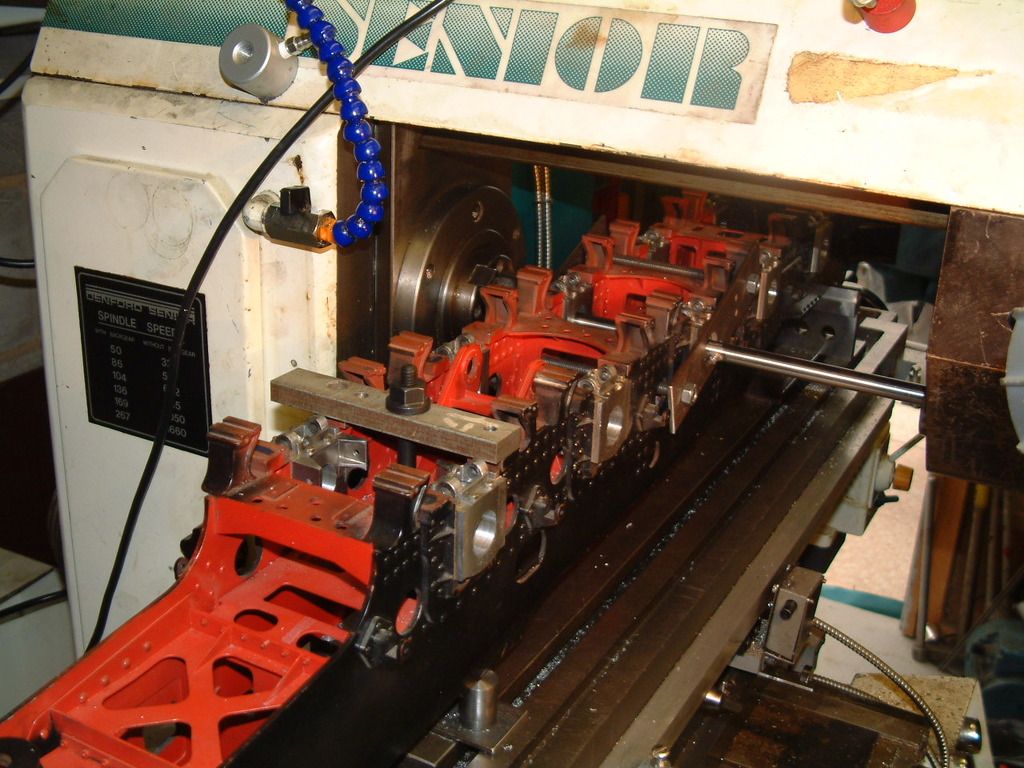
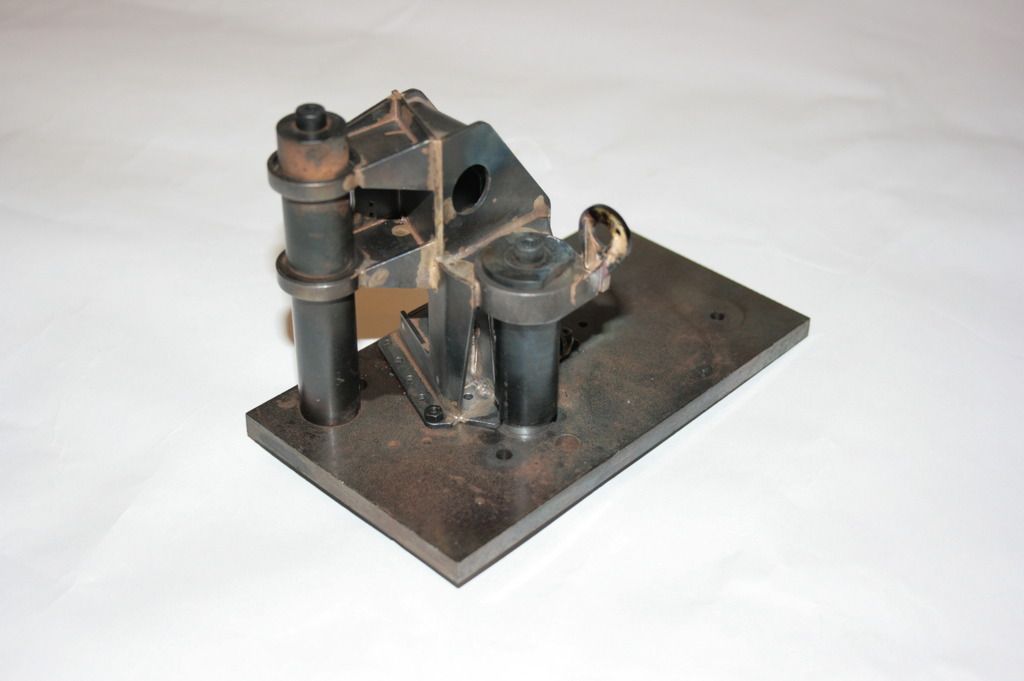
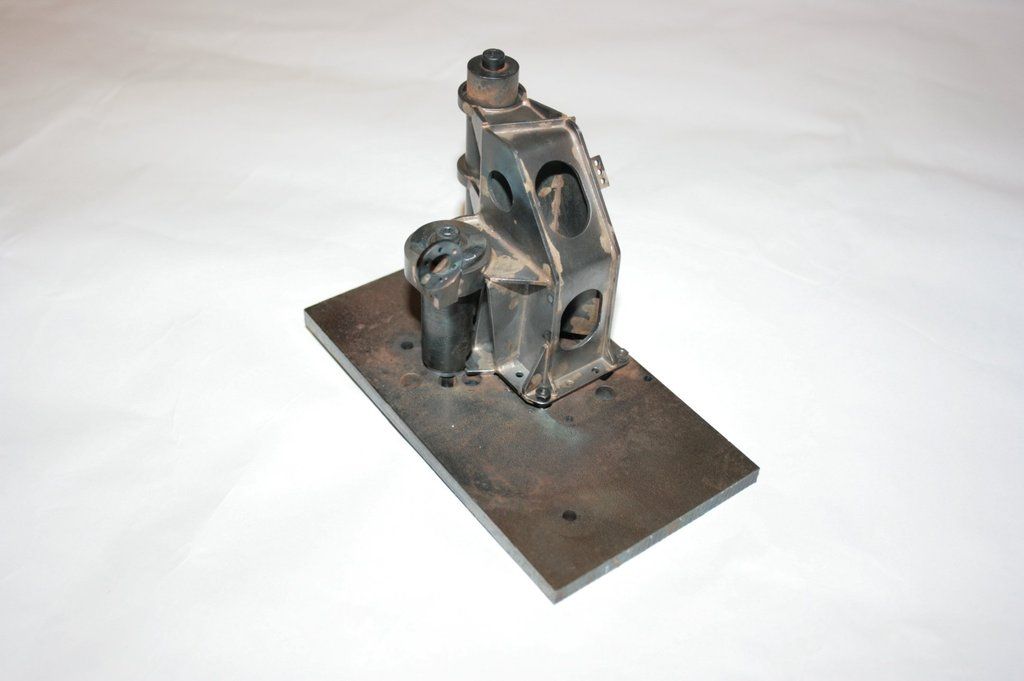
As you can see, the frames have been painted. The paint scheme is WRONG. Evening Star had a paint scheme specific to her, and it wasn't just the colour of the boiler etc. You can see the frames and stretchers are painted BS Signal Red (Vermilion) below the horizontal stretchers. This should all have been Black. The only Red was the inside faces of the frame plates from the the back of the saddle to the vertical stretcher supporting the front of the boiler, the back face of the saddle above the horizontal stretchers, and the inner faces of the horizontal stretcher side flanges. Everything else was Black. The NRM has, very kindly, in the past, given me full access to the loco and allowed me to climb all over, in, and under, her. I was also allowed to research the paint layers during my time with Precision Paints. Because of this I had to sandblast the frames back to bare metal and repaint. Grrr!!!!! It was worth it, though, to get it right. These next pics show how it actually is:
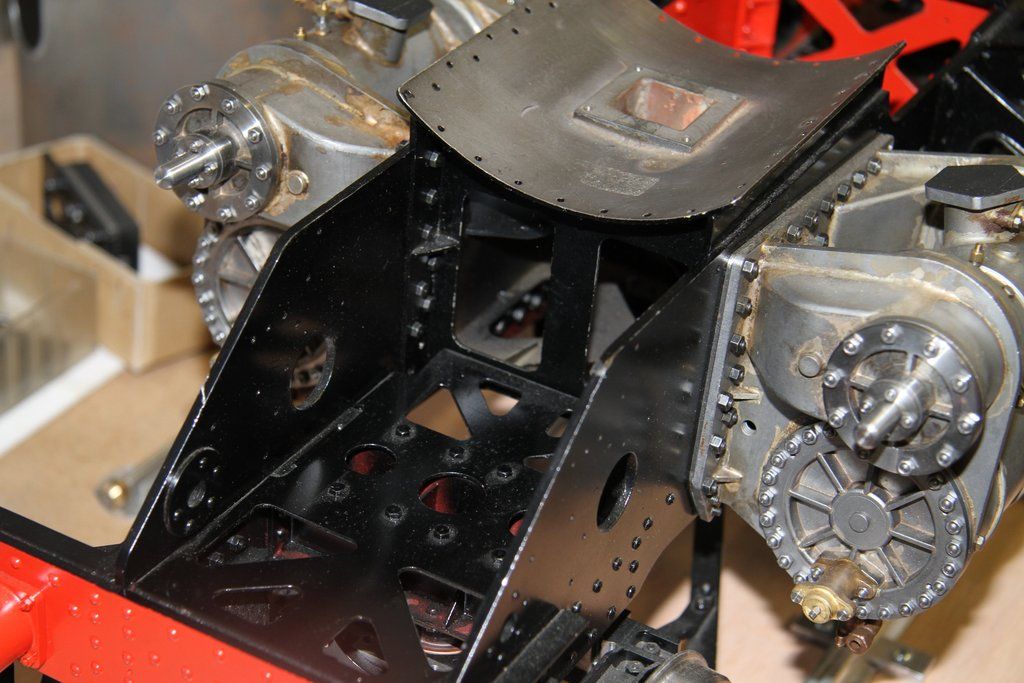
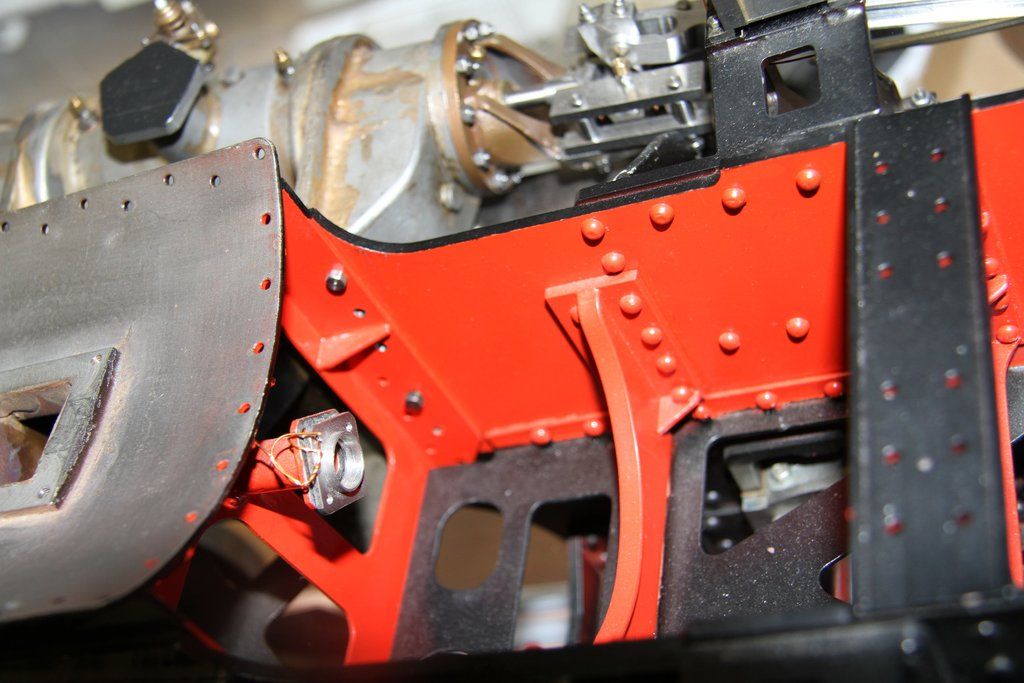
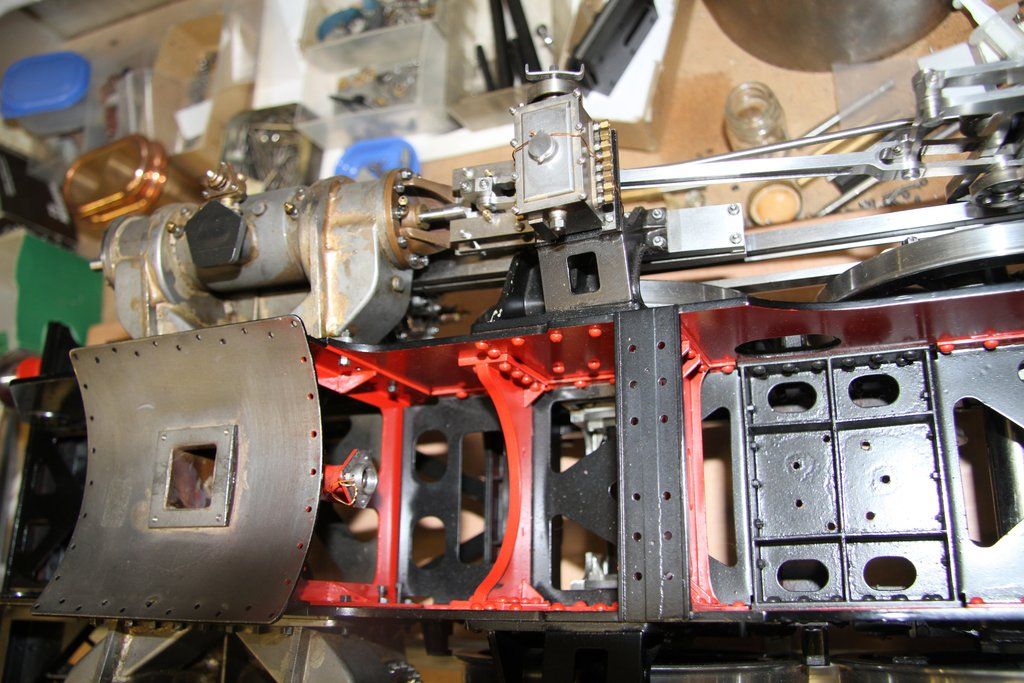
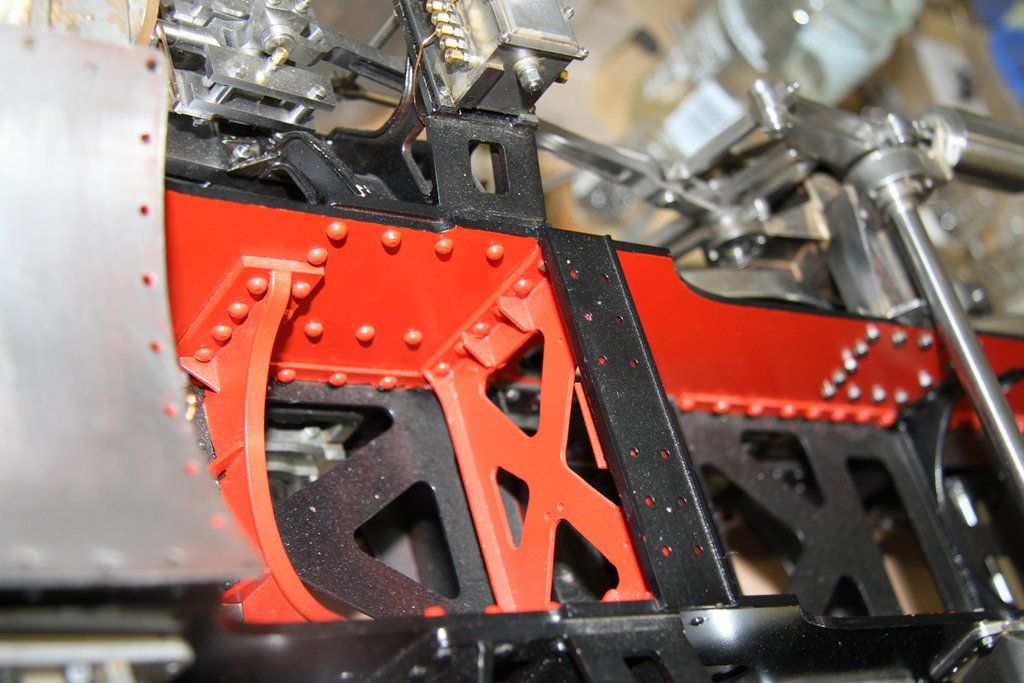
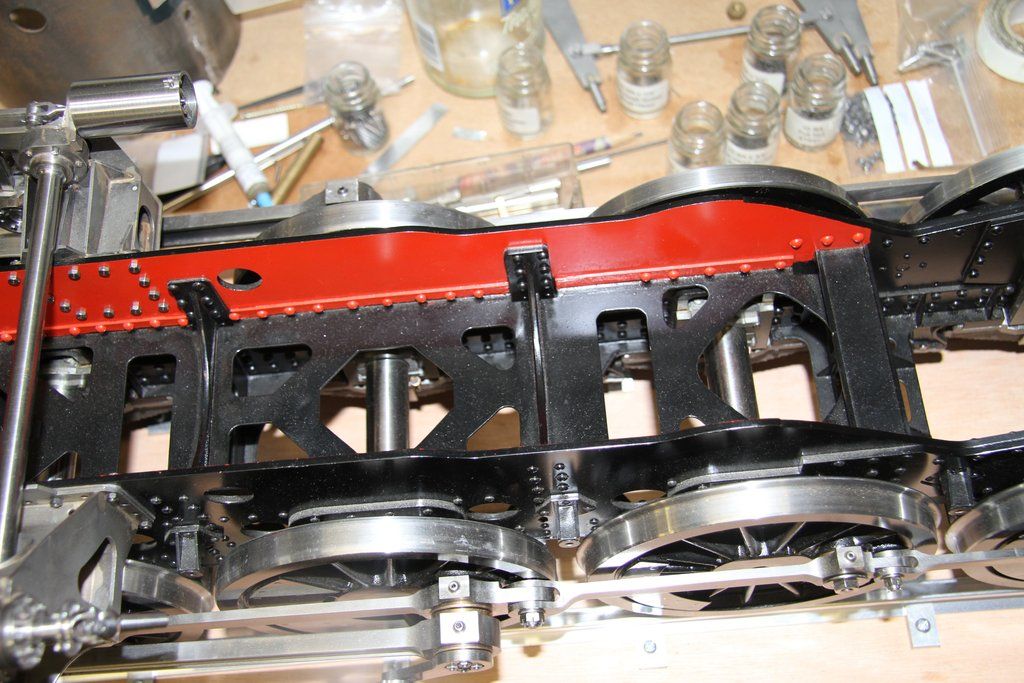
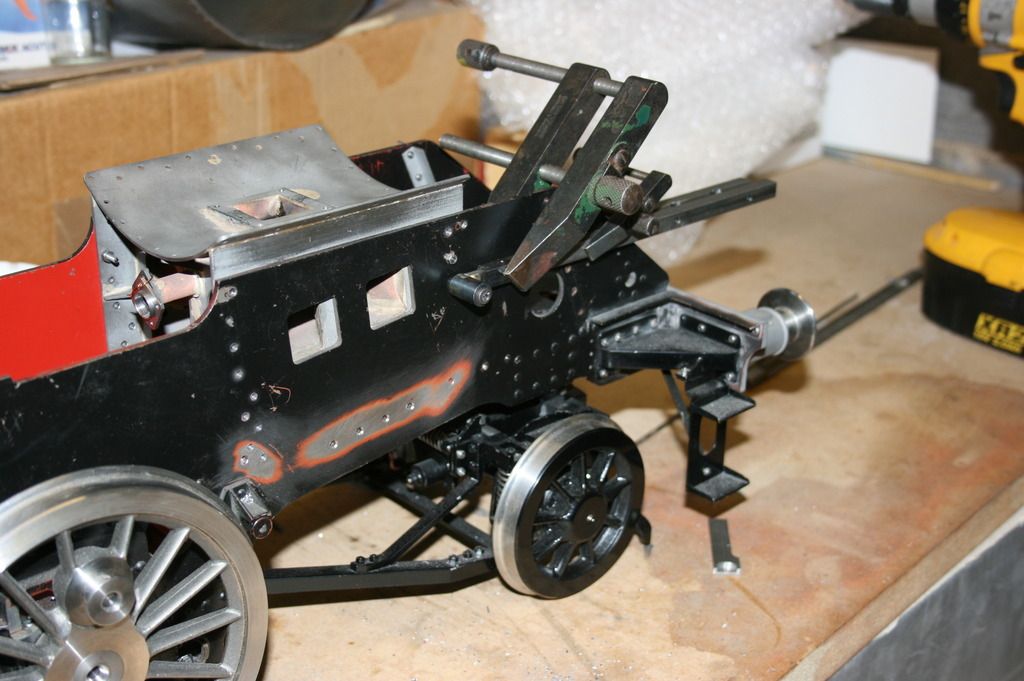
And everything below the horizontal stretchers is Black
|
|
|
|
Post by 92220 on Aug 5, 2016 12:27:47 GMT
Hi Andrew.
Yes they are fabricated. They are as near as I could get to the real thing. All my drawings are on AutoCAD. Do you have access to a CAD system. I can export the drawing as a DXF file which almost all CAD systems will read, if that is any help. Failing that I can print an A1 hardcopy, though it wouldn't have all the bits and bobs that I draw around the main drawing.
I've got photos of the make-up of the cylinders. I'll get them up together and post them for you to see what is involved. I warn you, it did take me around 6 months from start to finish, making them!! |
|
|
|
Post by 92220 on Aug 5, 2016 12:53:08 GMT
|
|
|
|
Post by fasterbyelan on Aug 5, 2016 13:16:10 GMT
Crackin' work there, well done!
|
|
|
|
Post by runner42 on Aug 6, 2016 5:36:48 GMT
Hi Bob,
a masterful example of fabricated cylinders, so well machined that I daresay you didn't require any jigs to hold them in place during the silver soldering process, they went together like a jigsaw. It maybe a dumb question but what material did you use?
Brian
PS If you used cast iron ( I didn't realise it is possible to silver solder cast iron) so the dumb question, however Google tells me that distortion is likely at silver soldering temperatures. Maybe I should have asked was there any special conditions that you applied during the silver soldering process?
PPS It's surprising what you find with Google. www.modelengineeringwebsite.com/Evening_Star.html
|
|
|
|
Post by 92220 on Aug 6, 2016 9:14:51 GMT
Hi Brian.
Thanks for the kind comments. No, there was no jig work for silversoldering the cylinders. I fitted everything together with pins and screws where necessary. It did take 3 or 4 silversoldering operations though, to finish them. Everything is EN1a bright mild steel. All bar stock was leaded for ease of machining. I did leave fairly substantial machining allowances in case of distortion, but there was surprisingly little. The liners are cast iron and the bores, and valve liners, were machine honed (Many years ago I used to work at Delapena Honing. Very useful!!).
For anyone contemplating a similar project - a work of advice - Do all the silversoldering without the backplate. Silversolder this on as the last operation. Doiung it all at once, as I did, made it extremely difficult to ensure good joints down inside the cavities between the cylinders and the backplate. I had to use a LOT of Easyflo to make sure it was sealed!! Had I left the backplate off until last, it would have been a much much easier job!
Bob.
p.s. That link was a big surprise. I never knew anything about that! |
|
|
|
Post by 92220 on Aug 6, 2016 9:35:30 GMT
Just goes to show, one should always plan a job. Hardly any of us do!! When it came to fitting the cylinders to the frames, I realised I had drilled the fitting holes in the smokebox saddle and the cylinder backplates, but not in the frames. OH DEAR!! The only thing to do was devise a jig that would line up a drill jig to locate in the saddle fitting holes. This is how I did it. Big sighs of relief - it worked!
Here's some more bits from the early days of building:
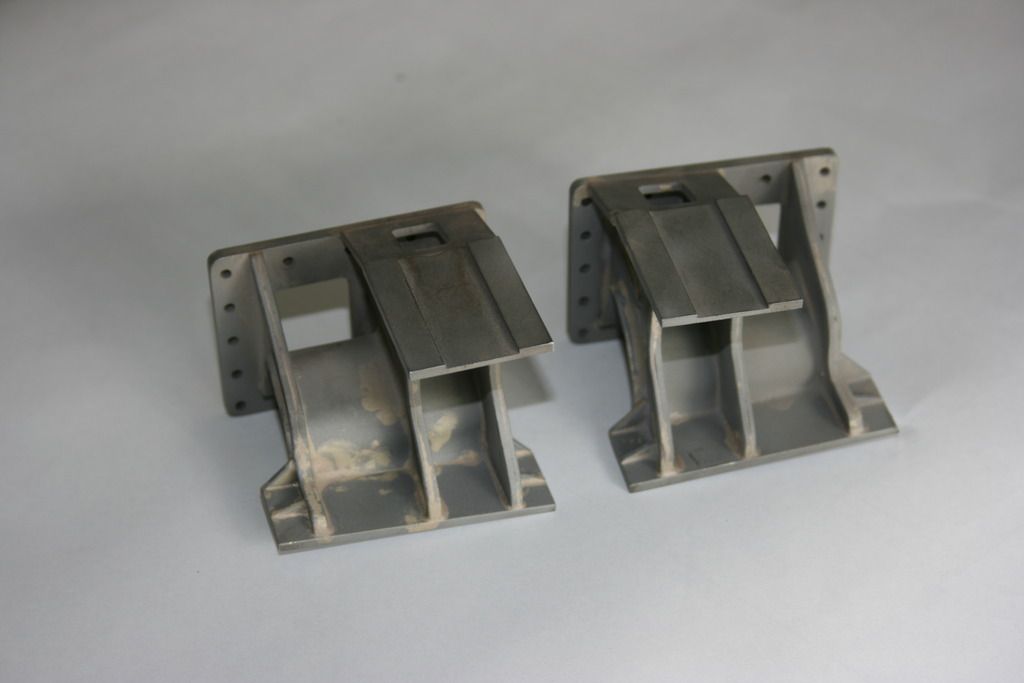
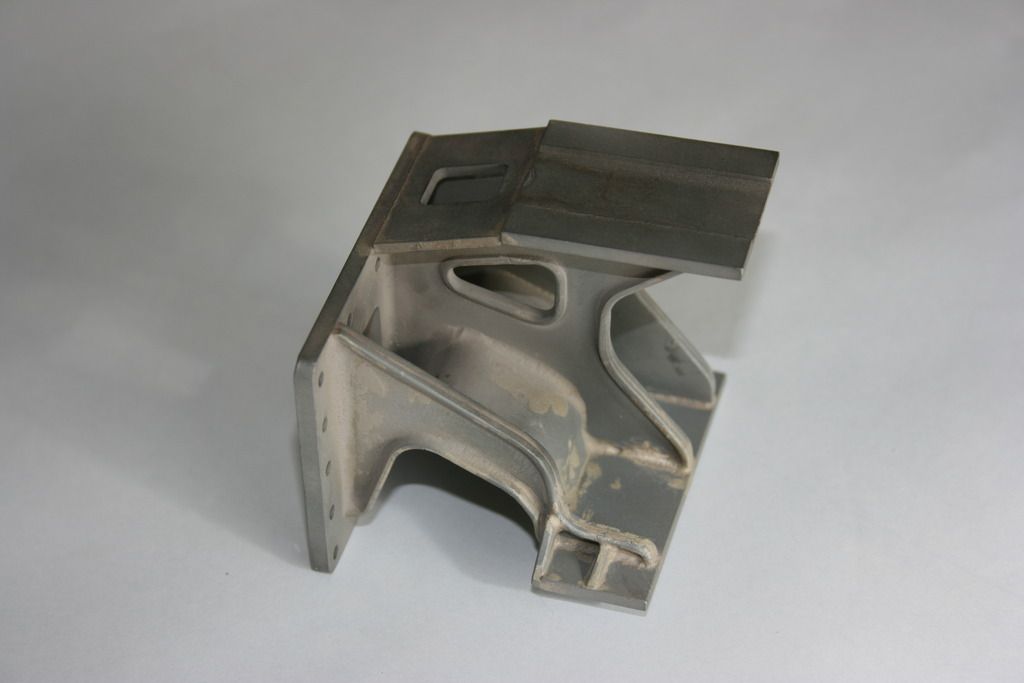
The slidebar brackets:
The motion bracket jigging for silversoldering:


Edited: I'm not sure what has happened here. I think it was because I was cleaning up some photos from Photobucket. I may have deleted the wrong ones here!! I'll try and work out what is missing.
Edit 2: These are the missing photos. I had deleted them from Photobucket, by mistake:
|
|
|
|
Post by fasterbyelan on Aug 6, 2016 11:18:05 GMT
Will you by showing the loco at the Midlands Exhibition this year ?
Karl
|
|
|
|
Post by 92220 on Aug 6, 2016 14:09:51 GMT
Hi Karl.
Yes it will be at the Midlands.
Bob.
|
|
|
|
Post by gall335i on Aug 7, 2016 11:28:49 GMT
Thanks Bob,
Photos are great. And looking forward to seeing it at the Midlands show, I'll be there the Friday, are you there then? Good to have a meet.
Andrew.
|
|
|
|
Post by 92220 on Aug 7, 2016 12:42:53 GMT
Hi Andrew. Unfortunately I will only be able to be there on set-up day and on the Sunday to collect the engine. I've found some more photos regarding the machining of the cylinders: The stub arbour for machining the end faces of the cylinders and boring the ends of the bores: 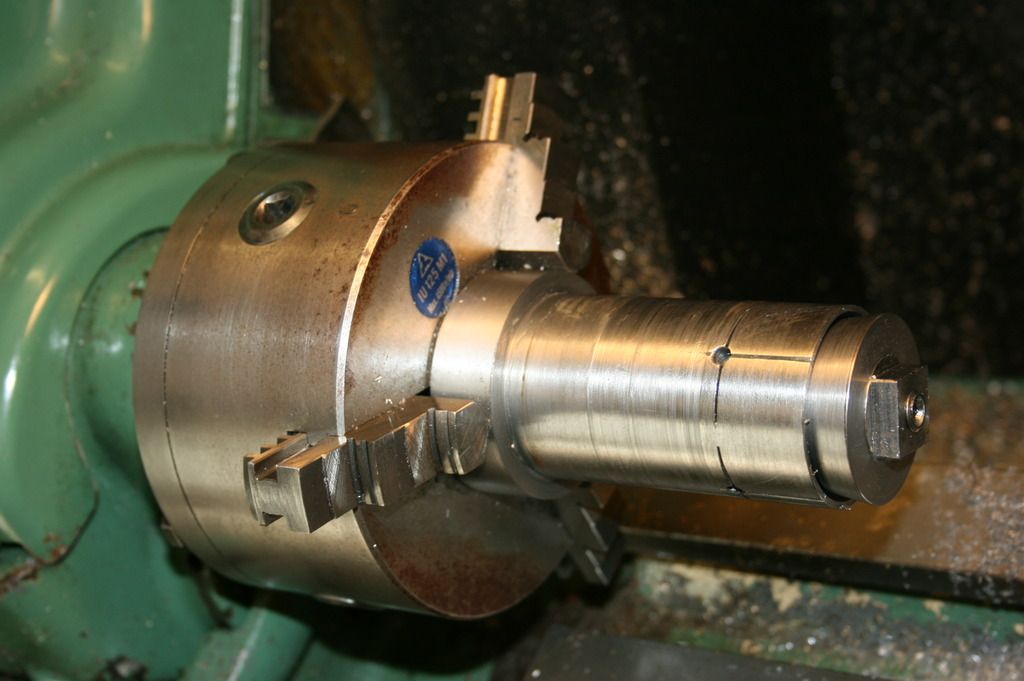 Boring the ends. The piston valve bores and ends were bored the same way. 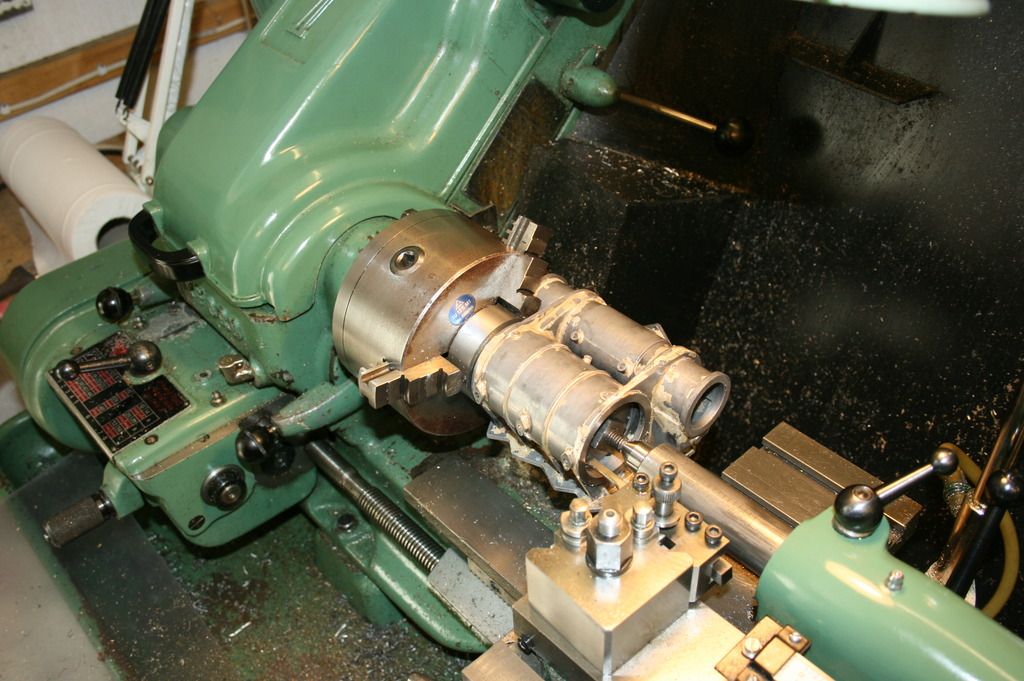 Machining the ports in the cylinder liners. 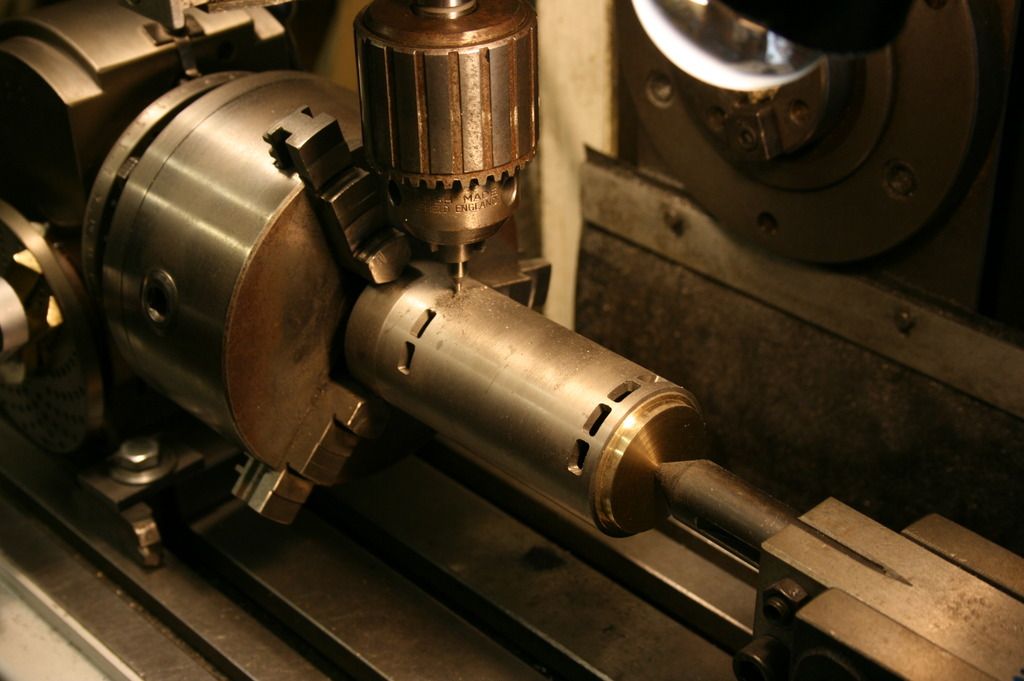 The liners were fitted into the cylinders with Loctite 620 to ensure a steamtight seal. When the cylinder liners and the piston valve liners were fitted, they were line bored on the mill, using the same 'between centres' boring bar that was used for boring the axleboxes. Using the DRO I was able to ensure the cylinder and piston valve bore centres, were exactly right. Unfortunately I can't find a photo of the set-up. Drilling the ends of the cylinders for the cover fixing studs: 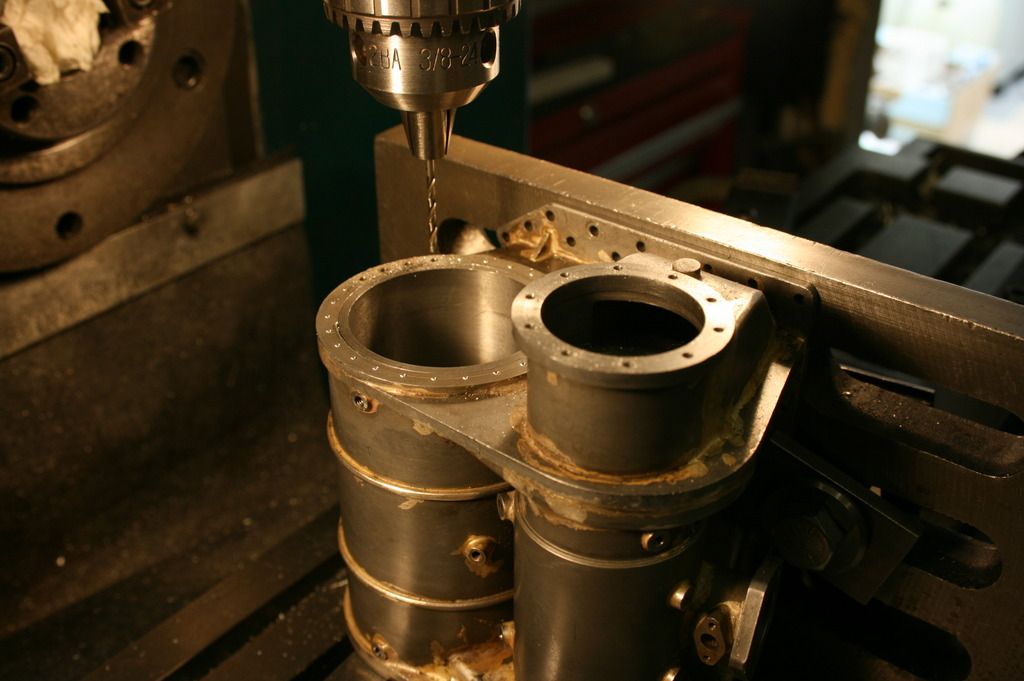 This mis a feature of the 9Fs that doesn't appear on the frame drawing, nor is it mentioned by anyone writing about them, yet every photo and 9F that I have seen, has this joggle in the top of the frames. I have never seen it on any model either: 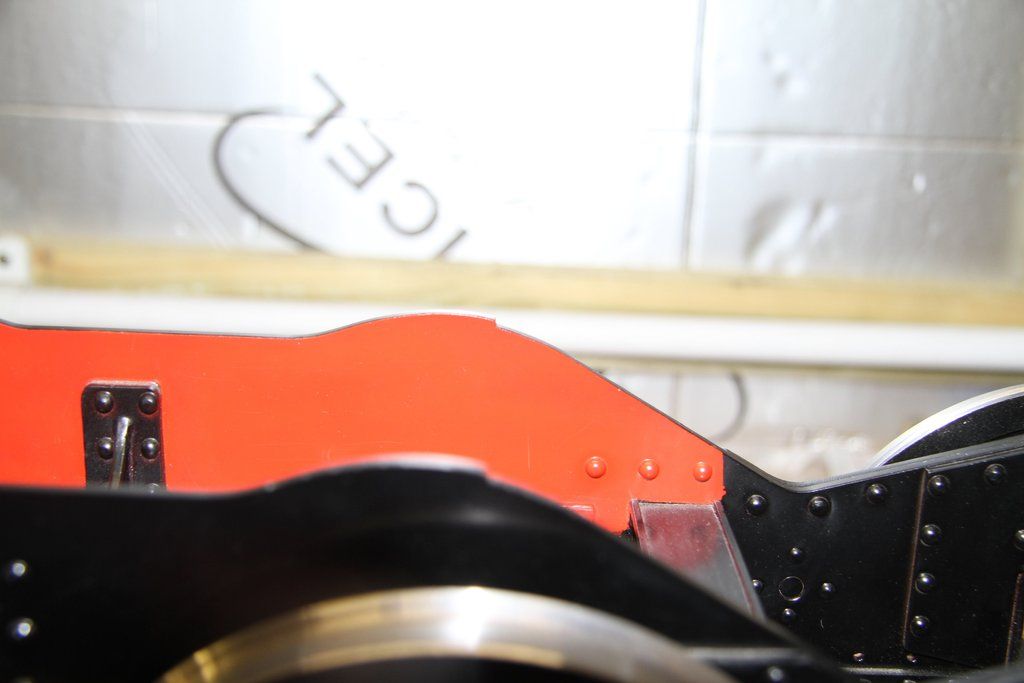 The joggle, on the full-size frames, is 3/4" deep, so 1/16" on a 5"g model. I think this came about possibly because the frame plates were flame cut from both ends because the flame cutting machine was not long enough to do the job in one setting and they had to finish the cut by starting from the other end. Just speculation, but I can see no other reason for this joggle, and as I pointed out, it's on every 9F (unless someone can come up with a photo of a 9F without it. |
|
|
|
Post by 92220 on Aug 7, 2016 16:14:45 GMT
|
|
|
|
Post by fasterbyelan on Aug 7, 2016 16:42:36 GMT
Hi Karl. Yes it will be at the Midlands. Bob. Thanks, it will be rewarding to see the loco in real life. Karl |
|
uuu
Elder Statesman
 your message here...
Posts: 2,807
|
Post by uuu on Aug 7, 2016 18:23:46 GMT
Oh no! Has no-one told you that a Myford is a substandard lathe, incapable of any proper work?  Wil |
|
|
|
Post by simplyloco on Aug 7, 2016 21:10:33 GMT
Oh no! Has no-one told you that a Myford is a substandard lathe, incapable of any proper work? Wil Well, I did visit David (Midland) in his lovely airy new workshop, and I noticed the Myford ML7 serial number: it was in Roman Numerals! |
|
|
|
Post by runner42 on Aug 8, 2016 8:00:59 GMT
Oh no! Has no-one told you that a Myford is a substandard lathe, incapable of any proper work? Wil Well it looks like Bob can make a silk purse using a sow's ear
Brian
|
|


