|
|
Post by runner42 on Jan 10, 2019 7:10:12 GMT
As you see from the photographs that the shed a.k.a. the workshop is a not large housing at the side and end of the garden. It is big enough to undertake the current ME tasks but it is also serves as a garden shed with all the garden tools, lawn mower and all the paraphernalia necessary for maintaining flower beds, etc. My part of it is rapidly becoming crowded with all the tools required for this hobby, such that I am stepping over things and I am not over cautious but an accident is a possibility. I have a single workbench that is constantly cluttered with tools, I am not a tidy person much to my wife's dismay, which puts the DY Black 5 locomotive standing on end against the bench. I could maximise the available space by the addition of more shelving and peg boards etc and have the bench clear enough to accommodate the chassis. But all this may be academic because as the project progresses the weight of the locomotive is getting too great for one man lift. Which brings into focus the problem of getting a completed locomotive from the shed to the vehicle for transport to the club. A trolley type handling frame is required which is a future addition, but it has to traverse a lawned area and then go up a step from the garden to the carport. This carport is not for vehicle placement there is another carport behind the roller doors. This is not the best thing so I am seriously considering keeping the chassis on its handling frame under the carport, so machining etc is done in the shed and assembly work done under the carport. The downside is security, the gate is locked but open at the top. I would like to solicit ideas in overcoming this logistical problem, others may have different ideas as many have similar issues. It can't always be straightforward. Doris is man handled from the shed to the car, but it's about the maximum I would attempt. Brian.  P1040219 P1040219 by Brian Leach, on Flickr 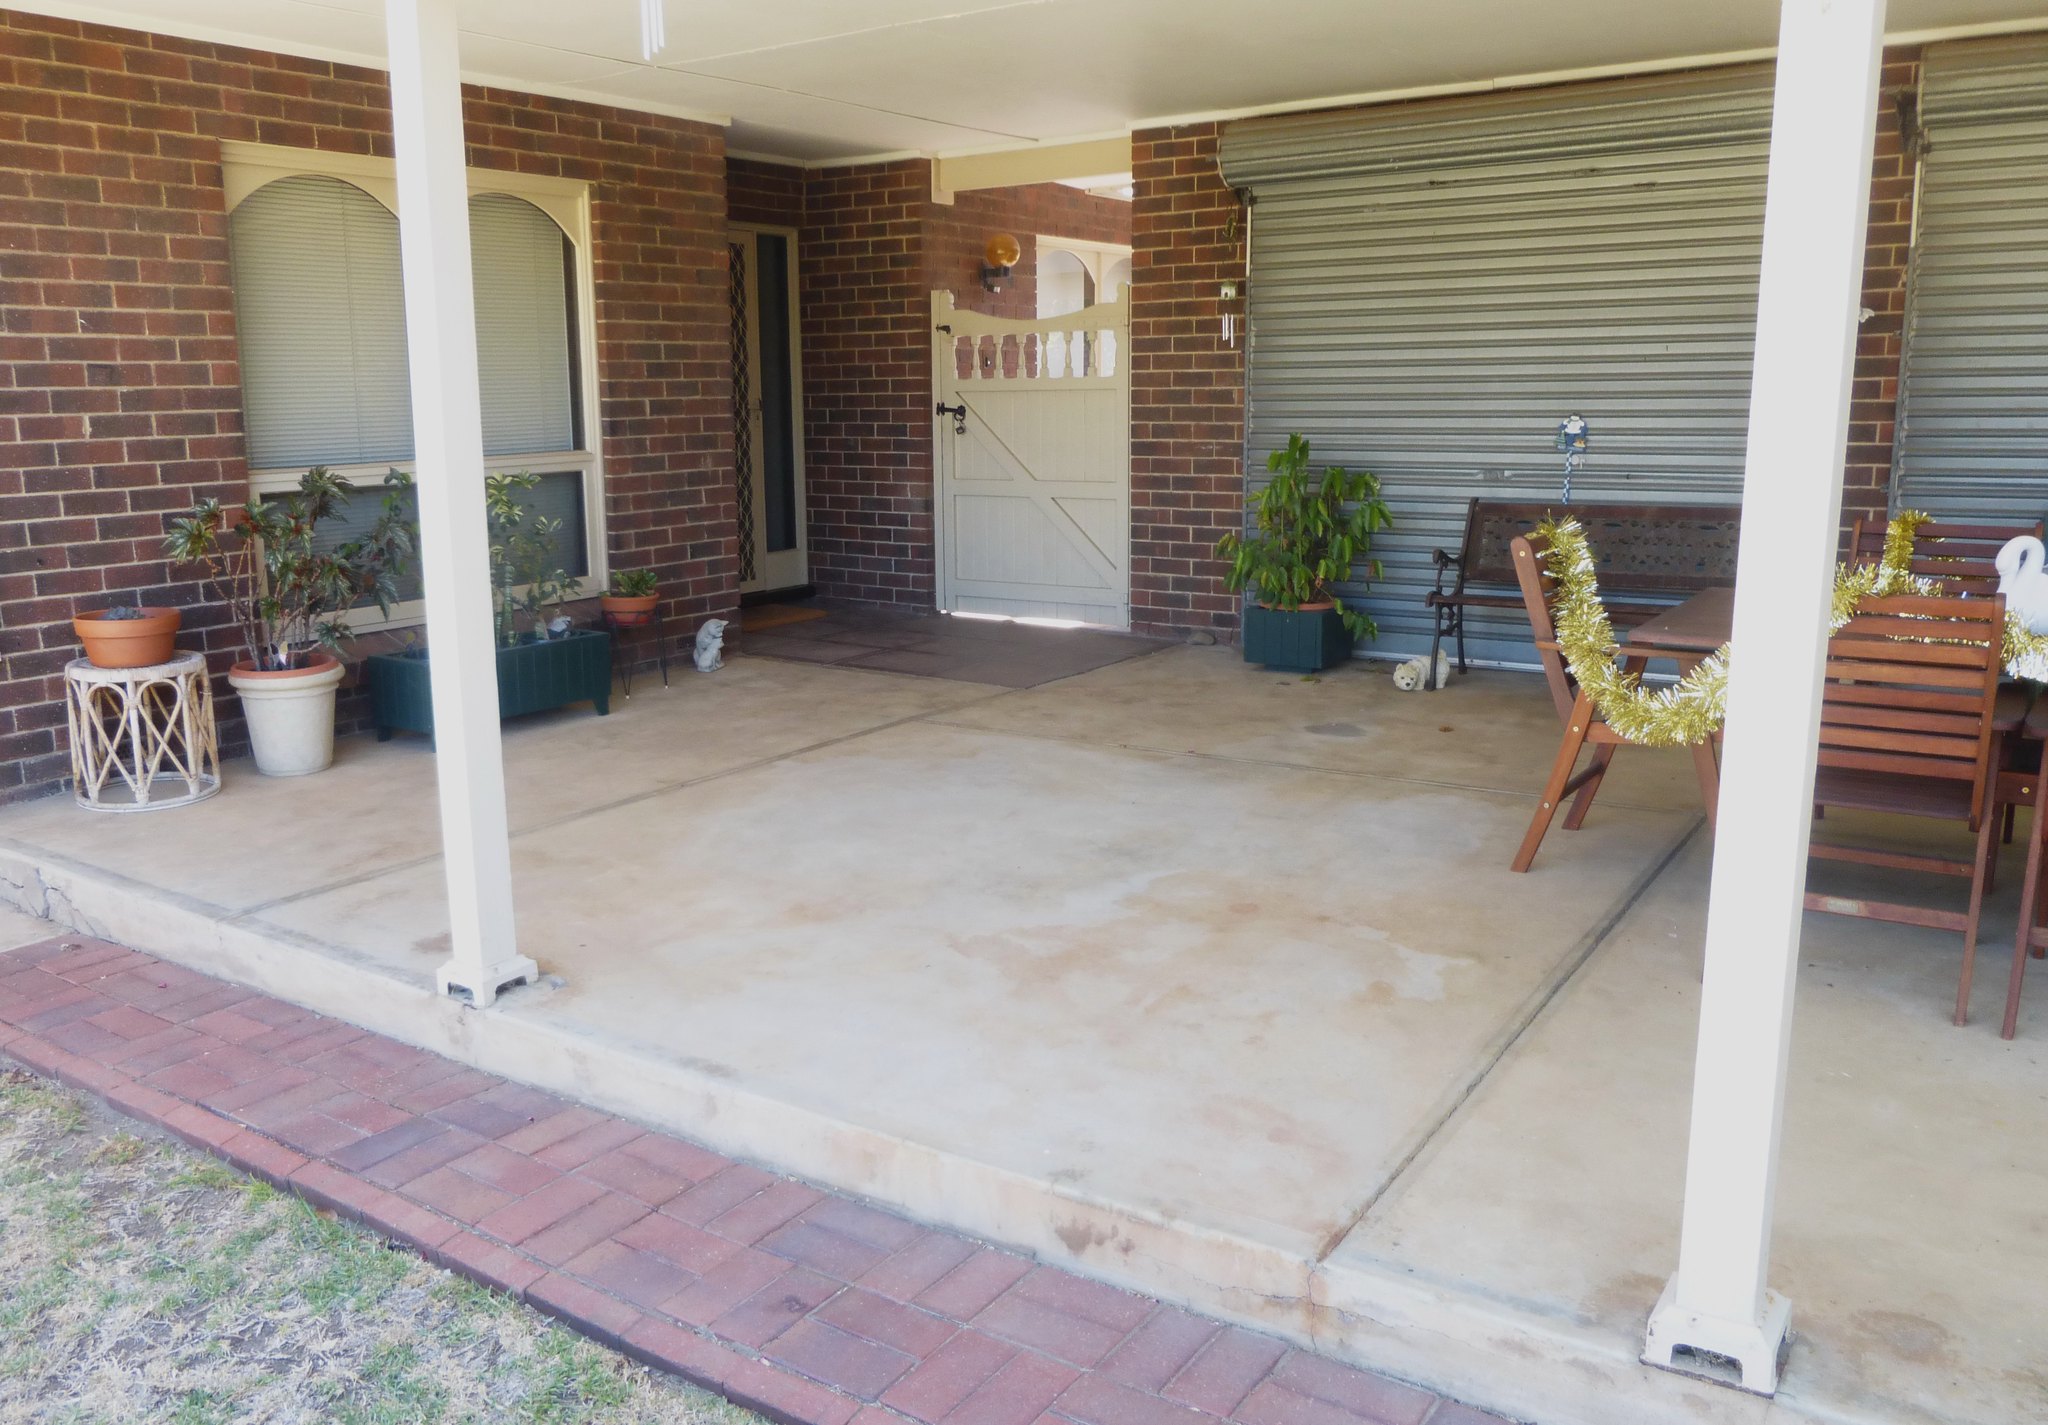 P1040218 P1040218 by Brian Leach, on Flickr  P1040217 P1040217 by Brian Leach, on Flickr |
|
|
|
Post by ilvaporista on Jan 10, 2019 8:00:24 GMT
I had a similar problem with many workshop re-layouts and added storage put in over time, the final solution was an extra shed for the garden tools. Here we have lean-to garden tool chests with front opening doors, a row of those under your shed windows where the bins are would hold a lot of stuff. The following are commercial plastic options but it gives you the idea. (you can also convince the wife it will tidy up the look of the garden by having the bins hidden!) I maximised storage by looking at the 'working envelope' which is where your body and arms will normally move and then consider anything else as possible storage. That means the roof space and high mounted wall cabinets are all utilised. I have tools and machines on wheels (the less sensitive to set up ones) which are pulled out when used and put away when finished, these are the press, shaper and all wood working machines. Another note is look at what you will use short term or frequently and what is just being stored. Take the stuff you don't use so much or won't need until later and put it in underutilised storage space. An example: I had a stack of left over tiles from the new kitchen but we want at some point to tile a further bit of the wall when we get a new fridge (only when the current one is life expired). These were taking up a corner of the workshop, pretty well hidden out of the way. I moved these to under the kitchen units behind the kickboard/plinth freeing up that corner for material storage. Look closely at everything in the shop and decide what really is useful and what is just gathering dust. If you do hide things do make a list, it's quite easy to forget where you put things. A tip from someone else on here was once a year open every box, drawer, cupboard and take everything out to refresh your mind as to what you have, that has saved me buying duplicates and kick started stalled projects as I waited to find that vital piece. Good luck with the negotiations with the other half, that's the tricky bit! Edit: For moving the loco about single handed I agree with Roger. I have a trolley with large dia soft wheels which handles the grass and small (3") steps quite well. It's made from a garden trolley, similar to this: www.machinemart.co.uk/p/q-qgpgc-garden-dump-cart/I have seen many people who make building stands from lifting tables www.machinemart.co.uk/p/htl300-300kg-hydraulic-lifting-table/These can be easily moved around as you work. The advantage of the lifting table is that you can then jack up to the right height to put in the back of the car. |
|
|
|
Post by Roger on Jan 10, 2019 8:01:54 GMT
Hi Brian,
Since you need a frame to securely hold the locomotive in for transporting in the car, perhaps you could make a low slung trolley with large wheels that would cope with both the lawn and the slope? It doesn't look like there's a step coming out of the shed, so once on the trolley it could be rolled out.
Personally, I would want to keep the workshop and the locomotive in the same place, it's not very convenient to have to go back and forth.
The bigger issue for me would be how to get the locomotive on and off the travelling frame and onto the bench at one and and into the car at the other. A low slung trolley that was at the same height as a lowered hydraulic lifting platform kept near the car would solve one problem. You could slide the travelling frame from the trolley onto the platform, made easier if the two could be locked together.
A crane/hoist of some kind to my mind is essential if you're going to lift this on your own. It doesn't have to be as fancy as my Travelling Crane, but I think it should have a means of moving the block and tackle along an 'I' beam so it can be lifted and then positioned on the bench say. My setup requires the removal of the buffer heads so the lifting/turning frame can be attached. After that, the crane moves the whole thing around wherever it's needed. The plan is to leave the completed locomotive on its carrying frame unless it's being worked on. I'm going to need to add a lifting eye to that so I can move it around easily.
Although a travelling crane is a bit over the top, it is well worth making something really flexible if you can fit it in. Mine's used for getting chucks on and off the lathe, lifting my heavy rotary table onto the mill and getting the workhead off the grinder to name but a few jobs. I use it most days for something or another.
I'm not tidy either, but in the workshop I don't have room for everything unless there's a pretty good system to store everything. Lin Bins are a huge help with this, and simple categories of things that go in each one means you can have a place for everything. For example, I have a large Lin Bin for anything that has two handles ie pliers, scissors, pipe grips etc, one for flat bladed screw drivers and another for cross point ones.
A big chest with shallow drawers can hold an enormous amount, with all the Metric Taps/Dies in one, Imperial in another etc
There will always be things that are hard to classify and then it gets messy, but any system is better than none. I have to put stuff away else I can't move!
|
|
|
|
Post by ilvaporista on Jan 10, 2019 8:22:54 GMT
I stole the trolley idea from Stuart. Have a look at time 1:51 for the transport trolley. www.youtube.com/watch?v=JWf-OlkrNV4To get up that single step I would make a set of ramps which would normally live on the trolley, when you need them put them in position and pull the trolley up. |
|
Lisa
Statesman

Posts: 806 
|
Post by Lisa on Jan 10, 2019 10:30:34 GMT
We had similar issues with moving loco's around when running commercially; there were a couple of jobs where we had to park a significant distance from where we'd have to set up the track, and in some cases had to carry everything along winding walkways, sometimes with steps, to get to the site. Dad's solution was a 2-wheel trolley using bicycle wheels, which allowed the loco to be rolled on, then moved around easily. Being two wheels meant the loading end could be put at any height easily for rolling the loco on or off, whether it was ground level for the track, bench level for maintenance, or waist level to get the loco in or out of the van. Also some bricks or a milk crate under the end would hold it level, giving a mobile work stand. I had a bit of a hunt for pictures, and of course there's no great picture of the trolley on it's own, but it can sort of be made out in the background of these: A dusk shot of our portable track setup, the loco trolley can just be seen in the middle of the track.  It's in the background here, connected to the end of the track.  As above, but I've messed with the brightness and contrast to hopefully show it a little better.  |
|
|
|
Post by 92220 on Jan 10, 2019 11:04:55 GMT
Hi Brian.
I have a similar problem with weight. My loco is being built on the far side of the workshop away from the door so I also have to lift it. I have had a Clarke 250Kg electric hoist for some years, that has just been sitting on the shelf unused. I am going to make a gantry, across the ceiling of the workshop, using 2 pieces of 4" x 2" planed timber (total assembled - 4 x 4). The span is just 11 feet so it is quite capable of supporting up to 150kgs at the centre of span. With the electric hoist fitted to a little trolley to run on the top edges of the timber it should make moving easy....and relatively cheap.
You say about doing the machining in the workshop and the assembly in the car port DON'T!!! You will have rust forming very rapidly. Ideally the loco should be kept at a temperature at least 60 F if at all possible, to keep moisture out of the surrounding air. If you line your shed walls, ceiling and floor, with 25mm insulation board, and cover the floor insulation with 20mm floor boarding, a small heater running on Economy 7 will keep the temperature pretty constant and no moisture in the air to cause rust. That is what I have done and can vouch for it's effectiveness for the last 30 years. Get a cheap shed to keep the gardening stuff in as this will cause rust because it brings damp into the storage space every time you use the tools in the garden. This, of course, is all assuming you have space and funds available.
Bob.
|
|
|
|
Post by Roger on Jan 10, 2019 11:34:41 GMT
A quick comment about the Clarke electric hoists.... even with the 2:1 reduction, they're too fast in my opinion. This is because they're really designed for attaching to scaffold poles and lifting long distances.
I shortened the wire drum on mine and added a free pulley. It's easy enough to make a low profile double sheave hook using a swivel hook to go with that.
|
|
|
|
Post by 92220 on Jan 10, 2019 13:38:16 GMT
Hi Roger.
Yes that is what I am aiming to do when I make my trolley. It is a necessary mod for use with a loco.
Bob.
|
|
|
|
Post by Jo on Jan 10, 2019 17:58:07 GMT
My Tuppence worth: I have hydraulic tables. One was home made and the top has two rails 5" apart on it for mounting a 5" loco and is longer than my commercial 500KG table (which I use to move model casting sets around  ) but both are the same width. The rails being towards the centre of the table make it easier to move that one around which would be a problem if the top surface was longer. These trolleys do not go below about 14" height. I also have what I call my roller skate which is about 12" square on the top and is used to move machine tools on and off machine beds (amongst other uses  ) it was originally marketed as a motorcycle stand to lift 150Kg but I think they realised that having wheels on a motorcycle stand was dangerous. Grass/cross country rolling: You will need large diameter pneumatic wheels. My 90Kg log splitter arrived with solid wheels and it was nearly impossible to roll on grass. Wheels replaced with slightly larger diameter pneumatic ones and it is a dream to roll around on the grass. Securing your loco to the trolley: You will need to secure it, trust me! Another option: I have a "sack truck" loco trolley. Which consists of two piece of angle Iron spaced at 5" to act as rails, 6" in from one end is a pair of pneumatic wheels and the other end two handles sticking out side to side. The over hang at the handle end can be put in the car with the other end blocked up, allowing the loco to be rolled out of the car and on to the trolley. The Loco is then clamped to the trolley using clamps over the buffers and the wheeled end of the trolley lowered to the floor. - It works it is not elegant but it got my loco's round corners, over grass and into the old garden workshop. It also has the advantage of being able to be put in the back of the car and taken with me to shows, it even goes down to ground level if you are running 5" at ground level. Jo |
|
|
|
Post by dhamblin on Jan 10, 2019 18:39:54 GMT
One of our societies' members has modified his Clarke 300kg hydraulic trolley with pneumatic tyres at the fixed wheel end and they work a treat to allow locos to be transferred down the garden to his workshop.
Regards,
Dan
|
|
|
|
Post by Roger on Jan 10, 2019 19:04:22 GMT
Hi Roger. Yes that is what I am aiming to do when I make my trolley. It is a necessary mod for use with a loco. Bob. Let me know when you're going to do that and I'll send you the drawings of the mods and the two sheave pulley arrangement if that's of any use. |
|
|
|
Post by runner42 on Jan 11, 2019 6:14:26 GMT
Thanks for the replies, the general opinion is to modify an hydraulic trolley with large pneumatic tyres. I have an hydraulic trolley which is affixed a baseboard to increase the footprint to accommodate my 3 1/2" gauge Black 5 Doris. It is long enough to enable the locomotive and tender to be in series, whether an even larger baseboard that would operate the same way with the 5" gauge Black 5 is debatable. When finished I would like the tender to be permanently fixed to the locomotive so it is not a requirement to make the connection at the club. The large pneumatic tyres would overcome the traversing the lawn part but I am still concerned with the step up from the garden to the carport. The only option is to use a 3 wheel per axle end stair climbing configuration. This shows the principle www.bunnings.com.au/westmix-large-stair-climber-trolley_p3355591 I would prefer to construct a purposed built trolley similar to this but with the stair climbing wheel arrangement. Brian 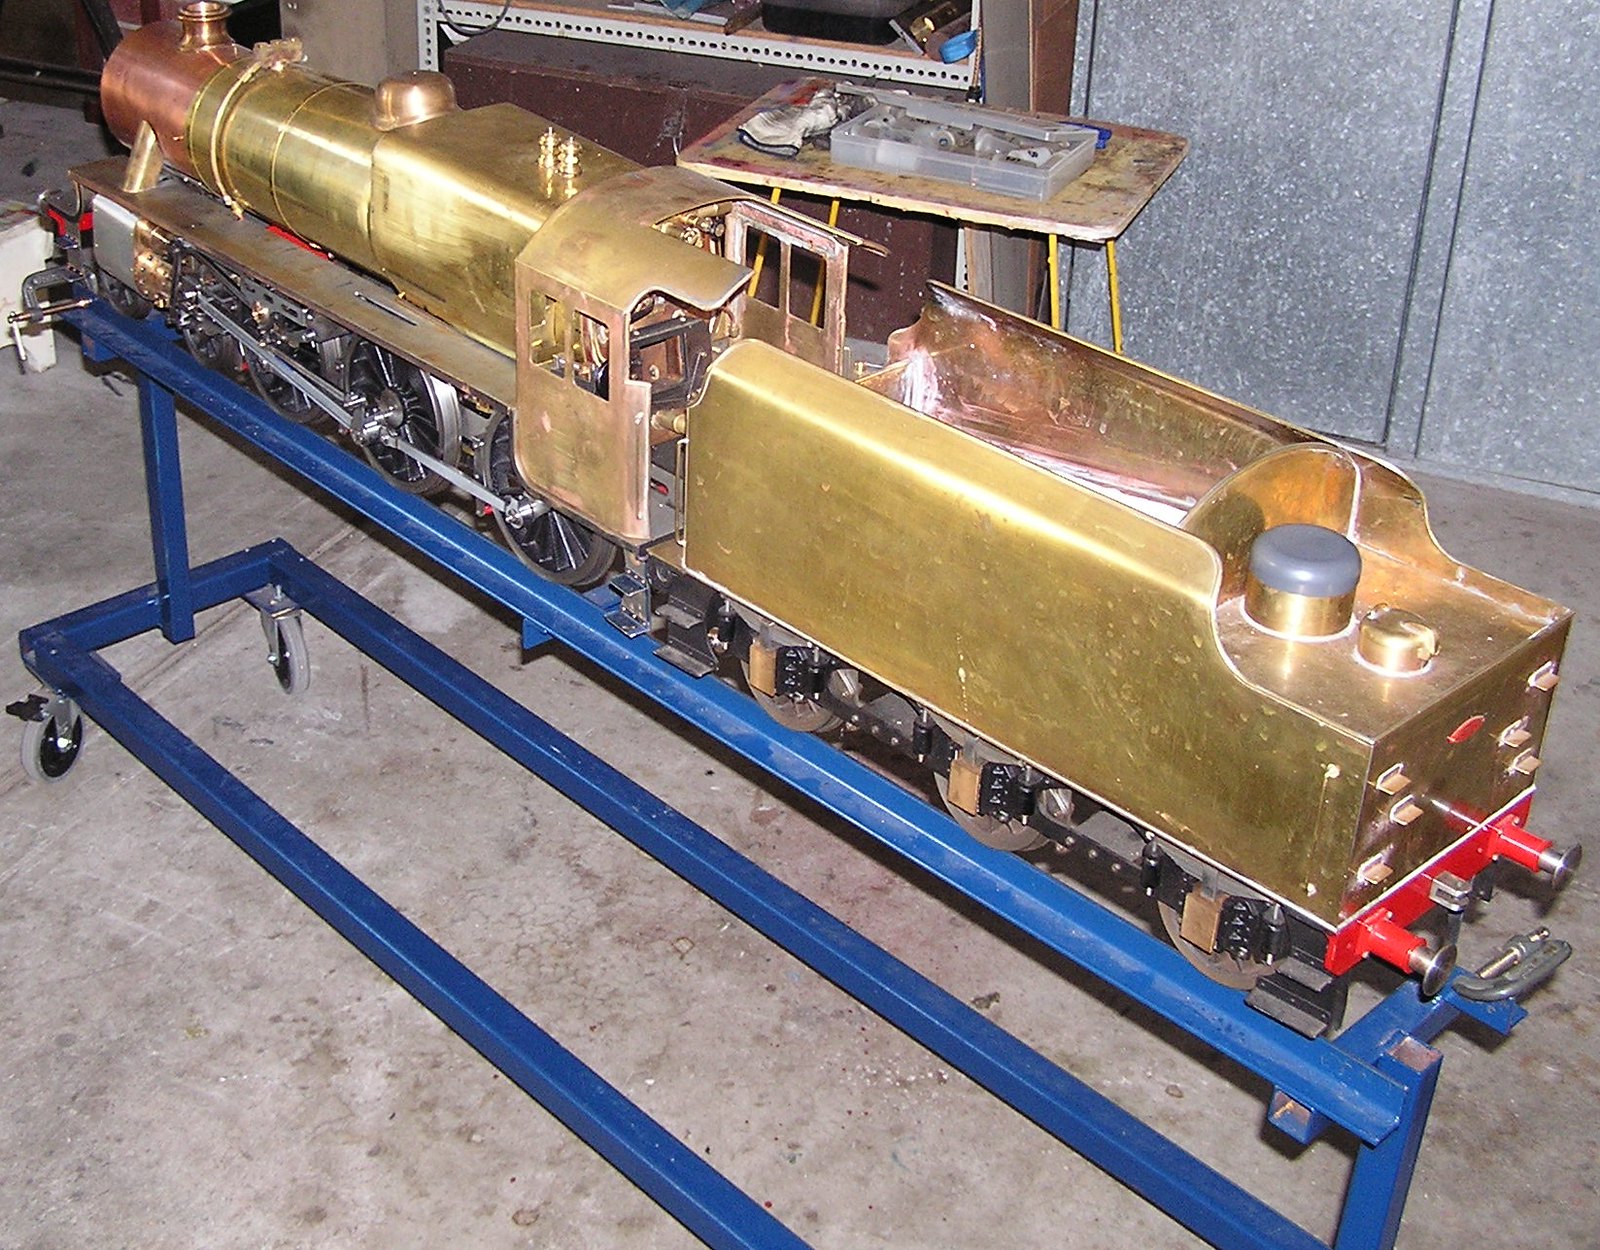 trolley trolley by Brian Leach, on Flickr |
|
|
|
Post by Roger on Jan 11, 2019 7:31:39 GMT
Hi Brian,
How about a removable ramp that you can put down so you can run the trolley over the step too? You could make it from Aluminium angle, Aluminium chequer plate and pop rivets so it could be quite large yet light and easy to move.
|
|
|
|
Post by ilvaporista on Jan 11, 2019 8:47:19 GMT
Try and borrow one of those three wheeled sack trucks to see how you get on with it. I find that they really push you to one side and it takes quite a bit of grunt to get them up a step.
|
|
|
|
Post by 92220 on Jan 11, 2019 8:51:28 GMT
That sounds a good idea. Another possibility is to buy a pair of ramps that are available for putting a motorised disabled trolley into an estate car. I would guess the bigger ones are about the same weight as a 5" g loco so the ramps should be plenty strong enough, yet are light weight.
Bob.
|
|
|
|
Post by 92220 on Jan 11, 2019 8:55:58 GMT
Hi Roger. Yes that is what I am aiming to do when I make my trolley. It is a necessary mod for use with a loco. Bob. Let me know when you're going to do that and I'll send you the drawings of the mods and the two sheave pulley arrangement if that's of any use. Hi Roger.
That would be very handy! I've started getting the materials in and clearing shelves to start fitting the gantry. A look at your drawings would be very much appreciated. Thank you for the kind offer.
Bob.
|
|
|
|
Post by Roger on Jan 11, 2019 9:50:35 GMT
Let me know when you're going to do that and I'll send you the drawings of the mods and the two sheave pulley arrangement if that's of any use. Hi Roger.
That would be very handy! I've started getting the materials in and clearing shelves to start fitting the gantry. A look at your drawings would be very much appreciated. Thank you for the kind offer.
Bob.
Drawings sent by email. |
|
Midland
Elder Statesman

Posts: 1,870
|
Post by Midland on Jan 11, 2019 12:17:26 GMT
Hi Brian We all seem to face the same problems! And I went through the fixed loco movers, Clark hydraulic gismos and all that. But we got to the point where my wife could not (would not) carry heavy locos around the garden so I had a find a solution that I could manage alone. The answer was a self-elevating stand (with a little help maybe) put on sack truck wheels with one end steering properly. That gyrated into a new workshop with secrete door and now I am completely independent. Will show you some pics. 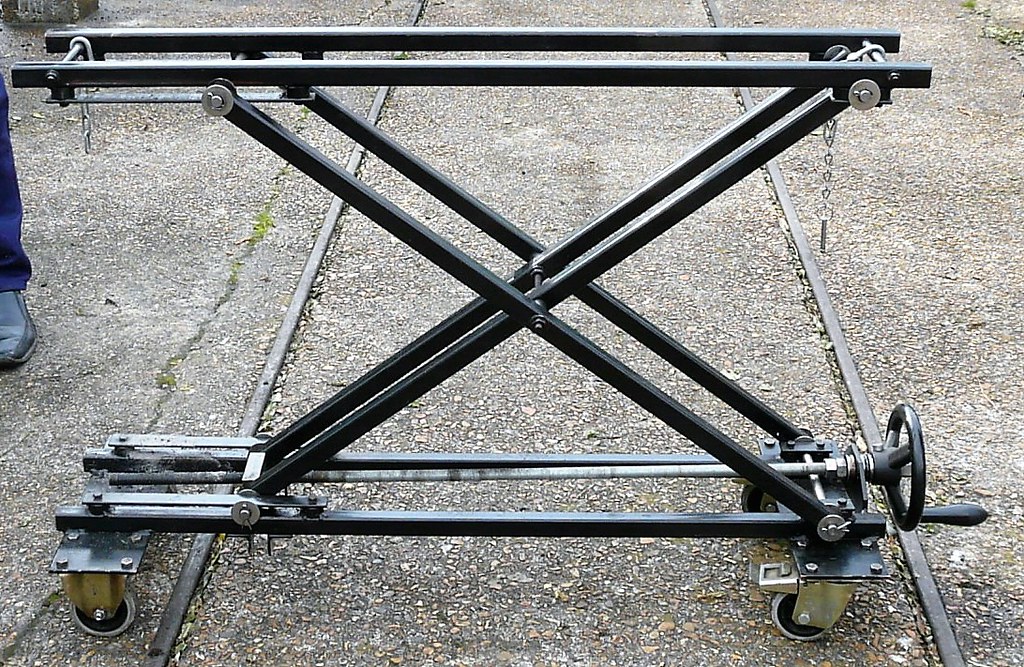 P1040950 P1040950 by David Goyder, on Flickr With this I could raise the loco to bench level and lower it for a low C of G for dragging around the garden. Then genius struck and the answer was build a new workshop so we swopped. She got my old shop and I got the one. With this one I have a hatch at car boot level and my lifter serves three levels. First is the mezzanine for loco storage, second is the hatch level and third is bench level.  IMG_1155 IMG_1155 by David Goyder, on Flickr You can see the M and B level, just, in this pic and the lifter at B level. The hatch level is roughly at the bottom of the Princess of W lid. Heavy lifts are courtesy of friends & neighbours. Had to take the wheels of to get the lifter down safely to the low level but that was a minor adjustment. Cheers David |
|
|
|
Post by gwr14xx on Jan 11, 2019 14:07:10 GMT
David,
I know it is easy to be wise after the event, but if you had inverted the design, the jacking screw hand wheel would have been at a more comfortable working height!
Regards,
Eddie.
|
|
|
|
Post by 92220 on Jan 11, 2019 14:55:47 GMT
Hi Roger.
That would be very handy! I've started getting the materials in and clearing shelves to start fitting the gantry. A look at your drawings would be very much appreciated. Thank you for the kind offer.
Bob.
Drawings sent by email. Brilliant! Thanks Roger. Bob. |
|


 ) but both are the same width. The rails being towards the centre of the table make it easier to move that one around which would be a problem if the top surface was longer. These trolleys do not go below about 14" height. I also have what I call my roller skate which is about 12" square on the top and is used to move machine tools on and off machine beds (amongst other uses
  ) it was originally marketed as a motorcycle stand to lift 150Kg but I think they realised that having wheels on a motorcycle stand was dangerous.


