|
|
Post by 92220 on Jul 27, 2021 8:02:39 GMT
Well done Adam. Really nice job, that workshop. Nice job on the house too.
Bob.
|
|
oldnorton
Statesman
 5" gauge LMS enthusiast
Posts: 692
|
Post by oldnorton on Jul 27, 2021 9:54:29 GMT
You have been a busy chap! and it all looks very nicely done as well.
Norm
|
|
|
|
Post by Cro on Sept 2, 2021 8:57:24 GMT
A quick update from me after a few days away at Gilling. A selection of photos and a link to youtube video I have uploaded of some highlights. I took the Black 5 with me again and it ran very well and its pulling power impressed on the oily rail where everyone was slipping with the 12 Mk1s she walked away from standing start on the hill - the big blocks of steel help. On the Friday a quick test run with the new ash pan fitted to see if it has affected steaming (doesn't have a solid one normally) and the heavy Maunsells were a good test. 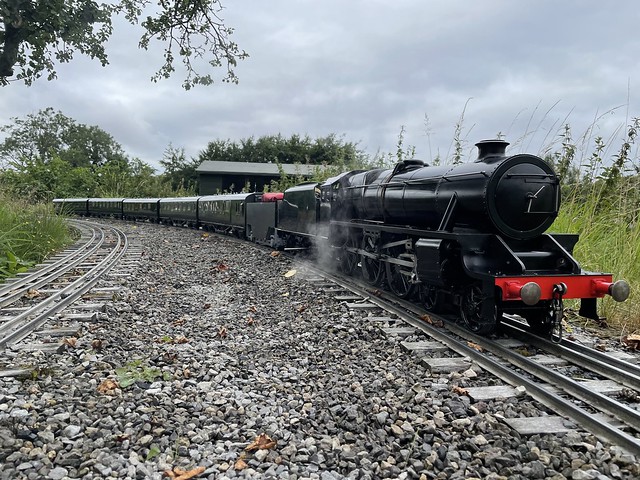 IMG_4820 IMG_4820 by Adam Cro, on Flickr A bit of a common theme over the weekend - sat at signals  IMG_4834 IMG_4834 by Adam Cro, on Flickr Nigels lovely Brit ran well for its debut rally.  IMG_4849 IMG_4849 by Adam Cro, on Flickr Nigel on his Super D  IMG_4875 IMG_4875 by Adam Cro, on Flickr LNER "Snapper" ran beautifully all weekend, sounded lovely with 6 even crisp beats.  IMG_4878 IMG_4878 by Adam Cro, on Flickr Doug Hewsons original Class 4MT finally made it to a Gilling Rally after completion 12 years ago, Eddie and his son Joe worked hard for 2 months to get her ready and it was lovely to see her go.  IMG_4881 IMG_4881 by Adam Cro, on Flickr Eddie at the regulator with Doug watching on from the side - a very happy man!  IMG_4887 IMG_4887 by Adam Cro, on Flickr The Might Pug was brilliant as always.  IMG_4893 IMG_4893 by Adam Cro, on Flickr Duchess of Sutherland and City of Birmingham showed us what "express passenger" really means!  IMG_4917 IMG_4917 by Adam Cro, on Flickr Black 5 and Jubilee had fun double heading on the slippery rail  IMG_4952 IMG_4952 by Adam Cro, on Flickr Can't beat a good manor, this sounds lovely with a load.  IMG_4960 IMG_4960 by Adam Cro, on Flickr Triple header anyone?  IMG_4965 IMG_4965 by Adam Cro, on Flickr These last photos were taken by John Foxton.  IMG_4994 IMG_4994 by Adam Cro, on Flickr 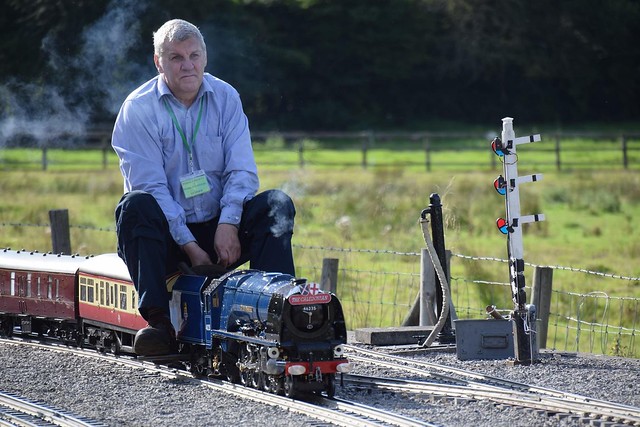 IMG_4995 IMG_4995 by Adam Cro, on Flickr  IMG_4997 IMG_4997 by Adam Cro, on Flickr And lastly - she's home! Now the clock is ticking for Gilling next year, Friday afternoons are being dedicated to my own work whilst the rest of the time is all about catching up on orders after 8 months without a workshop there is a lot to do. The workshop is essentially done now and is useable so progress will resume soon once a few jobs are done on the house.  IMG_5021 IMG_5021 by Adam Cro, on Flickr The highlights video is HEREAdam |
|
|
|
Post by Cro on Sept 21, 2021 7:37:15 GMT
Now the workshop is up and running I've been able to get back into some work. Whilst catching up on the fittings is ticking over again I have also been able to commit some time to the 9f as I am determined to have her at Gilling August 2022 which means completing it middle of the year for some running in. First up is to finish the regulator. I made and fitted the valve around this time last year including new superheaters and the spindle through the boiler but never did the linkage. First up was the handle and bracket I had cast in White Bronze for the extra strength. Simple turning job to make a stainless steel pivot pin, washer and tapered pin to hold it together. This will also hold a plate for vacuum and steam chest pressure gauge which I will show shortly.  Untitled Untitled by Adam Cro, on Flickr Next up was the pivot on the firebox. I drew this up full size and scaled it down and in old school fashion marked it out on some plate and set to it with hacksaw and files.  Untitled Untitled by Adam Cro, on Flickr To get the length of the pivot arm I had rods set up between the spindle arm and the handle on the backhead with everything held in place with tape until I was happy with the appearance - highly technical and calculated! Next up was the fork ends with rods silver soldered in place before fitting the bracket to the backhead. I then found that I needed to fix the backhead plate in more places to give it some rigidity when move the handle. The plate is held in place with 12ba bolts and in each position the formed 'corners' have a brass bush soldered in place because the copper obviously wouldn't take the threads well.  Untitled Untitled by Adam Cro, on Flickr 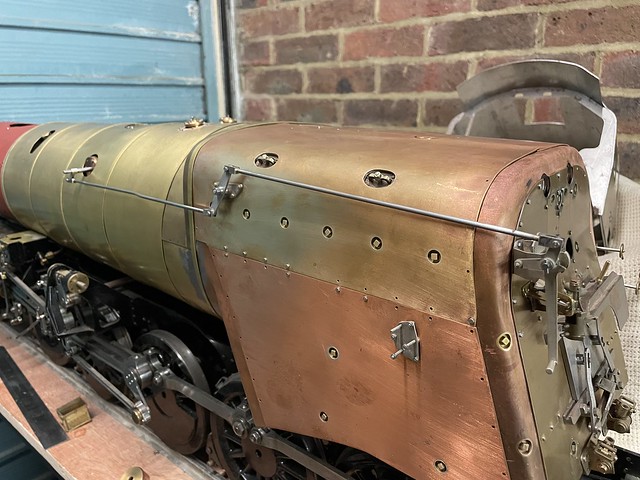 Untitled Untitled by Adam Cro, on Flickr  Untitled Untitled by Adam Cro, on Flickr HERE is a quick video of it all connected up. (EDIT - video on youtube as flickr just turns it white apparently) Next up was the gauge plate I mentioned before, these should be the other way around but you can't get 1/2" vacuum gauges and not sure I want one either. I have mounted these on a small bit of oak because, well why not, even if you can't see it.  Untitled Untitled by Adam Cro, on Flickr  Untitled Untitled by Adam Cro, on Flickr  Untitled Untitled by Adam Cro, on Flickr Now onto the spectacle plate and I have hated this job - its been as bad if not worse than I expected. Having drawn the whole cab up in 3D and had the parts laser cut its gone together very easily but the spec. plate does reply on 2 things. A) the bends being 100% correct and B) the shape of the boiler and the latter is what has caused the most problems. As I was unable to accurately model this I just added material to the inside edge of the laser cut but it meant a lot of fiddling around to get a fit I was happy with (and I'm not even that happy with it yet). The other thing is that the 3D model "flattens" parts like this in an odd manner and has added material to the curves where it shouldn't have so it's just been a right pig to do but we get there.  Untitled Untitled by Adam Cro, on Flickr  Untitled Untitled by Adam Cro, on Flickr  Untitled Untitled by Adam Cro, on Flickr I will next be silver soldering it to the main cab so that I can dress the side sheets/roof to match the profile better and then subsequently fill in any gaps left. I will be adding the draft angle around the cab at the end to cover any uneven gaps. Last up is the new lubricators. As I want to fit my castings in the correct place I have to dispense with the existing lubricators and fit something hidden so I have gone for this arrangement. Each pump uses a 3/32" ram of around 1/4" stroke sealed with a gland. I've made tons of these and never had a problem so sticking with what I know. When I ran the loco for a year the current 1/8" Dia. pumps were just a bit too much on our long track and I have always found 3/32" Dia to be spot on.  Untitled Untitled by Adam Cro, on Flickr One large tank with a divider down the middle to be mounted between the cylinders and driven off the front axle which I will make a split eccentric for. Once the cab spectacle plate is complete with spindle and regulator holes etc. I will go back to the regulator and remake the valve as I made a mistake last week which means its now useless and need to start again but I have a better plan now so fingers crossed it goes ok and will be nice a smooth. Thanks, Adam |
|
|
|
Post by 92220 on Sept 21, 2021 7:55:43 GMT
Hi Adam.
Some very nice sheet metal work there! Showing something for all of us to aim for!! I shall also be interested in your regulator when you have it sorted. I still have mine to sort too.
Bob.
|
|
|
|
Post by Cro on Dec 12, 2021 22:44:32 GMT
Just a quick update from me, last week I decided to have a go at the prototype LMS Manifold and injector valves in 7 1/4". These suit the Black 5s, Jubilees etc.. All very simple machining of the casting just skimming faces and drilling and tapping holes to start with. The main shut off valve is intended to work but I have made a mistake in the casting so for this one it will be a dummy. Did have to think of some interesting ways to hold it though as I haven't decided on jigs just yet.  Untitled Untitled by Adam Cro, on Flickr  Untitled Untitled by Adam Cro, on Flickr The Injector valves up next were also very simple, first up was the mounting face and O-ring pocket.  Untitled Untitled by Adam Cro, on Flickr The onto the seats and gland set up.  Untitled Untitled by Adam Cro, on Flickr  Untitled Untitled by Adam Cro, on Flickr The valve is designed like the full size with separate gland and threaded plate for the spindle.  Untitled Untitled by Adam Cro, on Flickr  Untitled Untitled by Adam Cro, on Flickr  Untitled Untitled by Adam Cro, on Flickr  Untitled Untitled by Adam Cro, on Flickr Last up was adding the squares and fitting the handles.  Untitled Untitled by Adam Cro, on Flickr  Untitled Untitled by Adam Cro, on Flickr  Untitled Untitled by Adam Cro, on Flickr Last job will be to machine the threads and pipe fittings/nuts and then cast all the "add ons" that didn't get cast when I originally did the prototype parts. Long term plan is to cast in the duplex shut off, pressure gauge shut off, steam heat shut off and valve leaving only whistle and injector valves as bolt ons. Nice to do something different to the BR bits that hasn't taken too long, back on the vacuum brake valves as I want to try and finish some pedestals for the end of the year if I can. Adam |
|
|
|
Post by GWR 101 on Dec 13, 2021 15:59:04 GMT
Adam, fantastic.  Regards Paul |
|
|
|
Post by Deleted on Dec 13, 2021 20:22:16 GMT
fantastic work Adam.. top stuff...
Pete
|
|
|
|
Post by Cro on Apr 11, 2022 14:49:01 GMT
Not quite to do with my fittings but the reason I'm not doing much at the moment - more DIY! So far this year its been about sorting what was our old kitchen into wife's new dog training room/office and a separate utility room. The plasterer came in a few weeks back so I took some time off work to get started on the patio which is probably biggest single project I have taken on myself since we got the house almost 3 years ago. Here are a few photos showing the progress to date. The initial plan including going down the side of the house where there used to be a conservatory, this is approx. 55m2 all in.  Untitled Untitled by Adam Cro, on Flickr First things first, mark it out and start digging (13/3/22) - but before I could even dig I had to clear a gap in the big pile of hard core we kept from the building work this time last year.  Untitled Untitled by Adam Cro, on Flickr  Untitled Untitled by Adam Cro, on Flickr One late night shift before the 1st skip was collected the next morning. I carefully worked out everything I need to build this I just forgot about how much had to come out, in the end 9 tons of clay has gone into skips for the trench and steps area.  Untitled Untitled by Adam Cro, on Flickr  Untitled Untitled by Adam Cro, on Flickr And after all that (4-5 days worth of digging) we start filling it all in again.  Untitled Untitled by Adam Cro, on Flickr  Untitled Untitled by Adam Cro, on Flickr  Untitled Untitled by Adam Cro, on Flickr Last Sunday (2/4/22) I was determined to start laying bricks even if I did tweak my back getting everything ready....  Untitled Untitled by Adam Cro, on Flickr On a Friday I finish early, half day, so I decided I would get as much as I could with a whole weekend free and I got a lot further than I thought. Aim was to try and get 2/3's of the wall built in essentially 2 days (Sunday Morning off to welcome Will, building his Maid of Kent, to the workshop for a chat). By no means perfect but this is now finished height ready for the soldier course and last of the block work behind before we start back filling.  Untitled Untitled by Adam Cro, on Flickr  Untitled Untitled by Adam Cro, on Flickr 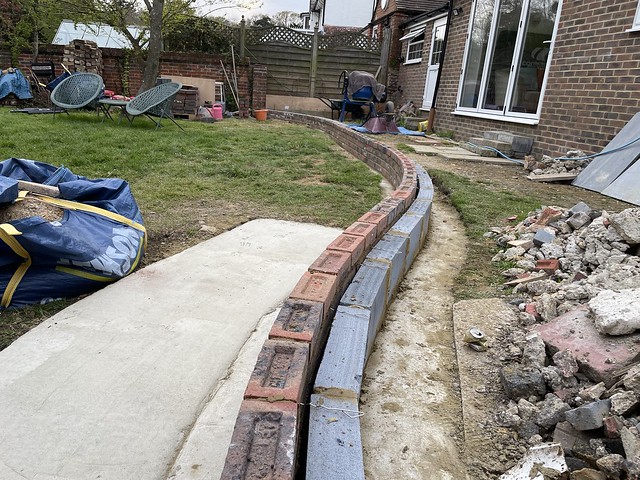 Untitled Untitled by Adam Cro, on Flickr  Untitled Untitled by Adam Cro, on Flickr Did someone say raised track?  Untitled Untitled by Adam Cro, on Flickr Whilst on the subject of wagons......I've been collecting some lately.  Untitled Untitled by Adam Cro, on Flickr  Untitled Untitled by Adam Cro, on Flickr  Untitled Untitled by Adam Cro, on Flickr 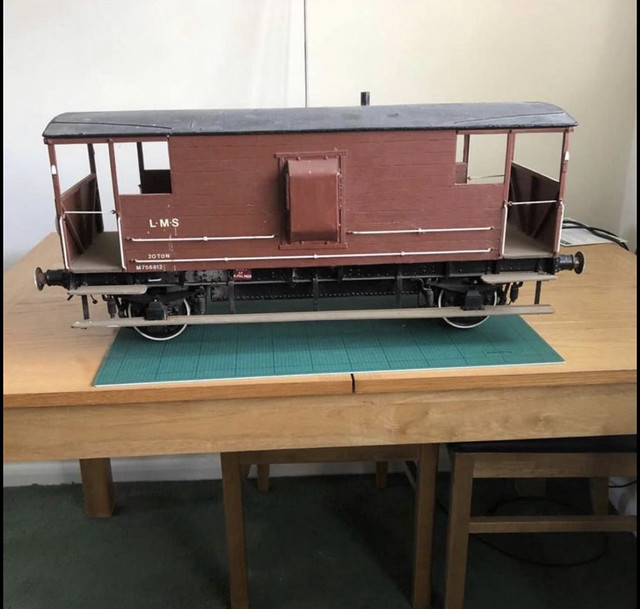 Untitled Untitled by Adam Cro, on Flickr Back to the patio that is as far as have got now. Long weekend means a day at the club, day with family and 2 days in the garden so I hope to complete the brick/block work, final bit of concrete to rebuild the neighbours wall and start back filling the rubble. Sadly Covid feels like its closing in around us as both parents now have it and half of the other vets at Jess' work have it so I fear its only a matter of time - as long as it doesn't stop me getting to the club on Saturday for a run! Best get back to work..... Adam |
|
dscott
Elder Statesman

Posts: 2,437
|
Post by dscott on Apr 11, 2022 23:39:18 GMT
WOW. Can you put me down for 2 Black Five Manifolds in 5" Please... Yes just ordered a boiler kit from Blackgates.
Lovely set of photos made my day.
Currently doing a whole wall of bricks polished in the Kitchen. But stuff like Club running and Basingstoke got in the way this week.
A superb Five ran well for the whole afternoon going between 8 and 9 passengers. Yes scale fittings and much admired.
David and Lily.
|
|
|
|
Post by 92220 on Apr 12, 2022 7:58:30 GMT
Nice work Adam!! Very!!! I think, rather than working on the 9f, building an excavator might be a better bet!! That is a massive amount you have dug out!
Bob.
|
|
|
|
Post by Cro on Apr 12, 2022 9:41:04 GMT
Bob,
I did think half way through, why didn't I get a digger in but I guess the whole reason for doing this all myself is to save money where I can.
I'm now debating do I mix the concrete for the slab myself (as I did with the footings) or get it poured....saving money me says do it myself, for ease pouring....
Adam
|
|
|
|
Post by 92220 on Apr 12, 2022 10:13:33 GMT
Hi Adam.
It's a debatable situation with the concrete. When I built my extension, some years ago, I got a company to send a lorry around with a load of mixed concrete. They couldn't get near to the footings to pour it, so had to unload onto a sheet,on the road. Mixed concrete seems to go off quicker than home mixed. I had to get a number of neighbours to help me move it all in a hurry, before it started to go off. If you mix the concrete yourself, you will have to mix, and lay, in stages, which will give visible joins, where having it poured, will give a slab with no join marks. It really depends on how you want it to look (but will be much easier on the back!!). Anyway, best of luck, whichever way you choose. Hope it all goes well.
Bob.
|
|
baldric
E-xcellent poster

Posts: 208
|
Post by baldric on Apr 12, 2022 11:20:41 GMT
For my workshop base I had a lorry that mixes there & then, as much as you need, they even did a test pyramid to confirm it was the correct mix. I think in non-covid times the firm could supply a couple of people to operate the barrows, but as it was in 2020, it was me, plus the 2 people I got to get me out of the ground. I was fortunate that the lorry could park on our drive, I am not sure what would have happened if they had to park on the road.
Baldric.
|
|
|
|
Post by flyingfox on Apr 12, 2022 11:35:08 GMT
Greetings Adam,
Might I suggest that if you decide to cast the base in stages, you do so, but allow for a 40 to 50 mm top skim, perhaps with a little more cement, which you could mix in one session, this would give a smoother finish, and cover up the joint marks between the stages. Provided the stage batches are made within a few days of each other they seem to be strong enough. I sloped the join between batches, and left the top, and slope rough finish to help bonding.
The one other point I would suggest is the addition of a waterproofing mixture in the mixes, to help any water creep.
Wish I was young enough to do it.
Best Wishes
Brian B
|
|
|
|
Post by Cro on Apr 12, 2022 13:25:18 GMT
Thanks all for the tips, The end results will have slabs so finish isn't key and I plan some re-inforcing mesh in there to tie it all together.
It's approx. 4.5m3 of concrete, maybe a bit more. Working on my own in a day I've managed to mix and pour in the footings around 2.5m3 at a time give or take. I'd much rather it poured in 1 go but I then worry about getting all my levels right whilst some bloke is pressing the button and looking at his watch....
Adam
|
|
|
|
Post by Cro on Jun 6, 2022 9:48:43 GMT
Morning All! Hope you had a nice long weekend. I was just going to post a couple of photos of 9f tender progress but I hadn't updated on the patio so here are a couple of photos. I managed to get a little further than this before last weekend (28th) when we had my 30th Bday do with friends and family and I've since had a week off manual labour but I'll be back to it this weekend to try push to finishing it soon., all the edges have been cut in and its only really down the side of the house left to do.  Untitled Untitled by Adam Cro, on Flickr  Untitled Untitled by Adam Cro, on Flickr 9f tender, whilst getting back into the workshop over the last few days I've split my time on jobs and the tender tank and getting it ready for soldering. I ended up using M1.6 rivet head bolts as the tank was drilled for 1/16th rivets but I felt the head size was just a little better on the M1.6s. I decided to do things in stages by fitting any non structural and caulking them before assembly.  Untitled Untitled by Adam Cro, on Flickr  Untitled Untitled by Adam Cro, on Flickr  Untitled Untitled by Adam Cro, on Flickr  Untitled Untitled by Adam Cro, on Flickr Once these were done the baffles were all screwed into place with the added angle I've used and then the sizes were spotted through and drilled ready for assembly, I made a little PTFE sleeve to go over the drill so that when the drill broke through (hand drill) it didn't mark the brass. There are roughly 80 bolts either side which took a while to fit.  Untitled Untitled by Adam Cro, on Flickr This was the next step for soldering whilst I had access to everything before the coal space goes in. I had a fair few blocks left from the patio wall so these were set up outside ready for some soldering.  Untitled Untitled by Adam Cro, on Flickr I made a slight mistake when soldering this - I fed solder along the base of baffles around the angle but didn't do it on the other side where it tabs into the sole plate, I thought it would flow through but I was wrong and every slot leaked so a quick heat up before heading out to the club Sunday fixed that - just one small leak left on the sole plate but I'll sort that when I next warm it up for the coal space. Before I could finally fit the coal space I wanted to add the final details.  Untitled Untitled by Adam Cro, on Flickr And now all screwed together ready to go - there are some large gaps in places and some awkward parts to seal which I'm not keen on with regards to the plate work design but we'll see how we get on! Wish me luck, this is where it gets difficult.  Untitled Untitled by Adam Cro, on Flickr  Untitled Untitled by Adam Cro, on Flickr Lastly - the City has a friend thanks to Jess for my bday present. I will aim to get this and the City to the same stage and then I can build them together. Obviously there are differences but jobs will be very similar so doing them together will keep the builds side by side and that way Dad and I will have a loco to enjoy together when done (in theory).  Untitled Untitled by Adam Cro, on Flickr Right - back to work! Hopefully another tender update soon. Adam |
|
|
|
Post by Cro on Jul 4, 2022 21:45:46 GMT
Evening all, Just a little update here on one of Grandads locos. This has been a late night project when time has allowed over the last couple of weeks to get Grandads 5” Stirling Single back in ticket. Some small jobs including the following were required: - Fit injector and re-plumb axle/hand pump, this meant two new clacks as the old brass ones broke off in the boiler upon removal. - New studs for piston glands - Adjusting the springing as the ride height was off with axleboxes siting too low and the conrods catching the lower slide bars. - Big clean up with scotch brite and polishing compounds before a general polish all over. Please to say she’s back running again and sounds and looks lovely. youtu.be/Q_iMqc5Fl2IAdam |
|
|
|
Post by Deleted on Jul 5, 2022 13:56:23 GMT
Well done Adam, that's a beautiful loco, my No. 2 best all-time loco... she looks a very good example too.... Pete |
|
|
|
Post by silverfox on Jul 7, 2022 7:54:11 GMT
Adam
just sent you an o/t pm
Ron
|
|


 Regards Paul
