|
|
Post by mr swarf on Jan 25, 2019 16:32:49 GMT
A look through my bits of bronze revealed a couple of inch's of 1 1/4" bar which would do for the pistons. Firstly I turned down the outside to about 10 thou over bore size. 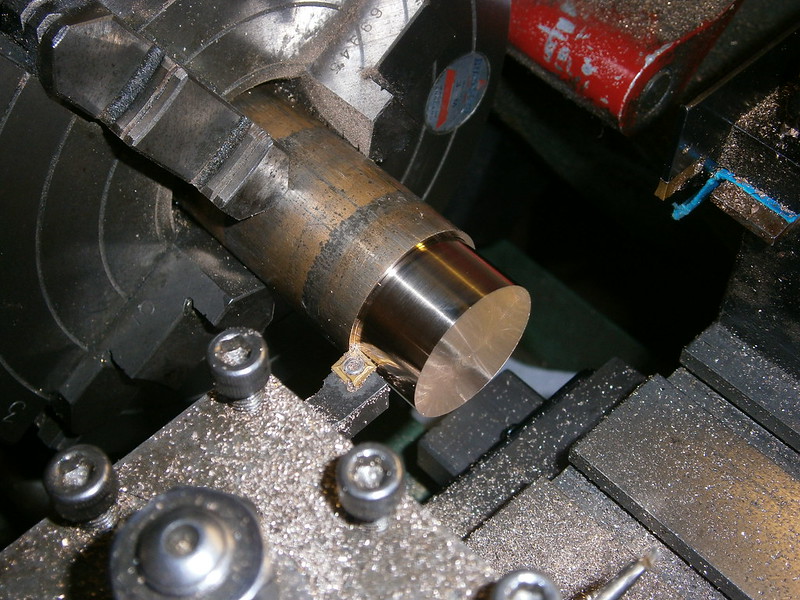 P1252000 P1252000 by Mr Swarf, on Flickr Then used a parting tool to form a groove 1/4" wide x 1/8" deep for the packing. I have decided to go with the traditional graphite packing. 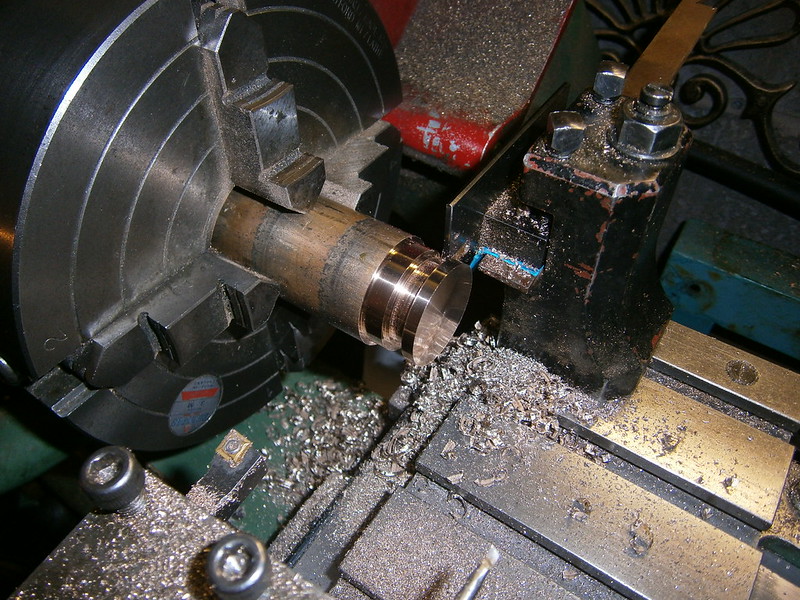 P1252001 P1252001 by Mr Swarf, on Flickr After the groove was done I parted it off at just over 1/2" long to allow a finish skim down to exactly 1/2" long. 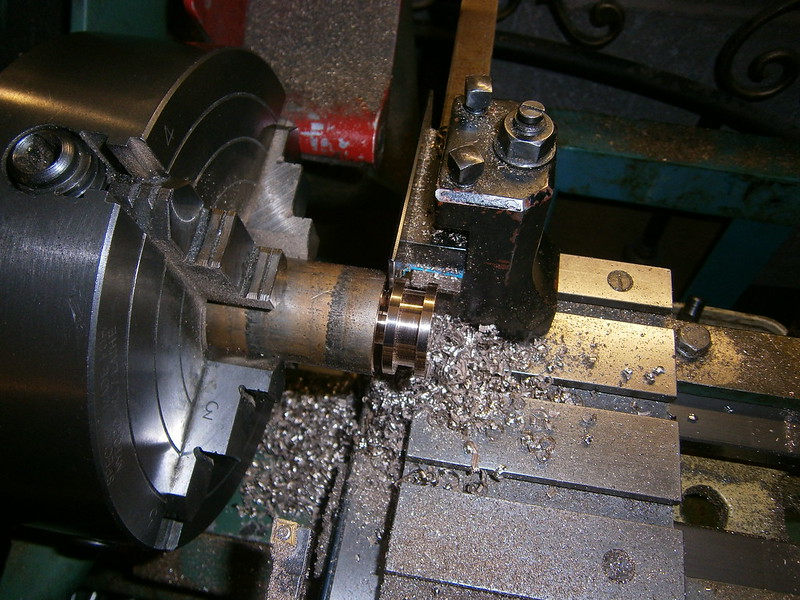 P1252006 P1252006 by Mr Swarf, on Flickr With the piston now in the 3 jaw I drilled & tapped 7/32 x 40 and then went half way in with a 7/32 slot drill to give the plain part. 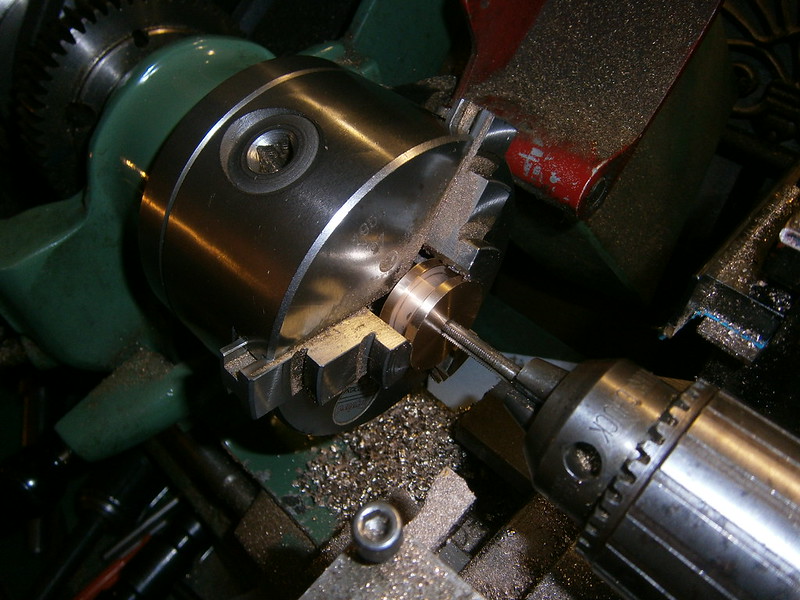 P1252007 P1252007 by Mr Swarf, on Flickr The piston rod was then placed into the tailstock chuck & run into the piston by turning the lathe by hand. 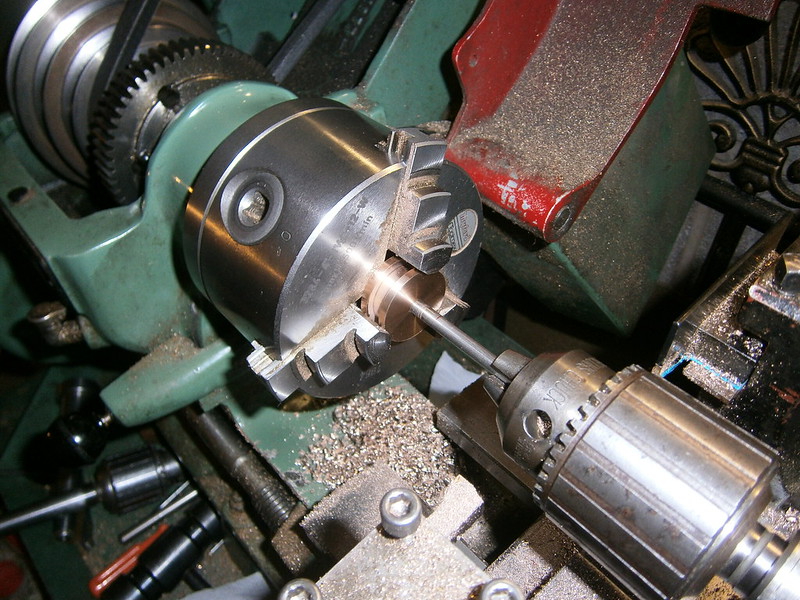 P1252008 P1252008 by Mr Swarf, on Flickr At this point lbsc says to mount the rod in a split bush. I've not had much success making accurate split bush's before so I decided to use the 4 jaw and use the dti to get the rod running as true as possible. 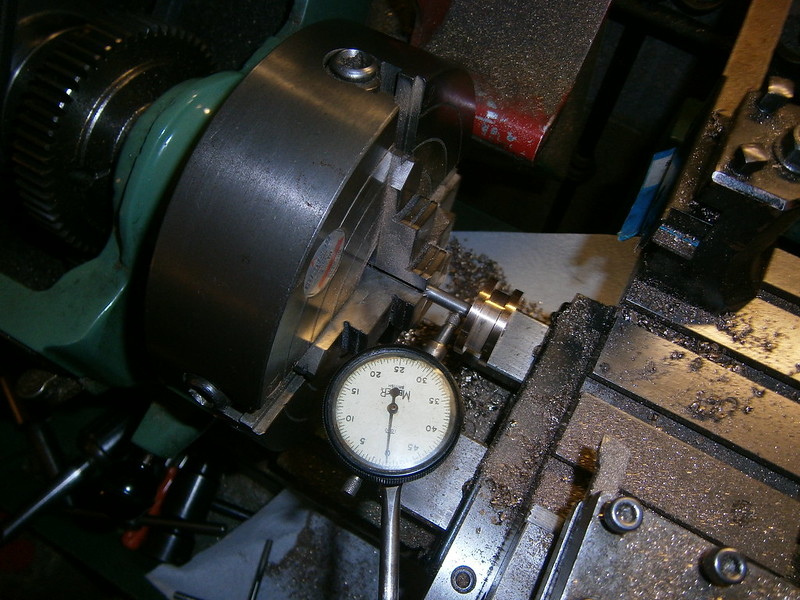 P1252009 P1252009 by Mr Swarf, on Flickr Then with a sharp hss tool I took the last few thou off the diameter to fit the bore. 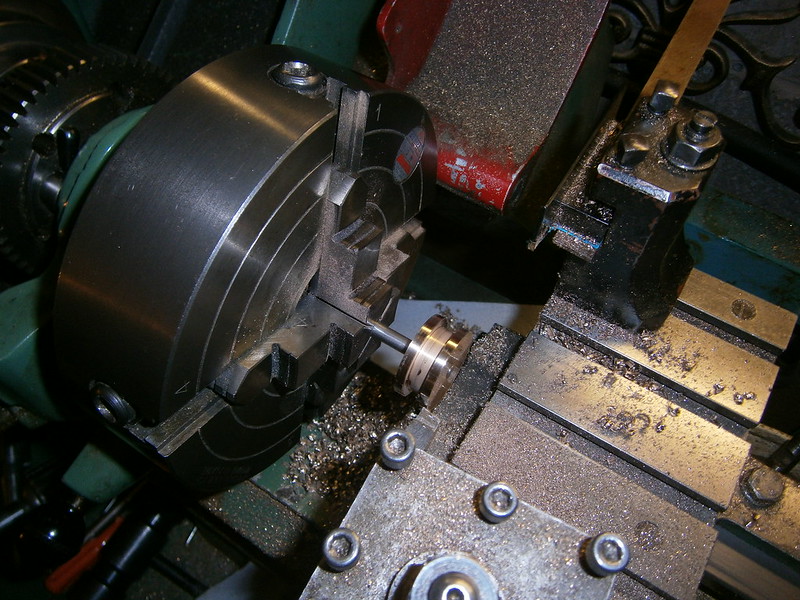 P1252010 P1252010 by Mr Swarf, on Flickr Repeat all this again and I have 2 pistons & rods. 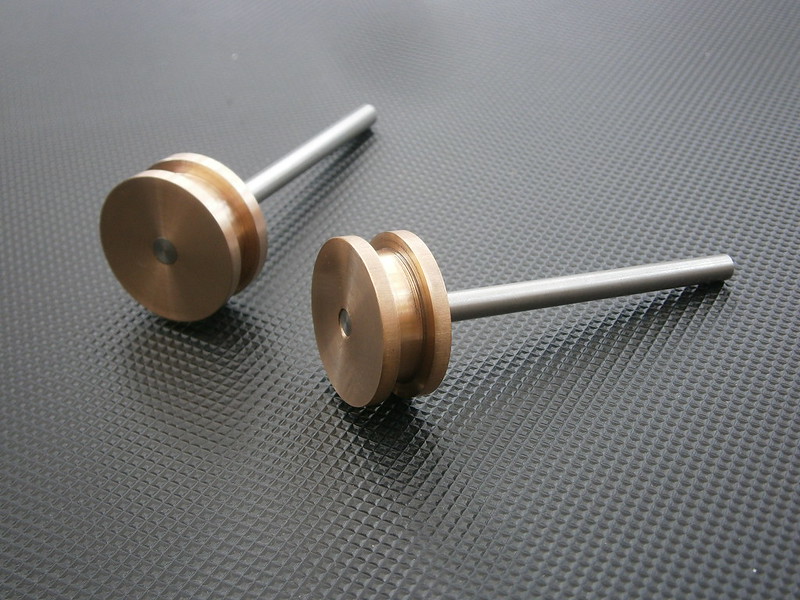 P1252011 P1252011 by Mr Swarf, on Flickr 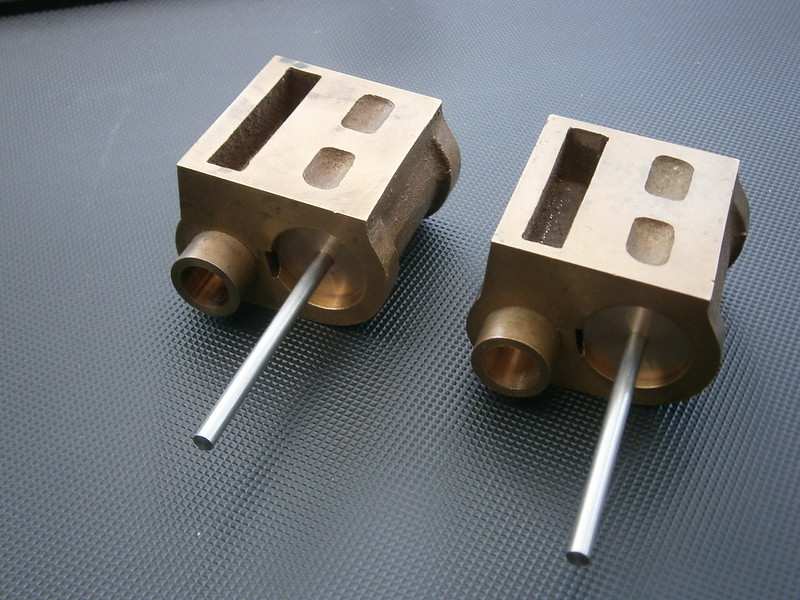 P1252012 P1252012 by Mr Swarf, on Flickr I'm off for another look in the offcuts box to see if there is anything what will do the covers. Paul |
|
|
|
Post by mr swarf on Jan 25, 2019 19:16:29 GMT
I have a couple of bar ends like this which I could get the front covers from. 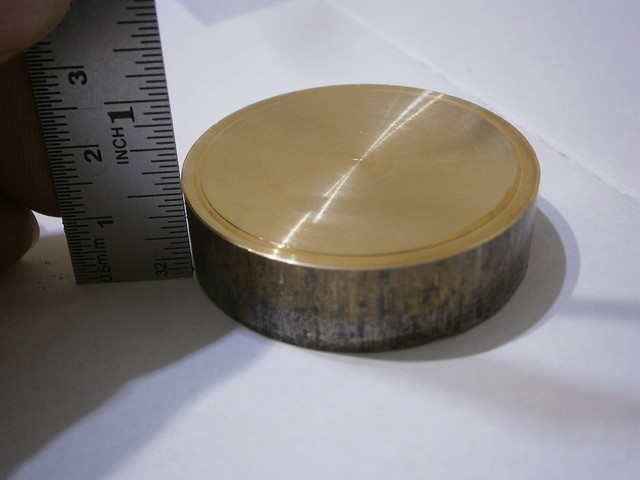 Bronze offcut Bronze offcut by Mr Swarf, on Flickr At only 1/2" long I can't safely hold it in the chuck & turn/part the cover . I am thinking of soft soldering it on the end of another bar. Will that stand up to parting the cover off or any other suggestions? |
|
JonL
Elder Statesman
 WWSME (Wiltshire)
Posts: 2,907
|
Post by JonL on Jan 25, 2019 21:41:23 GMT
Is 1/2" too short to hold in the chuck?
|
|
|
|
Post by mr swarf on Jan 26, 2019 11:59:22 GMT
Hi Nobby,
Allowing for squaring up the end, the thickness of the cover & parting blade ( I have a Sandvik Qcut with 3mm blade) it leaves about 1/8" to chuck it with. It just seems a little risky to me.
Looking at it again today I noticed something. I have the Myford threaded body 4 jaw, which means the work is closer to the headstock. The result of this is, at this diameter, my rear toolpost hits the chuck guard before getting to the chuck. If I remove the chuck guard I can get the parting blade right up to the chuck which gives me a bit more to hold it with. If I take it steady I should be ok. Only one way to find out.
Paul
|
|
JonL
Elder Statesman
WWSME (Wiltshire)
Posts: 2,907
|
Post by JonL on Jan 26, 2019 16:02:46 GMT
Good luck either way!
|
|
|
|
Post by chester on Jan 26, 2019 18:27:11 GMT
Hi mr swarf bore out some soft jaws for your chuck or make a split bush to go in your hard jaws and hold in with the running centre until nearly parted off and finish with a hacksaw. Graham
|
|
stevep
Elder Statesman
Posts: 1,070
|
Post by stevep on Jan 26, 2019 18:49:35 GMT
Remember that you need a register to go inside the cylinder bore. So turn the register first, then reverse in the chuck, holding the register, to part off - using the running centre to hold it steady until you get nearly all the way through (as suggested by Chester). You can then face off the outside of the cover, before repeating.
|
|
timb
Statesman

Posts: 512 
|
Post by timb on Jan 27, 2019 9:13:33 GMT
I have a couple of bar ends like this which I could get the front covers from. Bronze offcut by Mr Swarf, on Flickr At only 1/2" long I can't safely hold it in the chuck & turn/part the cover . I am thinking of soft soldering it on the end of another bar. Will that stand up to parting the cover off or any other suggestions? I used superglue to hold the eccentrics on my Invicta to a piece of ally bar and that worked fine. Light cuts and make it as central to the bar as you can. I lined up using a centre in the tailstock. Soft soldering will be more than adequate and much less stressful.
Tim
|
|
|
|
Post by mr swarf on Jan 28, 2019 19:33:29 GMT
With the chuck guard removed I decided to give it go held in the chuck. First I turned the outside to the required 1 5/8" diameter. Next the register was turned to fit the bore & here I encountered a little snag. The covers require a small cut out to clear the valve liner so as the previous builder had already fitted them I could not offer up the cylinder to check the fit. I used the micrometer reading of the piston which worked out ok. Not a big problem on the fronts but I need to watch this for the rear as these need to be spot on. A tip to others is to turn your covers before fitting the liner. 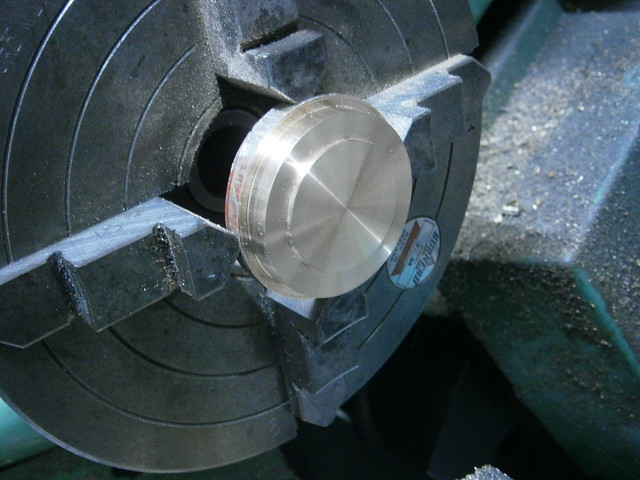 Turning Register Turning Register by Mr Swarf, on Flickr With fingers crossed I started to part the cover taking it gently. 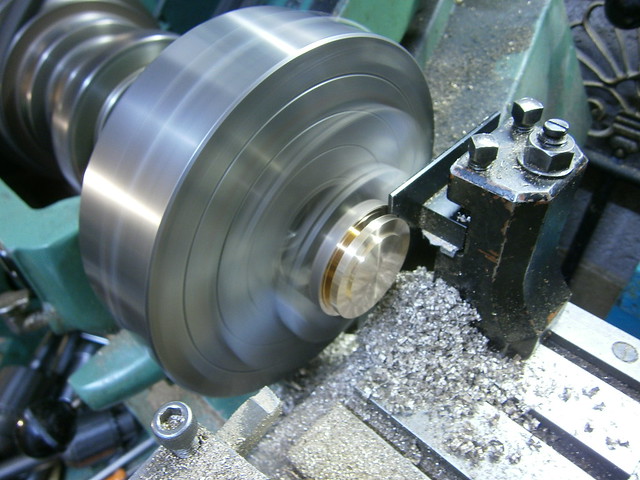 P1282021Parting Cover P1282021Parting Cover by Mr Swarf, on Flickr It parted off fine, just requiring a few thou skim to clean up afterwards. The little cutouts were then done with a half round file. 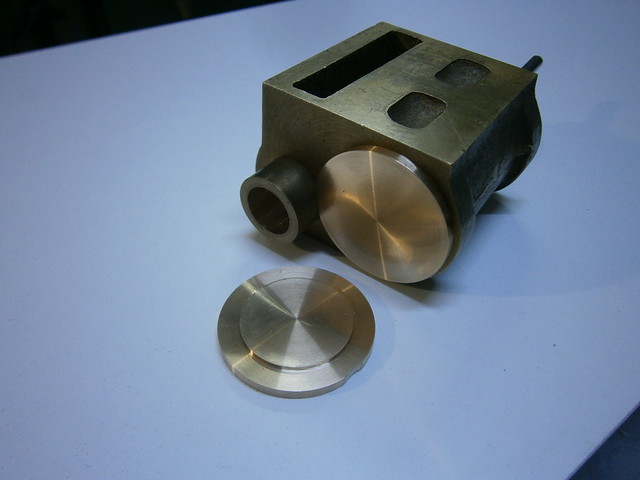 Front Covers Front Covers by Mr Swarf, on Flickr Paul |
|
mbrown
Elder Statesman
Posts: 1,719
Member is Online
|
Post by mbrown on Jan 28, 2019 20:32:20 GMT
Nice work. I see you used a rear parting holder - I guess that must have helped, but I would have had my heart in my mouth at that point!
Malcolm
|
|
JonL
Elder Statesman
WWSME (Wiltshire)
Posts: 2,907
|
Post by JonL on Jan 28, 2019 21:06:01 GMT
You are at exactly the point I'm about to embark! I hope I can get something approaching your finish, bravo.
|
|
|
|
Post by richard2018 on Jan 29, 2019 14:39:34 GMT
P1252000 by Mr Swarf, on Flickr Then used a parting tool to form a groove 1/4" wide x 1/8" deep for the packing. I have decided to go with the traditional graphite packing. Hi Paul,
Not seen a groove twice as wide as it is high, before. Is the plan to fit 2 turns of the usual 1/8" square graphite packing yarn, or is the yarn available in 1/4x 1/8"?
Regards, Richard.
|
|
|
|
Post by mr swarf on Feb 26, 2019 22:47:21 GMT
P1252000 by Mr Swarf, on Flickr Then used a parting tool to form a groove 1/4" wide x 1/8" deep for the packing. I have decided to go with the traditional graphite packing. Hi Paul,
Not seen a groove twice as wide as it is high, before. Is the plan to fit 2 turns of the usual 1/8" square graphite packing yarn, or is the yarn available in 1/4x 1/8"?
Regards, Richard.
Hi Richard, That's the dimension given, I assume its for 2 turns of 1/8" square packing. At least that's what I'm going to do. Paul |
|
|
|
Post by mr swarf on Feb 26, 2019 23:07:58 GMT
With some supplies bought at MMEX I can carry on with the piston valves. Some bronze bar was turned to a few thou over the bore size & then the center section roughed out with a parting tool, again to a few thou over the required size. The red marks are just to indicate approximately where to cut to. I use a CD marker pen for things like this 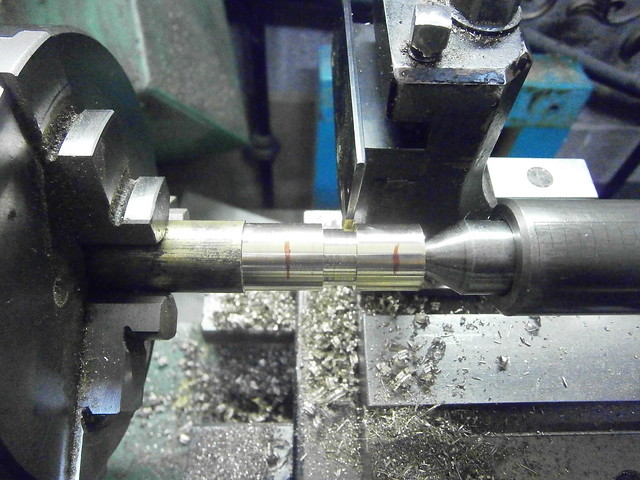 P2262025 P2262025 by Mr Swarf, on Flickr The center section was then brought to finished size with a round nosed tool. 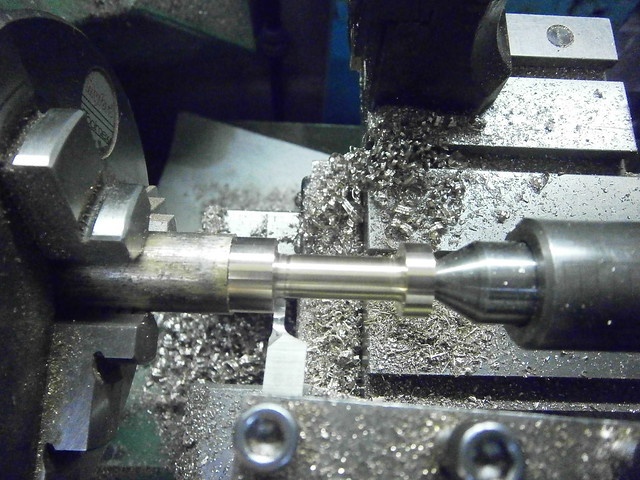 P2262026 P2262026 by Mr Swarf, on Flickr The outer diameter of the bobbins were then turned until a good fit in the bore. 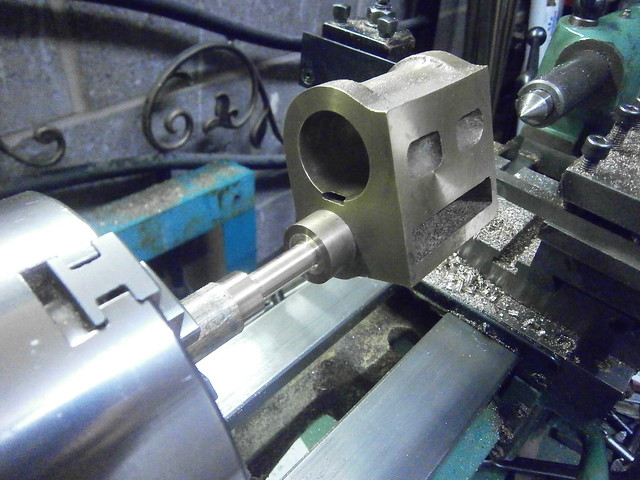 P2262029 P2262029 by Mr Swarf, on Flickr The valve is then parted off slightly over length and then faced back to the required length of 1 31/64" .  P2262030 P2262030 by Mr Swarf, on Flickr I now have to do it all again for the second cylinder. 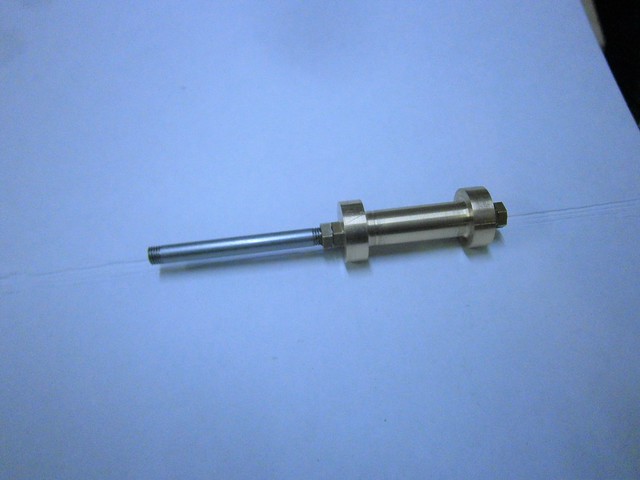 P2272034 P2272034 by Mr Swarf, on Flickr Paul |
|
|
|
Post by mr swarf on Feb 27, 2019 22:27:08 GMT
A little workshop time tonight sees the other piston valve completed by the same process.  P2282036 P2282036 by Mr Swarf, on Flickr Just the rear covers to go now. Thinking about them, what is the best way to machine the flats for the slide bars keeping them equidistant from the piston rod center? LBSC seems to gloss over this bit . Paul |
|
stevep
Elder Statesman
Posts: 1,070
|
Post by stevep on Feb 28, 2019 11:43:28 GMT
I made a stepped plug that fitted in the gland hole, with the larger diameter the distance between the slide bars. I coated the large diameter with a marking pen, then with the cover clamped on the milling machine bed, milled away the steps until the cutter started to remove the marker fluid.
|
|
timb
Statesman
Posts: 512
|
Post by timb on Feb 28, 2019 11:58:28 GMT
I can vouch for a jig that fits in the gland hole. It was the only way to get the lot accurate and repeatable on my Canterbury Lamb cylinders. You can take time making the jig getting it accurate, check and check the measurements again before you commit to drilling and when done you can guarantee they will both be the same!
Good luck whatever you choose to do, its coming along great!!
Tim
|
|
|
|
Post by runner42 on Mar 2, 2019 6:11:27 GMT
I assume that you don't have castings for the rear cylinder covers, so if you are intending to make them from round stock, instead of fabricating the the two flats that go on the rear cylinder cover you can make it simpler by just producing the end cover with a provision for the gland which is just a turning job and utilise a separate annulus upon which the flats are established. This annulus fixes over the gland and is self aligning so the slide bars are correctly oriented to the motion bracket fixings. Brian  slide bars slide bars by Brian Leach, on Flickr |
|
mbrown
Elder Statesman
Posts: 1,719
Member is Online
|
Post by mbrown on Mar 2, 2019 8:51:37 GMT
Those fabricated cylinders look interesting. The subject of fabricated cylinders came up on another thread the other day.
Do you have any further details?
Malcolm
|
|
|
|
Post by runner42 on Mar 3, 2019 7:04:15 GMT
Those fabricated cylinders look interesting. The subject of fabricated cylinders came up on another thread the other day. Do you have any further details? Malcolm <iframe width="29.860000000000127" height="4.52000000000001" style="position: absolute; width: 29.860000000000127px; height: 4.52000000000001px; z-index: -9999; border-style: none;left: 15px; top: -5px;" id="MoatPxIOPT0_62512917" scrolling="no"></iframe> <iframe width="29.860000000000127" height="4.52000000000001" style="position: absolute; width: 29.86px; height: 4.52px; z-index: -9999; border-style: none; left: 1427px; top: -5px;" id="MoatPxIOPT0_22519734" scrolling="no"></iframe> <iframe width="29.860000000000127" height="4.52000000000001" style="position: absolute; width: 29.86px; height: 4.52px; z-index: -9999; border-style: none; left: 15px; top: 165px;" id="MoatPxIOPT0_43074309" scrolling="no"></iframe> <iframe width="29.860000000000127" height="4.52000000000001" style="position: absolute; width: 29.86px; height: 4.52px; z-index: -9999; border-style: none; left: 1427px; top: 165px;" id="MoatPxIOPT0_90744933" scrolling="no"></iframe> Hi Malcolm, not wanting to contaminate this thread I have updated an old one found here modeleng.proboards.com/thread/8776/lms-black-5?page=1&scrollTo=170893Brian |
|


