dave f
Active Member
 Must focus on the Princess, resist temptation to tinker with new toy...
Posts: 45
|
Post by dave f on Mar 11, 2019 21:40:36 GMT
Hi people.
I decide to start a thread here rather than continue the discussion on the new members thread where I said hello. seemed more appropriate now that I have the photo upload sussed. :-D
The History.
I bought this from a dealer a few years ago when I was even wetter behind the ears than currently.
unsurprisingly wasn't quite as good as it seemed and needed a reasonable amount of work to sort out 'the mechanics'.(edit-not by me. had to pay a respectable chap who knows his onions to do it for me and what a good job he did)
have had some fun with it but now have moved on overseas for a few years I decided this was a good time to take the plunge and strip it apart.
It's fundamentally well built to LBSC's words and music, but like most things has been bodged along the way till it came to me.
Now I have some time (no real tools to speak of as I'm an expat so will have to make do/improvise/purchase as required) I really want to bring her back to her former glory.
So starting in January this year I started the disassembly, cleaning up and preparation for repainting.
I've read so many peoples threads/watched videos over the years and they inspired me to take the plunge, so thought I'd do the same in the hope the maybe someone will learn from the glorious mistakes I'm sure to make.
But as the old song goes "I'll get by with a little help from my friends"
So I'll post photos on this thread as I go (have a got a reasonable back log) with some descriptions of what was done (if not blatantly obvious) or cries for help. IF you have the time or inclination, please feel advise/comment/chastise etc.
Here we go
|
|
dave f
Active Member
Must focus on the Princess, resist temptation to tinker with new toy...
Posts: 45
|
Post by dave f on Mar 11, 2019 22:22:20 GMT
|
|
dave f
Active Member
Must focus on the Princess, resist temptation to tinker with new toy...
Posts: 45
|
Post by dave f on Mar 11, 2019 22:31:44 GMT
Decided to strip the tender apart first to get a feel for how it was put together.  IMG_2891 - Copy IMG_2891 - Copy by david follows, on Flickr managed to get the body work and chassis apart pretty easily. luckily someone (I assume the builder) had put numbering marks on the all the axles boxes to assist re-assembly. pretty grimey within the chassis so set to degreasing and removing all the old paint 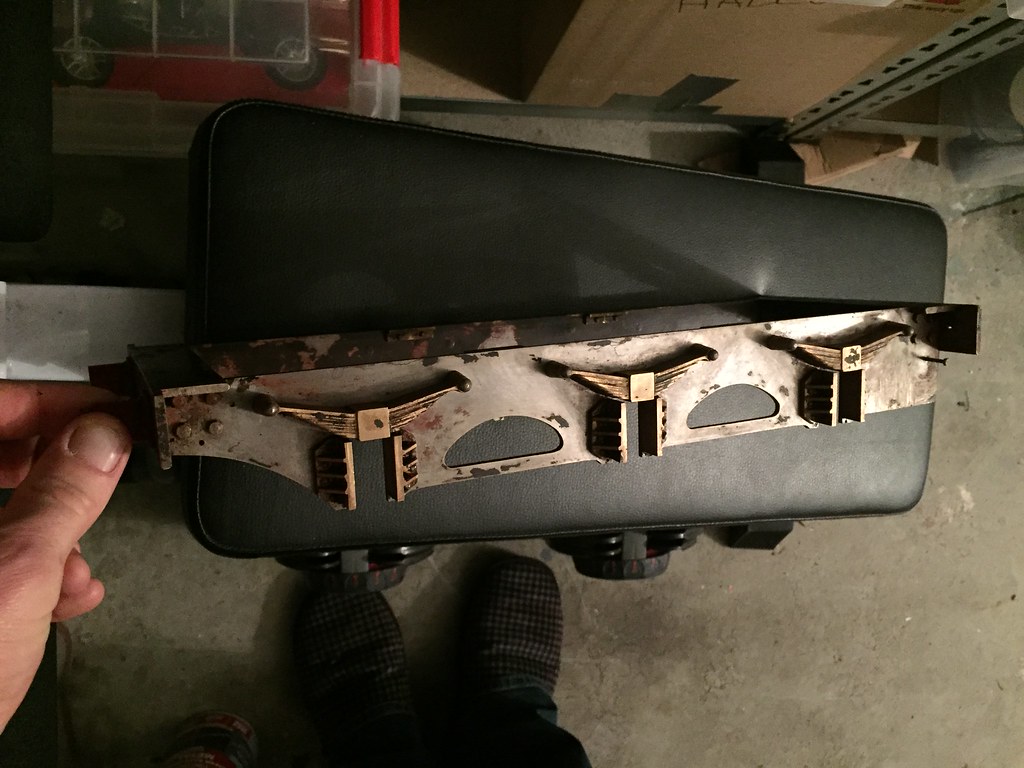 IMG_2918 - Copy IMG_2918 - Copy by david follows, on Flickr after a good bit of elbow grease, paint stripper and emery it looks pretty decent. (thiis isn't most recent photo) 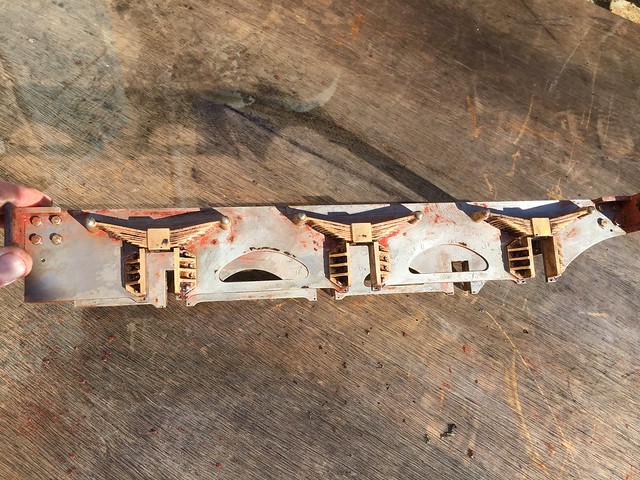 IMG_2962 IMG_2962 by david follows, on Flickr wheels and smaller components will follow soon. haven't taken the photos of the tender body work yet. There were 2 different water slide transfers on the tender body, each painted over to give a pretty bad final look. |
|
|
|
Post by Deleted on Mar 11, 2019 23:08:52 GMT
Hi Dave
Thank's for taking the time to share your adventure, I look forward to seeing your progress...
Cheers
Pete
|
|
timb
Statesman

Posts: 512 
|
Post by timb on Mar 12, 2019 17:28:30 GMT
A good start Dave, looking forward to see it proceed!
Tim
|
|
dave f
Active Member
Must focus on the Princess, resist temptation to tinker with new toy...
Posts: 45
|
Post by dave f on Mar 12, 2019 21:17:22 GMT
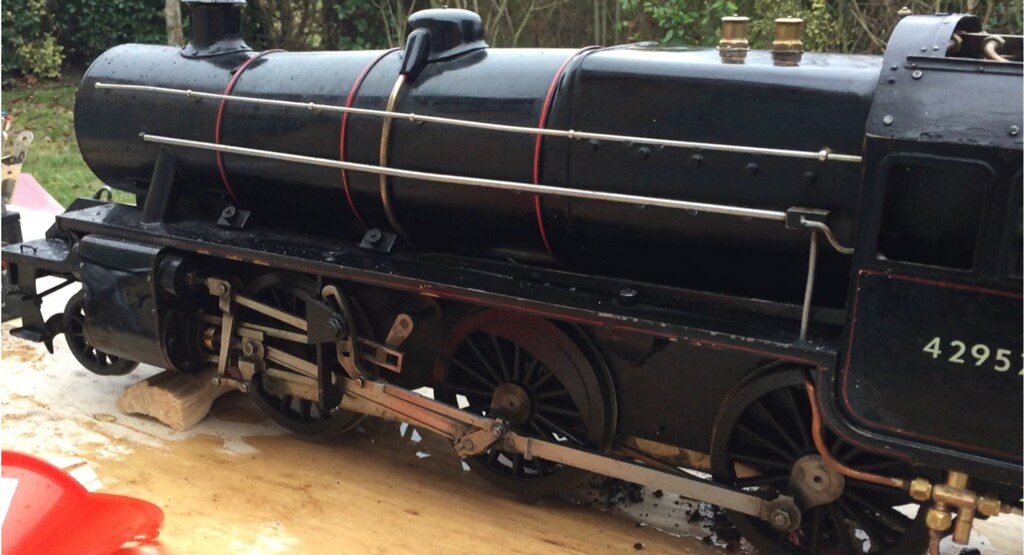
Thought I'd put up the disassembly photos of the engine bodywork etc. Cab came apart pretty easy. it's nicely put together like a lot of the engine. One thing I do like is that (I think) most of valves were made by the builder to the LBSC designs (excluding the new injector steam valve) I intent to keep as much of this as possible because I want to do a sympathetic restoration, not turn it brand new. (might ditch that blowdown valve though or at least fit a handle to it) 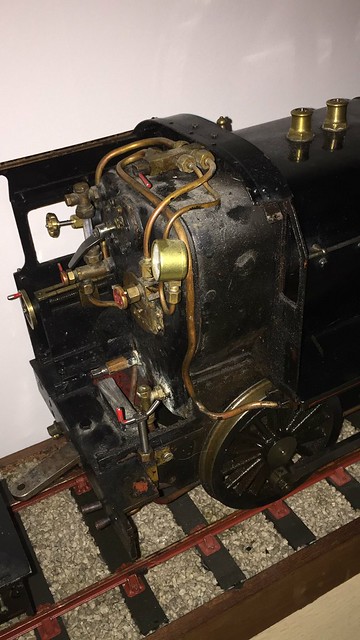 TEJU9457 TEJU9457 by david follows, on Flickr 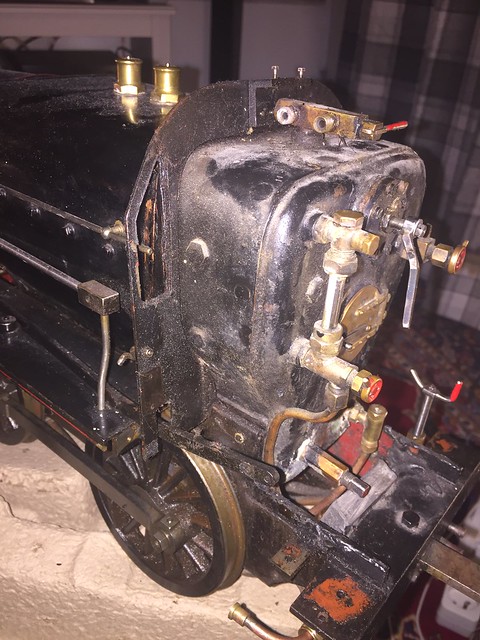 IMG_2879 - Copy IMG_2879 - Copy by david follows, on Flickr what really baffles me though is the amount of lead that was inside the cab. 3 great dollops of it. 1 you can see in the photos, the others were just crammed into the internal spaces of the cab. hideous. the fixing of it all can only be described as a BODGE... 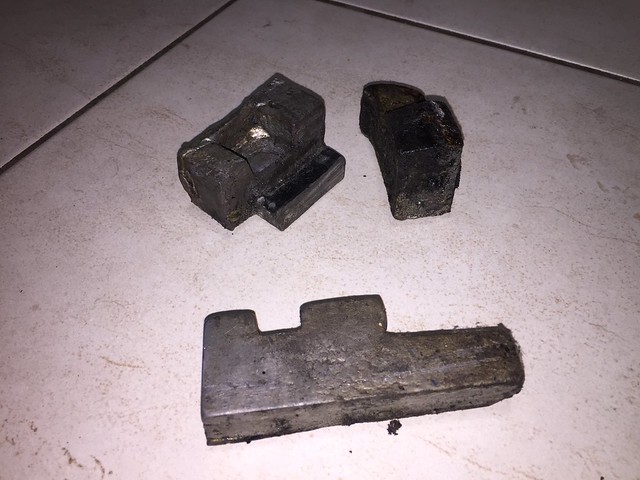 lead lead by david follows, on Flickr Which begs the question... WHY??? I'm sure LBSC wouldn't have designed an engine like this that was so out of balance that it required counterbalancing at the aft extremity of the chassis. Makes me wonder how well the suspension has been set up.... something tells me this will need some careful investigation. I'm not opposed a a little Plomb to aid traction, but I'd be hiding it neatly inside the chassis somewhere, directly over the wheels where it's most needed.... |
|
dave f
Active Member
Must focus on the Princess, resist temptation to tinker with new toy...
Posts: 45
|
Post by dave f on Mar 12, 2019 21:46:18 GMT
next I started getting stuck into removing all the 'trimmings' so to speak - buffers, dummy brake & steam hoses, etc  IMG_2910 - Copy IMG_2910 - Copy by david follows, on Flickr At this point I need to mention those tiny little spanners in the back ground. cheap laser cut jobbies from Blackgates. amazing for getting into the tightest of spaces. Credit where it's due and all that Front buffer beam almost clear and running boards off 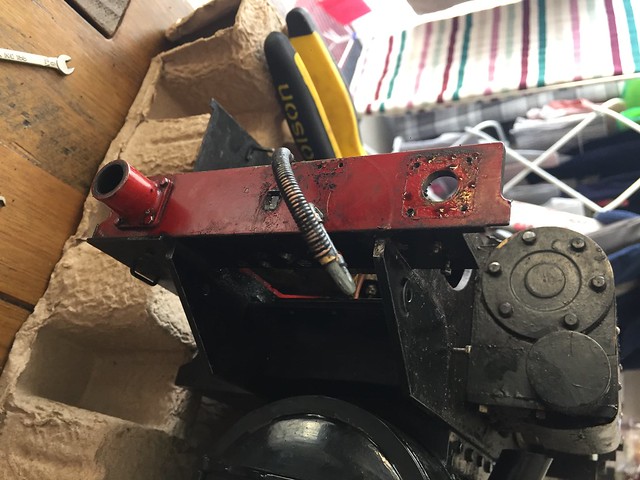 IMG_2912 - Copy IMG_2912 - Copy by david follows, on Flickr heres a view of the underside before any dismantling took place. here you can see some of the unsightly water piping that i may (or may not) replace. 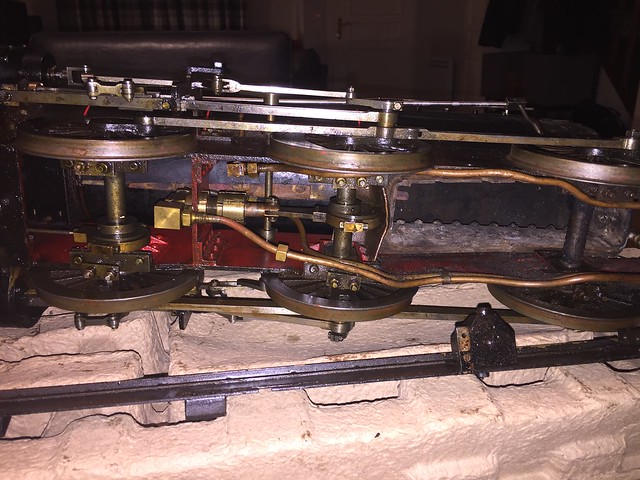 IMG_2928 - Copy IMG_2928 - Copy by david follows, on Flickr Only a single pump for this Princess. Here is one area I would also like to improve upon is the piping connections to the tender and various other connections at the rear of the chassis/cab  IMG_2929 - Copy IMG_2929 - Copy by david follows, on Flickr I think a nice wooden floor would be great in here... |
|
dave f
Active Member
Must focus on the Princess, resist temptation to tinker with new toy...
Posts: 45
|
Post by dave f on Mar 12, 2019 22:03:50 GMT
Now to get that boiler off........ Smoke box and all the connections first...... 3 1/2" smoke boxes are a little tight for my oversized mitts..... (note to self. need bigger engine)  IMG_2935 IMG_2935 by david follows, on Flickr One thing that has baffled me about this area, is the number of nuts/bolts used to retain things. My default thinking was 'surely tapping the holes in the smoke box would have made life much easier to undo all these soot covered nuts in inaccessible places'. SO whats the reason.... I'm sure someone can tell me the obvious point I'm missing? Getting the boiler off wasn't so bad despite wishing I was Frodo whilst trying to access the farthest nut.  IMG_2940 IMG_2940 by david follows, on Flickr now for the smoke box.... This proved to be harder. had to remove the steam inlet manifold from the cylinders as couldn't extract the steam pipe from the smoke box. great design (manifold), but pain in the backside to get out.... 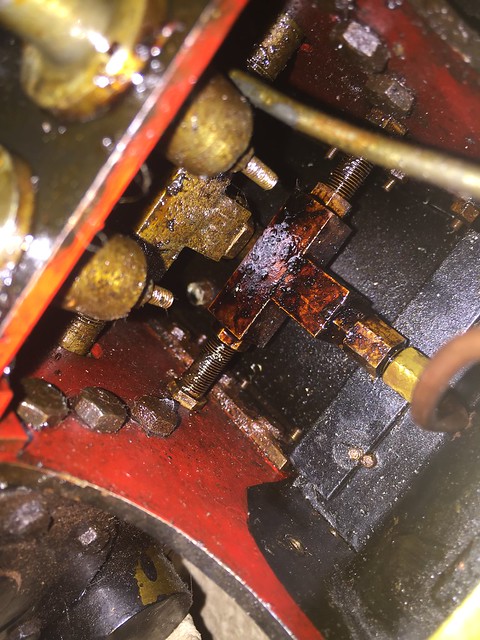 IMG_2937 IMG_2937 by david follows, on Flickr but now done. |
|
JonL
Elder Statesman
 WWSME (Wiltshire)
Posts: 2,909
|
Post by JonL on Mar 13, 2019 12:02:16 GMT
I was a little concerned that the pipe I procured for my smokebox is a little thick, but as you say its going to be a positive boon when I go to tap threads in it...
|
|
|
|
Post by doubletop on Mar 15, 2019 8:31:14 GMT
Dave
I love this part of the process, even though it does tend to throw up a few "OMG's". You may already have found some of them. The thing is if you aren't happy with something now plan to take the time to fix it now. The last thing you want to do is get to the end and wish you had. My 14xx refurb is on here, you'll see what I mean.
Pete
|
|
nonort
Part of the e-furniture
If all the worlds a Stage someone's nicked the Horses
Posts: 277
|
Post by nonort on Mar 15, 2019 9:03:21 GMT
I don't know if you realised but if the engine is built to the 'words and music' the smokebox door front plate is only pushed into the barrel. Also is the injector fitted up in reverse? It would appear that the delivery is going off to the rear perhaps the back head? Hope this helps.
|
|
|
|
Post by delaplume on Mar 18, 2019 21:40:44 GMT
Hi Dave, Glad to see you've made a goodly start with the dismantling..........good luck with the rest and "Nil Desperandum"......... Here's the wiki on the only surviving member of that type}----- www.svrwiki.com/LMS_Stanier_Mogul_42968This was Stanier's first design after moving from Swindon to Crewe and he caused a bit of a sensation when the very first one appeared with a GWR-type safety valve !!! Needless to say it was soon removed !! |
|
|
|
Post by ettingtonliam on Mar 18, 2019 23:22:37 GMT
According to ES Cox, thinking to please Stanier, the Derby drawing office had, shortly after he took office, produced a couple of proposal drawings of locos, complete with GW style coffee pot over the safety valves. He had made it clear in no uncertain terms that he didn't want his locos to be GW look alikes. You can imagine then, his displeasure when, as a result of a misunderstanding at Crewe, the first 2 6 0, No 13245, emerged from the erecting shop complete with coffee pot! It was immediately removed and even the official photos which had been taken with it in place were destroyed. A photo does (or did) exist though, and is reproduced in Volume 1 of Cox's 'Locomotive Panorama'
|
|
|
|
Post by delaplume on Mar 19, 2019 5:47:16 GMT
According to ES Cox, thinking to please Stanier, the Derby drawing office had, shortly after he took office, produced a couple of proposal drawings of locos, complete with GW style coffee pot over the safety valves. He had made it clear in no uncertain terms that he didn't want his locos to be GW look alikes. You can imagine then, his displeasure when, as a result of a misunderstanding at Crewe, the first 2 6 0, No 13245, emerged from the erecting shop complete with coffee pot! It was immediately removed and even the official photos which had been taken with it in place were destroyed. A photo does (or did) exist though, and is reproduced in Volume 1 of Cox's 'Locomotive Panorama' Yes, that's right-------I managed to find a reproduction of that photo on the web last time I was on this forum, but so far this time have been unsuccessful... |
|
|
|
Post by delaplume on Mar 19, 2019 5:57:55 GMT
Well--------have just had another try and have found TWO photos which I have downloaded onto my files but now am having probs getting them onto here............Go onto the web and Google under lms 13245 to see them...
|
|
|
|
Post by ettingtonliam on Mar 19, 2019 13:40:25 GMT
I did google lms 13245, and could find one photo of it with the coffee pot in place. It isn't the same photo as the one in Cox's book, although it might have been taken on the same day. The loco isn't in exactly the same position, the cranks are set differently, and in the Cox photo (attributed to W H Whitworth) its buffered up to another loco behind it, which isn't in the google photo. Theres a telegraph pole in the Cox photo which isn't in the google one, but the long low building in the background of both photos might be the same. Maybe an expert on Crewe Works can identify it - the paint shop maybe? Curiously, theres a photo on google of it in 'shop grey', looking like an official works photo, but with a dome on not a coffee pot. You'd think the 'shop grey' one would be earlier wouldn't you.
Maybe someone at Crewe had a sense of humour or was trying to wind up the the new boss - a bit of a risky business in the economic climate of the early 1930s don't you think?
|
|
|
|
Post by delaplume on Mar 19, 2019 15:26:37 GMT
"Wind up the new Boss"--LoL !!----yes, I like that idea... I seem to have sorted the uploading now so here you are then------------------>    |
|
dave f
Active Member
Must focus on the Princess, resist temptation to tinker with new toy...
Posts: 45
|
Post by dave f on Mar 19, 2019 21:45:40 GMT
Hi peeps. Back after a short break. Sorry been wrestling with french authorities........ heres a photo just before the smoke box came off 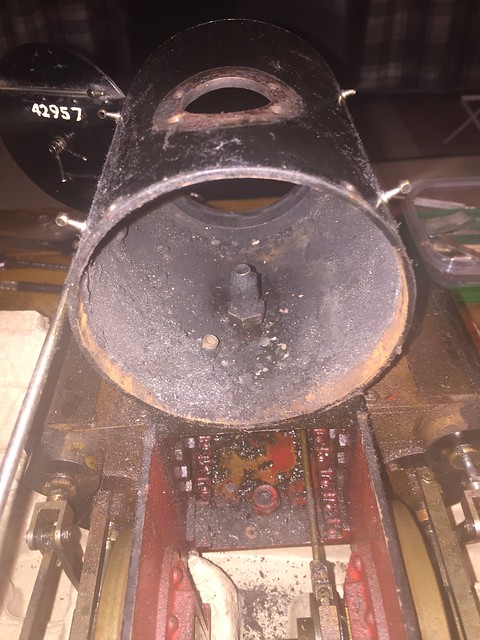 IMG_2946 IMG_2946 by david follows, on Flickr defo needs some TLC. Nonort Yes the smoke box door/ring indeed appears to be pressed in as you say  IMG_3307 IMG_3307 by david follows, on Flickr you can see it here. TBH this is 1 thing I find aesthetically unpleasing and I will be filling this - product recommendations for filling a smoke box please. I've heard good things about JB weld. The Injector fills the boiler via the top feed along with the axle pump. Whilst on the topic of the smoke box here are the various other parts that came off it during the disassembly that will need a good stripping.  IMG_3304 IMG_3304 by david follows, on Flickr particularly like the numbering Again, can someone tell me why virtually none of the fasteners for the smoke box were tapped?? There are plenty of other places where the material is thinner that uses tapping instead of nuts. Got the running boards and a few other bits cleaned up ready for painting. (the wife loves me storing it in the living room - ) 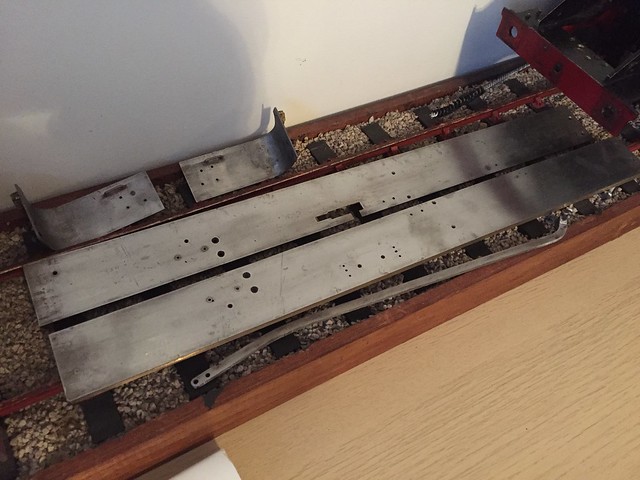 IMG_3310 IMG_3310 by david follows, on Flickr now for the boiler 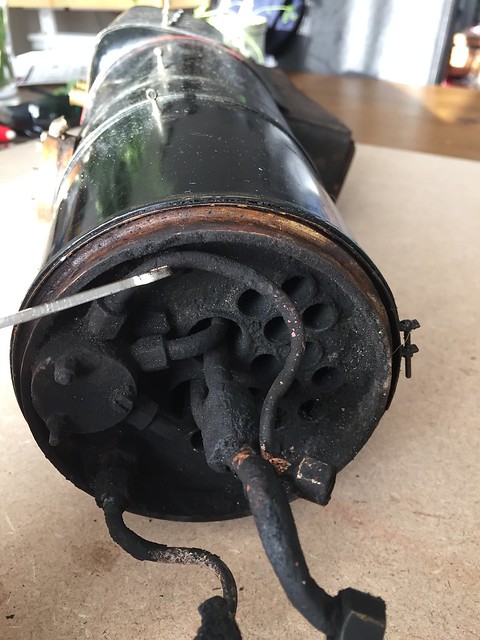 IMG_2955 IMG_2955 by david follows, on Flickr definitely intend to improve upon the routing of the blower pipe and nozzle. it's SOOO easy to dislodge it when cleaning the flues after a run. got the backhead quite nicely cleaned up  IMG_3313 IMG_3313 by david follows, on Flickr BUT
Snapped my first couple of bolts/screws - regulator bush and smoke box door mounting...... and what a great place to do it. of well. gotta learn somehow, albeit the painful way. Next headache...... I stupidly decided that taking out the blower pipe from the boiler was a good idea  IMG_3316 IMG_3316 by david follows, on Flickr something tells me this will be a B@st..... to get back in. any genius ideas on how to synchronise those threads. got the superheaters out as well. They were pretty caked in a good fews years of soot and grime.  IMG_3290 IMG_3290 by david follows, on Flickr But they have started to clean up quite nicely. but am obviously treading very carefully here. repairing or replacing these isn't a road I want to go down. Softly Softly catchy monkey  IMG_3311 IMG_3311 by david follows, on Flickr |
|
dave f
Active Member
Must focus on the Princess, resist temptation to tinker with new toy...
Posts: 45
|
Post by dave f on Mar 19, 2019 21:47:13 GMT
and thanks to all the other info that you put on here about the history of the first Mogul. the GWR top feed did make me chuckle.
|
|
dave f
Active Member
Must focus on the Princess, resist temptation to tinker with new toy...
Posts: 45
|
Post by dave f on Mar 19, 2019 22:04:28 GMT
So next was disassembly of the chassis. Key point here was 'how far do I go' for a paint job. decided that removing the cylinders could be like opening Pandoras box so she'll get her new colours with the cylinders still attached. Call me wimp, but the voices in my head are screaming 'You'll regret it if you do'............. so started by getting out the mechanical lubricator 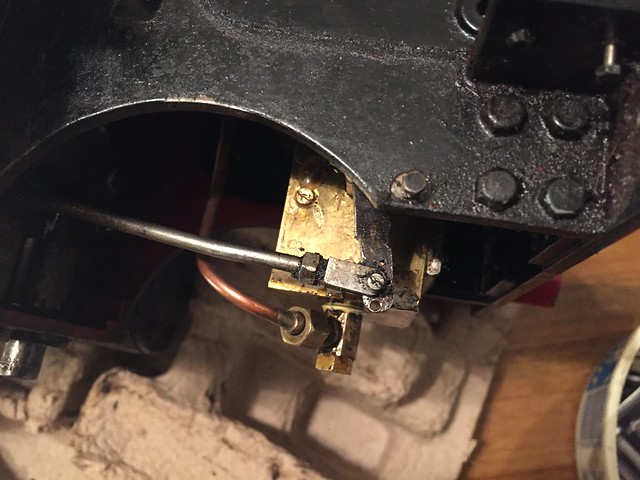 IMG_2969 IMG_2969 by david follows, on Flickr then onto the 'scary stuff'. taking apart the rods and linkages. I was very pleased to note the someone had previously marked the return cranks to aid re-assembly and timing. 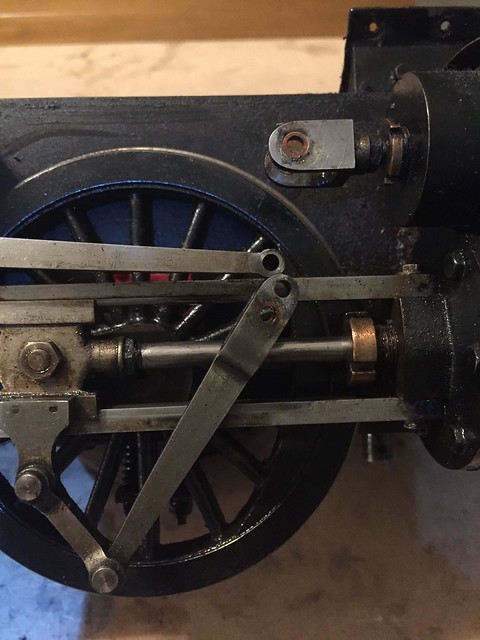 IMG_3332 IMG_3332 by david follows, on Flickr 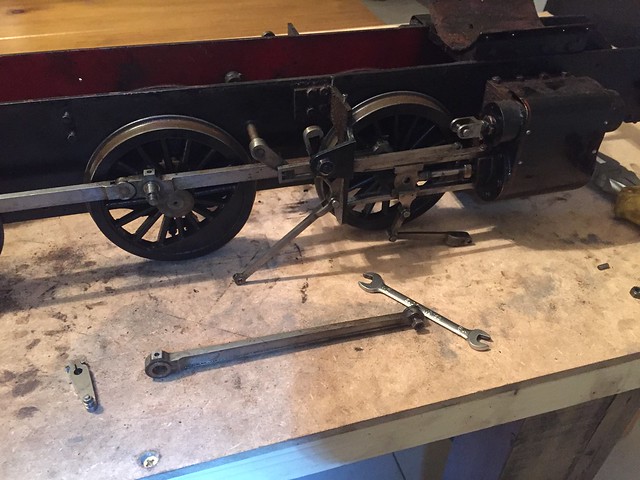 IMG_3333 IMG_3333 by david follows, on Flickr 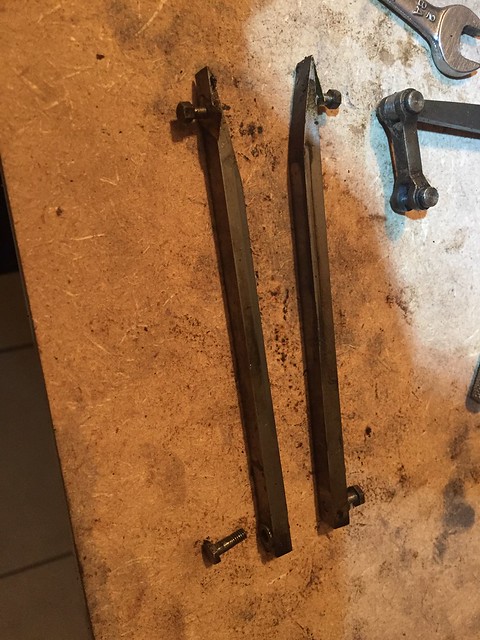 IMG_3335 IMG_3335 by david follows, on Flickr 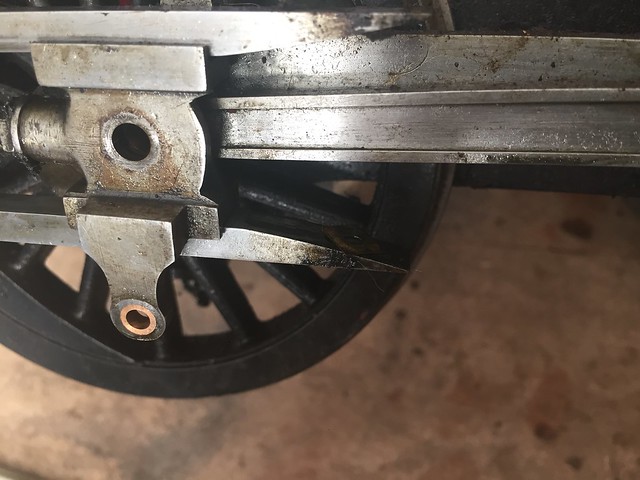 IMG_3356 IMG_3356 by david follows, on Flickr  IMG_3357 IMG_3357 by david follows, on Flickr  IMG_3358 IMG_3358 by david follows, on Flickr  IMG_3376 IMG_3376 by david follows, on Flickr now Im degreasing and degunking the chassis. have got soooo much paint stripping yet to do on all the smaller parts, but have to wait for my delivery before Captain Cellulose can help..... Plus still waiting for all the paint. so have got plenty to be going on with. no chance of getting bored. still, the easter bunny just brought something to my house that will keep me enthused...... 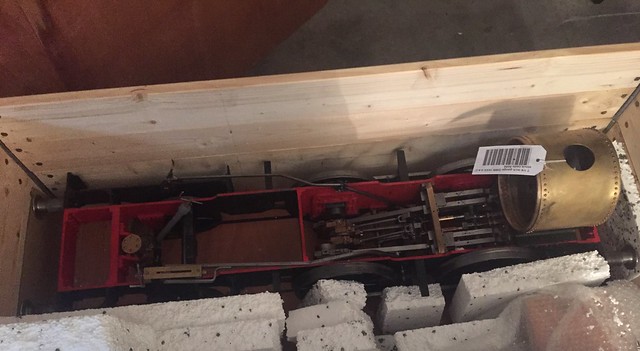 IMG_3399 (2) IMG_3399 (2) by david follows, on Flickr |
|