dalboy
E-xcellent poster

Posts: 235
|
Post by dalboy on Mar 28, 2022 17:34:56 GMT
My first project I decided to attempt at using a image hosting site in the end Anyway started in January this year having never used a mill but had used a metal working lathe many moons ago at school. Just to bring it up to date I will post photos without any text just to bring it up todate Lets hope this works.
|
|
dalboy
E-xcellent poster
Posts: 235
|
Post by dalboy on Mar 28, 2022 17:46:34 GMT
|
|
dalboy
E-xcellent poster
Posts: 235
|
Post by dalboy on Mar 28, 2022 18:30:50 GMT
Still more photos and up todate except todays which I will upload once my camera battery has charged
|
|
dalboy
E-xcellent poster
Posts: 235
|
Post by dalboy on Mar 28, 2022 19:31:13 GMT
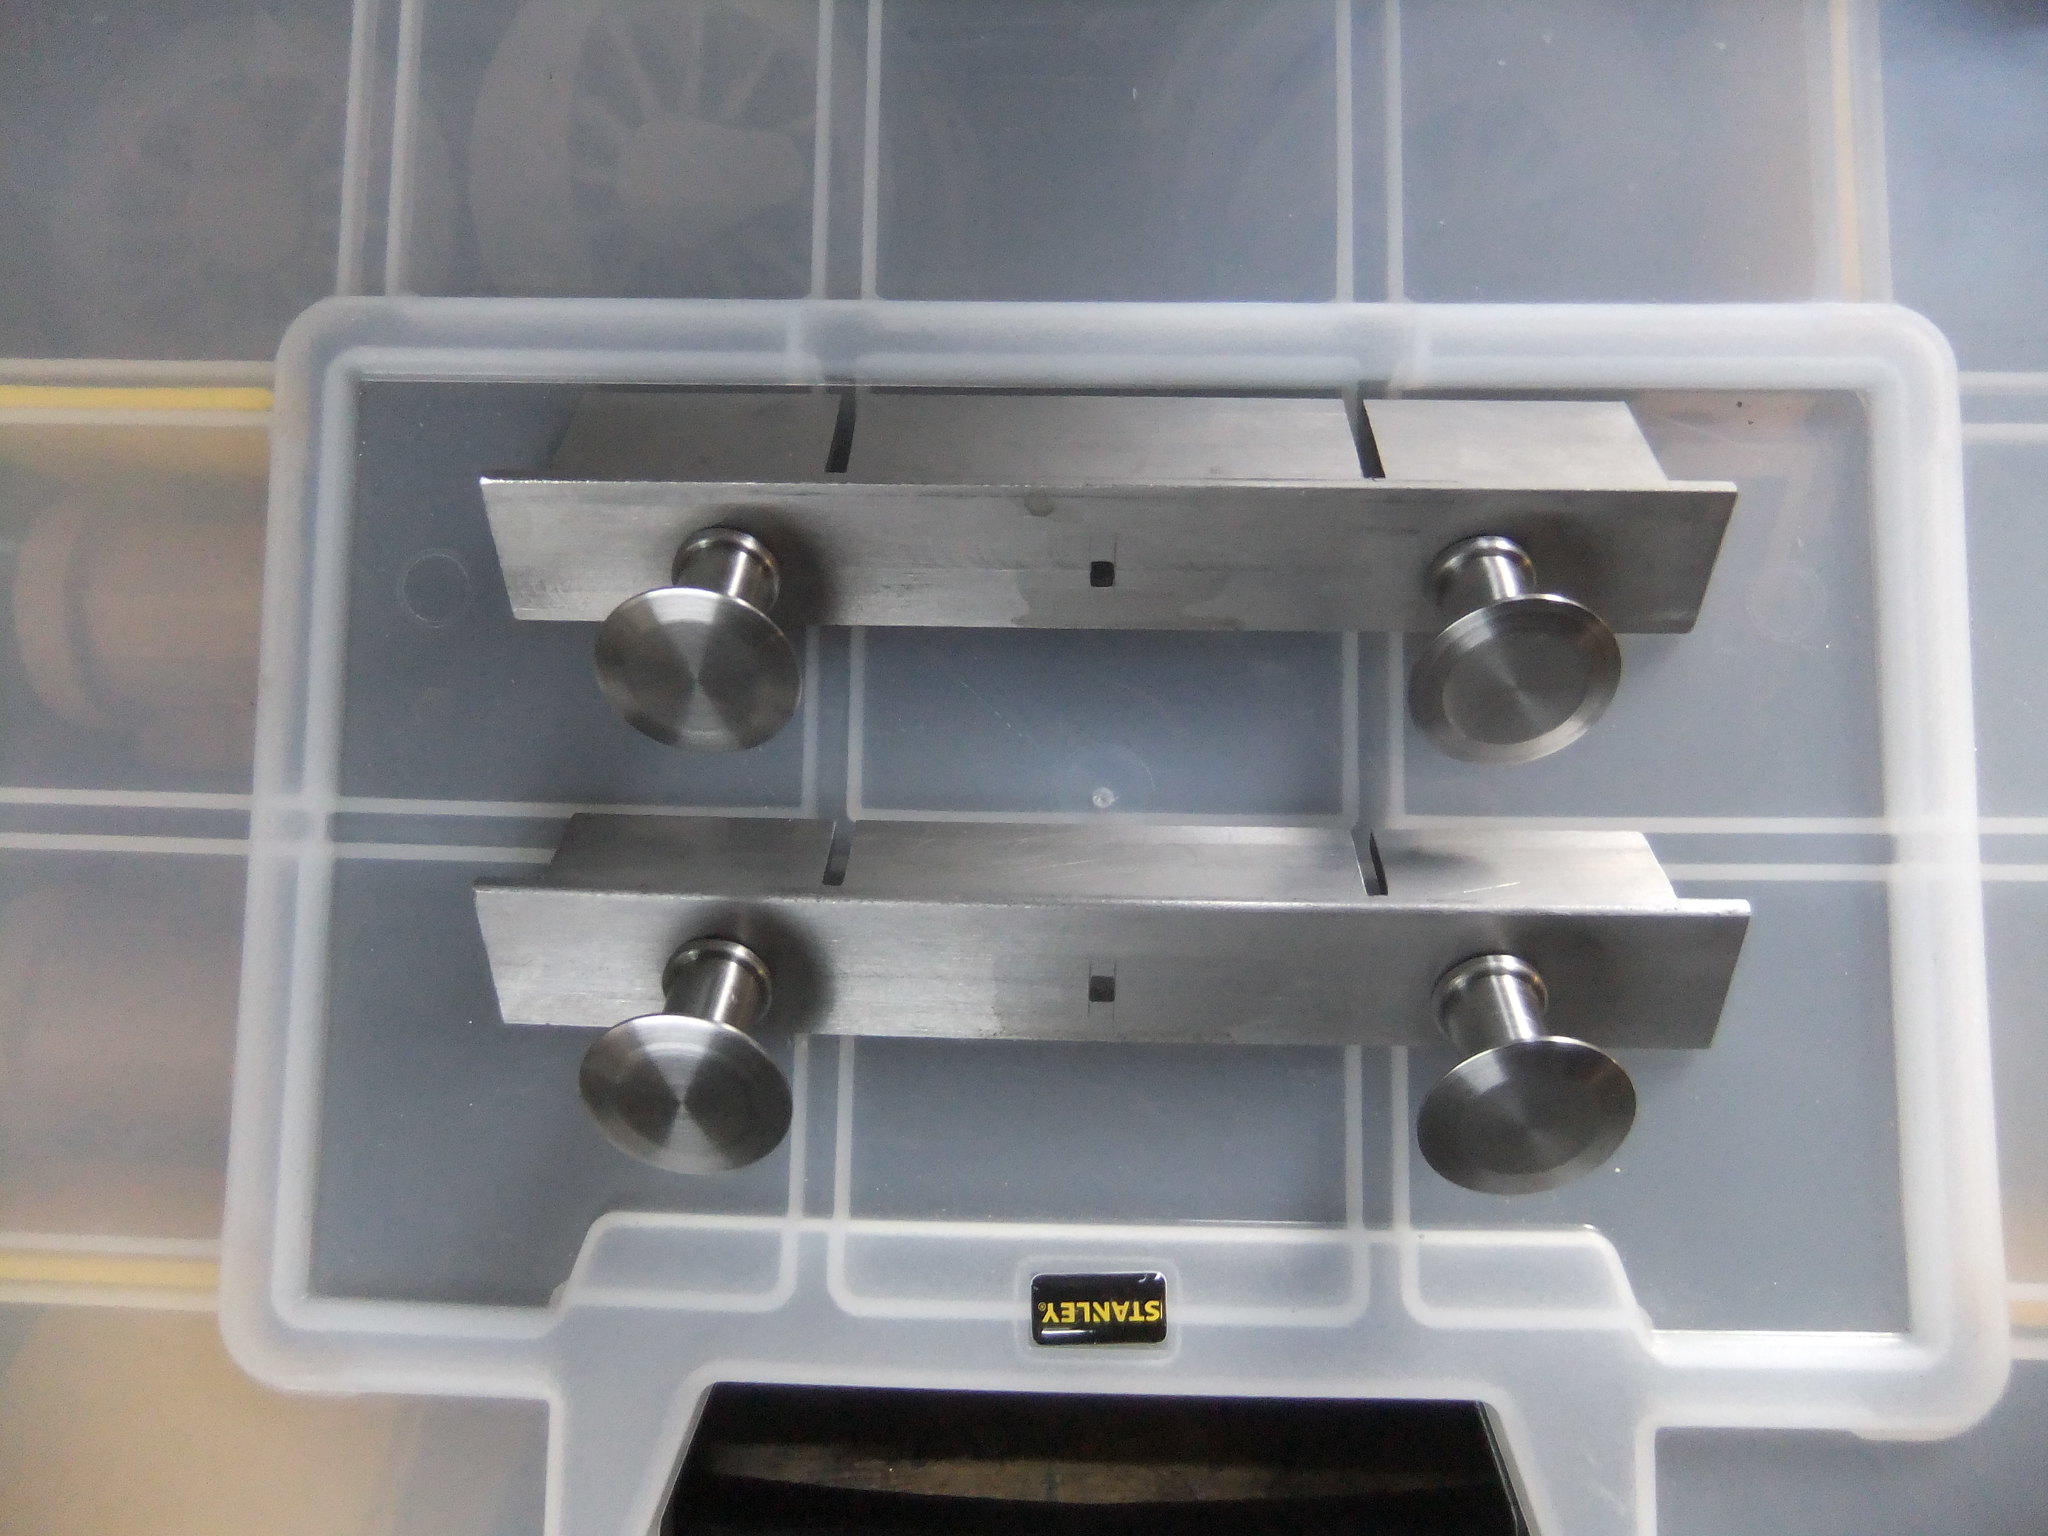
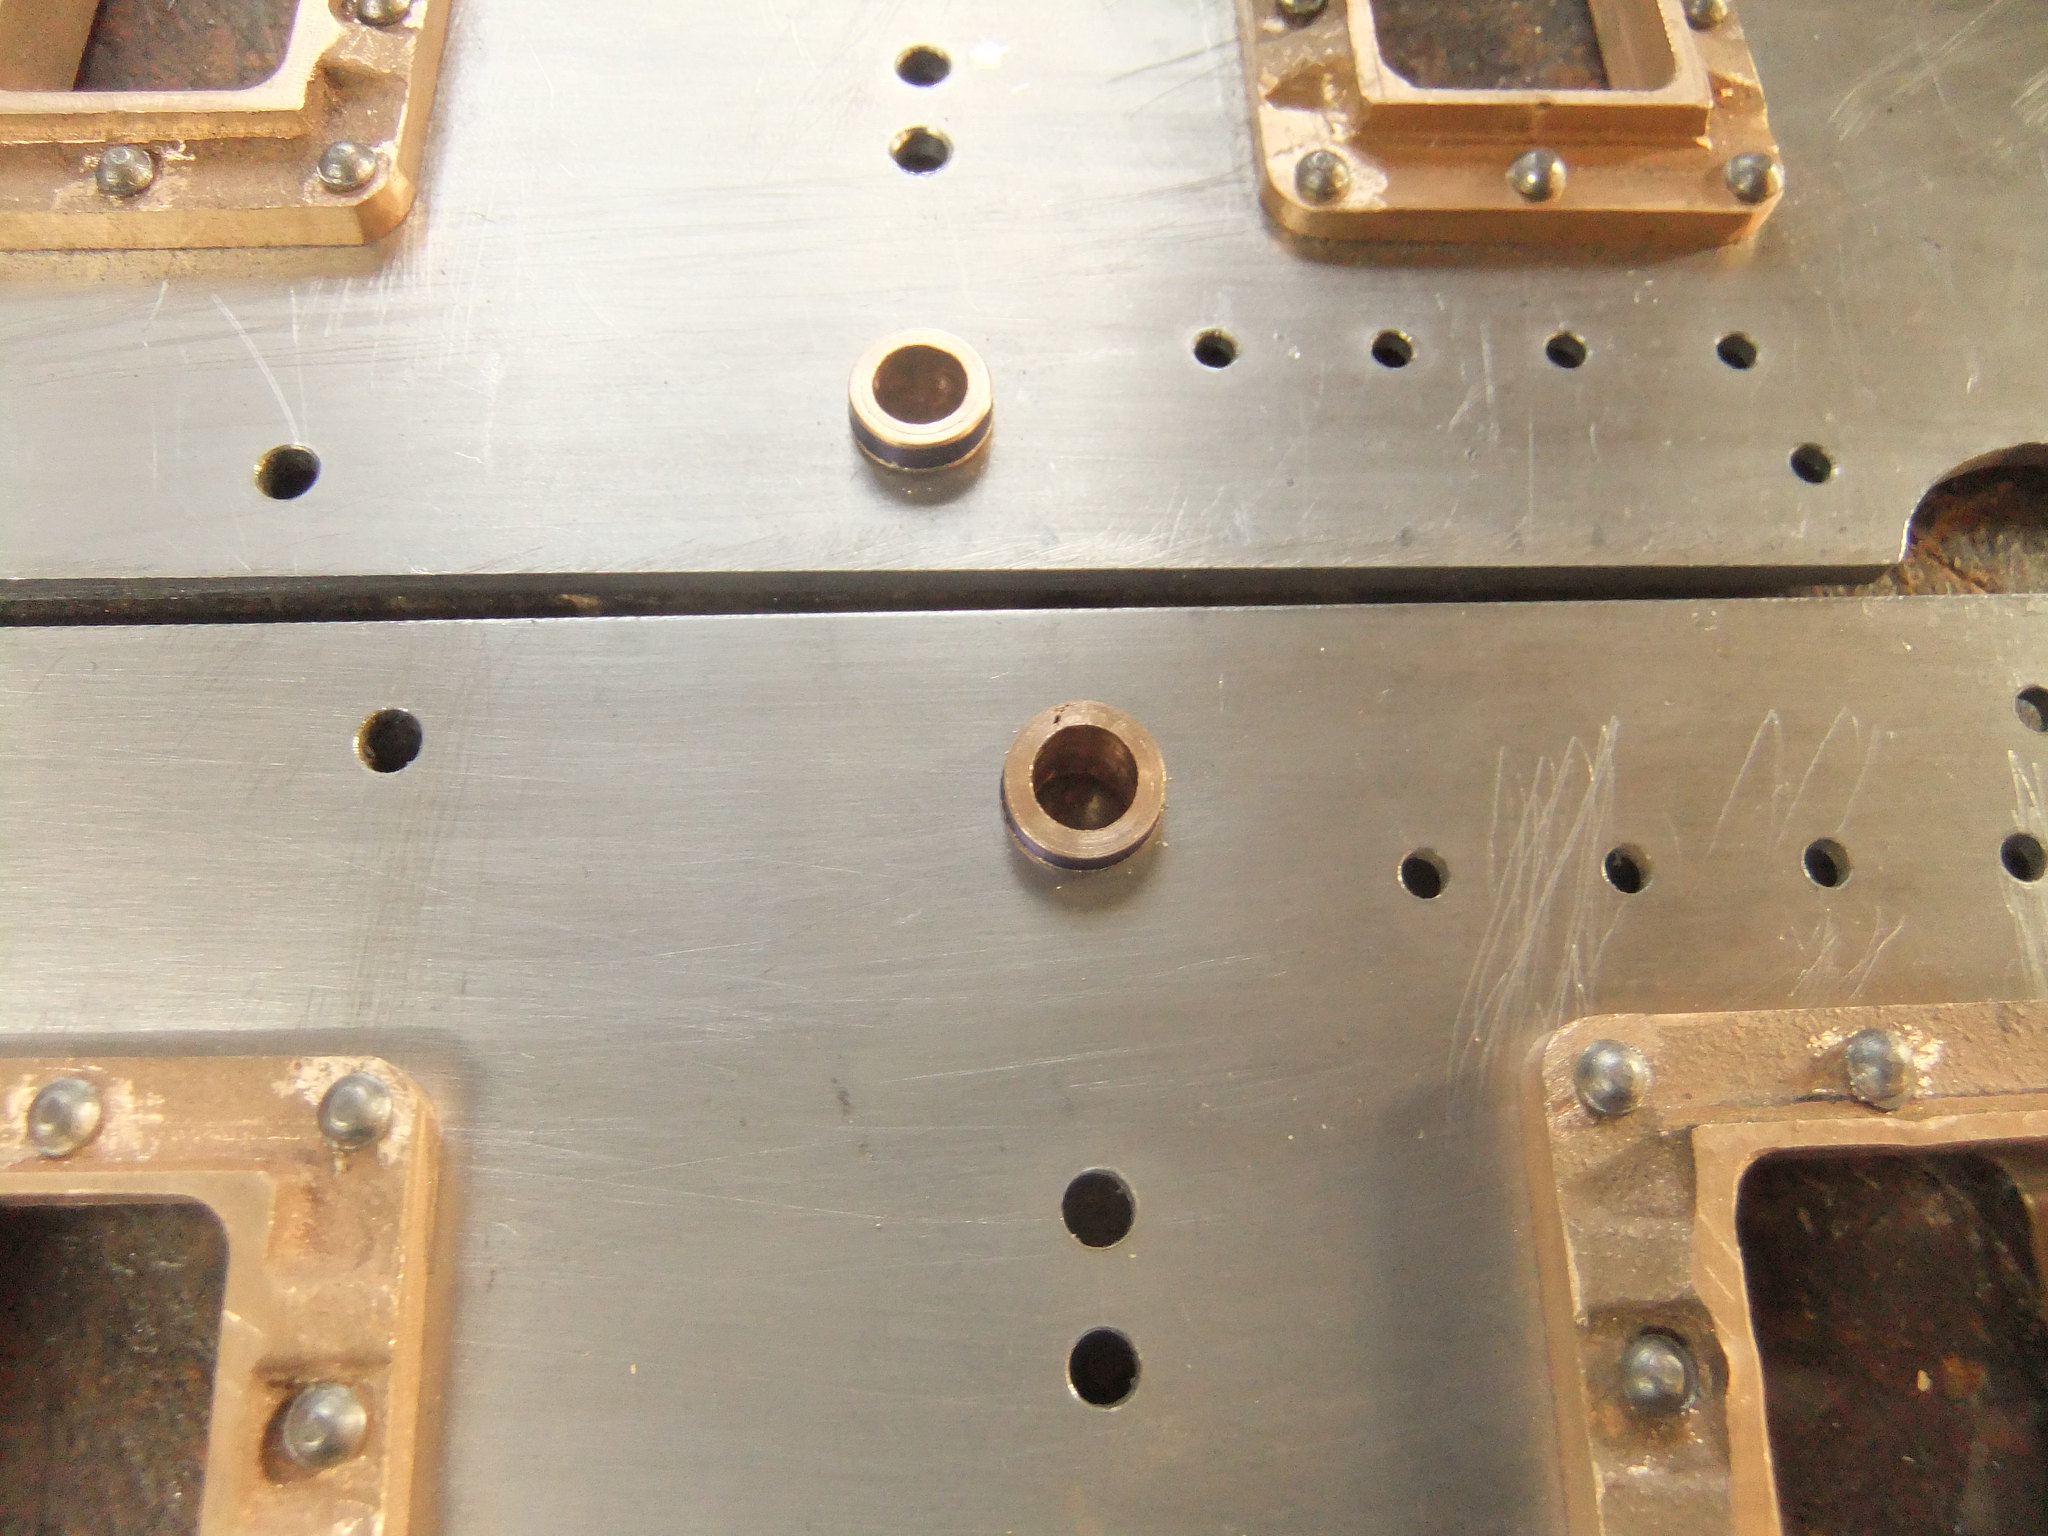
Well now that I am up todate with the photos I can now put in what I did today other than planting roses which bite you more cuts that working with metal. As can bee seen the axle blocks have already been cut to size and each one checked and marked so they will go back into the horns and I know they will not bind up some very fine filing on one or two of them sorted that out. Set the vice up with a stop for ease of repetitive work drilled and reamed the holes for the axles followed by another set up to drill the holes in the tops for the springs which will be the next job along with the horn stays. You can just make out the markings this is all done on the inside of the chassis so as not to show on the completed model  DSCF2305 DSCF2305 by Dalboy, on Flickr  DSCF2307 DSCF2307 by Dalboy, on Flickr |
|
mbrown
Elder Statesman

Posts: 1,717
|
Post by mbrown on Mar 28, 2022 19:34:05 GMT
There is some very nice work there - looking good.
Malcolm
|
|
|
|
Post by Deleted on Mar 28, 2022 19:48:17 GMT
That's a great start, keep up the greay work. Before you know it you'll have a ompleted chassis running on air.🙂
Pete
|
|
dscott
Elder Statesman
Posts: 2,437
|
Post by dscott on Mar 29, 2022 0:29:31 GMT
Superb.
Just in time for the Rob Roy Rally in the Summer.
My two are just modified drawings for part completed models sat on their wheels.
David and Lily.
Does the motor on your mill get hot? Or is it just the older gear driven models like ours.
|
|
dalboy
E-xcellent poster
Posts: 235
|
Post by dalboy on Mar 29, 2022 9:17:09 GMT
Thank you guys. this is just my journey in making the Rob Roy and not a how so I may do things different to how a more experienced model engineer will do. I am learning a lot and will make mistakes along the way.
As I have said in the past on other forums "He who has never made a mistake has never made anything"
|
|
|
|
Post by Deleted on Mar 29, 2022 10:20:29 GMT
Thank you guys. this is just my journey in making the Rob Roy and not a how so I may do things different to how a more experienced model engineer will do. I am learning a lot and will make mistakes along the way. As I have said in the past on other forums "He who has never made a mistake has never made anything" Don't worry about doing things your own way...there are many ways to skin a cat and the best way is what suits your tooling and experience, not in skinning a cat I hasten to add. For some jobs there are wrong ways though, where if not sure be guided by others. Regards Pete |
|
dalboy
E-xcellent poster
Posts: 235
|
Post by dalboy on Mar 29, 2022 10:56:41 GMT
Thank you guys. this is just my journey in making the Rob Roy and not a how so I may do things different to how a more experienced model engineer will do. I am learning a lot and will make mistakes along the way. As I have said in the past on other forums "He who has never made a mistake has never made anything" Don't worry about doing things your own way...there are many ways to skin a cat and the best way is what suits your tooling and experience, not in skinning a cat I hasten to add. For some jobs there are wrong ways though, where if not sure be guided by others. Regards Pete There are a few cats around here that need skinning after they have left little parcels in freshly dug garden. Being a woodturner as well I know that ask another on a forum can lead to asking 10 and get 12 different answers most of which are not incorrect. Being an ex plant mechanic I am quite aware at what could be dangerous when working with machines |
|
|
|
Post by philh1aa on Mar 29, 2022 11:31:31 GMT
The 2021 Rob Roy Rally article has been published in 'Engineering in Miniature' and the next will be 17th September 2022. I will be going again - hopefully. The Rally article from 2021 by Ian Horsfield shows 8 complete Rob Roys plus my rolling chassis. They look really nice lined up.
I learned an enormous amount by spending a good few hours asking stupid questions. many of the answers given will definitely be incorporated into my build. Those few hours were well worth the petrol to get over to Bromsgrove. Weather was nice too.
Phil H
|
|
|
|
Post by doubletop on Mar 31, 2022 7:32:12 GMT
Nice work!!
The only piece of advice I'd give about building a Rob Roy is think well ahead and consider how you are going to get to things later on, particularly for regular maintenance. My Rob Roy was built by my father over a number of years with parts being made and installed without thought of how to get to things underneath. A result of the long timeframe of construction and not having ever built a loco before. The quality of workmanship is superb, he was an instrument maker.
When I took over the near complete project, I think I must have stripped it down and re-built it 4 or 5 times in order to get it completed and running as I wanted.
Pete
|
|
|
|
Post by philh1aa on Mar 31, 2022 20:02:54 GMT
Pete,
I assume your father made the engine close to the design? Are you able to highlight parts that could be improved to help with maintenance? Which parts need to be removed regularly and could do with slight tweaks to the design? For example, would you recommend certain parts be held together with cap screws rather than say hex head or slotted screws etc?
I ask because I have heard about this issue with Rob Roy maintenance before but I am not sure what could be improved. I am currently building the valve gear on my Rob Roy.
Phil H
|
|
jma1009
Elder Statesman
Posts: 5,900
|
Post by jma1009 on Mar 31, 2022 21:49:48 GMT
Hi Phil,
Do a thorough search on here for 'Rob Roy' on the search function.
It is one of Martin Evans' earlier designs and there are numerous errors documented on here. And non prototype stuff. I have a recollection of re-doing the smokebox draughting, and I have a recollection of the valve gear requiring alteration plus bits hitting bits they should not etc .
Cheers,
Julian
|
|
|
|
Post by philh1aa on Apr 2, 2022 11:54:47 GMT
Julian,
I am aware of most of the Rob Roy design niggles e.g., the offset valve gear to miss the front horns and the low blast pipe etc but I have also heard about maintenance issues rather than build issues. However, I will have a go at your suggestion first to see if anything pops out that I wasn't aware of.
Phil H
|
|
dalboy
E-xcellent poster
Posts: 235
|
Post by dalboy on Apr 2, 2022 16:59:50 GMT
Six Hornstays made and drilled then the horns drilled and tapped followed by shortening the fixing screws as I only had some which were too long these are 5BA bolts  DSCF2319 (2) DSCF2319 (2) by Dalboy, on Flickr The centre support rod was cut and drilled either end then tapped 6BA so I took the opportunity to do a dry fit. Hopefully will be able to get the surface plate out and get everything squared up and the holes drilled and tapped to hold the buffer beams in.
|
|
|
|
Post by doubletop on Apr 3, 2022 9:45:26 GMT
Pete, I assume your father made the engine close to the design? Are you able to highlight parts that could be improved to help with maintenance? Which parts need to be removed regularly and could do with slight tweaks to the design? For example, would you recommend certain parts be held together with cap screws rather than say hex head or slotted screws etc? I ask because I have heard about this issue with Rob Roy maintenance before but I am not sure what could be improved. I am currently building the valve gear on my Rob Roy. Phil H Phil As you say, my father built it so I can't really comment on the building. But I did document my experiences on getting it going here www.homemodelenginemachinist.com/threads/rob-roy.8800/Hope that helps Pete |
|
|
|
Post by rickhann on Apr 3, 2022 18:34:43 GMT
Phil, I constructed my Rob Roy over a 20+ year period. It was a challenge for me as I was/am not a "machinist". The problem with the valve drive is commonly known and an easy fix. One thing I would do differently if I were to do it again would be to run the exhaust piping from the front of the valve chests rather than between the chests. I have seen where someone else has done it so I know it can be done. Initially, I had a problem with the lubricator pumping too much oil and the adjustment did not provide for reducing the flow sufficiently. I solved that problem by using a "lost Motion Drive". Very simple and easily adjustable from 0 to maximum output. I also converted it to run on propane. Good Luck with your build. Rick
|
|
|
|
Post by rickhann on Apr 3, 2022 18:48:57 GMT
Phil, I think I gave wrong info on the piping recommendation. The piping I am referring to is the very short section between the valve chests. I am working from memory, and I am not sure if it was exhaust or intake. Sorry for the confusion. Rick
|
|
dalboy
E-xcellent poster
Posts: 235
|
Post by dalboy on Apr 3, 2022 19:54:10 GMT
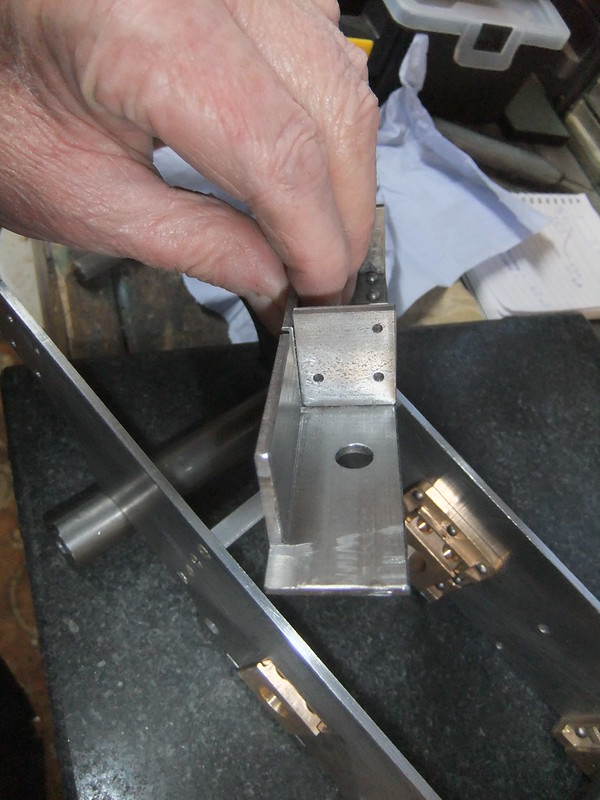
Got the surface plate out and stood the chassis assembly on that with the aid of a pieces of round bar to get the frames level front to back. I then added the bracing bar and buffer beams as well as a long piece of silver steel which will become the axles. Got everything sat nice ans square and checked the axle is at right angles to the frames I then clamped the buffer beams so they would not move checked the beams for level across the chassis front and rear they also are level front to back must be beginners luck that everything line up just great.
Put a drill through the frames to mark the beams everything still going well remove one of the beams so I could drill right through the angle bracket. Drilled some of the holes still one more to do as the clamp had covered that one up. This is where I hit a problem and that is threading the holes unfortunately I could not get in straight as the tap is too short. So I can either find a long series 6Ba tap or enlarge the hole to take a 5Ba as I already have a long series tap of that size. I can not see any problem doing the latter but I will hold off until I have examined the plans to see if this would not be possible. The front buffer beam is fitted with 5 BA
As you can see I have a few long series taps they could do with a clean up but all are in a serviceable condition. The one nearest is the 5BA
|
|