lancelot
Part of the e-furniture

Posts: 471
|
Post by lancelot on Sept 24, 2006 18:30:11 GMT
  Hello folks, an update as above, shows the current stage of build on the James Coombes, the castings and drawings are from the 1977 era, and are considerably superior to the castings of today,dimensionally accurate, and easily machined. I will try and take photos of the different stages as I build. All the best for now, John. |
|
lancelot
Part of the e-furniture
Posts: 471
|
Post by lancelot on Sept 24, 2006 19:19:56 GMT
P.S. me again, slight possible problem with cylinder, as seen on photo, ported from inside to outside on casting,both ends, one end clear, inside to outside, the other port appears to be blocked with sand slag or metal, will not clear with powerful air line, and can not get probe down port, any suggestions? All the best for now, John.  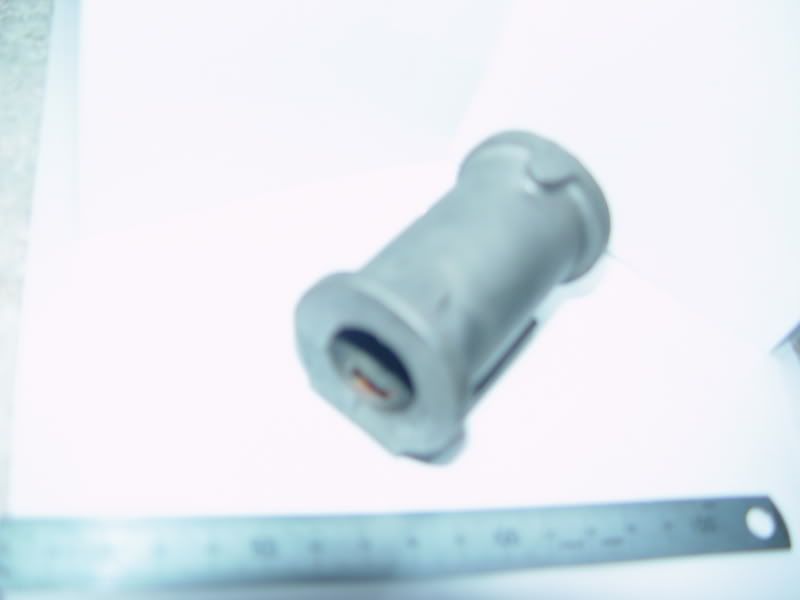 |
|
|
|
Post by Tel on Sept 25, 2006 10:52:16 GMT
Urk!!!  That is a gnarly one. If all else fails it should be possible to drill the passage out by going in thru the face of the flange & tapping/plugging the ends after. Last resort stuff tho'. If you do that, use a taper tap & go just deep enough to get a couple of full turns of thread, then use brass screws with loctite & snip the ends off flush |
|
lancelot
Part of the e-furniture
Posts: 471
|
Post by lancelot on Sept 25, 2006 16:18:55 GMT
Hi Tel,
thinking somewhat along those lines myself,or may wait until I have bored out to size, and mark out hole pitches for end covers, then if enough room may mill a little off each inner end ''inside bore'' similar to 10v. that might let me run a ''wire drill'' down the port to clear obstruction.?
All the best for now,
John.
|
|
|
|
Post by ron on Sept 25, 2006 16:19:02 GMT
John
I had the same problem with the Victoria cylinder casting, a combination of tapping it on a hard surface and poking with bits of wire eventually cleared it.
Ron
|
|
lancelot
Part of the e-furniture
Posts: 471
|
Post by lancelot on Sept 25, 2006 17:57:52 GMT
|
|
|
|
Post by ron on Sept 26, 2006 9:29:45 GMT
Great stuff John, a couple of pictues of the No 9 underway, I chickened out and fabricated a crank first, I'll have a go at machining the forging later.    Ron |
|
lancelot
Part of the e-furniture
Posts: 471
|
Post by lancelot on Sept 26, 2006 11:14:30 GMT
Helo Roy,
just looking at the boring bar set up, what is the centre height of your machine? mine is 3 1/4'', [tweaked the photo in Photo Shop to see what you were doing] and can see what I think is the bed plate for the cylinder? how did the borer bar handle the cut ? what size is the outfit? I was looking at some of the ones from Chronos and at the moment am ''dithering''
All the best for now,
John.
|
|
|
|
Post by ron on Sept 26, 2006 17:00:29 GMT
Hi John I bought the 3MT boring bar from RDG Online in Hebden Bridge, it was a special offer with 12 boring bars, I think it was about £60 + P&P, it's probably the same kit that Chronos sell. The maximum dia the lathe can turn is just under 9" but it's bottom speed is a bit on the high side at 140 rpm it could do with being half that. What you see clamped on the cross slide is the main bedplate for the No 9, this more or less carries everything, ie the cylinder, bearings and crosshead slide etc it requires a fair degree of accuracy and that was the only way I could think of machining it, the end that you see carries the cylinder, it had just had the OD turned to size, then the ID to suit the cylinder end cover and finally I faced it using the boring head as a flycutter, it was all a bit nerve wracking, as you know Stuarts have no castings for the No 9 at present so it was a 'do it once and do it right sort of job' Hopefully there shoud be a picture of it out of the lathe below.  |
|
lancelot
Part of the e-furniture
Posts: 471
|
Post by lancelot on Sept 26, 2006 17:36:56 GMT
Looks like a good job Ron. I think that I will get myself one of those boring bars, might need to be a bit smaller though.
All the best for now,
John.
|
|
lancelot
Part of the e-furniture
Posts: 471
|
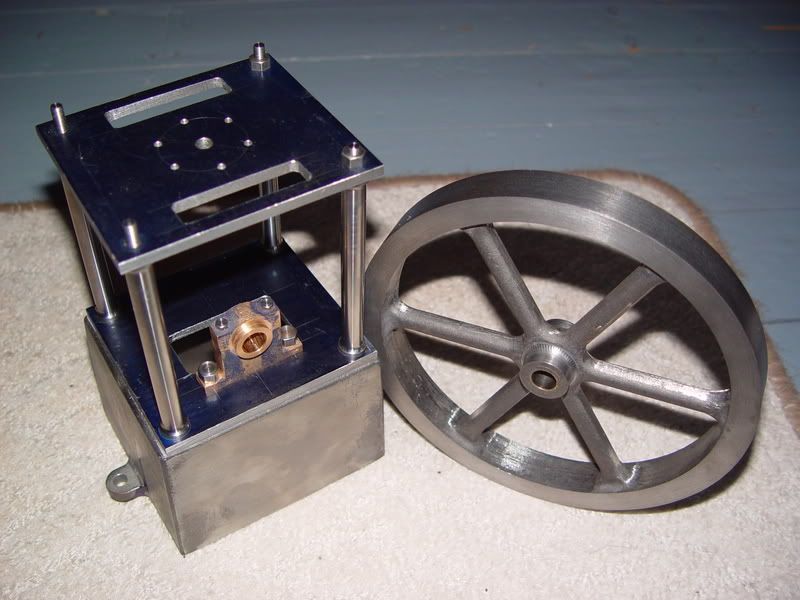
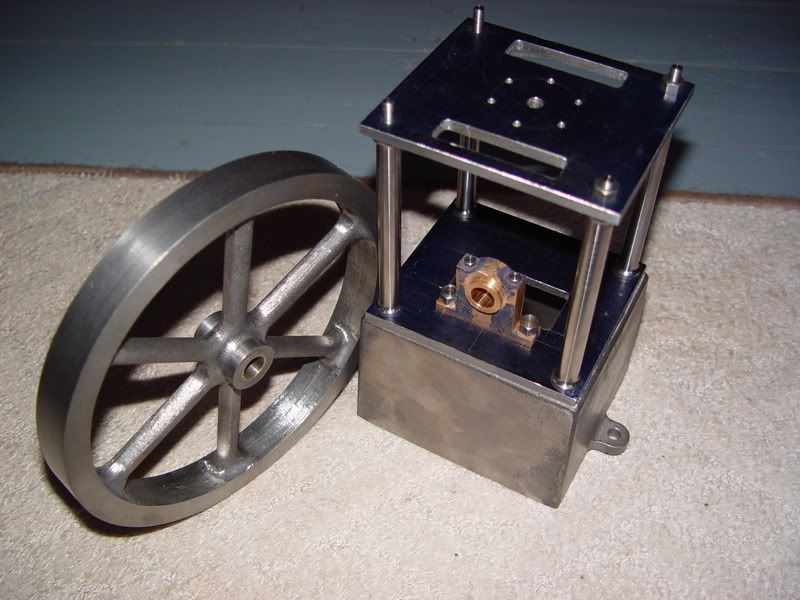
Post by lancelot on Nov 28, 2006 18:13:31 GMT
Hello all,
back in harness with the ''COOMBES'', for starters, had to reline the tailstock as it was running out about 3 thou'' over 6''... I only discovered this on making the crankshaft, now set dead true, courtesy of test bar from Chronos,
Made a new shaft from silver steel 7/16'' ...nice stuff for shafts...
the outer pedestal, bearings, shaft, flywheel and outer pulley are now fitted ready for lining up.
The cylinder is bored out and faced up to size,... The blockage I referred to in an earlier post, I was able to clear after cylinder bored to size,...I shoved a 10 thou'' feeler down the ports,... that sorted the problem.
The next part to make was the cylinder locator which centred it on top of the bottom plate, worked out fine.
All the best for now,
John.
|
|
lancelot
Part of the e-furniture
Posts: 471
|
Post by lancelot on Jan 9, 2007 17:41:35 GMT
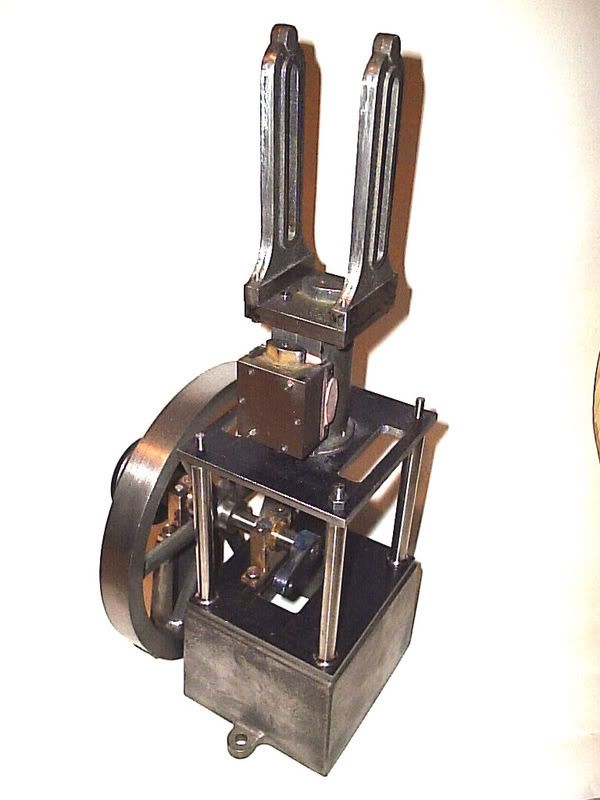 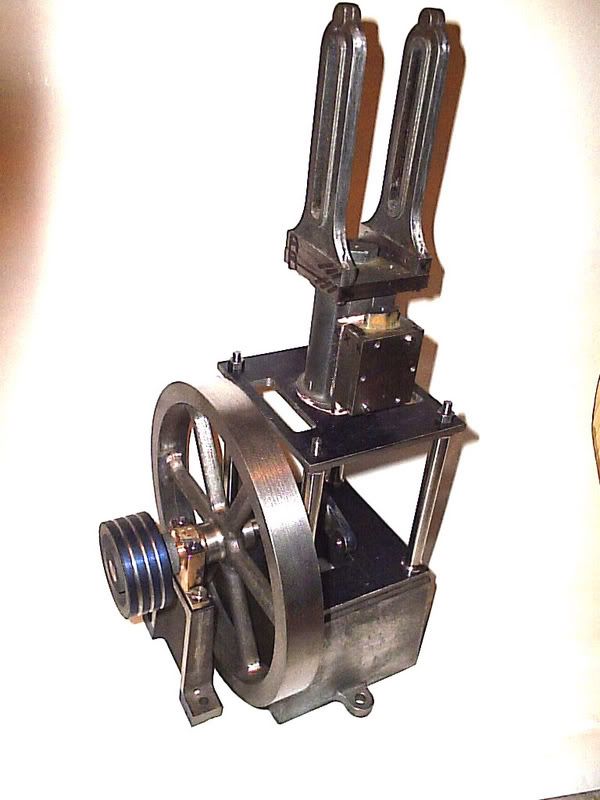 some more shots of the ''James Coombes'' All the best for now, John. |
|
|
|
Post by jgb7573 on Jan 10, 2007 9:33:06 GMT
Coming along nicely!
|
|


 That is a gnarly one. If all else fails it should be possible to drill the passage out by going in thru the face of the flange & tapping/plugging the ends after. Last resort stuff tho'. If you do that, use a taper tap & go just deep enough to get a couple of full turns of thread, then use brass screws with loctite & snip the ends off flush