|
|
Post by spamcanman on Jul 3, 2008 14:26:50 GMT
Clack valve. I have finished off the clack valve this evening and found that it won't seal properly. I have tried two new bronze balls but it still leaks. I have tried lightly tapping the balls to secure a better seat but it made little difference.  any suggestions would be great. ace Try Nitrile balls I use them in my Asters they are perfect for the job  |
|
|
|
Post by spamcanman on Jul 3, 2008 14:32:13 GMT
ianmac Do you have any track laid out yet? I was looking at my garden the other day and decided to put out 3 pieces of track that I have just to see what kind of scale I could do in the garden. Well I think it will be a fairly small one but I don't know how sharp a curve I can have. Any ideas on the smallest size of bend. steve Hi Ace, Minimum would be about 71/2 feet radius for your loco the bigger locos like Duchess and 9F's need 9 foot radius. The bigger you get the radius the nicer the loco will look going round also less drag on the wheels. |
|
ace
Statesman

Posts: 528
|
Post by ace on Jul 3, 2008 17:10:00 GMT
John - Ian
Hi John
Having read what you say I am wondering if I may have mis-shaped the main barrel of the clack valve during the soldering process with my clamp!. I will recheck that tonight. I will have to order some 1/8" steel balls to try the other solution.
Hi Ian
I will look at both solutions tonight and if required make a new one, only a bit more carefully. I'm hoping that when up and running I can get it to run as slowly on steam as I can on air and so I am looking to create a simple oval figure track for now so that I can at least see what I made go past clearly. ;D ;D
|
|
|
|
Post by spamcanman on Jul 3, 2008 22:00:29 GMT
You will find that a single cylinder loco will not run as slow as a twin, they also tend to get wheel lock when first starting so you may have to tease the wheels round at first.
|
|
ace
Statesman
Posts: 528
|
Post by ace on Jul 3, 2008 23:20:31 GMT
Thanks Spamcanman
I have bench run the loco on air on a full 1 mtr length of track and found this to be so. I thought that it was due maybe to parts not being quite right or a further adjustment on the timing being required. As you say a gentle push and its off forwards and in reverse. Well thats nice to know its not my M E skills then.
My clack valve I think may have been squashed a little during the soldering, as the drill would not slide back up the hole but after a little work with a drill and as John said re-setting the face with an end mill seems to have done the trick. (a steam test will prove that later) ;D
do you know of a supplier for Nitrile balls? wouldn't mind trying these out.
Ace
|
|
ianmac
Part of the e-furniture
Posts: 308
|
Post by ianmac on Jul 3, 2008 23:41:55 GMT
One half of my track would be fairly clost to 7 ft but the other side is R1 or 4ft ;D
I can see a weekend of civil engineering comming up ;D
|
|
|
|
Post by spamcanman on Jul 4, 2008 22:18:24 GMT
Hi Ace, Polly sell them www.pollymodelengineering.co.uk/index.asp or try Maidstone Engineering I purchased some last week shop.maidstone-engineering.co.uk/?mod=product&cat_id=3&product_id=221 you can use them on most things but DEFINITELY NOT in a safety valve. A good tip if you have a spare brass or stainless ball is stick it to a piece of rod with super glue or like and using a lapping paste that car builders use on car engine valves lap the ball into the seat of the clack or pump (it works) then drop your new ball in, obviously you cannot do this with nitrile balls. |
|
ace
Statesman
Posts: 528
|
Post by ace on Jul 5, 2008 9:43:46 GMT
Many thanks spamcanman
I would never of thought of that idea, mind you I have used grinding paste to lap cylinders to engine standards before.
Thanks for the suppliers info, I'll order some this weekend and give one ago in the valve.
ace
|
|
ace
Statesman
Posts: 528
|
Post by ace on Jul 6, 2008 0:45:54 GMT
More progress .... I have now almost completed the cab, just needs cleaning up a little more and the smoke box is just in need of a door and stack to finish that off too. 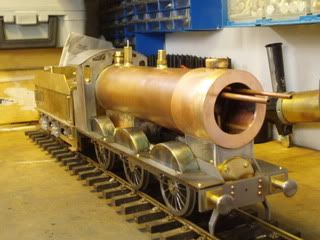 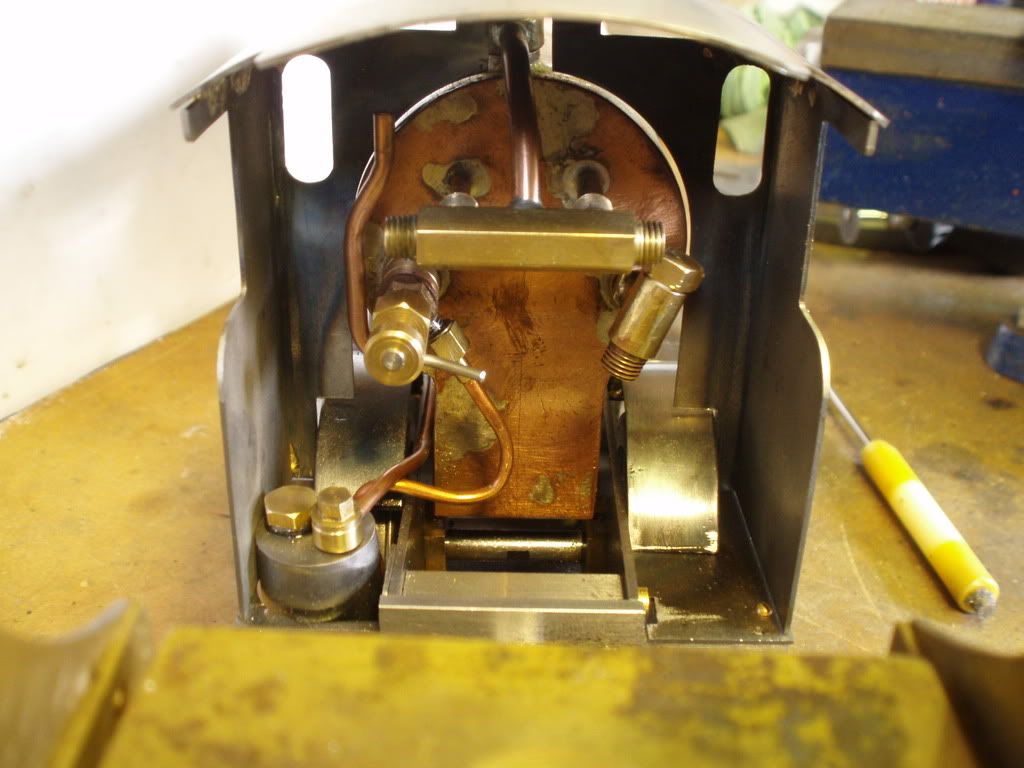 Regulator spindles removed during cab construction. 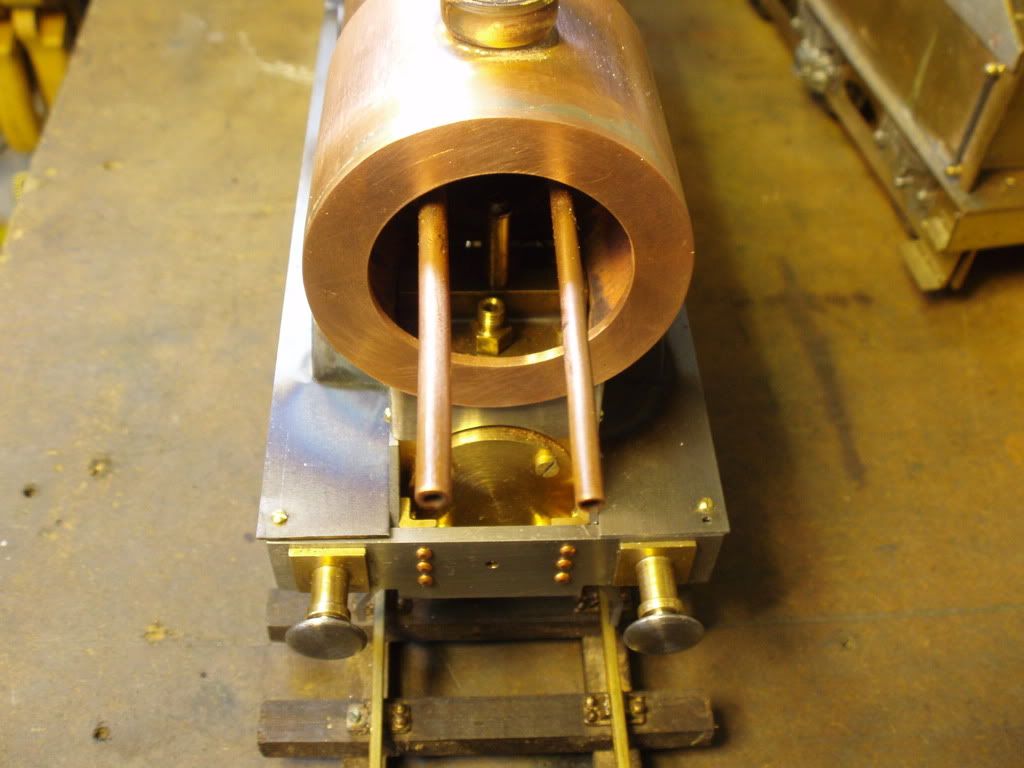 Smoke box door and smoke stack next on the to do list. Then there's a lot of cleaning up to do on the cab, foot plates and splashers etc after all the brazing. |
|
|
|
Post by spamcanman on Jul 6, 2008 9:07:33 GMT
 Looks very nice, well done I bet your well and truly hooked to Gauge1 now ;D I am about to puchase some drawings for a Patriot by Paul Forsyth do you know of any of his stuff.
|
|
ace
Statesman
Posts: 528
|
Post by ace on Jul 6, 2008 10:28:03 GMT
Hi spamcanman Hooked is putting it mildly, I didn't realise it but yesterday I spent 9 1/2 hours in the shed cutting, filing, drilling and then brazing up the cab and soldering the smoke box. I did mess up on my first attempt on the cab roof, got a bit carried with the nibbler and when rolled found it to be a tad short.  If I can sneak in to the shed today before the wife sees me I intend to complete the smoke box door and try to work out how to bend, cut and connect the pipe work for the blower and steam pipe through the now small opening. ;D Will post later and pics if not locked out by wife. ;D ;D |
|
ace
Statesman
Posts: 528
|
Post by ace on Jul 6, 2008 10:44:13 GMT
P.S In such a rush to sneak out to the shed forgot to answer your second question - No I don't know Paul Forsyth's work, and admit that as far as locos go and building them I am a complete beginner. I have just ordered a book called building model steam locomotives (for the beginner ;D). maybe after I have completed this project I will then call myself 'chuffed' instead of ACE. ace ;D  |
|
|
|
Post by spamcanman on Jul 6, 2008 18:17:07 GMT
After you have built the 'Project' I'm sure you can build any Gauge 1 loco. The next loco people have built after the 'Project' is the 'Dee' www.gaugeone.org/project.htm#Dee the reason being is some of the stages are already covered building a 'Project'. Paul Forsyth has been into Gauge 1 for many years and there are litterly hundreds of his locos running around gardens, he sells drawings in 10mm scale for spirit fired locos. He does Single Inside Cylinder locos Twin Outside Cylinder locos in Tanks or tender and engine. |
|
ace
Statesman
Posts: 528
|
Post by ace on Jul 6, 2008 22:03:27 GMT
'O' yes my thoughts are already of the next G1 project and the 'Dee' seems to be the right way I think. Didn't get to the shed though, instead got to spend 4 hrs tramping around the Trafford Centre with the wife.  |
|
|
|
Post by spamcanman on Jul 6, 2008 23:20:04 GMT
|
|
ace
Statesman
Posts: 528
|
Post by ace on Jul 7, 2008 22:35:43 GMT
A little confused........ Can someone tell me which is the blast pipe and which is the steam pipe on the 'Project', one pipe is 1/8" and the other 5/32" and which way should the blast pipe from the boiler point, up or down in the smoke box. cheers ace |
|
|
|
Post by spurley on Jul 8, 2008 17:51:48 GMT
Hi Ace
Hope I'm not 'teaching Granny to suck eggs' here (and I've understood your question!) but, the blast pipe is the exhaust from the cylinders and thus should point up, and align with, the chimney. The steam feed should come from the boiler to the cylinders and should be identifiable by it's routing at present. However, if you're not sure you could lightly pressurise the boiler (a couple of strokes from a cycle pump through a suitable adaptor should do it) then open the regulator and the air will hiss from the main steam pipe.
If your question related to the connections to/from the cylinders then this is slightly harder to answer without the drawings. Again you could use a cycle pump and connect to one of the tees with a piece of rubber hose. A few strokes again on the pump should, if the valve events are correct, spin the wheels a revoltion or two. If this doesn't work try the other connection!
Hope this helps?
Cheers
Brian
|
|
|
|
Post by spamcanman on Jul 8, 2008 18:36:05 GMT
Hi Ace, Firstly the blast pipe faces up the chimney, when looking into the cab the lever on the right is your regulator the lever to the left the blower. |
|
ace
Statesman
Posts: 528
|
Post by ace on Jul 8, 2008 22:58:23 GMT
Hi guys
Spurley / Spamcanman
Thanks guys, I was a bit confused as the drawing shows the 1/8" pipe (blower) on the left from the back-head and from the front to be on the left again. Drawing error.
So the blower pipe must bend around the petticoat and then down from the boiler and then up along side the blast pipe if I am correct then.
ace
|
|
|
|
Post by spamcanman on Jul 9, 2008 7:43:22 GMT
Hi guys Spurley / Spamcanman So the blower pipe must bend around the petticoat and then down from the boiler and then up along side the blast pipe if I am correct then. Yep! |
|


 any suggestions would be great.

 Looks very nice, well done I bet your well and truly hooked to Gauge1 now ;D


