|
|
Post by spamcanman on Jun 24, 2008 15:48:21 GMT
|
|
ianmac
Part of the e-furniture

Posts: 308
|
Post by ianmac on Jun 25, 2008 0:14:17 GMT
is the pope catholic ;D
The workmanship in these "kits" is amazing.
post away
|
|
abby
Statesman
Posts: 925
|
Post by abby on Jun 25, 2008 16:14:17 GMT
I am sure it would be of great interest , plenty of photos if you can !
|
|
|
|
Post by spurley on Jun 25, 2008 17:10:25 GMT
Hi there
I'll second Abby, please get posting. I'm interested.
Cheers
Brian
|
|
|
|
Post by spamcanman on Jun 25, 2008 21:11:13 GMT
Here we go then,
Asters are produced by a small Japanese company that originally built Cash Machines but when things started to go electrical in the early 70's Aster did not want to do this so they had some very skilled engineers with nothing to do, Aster then started to produce there first live steam loco a 'Schools' class 4-4-0 with tender is had a Smithies boiler and meths fired they produced 3000 costing £300 a lot of money in the 70's today a mint one will fetch £2000. They are still easy to find and it was what got me into Gauge1 3 years ago.
|
|
|
|
Post by spamcanman on Jun 25, 2008 21:26:12 GMT
The kit I am going to do the build thread on is the new BR Standard Class 9f 2-10-0. Aster have produced 2 types the 'Evening Star' and an all black 9f, I chose the all Black as these ran up and down the country pulling anything from coaches to wagons. I'll include as many pictures as possible. 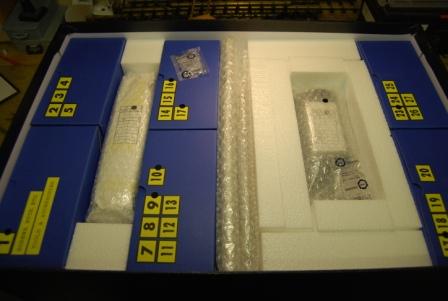 The 9f has a limited production run of 311 but 110 of these are Black mine is number 51 they come with a nice little makers plate. As you can see the boxes are all numbered, inside the boxes all the packets of parts and fixings are lettered and numbered there is a very comprehensive instruction manual and a picture manual to help see now parts go together. |
|
|
|
Post by spamcanman on Jun 26, 2008 16:43:05 GMT
First part of the build are the cylinders, there is no machining or filing to do on these kits they are literally a nut'n'bolt job. 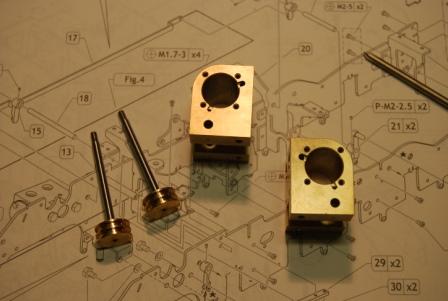 notice the pistons are grooved for 2 ceramic rings 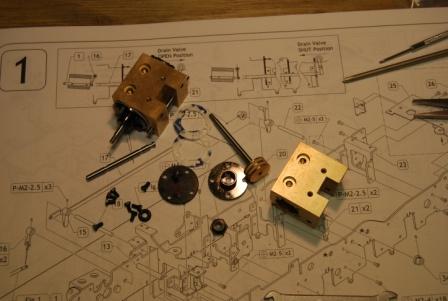 Piston rings fitted and one cylinder completed notice the gaskets to seal the front and rear plates using metric cross head screws. The bar with the grooves is for the drain cocks.  |
|
brozier
Part of the e-furniture
Posts: 335
|
Post by brozier on Jun 27, 2008 12:55:36 GMT
Hi, This looks really interesting keep up the good work. The drawings remind me of the books Kozo Hiraoka has produced. www.craftsmanshipmuseum.com/Hiraoka.htmAn exploded assembly drawing really makes it clear how all the parts fit together. It's something Model Engineer and their ilk never seemed to have figured out. But for any one who has glued together a plastic model kit it just looks right.  The Aster kit really looks top quality. Cheers Bryan |
|
|
|
Post by dickdastardly40 on Jun 27, 2008 13:28:16 GMT
Good stuff, thanks for posting!
What sort of ball park price are these Kits please?
Al
|
|
|
|
Post by baggo on Jun 27, 2008 13:40:25 GMT
£3,150 from Aster Hobbies. Not sure if that includes VAT or not.
|
|
|
|
Post by spamcanman on Jun 27, 2008 14:46:54 GMT
Your correct with the price and that's including VAT. One thing about all Asters they are a limited production run so when they run out that's it, they do keep spares for all there engines they have ever built (now that's a service). A thing to remember is they are a very good investment and secondhand ones change hands for more than they cost when new. Already the 9F 'Evening Star' has sold out only being out for 5 months and I know if I wanted one now I would have to pay a premium  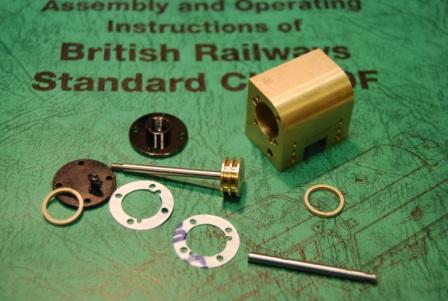 |
|
|
|
Post by spamcanman on Jun 27, 2008 15:11:42 GMT
Main frames assembled the instructions say make sure these are assembled on a sheet of glass or flat surface. 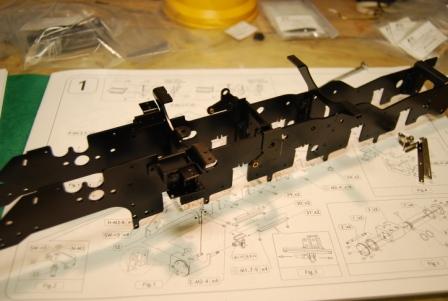 |
|
|
|
Post by spamcanman on Jun 27, 2008 22:30:22 GMT
|
|
|
|
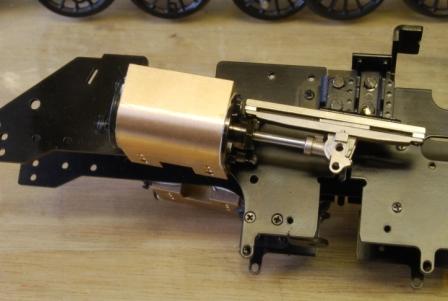
Post by spamcanman on Jun 29, 2008 8:17:41 GMT
I have fitted the Forward/Reverser bracket to the back of the frame notice the wheel which is full y adjustable so I can notch up the loco when running. 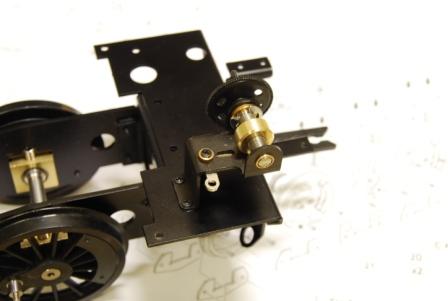 The crank is fitted to one of the main wheel shafts to pump the bypass valve, for a bearing between surfaces Aster supply a small length of PTFE strip these are very free running and only need some light oiling occasionally. 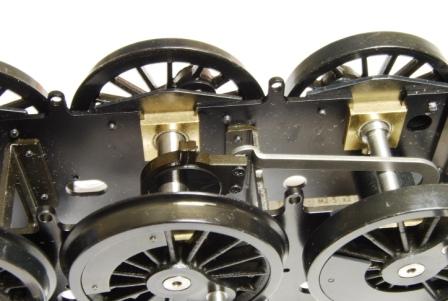 |
|
|
|
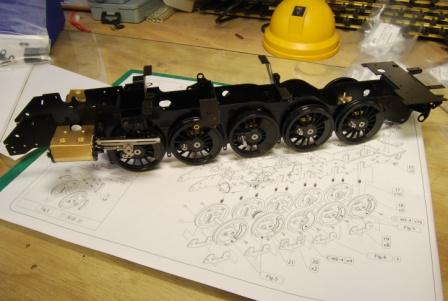
Post by spamcanman on Jul 1, 2008 22:09:18 GMT
I have finished fitting the slide bars and coupling rods to the wheels it's looking more like a loco now every time I add something I check for smooth motions before proceding to the next part. 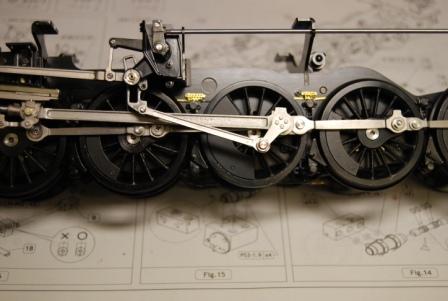 I have also fitted the Forward/Reversing rod and checked that the linkages are adjusted properly all the moving parts are bushed and Aster recommend using Loctite 222 which I will do thoughout the build. 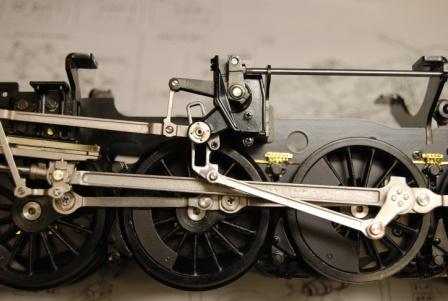 |
|
|
|
Post by spamcanman on Jul 1, 2008 22:37:26 GMT
With both Cylinders fitted to the frames you can see the branch pipe with double nozzle is also fitted. 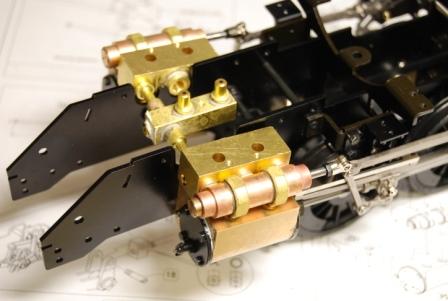 As you can see in the picture my 9f is fitted with piston valves as per full size this is a first for Aster as all there locos have been slide valves in the past. If you look at the piston valve you can just see a slotted head for a screwdriver, to time the valves which I will describe in another post I slacken the lock nut so the piston can turn fore or aft to lengthen or shorten the rod. Having piston valves it was a must to have drain cocks or lock up would occur. |
|
|
|
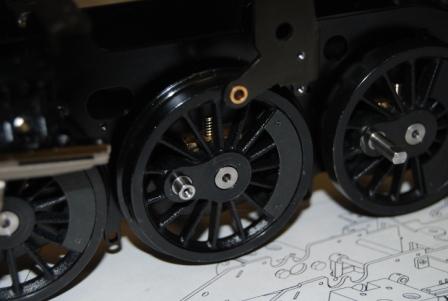
Post by spamcanman on Jul 6, 2008 11:59:35 GMT
The axle pump is assembled the manuel says tap the 4mm supplied stainless steel ball with a piece of wood dowel to seat the ball, I do this then discard the ball and replace it with a Nitrile ball I find these work fautless As you may see more detail fittings are going on like the sand pipes near the wheel rims and brake hangers 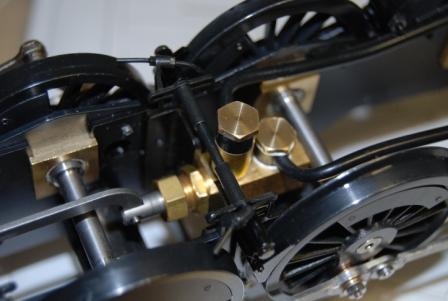 |
|
|
|
Post by spamcanman on Jul 6, 2008 12:04:54 GMT
Next the Bypass valve and handle, with experience I can get the handle just in the correct position to pump water at the same rate of water used in the boiler 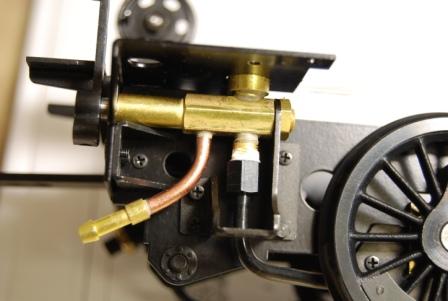 |
|
|
|
Post by Phil Sutton on Jul 6, 2008 16:34:11 GMT
Looking good so far, Spamcanman. ;D ;D
|
|
|
|
Post by spamcanman on Jul 7, 2008 16:11:22 GMT
Everything in place and ready for the boiler and smoke box to be attached. 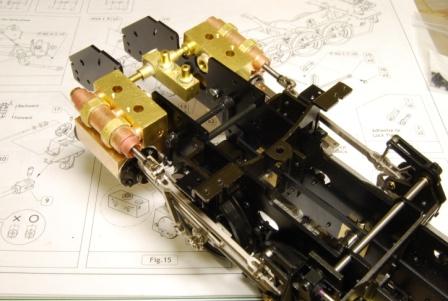 |
|