|
|
Post by Deleted on Dec 15, 2014 23:24:57 GMT
Thanks Andrew. I must say working out the various shapes and how they fit together is an interesting exercise. Jim 'Interesting'? That reminds me of an ancient Chinese curse. I found it all quite mind bending! Excuse the pun... John |
|
|
|
Post by Jim on Dec 21, 2014 8:03:48 GMT
John (Simplyloco) isn't far wrong when he says forming up the cleading is mind bending.  I have spent most of the day feeding a sheet of gal steel through the rolls then bending over formers on one side only to find the other side that had fitted perfectly had sprung out and so on and on. In the end a soothing ale was called for which calmed things down to the point where the new top fits nicely. The next task will be to mark out and cut the excess off the overhanging sides to form a neat join line with the side panels. The first photo shows the top in a trial fit. The lines mark the centre of the sheet and the commencement of the tighter side curves. 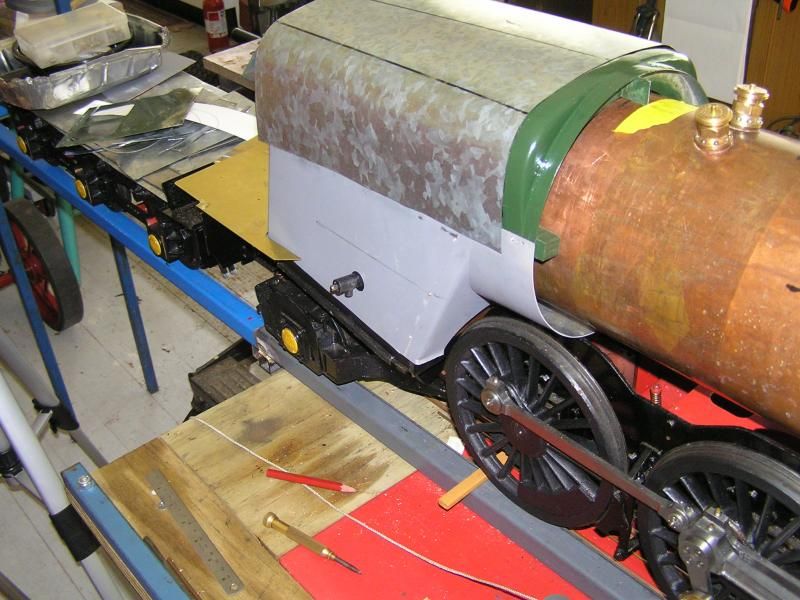 The second photo shows the top after much tweaking and fixed with holding screws on the front edge securing everything so the sides can be marked out and trimmed. 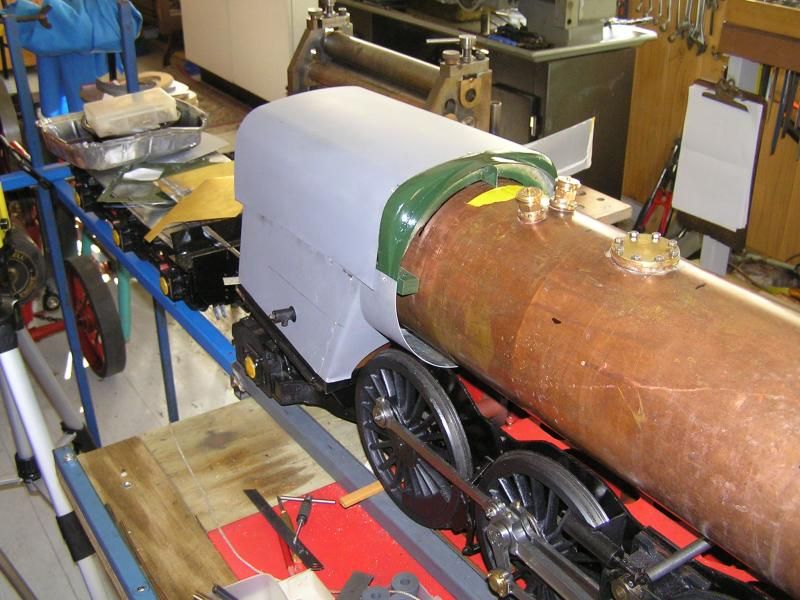 Hopefully the sections along the boiler barrel will be less complex. Jim |
|
|
|
Post by GWR 101 on Dec 21, 2014 10:25:30 GMT
Looking good Jim, hope the smoothing ales had the desired effect.  It will be worth it in the end, well that's what I keep telling myself after spending almost two days trying to form a "Y" out of two bits of 1/4" dia. copper pipe. Regards Paul |
|
|
|
Post by Jim on Dec 21, 2014 11:17:31 GMT
It's frustrating Paul I know. I was fortunate that a chap in our club had worked for Yorkshire Fittings and remembered they made a Y branch not sure if they went to .25"
but might be worth trying a local plumbing supplier to see what they have.
Jim
|
|
|
|
Post by Roger on Dec 21, 2014 12:06:44 GMT
Looking good Jim, hope the smoothing ales had the desired effect.  It will be worth it in the end, well that's what I keep telling myself after spending almost two days trying to form a "Y" out of two bits of 1/4" dia. copper pipe. Regards Paul Indeed it will be worth it, and I'd get a lot more of a kick out of making the 'Y' than buying one even if that was possible. Overcoming obstacles and creating something is the whole point of this for me. I could buy a locomotive, but where's the sense of satisfaction in that? |
|
|
|
Post by Jim on Dec 21, 2014 12:32:22 GMT
Agreed Roger, it's the journey not the destination as the saying goes. Sometimes though it's nice to find just the thing you're trying to make sitting in a shop all ready to go such as a swept Y. On the other hand I intend making my own wash out plugs despite there being some lovely castings available. Well that's the plan but first the cleading needs sorting.  Jim |
|
|
|
Post by GWR 101 on Dec 21, 2014 13:31:25 GMT
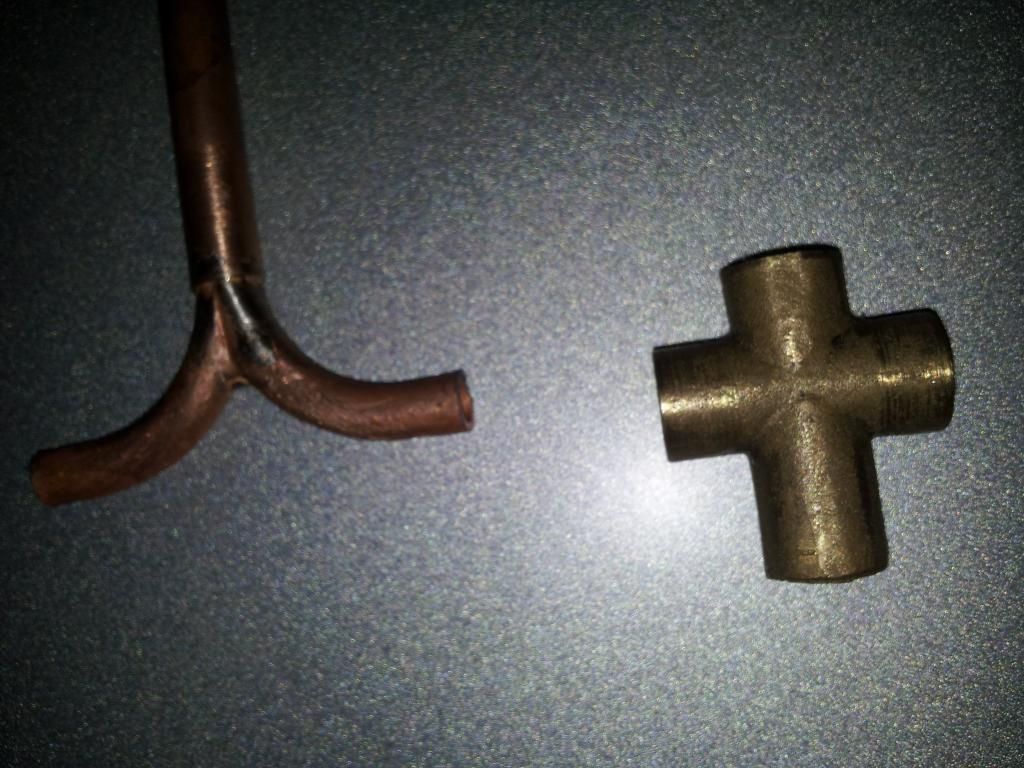
Hi Jim and Roger, this is my feeble attempt, as its for the exhaust and hidden well underneath I believe it will be useable the original "T" is on the right. Sorry forgot to mention it's 5/16" pipe (not 1/4") and it feeds into 3/8" dia. to go up through the smoke box, I have a cunning plan to make a seal to preserve the vacuum.  Regards Paul Regards Paul
|
|
|
|
Post by Roger on Dec 21, 2014 13:46:37 GMT
That looks absolutely fine to me, I'd be perfectly happy with that.
|
|
|
|
Post by Jim on Dec 21, 2014 20:19:13 GMT
Your Y branch looks pretty good to me too Paul and it will do just what you want it to do. Well done mate. Now with every thing all shipshape and Bristol fashion for our daughter's naval officer's eagle eye, she joins us on Christmas day, I can probably sneak more time in the workshop to decide what magic method I'll use to spot the location of the manifold bush now hidden under the cleading. It will need to be right first time, I mean I can't have Boadicea's clothing looking like a Swiss cheese revealing her all for the world to see as I drill holes based on my firm recollection that 'Its' right here!' only to find it isn't.  This hobby could drive one to drink.. which reminds me... Jim |
|
Andrew C
Part of the e-furniture

Posts: 447
|
Post by Andrew C on Dec 21, 2014 22:59:44 GMT
Hi Jim.
Try a light tap on the cladding with a rubber hammer over the area, it will mark the under side of the sheet where the bush is. You only need a slight mark of the edge of the bush so you don't need to hit it hard and you should not damage the bush.
Andrew
|
|
|
|
Post by Deleted on Dec 21, 2014 23:01:11 GMT
D This hobby could drive one to drink.. which reminds me... Jim But you forgot to write and thank her... I've just noticed that you have a parallel boiler! That could cause more problems than it was designed to solve if you're not careful... Happy soothing ales. John |
|
|
|
Post by Jim on Dec 21, 2014 23:45:58 GMT
Thanks John and Andrew. John, I hope this isn't another of your Chinese curses and just when I'd got the barrel cleading all worked out...well in theory that is. I'll try your suggestion sounds a good one Andrew but don't be surprised if I swap lots of holes for lots of dents.  Seriously though I will smear some printer's ink on the bush to give a clear outline on the underside of the cleading, I don't have marking blue any more prefering a felt tipped pen. Thanks for the the heads up I'll give it a go. Jim |
|
|
|
Post by Jim on Dec 22, 2014 1:55:44 GMT
Just an update on the previous post. I followed Andrew's suggestion with the addition of the printer's ink smeared on the manifold bush and the result was, as the following pics show..spot on.  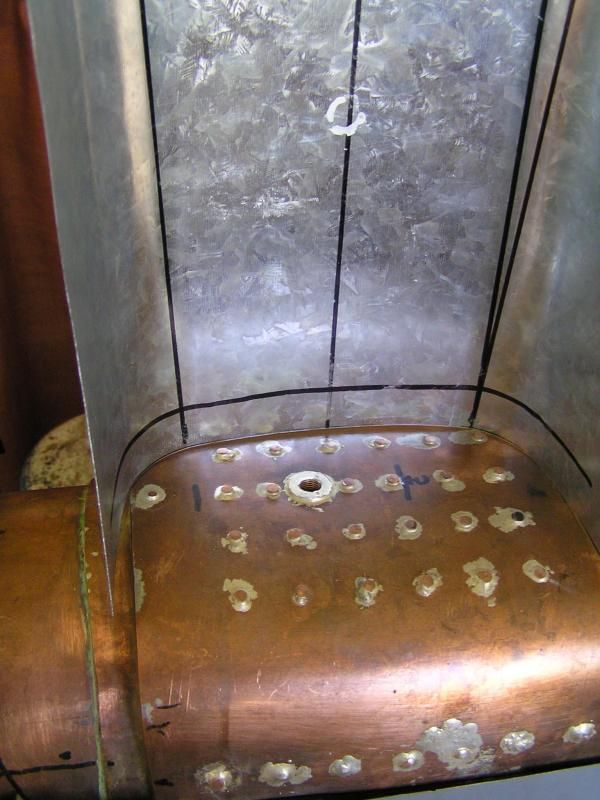 The sheet metal step drill used to cut the hole. 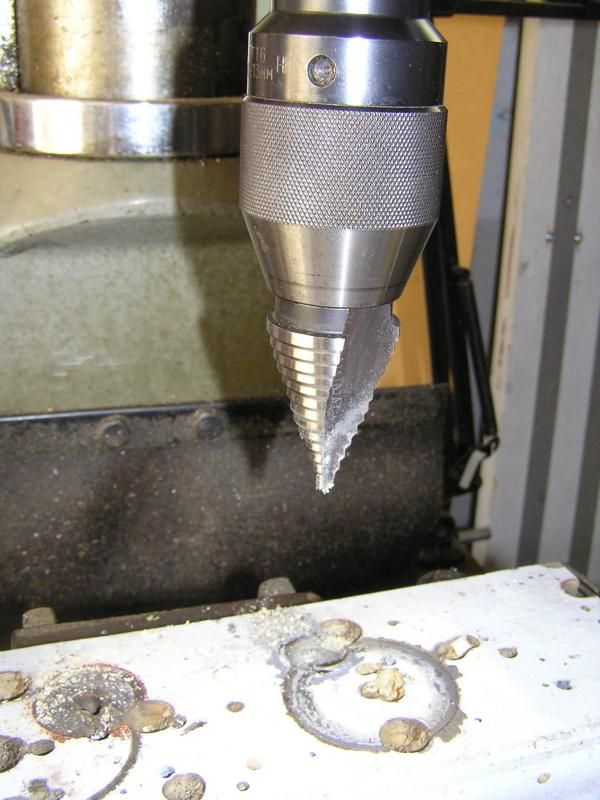 The trial fitting. 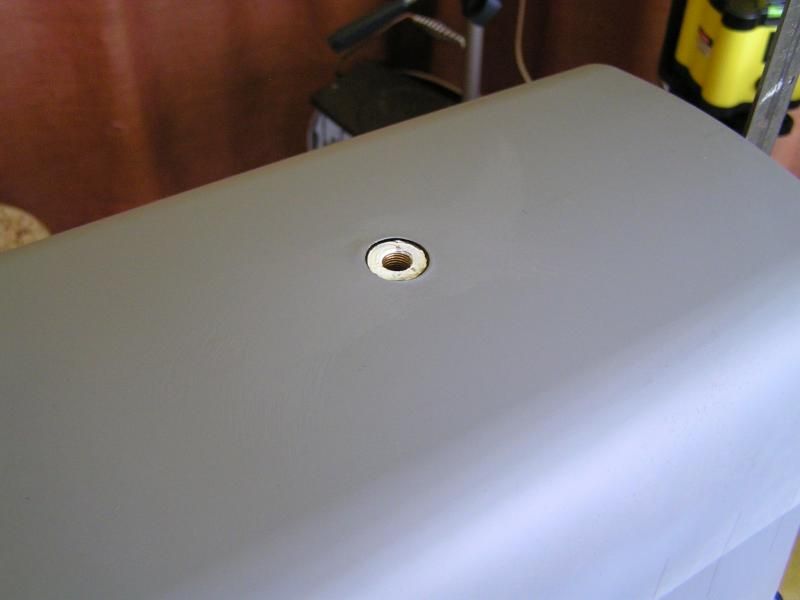 Finally with the manifold in place. 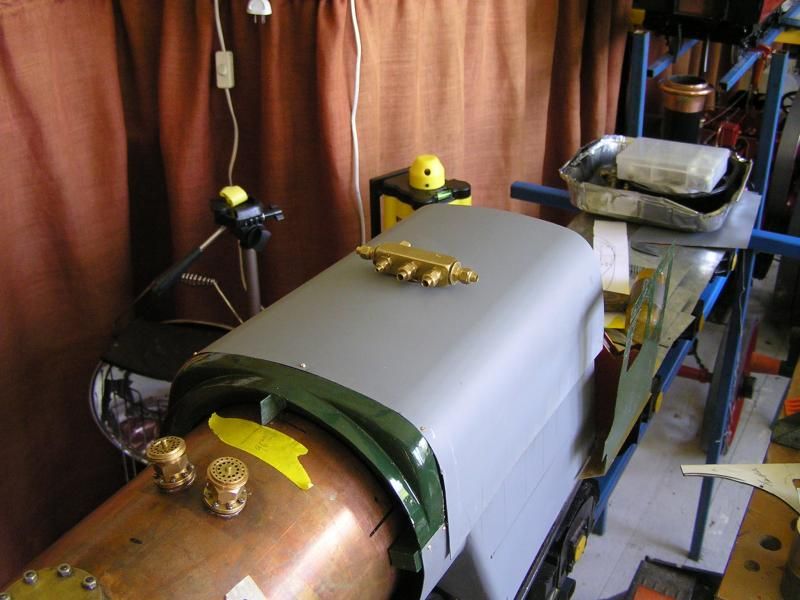 All that remains now is to trim the excess metal from the sides and then start on the back head and washout plugs. Jim |
|
|
|
Post by Shawki Shlemon on Dec 22, 2014 8:22:59 GMT
Very nice work and good progress , 2015 for steaming , I hope .
|
|
|
|
Post by Roger on Dec 22, 2014 8:54:39 GMT
Excellent! Don't you just love it when a plan comes together. I'm too late on this or I'd have said to try a thin layer or Blue-Tack to carry across the imprint. That's a trick I used to use when faced with getting a new spindle type apart. They often have special nuts with two or three holes in the face of them, and you can't measure the pitch because they're on a shaft down a deep hole. With a little cunning, I could make the tool, less the holes, and then add Blue-Tack to the end of it to get the hole positions. Simple but effective.
|
|
|
|
Post by Deleted on Dec 22, 2014 9:02:47 GMT
Hi Jim.
Nice to see a success story unfolding...
John
|
|
|
|
Post by Jim on Dec 22, 2014 10:33:12 GMT
Hi Jim. Nice to see a success story unfolding... John OMG please don't mention anything unfolding John.  I spent an hour this afternoon trimming off the excess on one side then reached across to get a screw driver and knocked the lot onto the floor! Fortunately I didn't have a heart attack and no damage was done. It must be Christmas. Jim |
|
|
|
Post by Jim on Dec 22, 2014 10:39:18 GMT
Thanks Shawki and Roger for you comments.
Blue tack, I'll store that idea away for later on Roger. As for getting into steam in 2015 that's my aim Shawki. It would be nice to get to say, the Hot Pot run next year, says I hopefully.
Jim
|
|
|
|
Post by Deleted on Dec 22, 2014 12:08:55 GMT
This is coming along very well Jim. I am learning with every one of your posts. (I REALLY enjoy the soothing ale part at the end  ) Cheers Tom |
|
|
|
Post by Jim on Dec 24, 2014 8:17:30 GMT
After lots of trial fittings, careful checking and strategic snipping the fire box cladding now fits nicely with only the holding screws to be fitted. Next job will be the backhead but already the outline is taking shape. Looking at the photo I think the manifold could do with a remake, it's too big and 'clunky'  Jim 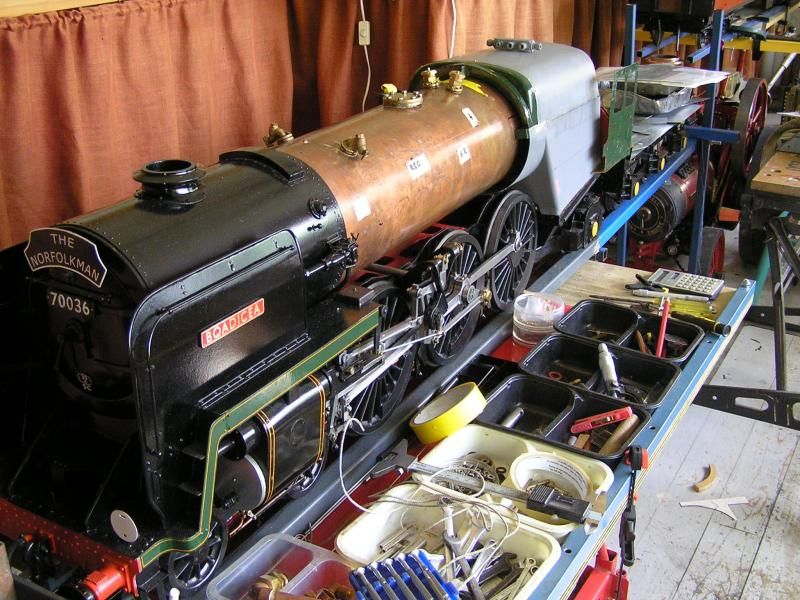 |
|