Lisa
Statesman

Posts: 806 
|
Post by Lisa on May 20, 2017 10:22:39 GMT
In order to bore the cylinders for my Blowfly, I need to mount the cylinder castings on the lathe cross slide, and to do that I'm going to need a bolting plate fitted to the cross slide. I have a piece of 100x10mm (offcut from the loco frames) which should do the job nicely after a bit of cleaning up:  So today I took off the compound slide and cross slide, and took some measurements:  Then did some 3D modelling in openscad, first the cross slide:  Then the bolting plate:  The eagle-eyed might notice the missing hole at this point. The bolting plate has 4 rows of 6 M10 holes in it - M10 suits the clamping kit I have for the mill - and 4 counter-bored holes for caphead bolts to fit in that fix the plate to the cross slide. There's also a 7mm deep hole drilled from the underside to clear the mounting spigot for the compound slide. I tried a few different spacings of the various holes, but this arrangement seems best. Adding 2 more bolts to fix the plate to the cross slide is also a possibility, but I don't think that'd be necessary. The M10 holes are on 24mm centres, which as 24 is a multiple of 1.5, and one turn of the mill handwheels is 1.5mm, means that each hole will be at 0,0; which should simplify things a little. I've got a 25mm face mill on its way to me, which should help in getting the plate cleaned up and flat. |
|
|
|
Post by deverett on May 22, 2017 11:01:37 GMT
 I realise that my lathe (Harrison M300) is quite a bit larger than yours, but show my idea as a possible solution to others. I made an auxiliary boring table to fit on the cross slide and clamped to it using the dovetails on the sides. linklinkIt was made from 3/4" plate and instead of making tee slots, which I thought might bow the plate, I drilled/tapped M8 holes in suitable looking places. I didn't want to have to remove the topslide or rear toolpost, so tailored the table to fit between the two. Fortunately, there is sufficient room on it for any envisaged jobs. Dave The Emerald Isle ps. How do you insert pictures that can be seen instead of clicking onto the link? |
|
Lisa
Statesman
Posts: 806
|
Post by Lisa on May 23, 2017 3:50:01 GMT
Thanks for the photo's Dave, that looks like a good solution if you've got the space; wouldn't leave much room on my little lathe though. Re: posting pictures here, if you look to the right of your photo's in that link, there's a "Share This Photo" area on that web page with several little boxes to copy from; the bottom one marked IMG is the one you want, just copy that and paste into your message here, and... 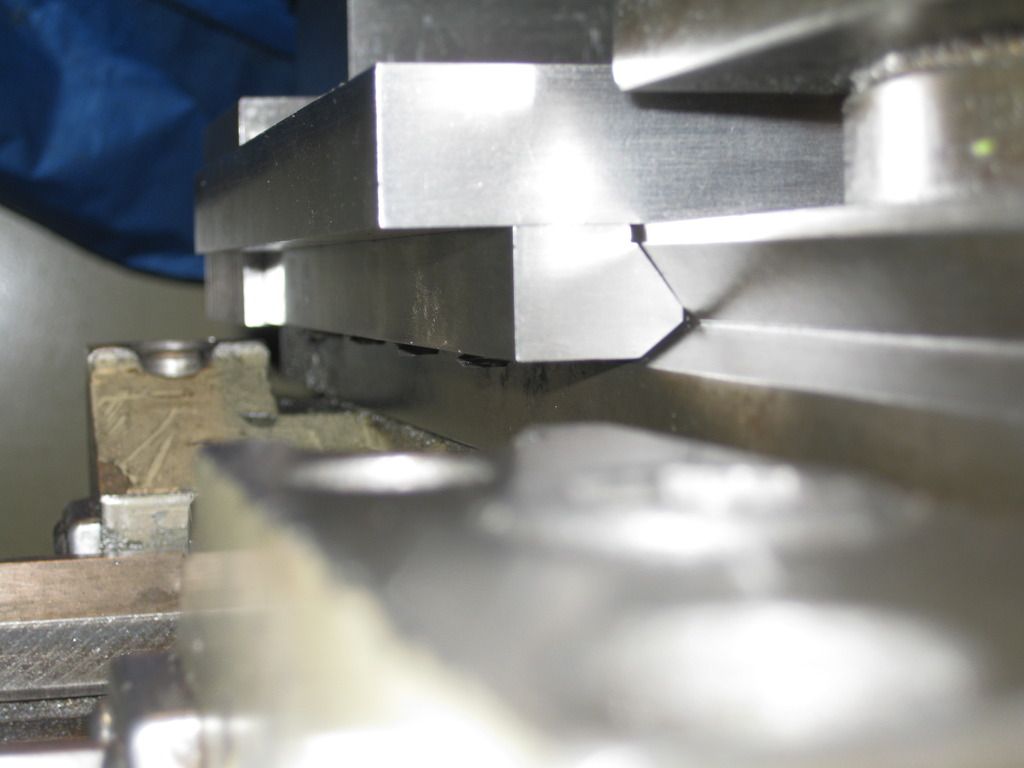 |
|
|
|
Post by 92220 on May 23, 2017 16:36:54 GMT
Hi Dave.
To post photos, you have to upload them to a host site like Photobucket. You the bring the photo you want, onto the screen. When it is there, you will see a 'path' to it, in a box on the right hand side of the screen. right click on that and it will highlight and then 'copy'. Go back to you thread, in the forum, and 'paste' it into your thread. When you post the thread the photo comes up on screen instead of the path to the Photobucket server. If you go onto the Home page, the last 'sticky' at the top of the page is headed 'Posting photos'. That gives you step by step instructions too. One thing I did learn....make sure the photo file size is 4M or less or it takes ages to load and download! I usually take all my photos at max resolution of 52M and then if I want to post it I resize it on Paintshop Pro or Photoshop, to 4M or less. Hope that helps.
Bob.
|
|
|
|
Post by 92220 on May 23, 2017 16:48:39 GMT
Hi Dave.
I've just looked at your photo 'link'. I see you are using Photobucket. So you are almost there. The box I was referring to is the URL box on the right hand side of the screen. Just copy that and paste it into your forum post. If you still have problems, PM me.
Bob.
|
|
|
|
Post by deverett on May 24, 2017 8:42:48 GMT
Thanks for the help folks. It is a while since I used Photobucket and the layout has changed somewhat and I forgot how to use the link arrangement.
Dave
The Emerald Isle
|
|
Lisa
Statesman
Posts: 806
|
Post by Lisa on Jun 30, 2017 8:28:34 GMT
A bit of milling today resulted in the bolting plate now looking like this:  Which is a lot smoother than it looks, though it'll get a rub on some emery cloth on a flat surface later. I've already drilled the relief hole in the other side, for fitting over the spigot the compound slide mounts on, so next up will be drill and taping the 24 M10 holes, and the holes for bolting it to the cross slide. Then I'll drill and tap the cross slide. I don't often use cutting fluid but this is one time that I did, here's a pic showing the difference in cut when face milling with and without cutting fluid:  Kinder on the cutter as well, no doubt. Also, home hair dying kits, as bought from supermarkets etc, come with these handy little bottles. Handy for dribbling a bit of cutting fluid where needed.  We ended up with a good stock of them when dad's girlfriend started going grey; as such they tend to get used for many things around the workshop. |
|
Lisa
Statesman
Posts: 806
|
Post by Lisa on Jul 2, 2017 8:28:23 GMT
Starting on drilling and tapping the M10 holes, 2 done, 22 to go:  One of the studs from the mill clamping kit screwed in, just to prove to myself that I didn't mess up and get the thread wrong. If I can get a few holes done everyday it shouldn't take too long. |
|
Lisa
Statesman
Posts: 806
|
Post by Lisa on Jul 4, 2017 9:04:02 GMT
drill, drill, drill, tap... drill, drill, drill, tap... drill, drill, drill, tap...gradually getting there, only 16 more to go:  There's a hole under the clamp on the right too; the clamp should now be out of the way of the rest of them. Will have to move the rear clamp when I get to it. |
|
|
|
Post by 92220 on Jul 7, 2017 9:15:23 GMT
You are a glutton for punishment, aren't you......24 x M10 tapped holes!!!!!! Nice bit of milling over that size area too. You are right about the coolant used while milling. It also increases the life of the cutter by at least doubling it, before requiring sharpening. I'd go along with you on that tip on coolant bottles too. I bought a pack of 20 x 250mls plastic laboratory wash bottles (they have a long spout)for a job. Had 3 left over so now use them for coolant on the mill and the lathe. I hardly ever use the built-in coolant pumps now - too messy - and as you say, the coolant goes exactly where you want it, not sprayed all over the workshop floor!!
Bob
|
|
Lisa
Statesman
Posts: 806
|
Post by Lisa on Jul 7, 2017 9:58:49 GMT
You are a glutton for punishment, aren't you......24 x M10 tapped holes!!!!!! Nice bit of milling over that size area too. You are right about the coolant used while milling. It also increases the life of the cutter by at least doubling it, before requiring sharpening. I'd go along with you on that tip on coolant bottles too. I bought a pack of 20 x 250mls plastic laboratory wash bottles (they have a long spout)for a job. Had 3 left over so now use them for coolant on the mill and the lathe. I hardly ever use the built-in coolant pumps now - too messy - and as you say, the coolant goes exactly where you want it, not sprayed all over the workshop floor!! Bob I figured it might take a while, but it's one of those things that'll likely come in handy for many future tasks, so might as well make a job of it. Down to five and a bit holes to go:  The 'and a bit' being because I start off with a centre drill - which is considerably less likely to wander all over the place - and it broke off in the hole. I've had a bit of a go at getting it out, including grinding away with the not-a-dremel, but I think I'll just come in from the back on that one, which might push the broken bit out, hopefully. At the least it should give a through-hole with which I can punch it out. |
|
|
|
Post by 92220 on Jul 7, 2017 11:02:07 GMT
Hi Lisa.
Try going through with an endmill instead of a drill. That cuts on the outside of the hole, leaving a small core in the middle. That might be easier to knock out that risking damaging a drill from the other side and still not getting it out. You may need a couple of goes with the endmill because the centre will stop you going too far. You will need to swap for a slot drill to just take the centre core out, until you get to the tip of the centre drill. Then you can take the endmill down as far as it will go, around the centre. You should then be able to knock it out. Another possibility is, if you have a cut-off grinder, that is thin enough, is to carefully grind a slot down the centre of a slot drill so that it is converted into a core drill. That way you can possibly just bore straight through, around the centredrill point. When you take the plate off the mill, make sure you fit stops so that you can just drop the plate back on and you know it is where it should be, within a couple of thou or so. Hope that helps and you get it sorted without too much hassle.
Another point that a lot of model engineers, who haven't had the experience of working in a machine-shop(you may not be one of these), don't know; centre drills should normally be run at maximum speed (2000/3000rpm if poss.), to keep them central to the axis of rotation, and increasing their resistance to breakage (centre drill up to at least No.4 size). Running too slow makes the centre-drill much more susceptible to breakages.
Bob.
|
|
|
|
Post by racinjason on Jul 7, 2017 12:44:07 GMT
Lisa,
Grind the broken center drill down the side leaving a blade offset this will cut around the outside of the broken off part of the center drill and you won't damage the hole.
Cheers Jason
|
|
|
|
Post by 92220 on Jul 7, 2017 13:16:54 GMT
That's a good point. With Jason's idea of making a hollow cutter from the original centre drill, you might well do the job without turning the plate over and needing to re-position it. The main question will be if there is enough length of centre-drill body to grind a cutting edge and also hold it rigid, and be able to drill down far enough. Failing that, the endmill route should do it.
If the length of the centredrill prevents doing it to Jason's suggestion, if you have the right size endmill and an offset cut-off hand grinder, you would probably be able to do it all without taking the plate off the mill anyway. Final suggestion....get a couple of solid carbide cutters, smaller than the centredrill body diam, and machine away the centredrill. I say 'a couple', just in case one chips. They are cheap enough, these days.
Bob.
|
|
Lisa
Statesman
Posts: 806
|
Post by Lisa on Jul 11, 2017 10:23:44 GMT
Thanks for the suggestions, what I ended up doing was coming down from the top with a 8mm end mill, which left a central spigot containing the bit of broken drill; I then smacked it with a punch to break it off. Drilling could then resume as normal. And so, all 24 are done:  I just need to drill and counterbore the holes for fixing it to the cross slide, then much deburring followed by drilling and tapping the cross slide. |
|
peteh
Statesman
Still making mistakes!
Posts: 760
|
Post by peteh on Jul 11, 2017 11:54:00 GMT
Well done Lisa - a labour of love but as you say will be useful for many things !
|
|
Lisa
Statesman
Posts: 806
|
Post by Lisa on Jul 12, 2017 11:30:22 GMT
Still needs deburring, otherwise the bolting plate is now done. Sitting loose on the lathe for the pic'.  Drilling and tapping the cross slide still to do. |
|
|
|
Post by Roger on Jul 13, 2017 15:18:11 GMT
This is a most excellent and useful addition, I'm sure you'll find many other occasions where it's going to be invaluable.
|
|
Lisa
Statesman
Posts: 806
|
Post by Lisa on Jul 20, 2017 7:49:12 GMT
Today I spent about an hour with the bolting plate on some emery on a surface plate (of sorts, some thick plate glass pinched from a broken photocopier). This got the worst of the machining marks out, but I'll probably give it another go later; I was starting worry about my arms forming a union and going on strike. So then I spent some time squaring up the cross slide in the mill, and drilling and tapping it for attaching the plate. Thus the plate is pretty much done now:  Compare the surface finish here with the previous photo. Which means I'm a little closer to being able to do something like this:  One thing I forgot though, was to get some grub screws to put in the cross slide holes when the plate isn't fitted, to stop them filling with swarf; so I'll have to grab some fairly soon. |
|
isc
Statesman
Posts: 708
|
Post by isc on Jul 20, 2017 9:38:36 GMT
Just use some off cuttings from shortened bolts, or bits of 10 mm rod with a thread on it, get the hacksaw and cut a screwdriver slot, all done. isc
|
|


