|
|
Post by Oily Rag on Feb 15, 2021 22:06:17 GMT
I am doing the simple mundane operation of using button dies in a tail stock die holder however I am disappointed with the results as the thread is tapered at the end of thread stop for the thickness of the button die. This is a problem for small parts. Photos are of a scraper, 1/4 x 40 ME. This is a tight fit for the last threads into a boiler bush.
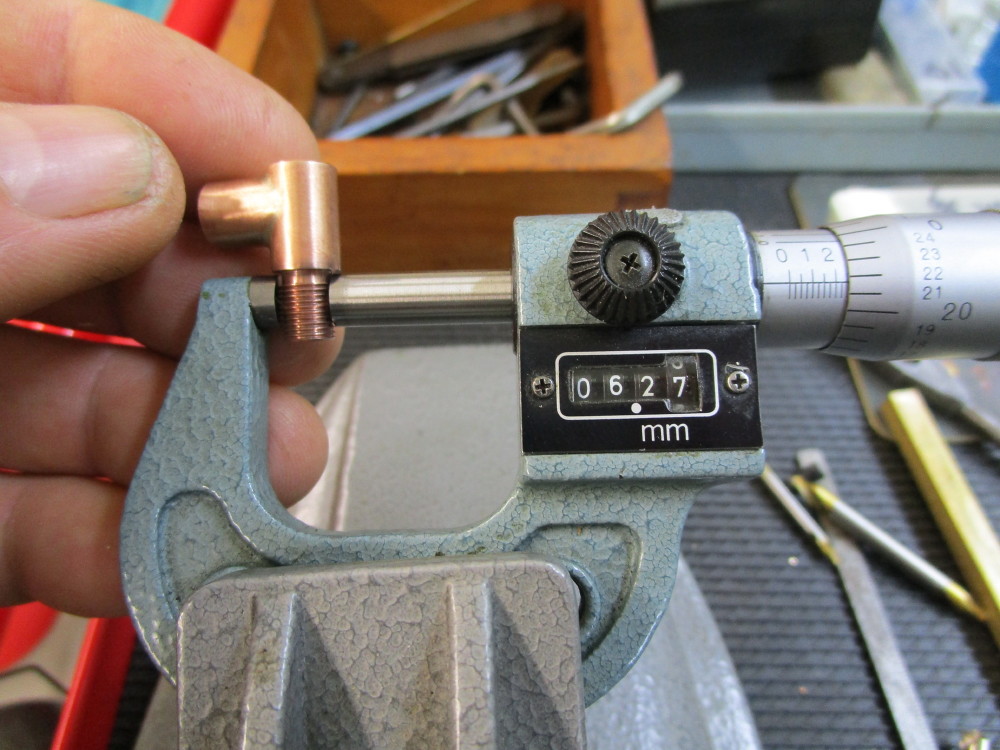
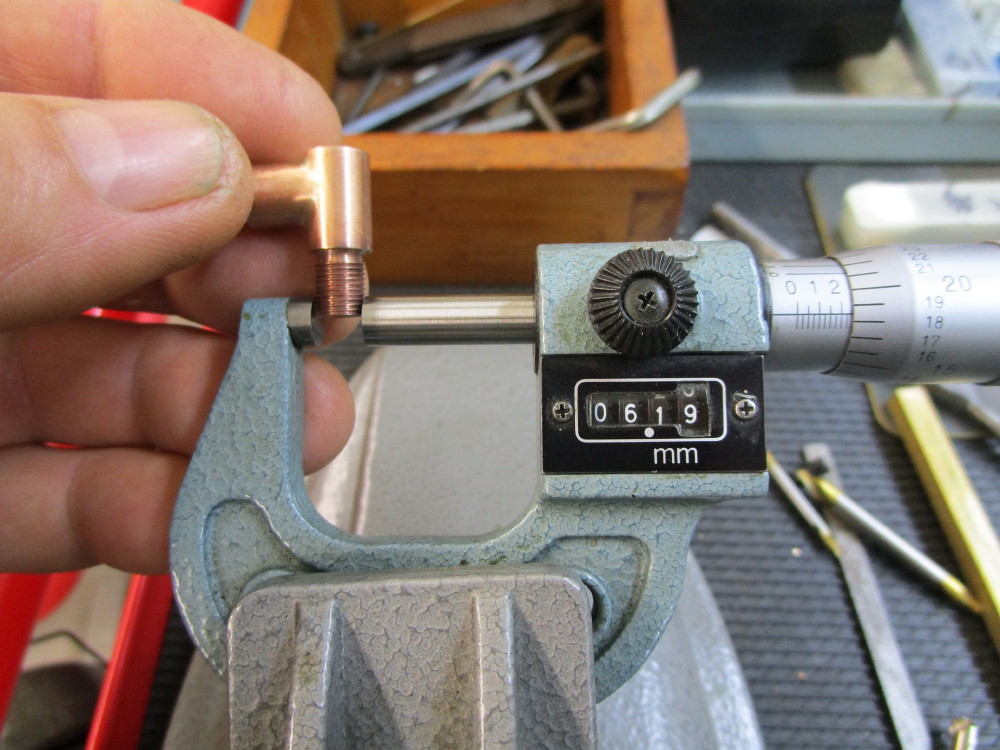
An example, last night I am using 5/32 x 40 ME on Phosphor Bronze round that I got from Polly. I start with the usual extra length to be later trimmed off, bevel on the end to start the cut, but up at the end of the thread next to a shoulder I have a a taper of 0.05 -.06mm which is a pain for fitting a nut up close to a shoulder after the length of thread is trimmed to 5mm in length. Then the nut does not fit.
I have checked the die tailstock die holder, it looks to be sweet, I have tried turning the raw stock 0.50mm under size, then tried over size, tried opening up the die and then passes closing. I get a good fit on the end of the end of the rod but after trimming then the reaming thread is tapered and over sized at the shoulder. I have not tried cutting the relief at the shoulder before running the die, I have always cut the relief/square shoulder after the thread was cut. New buttons, two brands tried, at this time I cannot cut 32 and 40 tpi on my Myford 254S but I am going to make inquiries.
Maybe I need to spend a fortune and get an 32 and 40 ME set from www.tap-die.com but....
Help, what is this numpty doing wrong ?
|
|
lesstoneuk
Part of the e-furniture
 Retired Omnibus navigation & velocity adjustment technician
Posts: 373
|
Post by lesstoneuk on Feb 15, 2021 22:33:08 GMT
There are two sides to a die. Right side, you get a lead in to help with thread starting. Wrong side there is no lead. Turn your die in the dieholder and do a second pass up to the shoulder. You'll find it will have got rid of the lead taper.
|
|
|
|
Post by Oily Rag on Feb 15, 2021 22:50:08 GMT
There are two sides to a die. Right side, you get a lead in to help with thread starting. Wrong side there is no lead. Turn your die in the dieholder and do a second pass up to the shoulder. You'll find it will have got rid of the lead taper. Oh, that simple. Note,that piece was trimmed from length of 12mm of thread Thank you. |
|
|
|
Post by Oily Rag on Feb 15, 2021 22:51:27 GMT
There are two sides to a die. Right side, you get a lead in to help with thread starting. Wrong side there is no lead. Turn your die in the dieholder and do a second pass up to the shoulder. You'll find it will have got rid of the lead taper.
I will do some tests runs on lengths tonight.
Thankyou. |
|
|
|
Post by Roger on Feb 15, 2021 23:56:13 GMT
I'm afraid that you will still probably have a small taper, however you go about it. That's because Phosphor Bronze will exert quite a lot of force on the die. When the die is only partially engaged with the thread, there's less thread to press against the die. As you get to the position where the whole of the die is cutting, the die will be forced open more, and the size will almost certainly be a little bigger. Yes, turning the die around will let you get closer to the shoulder, but don't be surprised to find it's still larger there.
This is another reason why I screw cut everything, but I understand you can't do that in this case. It's definitely worth getting whatever changewheels you need to be able to cut whatever threads you like.
|
|
|
|
Post by Oily Rag on Feb 16, 2021 2:54:29 GMT
I'm afraid that you will still probably have a small taper, however you go about it. That's because Phosphor Bronze will exert quite a lot of force on the die. When the die is only partially engaged with the thread, there's less thread to press against the die. As you get to the position where the whole of the die is cutting, the die will be forced open more, and the size will almost certainly be a little bigger. Yes, turning the die around will let you get closer to the shoulder, but don't be surprised to find it's still larger there. This is another reason why I screw cut everything, but I understand you can't do that in this case. It's definitely worth getting whatever changewheels you need to be able to cut whatever threads you like.
Roger, it is what I suspected however I get this with all materials as well.
]Screw cutting is the way, I am working on the change wheels for the ME threads.
Another reason fine Metric wins eh!
|
|
|
|
Post by runner42 on Feb 16, 2021 5:43:22 GMT
Reversing the die works in most cases, but if you still have problems then cutting a small rebate removes the tight thread and allows it to be butted up to the mating face without undue force. Brian  rebate thread rebate thread by Brian Leach, on Flickr |
|
|
|
Post by keith1500 on Feb 16, 2021 7:48:50 GMT
Out of curiosity, to counter act the force of the phosphor Bronze on the die you could tighten up the die holder screws?
Or is a button die a non adjustable type?
|
|
|
|
Post by gwr14xx on Feb 16, 2021 8:09:32 GMT
Most of us take it for granted that the tools we purchase (in this case, dies) are fit for purpose. Unfortunately, the cheaper products often aren't. In the case of your die, if the thread is not quite square to the face and OD of the die, when you clamp it in the die holder, the thread will be at an angle to the part and try to cut a tapered thread. Even if your screwcutting skills leave something to be desired, you could start the thread by screwcutting and then finish it to size (by hand) with the die, to see if that improves matters.
Regards,
Eddie.
|
|
|
|
Post by Roger on Feb 16, 2021 8:53:43 GMT
I'm afraid that you will still probably have a small taper, however you go about it. That's because Phosphor Bronze will exert quite a lot of force on the die. When the die is only partially engaged with the thread, there's less thread to press against the die. As you get to the position where the whole of the die is cutting, the die will be forced open more, and the size will almost certainly be a little bigger. Yes, turning the die around will let you get closer to the shoulder, but don't be surprised to find it's still larger there. This is another reason why I screw cut everything, but I understand you can't do that in this case. It's definitely worth getting whatever changewheels you need to be able to cut whatever threads you like.
Roger, it is what I suspected however I get this with all materials as well.
]Screw cutting is the way, I am working on the change wheels for the ME threads.
Another reason fine Metric wins eh!
It's a perennial problem I'm afraid. Usually you end up with a looser fit than you'd like at one end to get the fit you need at the other. Brian's method of undercutting the end gets my vote, and that makes screw cutting simple because you have somewhere to run into. I usually make that undercut suit an O-ring where I need a seal. It's usually easy to find an O-ring section that fits just right. I agree completely with your comments on Metric threads of course. If you can stretch to the few insert sizes you need, you can cover all of the threads you will need and never have to use dies again. It's very rare indeed for me to use a die, and the more you screw cut the quicker and better you get at it. |
|
|
|
Post by 92220 on Feb 16, 2021 9:19:48 GMT
The other way to get over the tapered thread problem is to make the thread length twice as long. Thread it, and then turn down to length. Lesstoneuk says that one side of the die has a taper feed and the other side doesn't. I agree that some dies are like that, but not many brands. Most of my dies have tapered leads on both sides. Most of my dies are HSS but even the few carbon steel dies I have, have tapered leads both sides, though not as long a taper on the back face On the dies. If I want to thread right up to a shoulder, I have ground down the thickness on the back face of all the dies, to get rid of the taper lead. That way, I can start cutting the thread with the face with a lead-in, and then finish with the back face forward to thread right up to a face. You will also get a tapered thread if the die is not dead sharp (i.e. brand new), and HSS dies are sharper than carbon steel.
I was talking to Terry Holt, of Kirjeng M.E.Services, some years ago, about why HSS dies are better than carbon steel dies. It all stems from the fact that the carbon steel dies have cut threads and therefore end up with a thread that has microscopic burrs on the thread crests. These burrs break off the first time the die is used and that slightly blunts it. HSS dies are ground threads and they don't have any thread burrs. His advice, for carbon steel dies, is to cut a thread in a piece of mild steel as the very first thread the die cuts, from new. Cutting the thread in steel takes those tiny burrs off so that fiuture threads will all be cut to size (hopefully). If you use a new carbon steel die to cut a brass thread, the die will take out too much metal and the thread will be loose.
Bob
|
|
stevep
Elder Statesman

Posts: 1,070
|
Post by stevep on Feb 16, 2021 9:30:18 GMT
I agree with using the die backwards. Most die holders have three screws - one goes into the split, so you can adjust the fit of the thread (start off with it screwed in hard, and if the thread is oversized, slacken it off), and two other screws which should be screwed in really tight, to avoid the effect that Roger described - the die opening out. I agree with Brian that an undercut is an excellent idea, and I use this tool that I made.  Originally built to put the grooves in pins of the Pansy valve gear for 'E' clips, it does a cracking job of providing the undercut. Use whichever thickness of slitting saw that suits your purpose. |
|
|
|
Post by 92220 on Feb 16, 2021 9:42:54 GMT
Brilliant idea Steve!!
Bob.
|
|
kipford
Statesman
Building a Don Young 5" Gauge Aspinall Class 27
Posts: 566 
|
Post by kipford on Feb 16, 2021 10:28:38 GMT
Steve Brilliant, have you got a drawing to save me having to think about it?  Dave |
|
stevep
Elder Statesman
Posts: 1,070
|
Post by stevep on Feb 16, 2021 11:30:26 GMT
Sorry - another of those 'designed at the lathe' ideas, so no drawings, but this picture may help out.  And here are the 'E' clips on the Pansy valve gear (which is what the tool was made for).  |
|
|
|
Post by simplyloco on Feb 16, 2021 11:38:23 GMT
|
|
Midland
Elder Statesman
Posts: 1,870
|
Post by Midland on Feb 16, 2021 11:54:12 GMT
Reversing the die works in most cases, but if you still have problems then cutting a small rebate removes the tight thread and allows it to be butted up to the mating face without undue force. Brian rebate thread by Brian Leach, on Flickr That is what I was told to do 20 years ago. D |
|
jasonb
Elder Statesman
Posts: 1,209
|
Post by jasonb on Feb 16, 2021 15:10:48 GMT
I also usually do an under cut against the shoulder but on some parts where there may be a hole in them you can end up with a weak spot due to a thin wall thickness. In cases like that the mating threaded hole can have a shallow 1 -1.5 turn counterbore drilled so the unthreaded part of the male thread will fit into that area where there is no female thread.
I also find that many newer dies have a lead in on both sides not just the printed one so a couple of mu ME dies have been ground down so the full thread is at the edge of the die.
|
|
JonL
Elder Statesman
WWSME (Wiltshire)
Posts: 2,909
|
Post by JonL on Feb 16, 2021 15:22:24 GMT
The original post says he doesn't have the change gears for that. |
|
Gary L
Elder Statesman
Posts: 1,208
|
Post by Gary L on Feb 16, 2021 17:43:52 GMT
Ideally I understand the groove should have rounded corners to avoid a stress point (or avoid making it worse!). But I have a fine parting tool (for small diameter stock) with a blade only 1.5mm wide, which gets used a lot if the thread dia is not too small. Gary |
|


