mbrown
Elder Statesman
  
Posts: 1,793
|
Post by mbrown on Mar 15, 2017 18:07:10 GMT
Many thanks Bob,
None of the two-pack etch primers I have seen state in terms that they work on galvanised steel, but your experience backs up my hunch that they are the best bet.
Malcolm
|
|
|
|
Post by 92220 on Mar 15, 2017 18:27:06 GMT
Hi Malcolm.
No you won't find anything that states on the label that it will stick to galvanised. Basically, nothing will stick to galvanised like it will to bare steel, but 2-pack etch primer is the best of what there is available.
I think I might do a bit of investigation to try and find out what actually happens to galvanised steel when it weathers. Maybe it can be replicated chemically in the workshop. I'll see what I can find out.
Bob.
|
|
|
|
Post by 92220 on Mar 15, 2017 18:50:20 GMT
Hi Malcolm.
I have found some info. Things have advance a bit since I left the paint business. There is a pre-treatment for new galvanised steel. It's called T-wash. I've pulled this off the website:
HEMPEL'S T WASH 09940
Description
HEMPEL'S T-WASH 09940 is an etch solution for new galvanised steel based on a formulation developed by British Rail.
Area of use
As pre-treatment for new galvanised steel.
There is also this:-
Although pretreatment of galvanized components is best carried out immediately after galvanizing, before the surface has become contaminated in any way, this is not always practical. Pre-treatment can be carried out later but it is vital that the surface is adequately cleaned to remove all traces of contaminants such as oil, grease and dirt. The cleaning operation must leave no residues on the cleaned surface and any wet storage staining should be removed using a stiff brush. Washing down the coating with water will help to remove soluble salts.
There are four recognised methods of surface pretreatment that produce a sound substrate for paint coating:
1.T-Wash (or its proprietary equivalent) and when to paint galvanized steel
Despite the fact that this preparation process has been available for some considerable time, T-Wash is still generally considered to be the best pretreatment method for painting galvanized steel. T-Wash is a modified zinc phosphate solution which contains a small amount of copper salts. When applied, a dark grey or black discolouration of the zinc surface will result. T-Wash must not be allowed to pool on horizontal surfaces or this will prevent maximum paint adhesion. Any excess should be removed by water. T-wash is most suitable for application to new galvanizing and should not be used on weathered galvanizing (see etch primers). Sufficient time must be allowed for the T-Wash to react and dry thoroughly before the first coat of paint is applied. (Suppliers’ information will give recommended time intervals). While research has shown that T-Washed surfaces can be left for up to 30 days before painting and good paint adhesion can still result, it is advisable to minimise the time between pre-treatment and paint application. Any white salt formed by the exposure of the T-Washed surface to moisture must be removed before painting, using a stiff brush. If the T-Washed surface has become contaminated it must be cleaned in accordance with the suppliers’ recommendations.
◾ Constituents of T-Wash
The constituents of T-Wash are phosphoric acid (9.0%), ethyl cellusolve (16.5%), methylated spirit (16.5%), water (57.0%) and copper carbonate (1.0%). Variations to this composition may exist and so it is wise to consult the supplier if a successful result is to be achieved.
2. Etch primers
Etch primers have also been used successfully. Their major disadvantage is the absence of any visible colour change as is the case with T-Wash. Therefore, there can never be complete confidence that all surfaces have reacted with the primer. Etch primers are most suited to application on older, weathered galvanizing.
3. Sweep blasting
A mechanical method of pre-treatment is sweep blasting using fine copper slag, J blast or carborundum powder with a blast pressure of no greater than 40psi (2.7 bar). This will ensure that only the minimum amount of oxide is removed and the zinc surface is left in a slightly roughened condition. Care should be taken when carrying out sweep blasting on very thick galvanized coatings to avoid damage to the coating. The optimum nozzle-to-work piece distance and angle of blasting needs to be identified for all surfaces on the galvanized steelwork if optimum results are to be achieved. Angular iron blasting grit must not be used under any circumstances. Sweep blasting is often used in addition to the chemical preparation stage.
4. Weathering
This process only becomes fully effective after a galvanized surface has been exposed to the atmosphere for a period of at least six months. The surface is prepared using either abrasive pads or a stiff brush to remove all loose adherent materials and making sure that the bright zinc surface is not restored.
This is followed by a hot detergent wash and rinsing with fresh clean water. The surface must be fully dry before any paint is applied. Weathering should not be used as a method of surface preparation in marine environments with high chloride levels.
|
|
mbrown
Elder Statesman
  
Posts: 1,793
|
Post by mbrown on Mar 15, 2017 18:57:35 GMT
Many thanks Bob. All worth investigating.
I hope this information might be useful to Jim too - and that he'll forgive us for barging in on his thread!
Malcolm
|
|
|
|
Post by fostergp6nhp on Mar 15, 2017 20:45:06 GMT
The landrover boys fitting new galvanised chassis use Mordant T wash to get paint to stick.
|
|
|
|
Post by Jim on Mar 15, 2017 22:14:52 GMT
Hi Malcolm,
Have no worries at all about hijacking the thread. All contributions on this issue are invaluable for anyone following this topic especially if they are thinking of using galvanized iron/steel as it certainly can present problems as does brass, in getting paint to adhere if not prepared properly.
In my case I give the plates a good rub over with steel wool to clean them and in the process remove any surface oxidation. I then wash the job frequently during assembly to ensure all traces of flux are removed as new parts etc are added which also helps clean the surfaces for future painting. When complete I spray the job with Repco Grey Etch Primer. It specifically states it provides 'excellent surface adhesion' on a list of metals including Galvanized Iron, Brass, Copper and Zinc Anneal.
I can only add that these methods have worked well for me with no sign of paint lifting or blistering over time.
Jim
|
|
|
|
Post by Jim on Mar 19, 2017 4:31:05 GMT
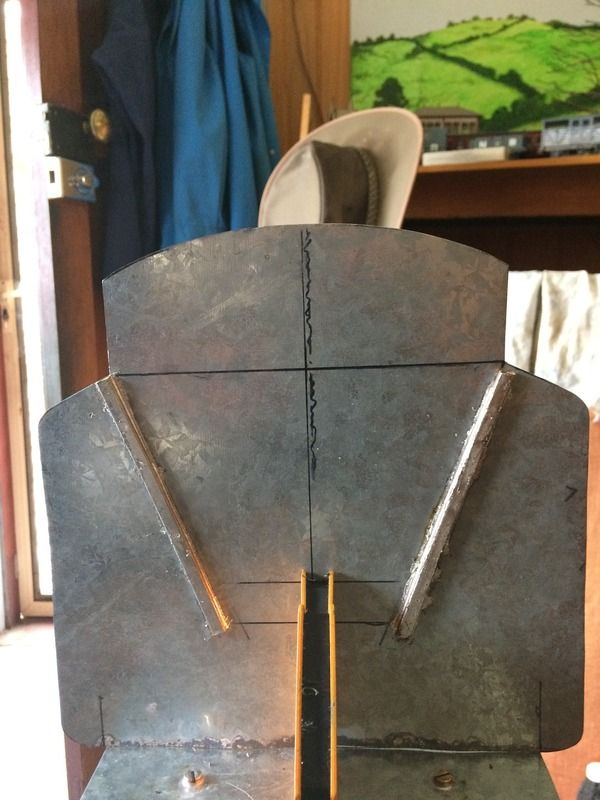
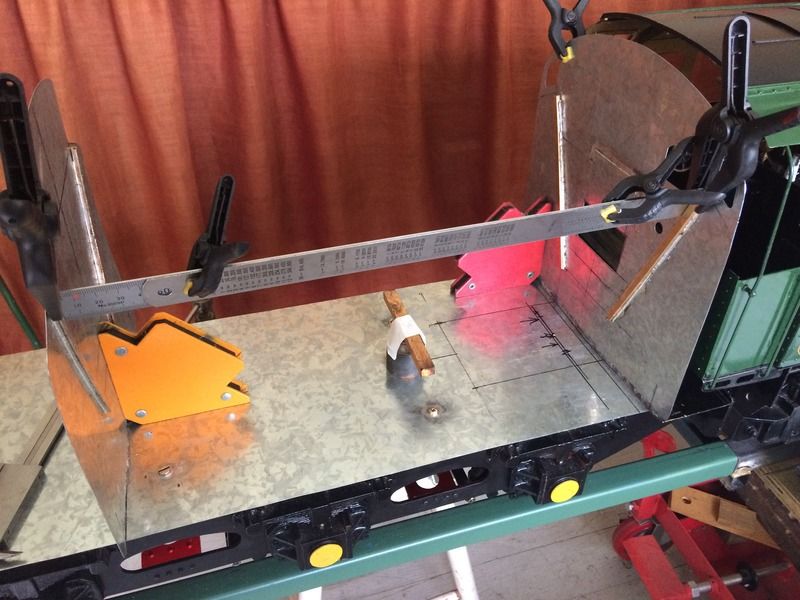
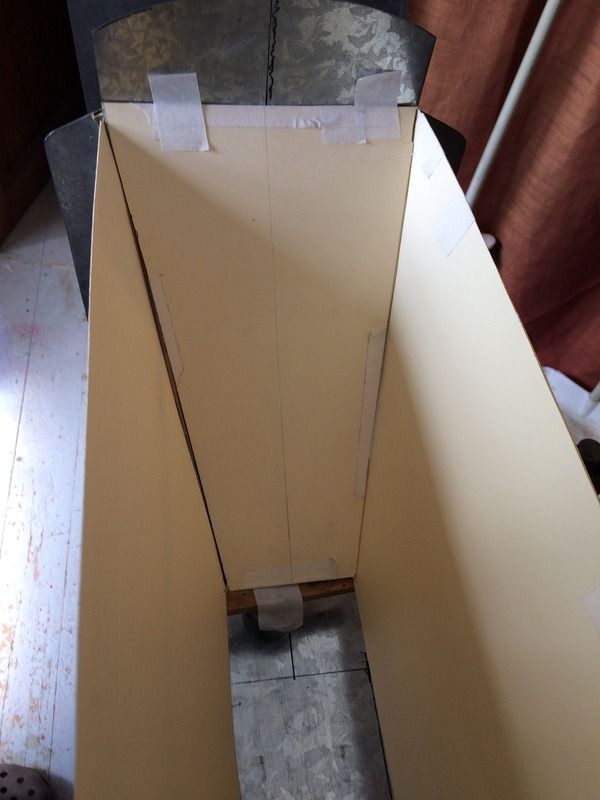
I got a bit more done on the tender today having decided that the floor I'd made earlier needed re jigging in the light of some very detailed information I'd received from Frank and Stanley. However before I started to reshape the old floor I decided a complete card mock up was needed first. The first photo shows the rear bulkhead with the support guides in place for the side walls of the bunker.  The next photo shows the guides being checked to ensure they are level and in line.  Finally a photo showing the side walls in place along with a new floor section to check its fit. Once I'm happy with everything I'll use the patterns to cut the metal.  The 'gap' on the left hand side plate is from the black marking pen used to mark out the line the sloping floor plate will take, it had me worried when I first saw it.  Jim. |
|
|
|
Post by firebox on Mar 19, 2017 12:32:08 GMT
Good job Jim, cardboard always helps with angles in all directions!
|
|
|
|
Post by Jim on Mar 19, 2017 22:35:13 GMT
Cardboard is certainly handy, in fact for me it's the poor man's 3D CAD.   |
|
|
|
Post by vulcanbomber on Mar 19, 2017 22:50:27 GMT
Yes, compound angles, what fun!
|
|
|
|
Post by Deleted on Mar 19, 2017 23:02:22 GMT
Compounds can be a pain but not impossible...I had an issue recently with my car..gave it to a porsche specialist to have some corrosion sorted on the passenger lower front wing....it's not an easy shape and they got it wrong...I pointed out their errors (there were a few) and they agreed to redo the work. I said fine but this time I told them to work to my templates....car is spot on now....  Back on topic...great work Jim..You're making light work of your tender body...sir.. Pete |
|
|
|
Post by Jim on Mar 20, 2017 7:00:59 GMT
Thanks Pete though having gone 'off the plan' so to speak I've had to do a fair bit of head scratching making sure it will work. Anyway today I cut out the two bunker sides and have fitted them temporarily in place as the photo shows.  The soothing ale helps iron out any kinks in the plate I've discovered. Jim |
|
Lisa
Statesman
 
Posts: 806 
|
Post by Lisa on Mar 20, 2017 7:41:20 GMT
I hope you've got a plan for those sharp edges on the front Jim, otherwise some torn hands may be in your future!
|
|
|
|
Post by Jim on Mar 20, 2017 7:50:51 GMT
I do have a plan Lisa I just haven't thought of it yet.  Seriously though you're right about the sharp edges which is why I've opted for a wider opening/lift out section in the front bulkhead for access when driving. As things stand I think my current plan means my hands will be below and clear of those sharp corners. I certainly will be doing some trials first. Jim. |
|
|
|
Post by Jim on Mar 22, 2017 4:15:47 GMT
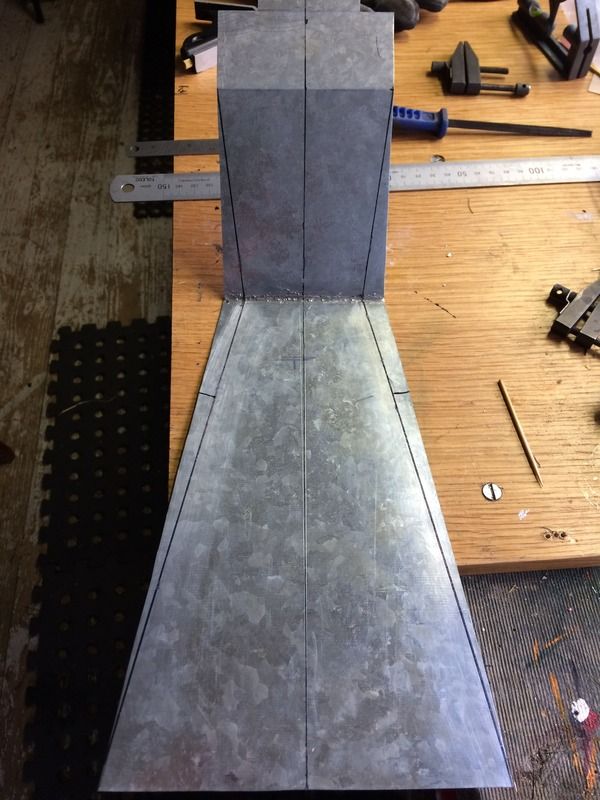
After revisiting ideas, photos and drawings sent to me by Reg, Frank and Stanley I decided to redo the bunker floor to create an extended flat area back from the coal hole to where the back wall of the locker lift out section ended. As a result the bunker floor dipped deeper and so needed re-cutting. I also decided to discard one of the bunker sides as it had stretched and distorted due to factors unknown. It would make an excellent 'clicker' as the dished sections 'popped' in and out.  Reg also suggested using the water dome as a cover for the injector water valves which I much prefer to my original thought of a lift off rear deck. For driving purposes this location makes the valves easily accessible. I'll fit dummy taps handles in their correct location in the cab. The photo show the bunker floor marked out ready for cutting.  Jim. |
|
|
|
Post by Jim on Mar 22, 2017 6:26:13 GMT
Just completed soldering up the sides and floor of the bunker and the trial assembly shows only a couple of high spots that need attention.  Jim |
|
|
|
Post by Jim on Mar 27, 2017 7:32:58 GMT
Today I started on the rear panel to the lift out section by making up a card template. While this is not how it would have appeared in real life there is room for changes to make it more prototypical if I decide to. I've also decided to make the fire iron tunnel removable as part of the lift out section which will give a more or less obstruction free access to the cab. Well that's the plan at this stage. Jim.  |
|
|
|
Post by springcrocus on Mar 27, 2017 8:00:32 GMT
I haven't yet decided whether or not to model the fire-iron tunnel. I might make a dummy recess in the lift-out section only and not bother with the section in the bunker. It's just something else to catch your hand on. Anyway, looking good Jim.
Steve
|
|
|
|
Post by Jim on Mar 27, 2017 8:08:17 GMT
Thanks Steve, At this stage I intend attaching the tunnel to the lift out section so it comes away too. On the other hand given I intend having a dummy coal load in the tender when on display there really isn't much point in including it in the first place. I'll think about it over a soothing ale.  Jim |
|
|
|
Post by Jim on Mar 29, 2017 6:37:00 GMT
After some checking and adjusting I got the card template to a stage I was happy with so today I used it marking out the plate for cutting out the final version. Next job will be to fold up the tunnel walls along with some extra strengthening to support the two parts.  Jim |
|