Post by Shawki Shlemon on Nov 5, 2006 0:08:45 GMT
A few guys asked how I bore my cylinders. After showing them the method I use (not claiming it is my invention) to bore my cylinders on the lathe between centres, they have successfully used it and happy with it .I thought it might be a good idea to share it with everyone particularly with new comers in the hobby.
This is how is done:-
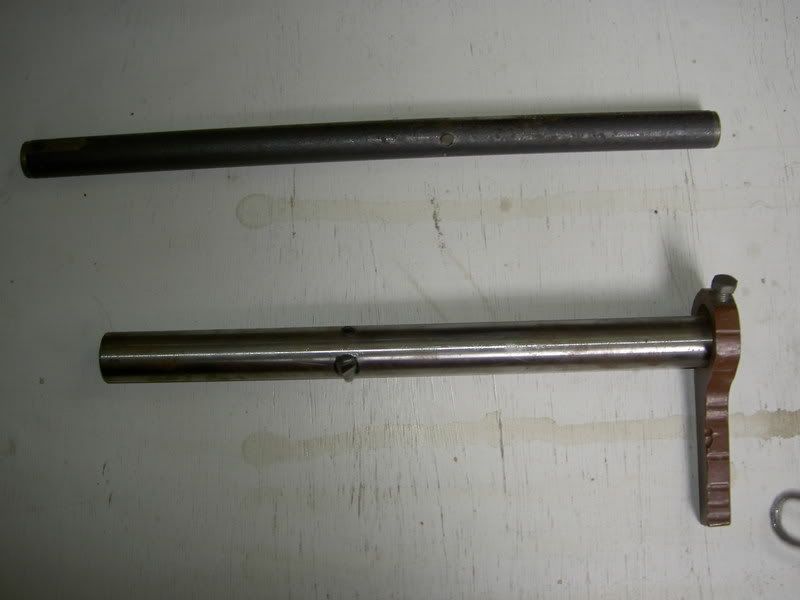
1) Make two boring bars, each bar consist of a rod of suitable diameter for the job about 12” long with centre holes at both ends and one cross hole about 5” from one end for cutting tool with a grub screw at 90 degrees for locking .see picture.
2) Weld a ½”thick, 3”square plate to a Morse taper bit, hold in the lathe and face it see picture

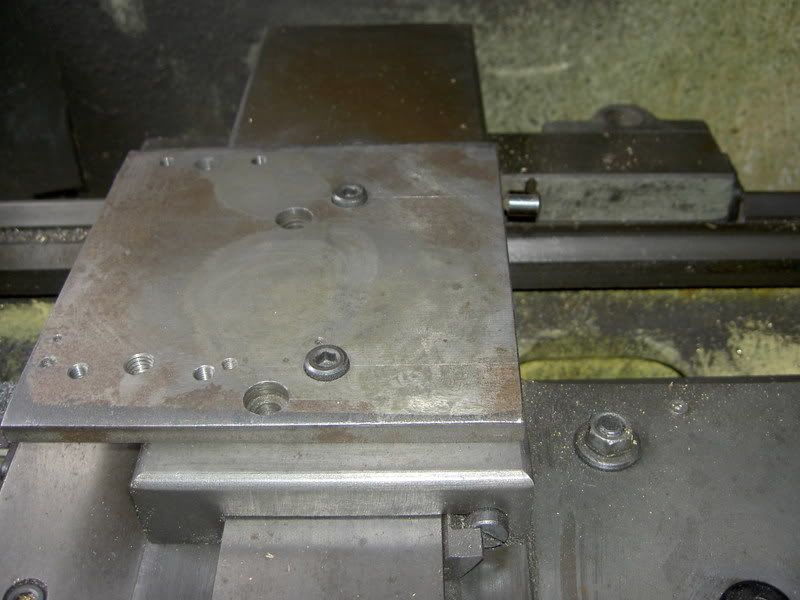
3 ) A plate 6” square 3/8” – ½” thick is required to replace tool post .This is the plate where cylinder or any other item is mounted for milling or boring. See picture
4) Establish a datum face on the cylinder and mill a face. From this face as datum mill other faces except front and rear faces.
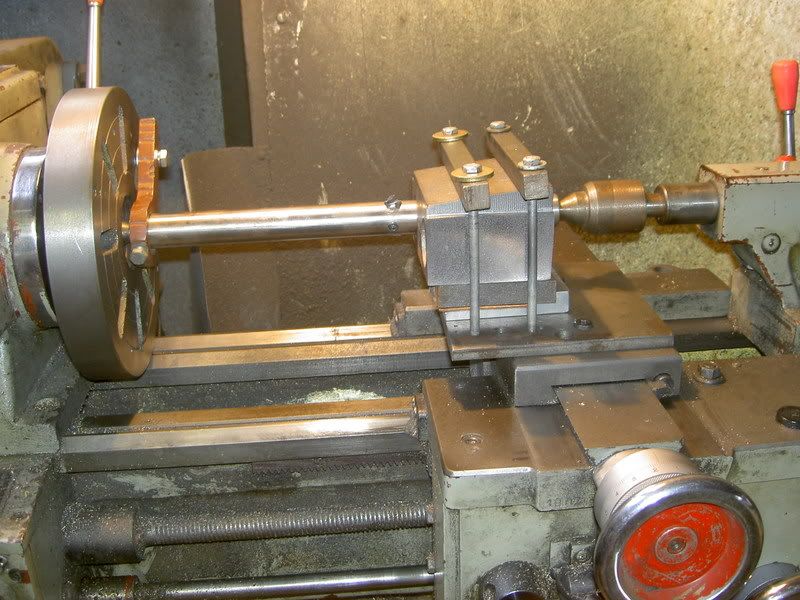
5) Mount the cylinder on the plate using any suitable surface as base and pack up the cylinder so that the centre of the bore is in line with centre of the lathe and the distance between the centre line and the base surface is as in the drawing (correct).Also ensure the bore is parallel to the lathe centerline .Ensure the cylinder REAR FACE is facing the headstock.
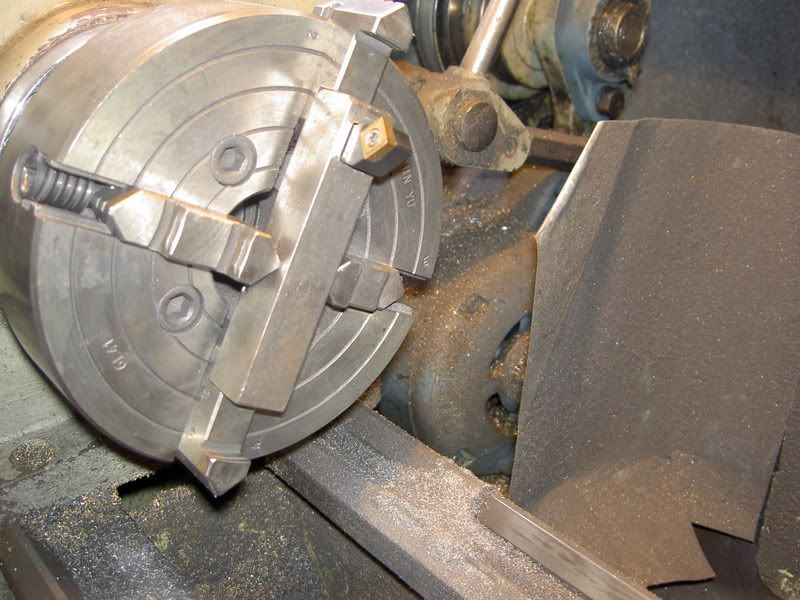
6) Now fit four jaw chuck with an off centre tool and face the rear face .Note before facing that there is no fouling and the cut can run across freely. See picture
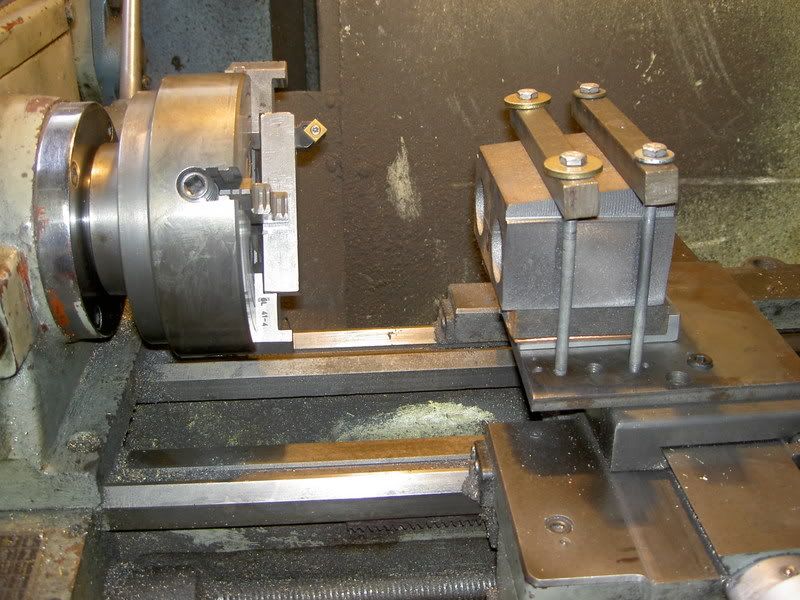
7) Remove chuck, install centre and face plate, fit live centre in tail stock, install tool between centres with driving dog, Set the tool to take 0.5 mm or 0.020” cut, select lowest speed and feed and go.
8) Now sit and have a cup of tea or do something else until the cut is done.
9) Repeat this until you are close to final cut.
10) Replace the boring bar and use the second bar to get final cut .Remove this bar and leave on the side for cylinder no 2 final cut.
11)Now mount the cylinder with front face facing the head stock and use the Morse taper tool in the tail stock to line up the cylinder and face the front face of the cylinder as in (6). Repeat this for cylinder no 2 .
For any questions please log on my website SHLEMON LIVE STEAM MODELS
This is how is done:-
1) Make two boring bars, each bar consist of a rod of suitable diameter for the job about 12” long with centre holes at both ends and one cross hole about 5” from one end for cutting tool with a grub screw at 90 degrees for locking .see picture.

2) Weld a ½”thick, 3”square plate to a Morse taper bit, hold in the lathe and face it see picture

3 ) A plate 6” square 3/8” – ½” thick is required to replace tool post .This is the plate where cylinder or any other item is mounted for milling or boring. See picture

4) Establish a datum face on the cylinder and mill a face. From this face as datum mill other faces except front and rear faces.
5) Mount the cylinder on the plate using any suitable surface as base and pack up the cylinder so that the centre of the bore is in line with centre of the lathe and the distance between the centre line and the base surface is as in the drawing (correct).Also ensure the bore is parallel to the lathe centerline .Ensure the cylinder REAR FACE is facing the headstock.
6) Now fit four jaw chuck with an off centre tool and face the rear face .Note before facing that there is no fouling and the cut can run across freely. See picture


7) Remove chuck, install centre and face plate, fit live centre in tail stock, install tool between centres with driving dog, Set the tool to take 0.5 mm or 0.020” cut, select lowest speed and feed and go.
8) Now sit and have a cup of tea or do something else until the cut is done.
9) Repeat this until you are close to final cut.
10) Replace the boring bar and use the second bar to get final cut .Remove this bar and leave on the side for cylinder no 2 final cut.
11)Now mount the cylinder with front face facing the head stock and use the Morse taper tool in the tail stock to line up the cylinder and face the front face of the cylinder as in (6). Repeat this for cylinder no 2 .
For any questions please log on my website SHLEMON LIVE STEAM MODELS


 A
A