|
|
Post by ejparrott on Aug 16, 2015 8:24:16 GMT
Found a bit of time yesterday to assemble the inner motion bracket, 7 in the evening is the start of a good time to do it, light just starting to fade off so you can see the colours. 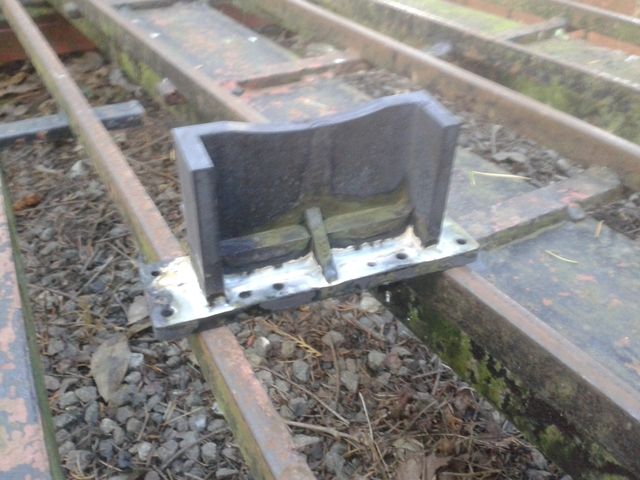 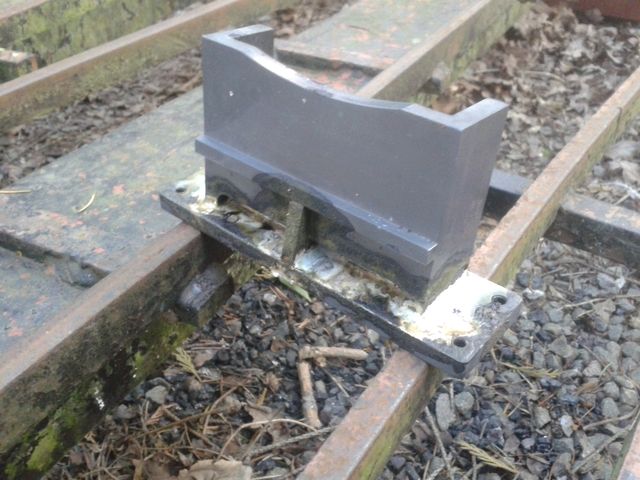 Bit annoyed I forgot to get the top of the gusset with the solder but it'll be fine. By the time it's been painted you'll never know. Need to wait for the works shotblaster to be operational again and then I can tidy it up. |
|
|
|
Post by ejparrott on Aug 24, 2015 12:02:32 GMT
Yesterday I machined the two diameters each side of the pump eccentric, this morning I went and fetched some 3/16" silver steel and then made the two studs that hold the strap halves together. I'm going to machine the diameters on the valve eccentrics next, then I'll put the pump strap up and machine the groove in it. 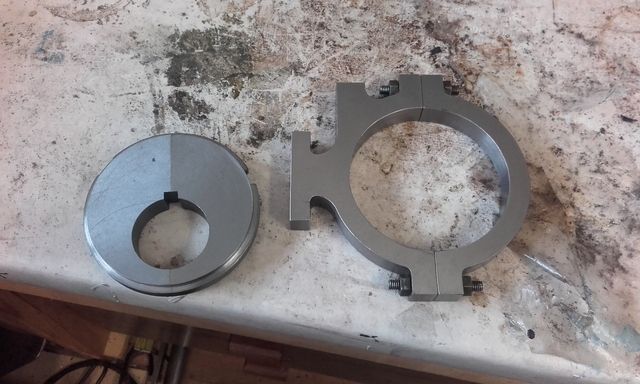 |
|
|
|
Post by ejparrott on Sept 14, 2015 11:24:45 GMT
This morning I've finished machining the valve eccentrics. Now I need to fiddle with the nuts to split them again, then I can reassemble to the axle with the smaller nuts David made for my while I was on holiday earlier in the year. 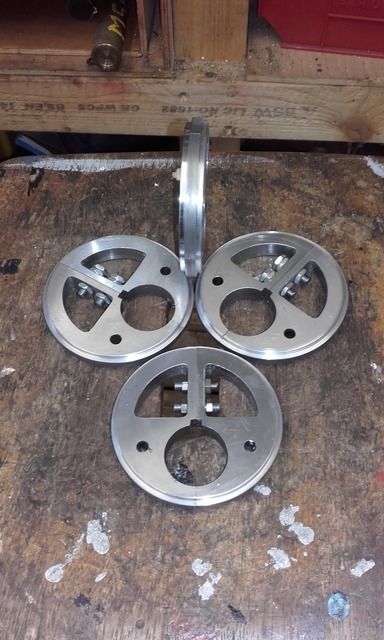 |
|
|
|
Post by ejparrott on Sept 15, 2015 18:39:27 GMT
I've got a particularly nasty programming job on at work at the moment...giving me square eyes and driving me up the wall, so I took 10 minutes out last night to put the groove in the pump eccentric strap 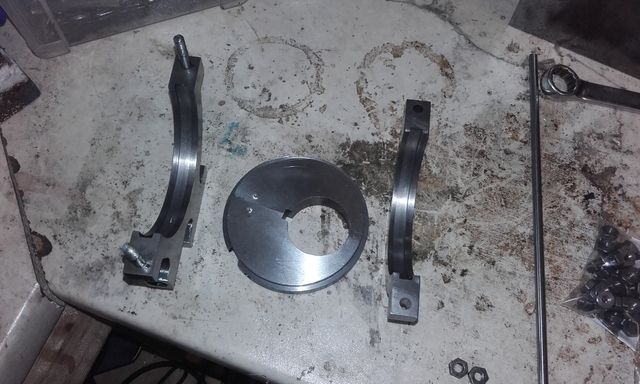 Then spent half and hour this morning fitting the two together. Little bit of fitting was required, still got a tight spot but I can't see why. Nothing too bad so I'll oil it up and see what happens when the wheels are turning. Push comes to shove I'll drop a bit of time saver in. 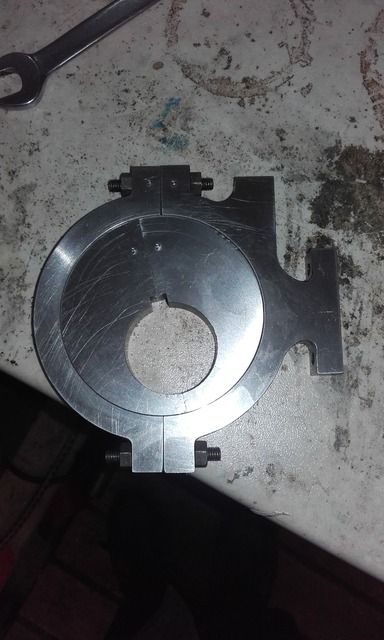 |
|
|
|
Post by ejparrott on Sept 21, 2015 8:58:29 GMT
Little bit more progress. Called in at my friendly sheet metal place on Saturday morning, picked up the folded coal bunkers. I had these laser cut about 2 years ago now and they've been sat behind the door in the bedroom...Oh yes, that's another bit that's been 'bought in' and I've not 'made myself'...well not apart from the hard work of tracking down the original drawing, measuring the prototype, creating a scale drawing, and creating a CAD drawing of it...after learning to use CAD of course.... 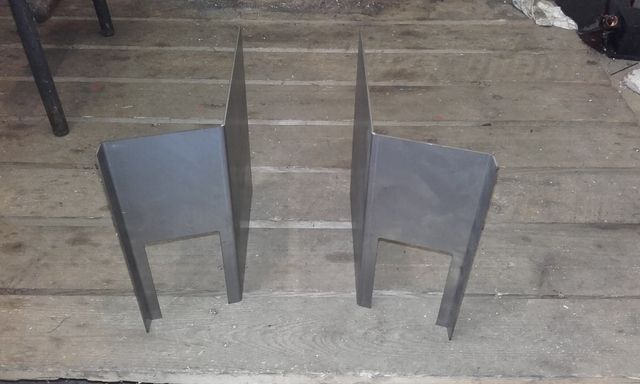 Now that I've got them in my hand, I think it's pretty certain I won't be using them for real. Capacity is going to be too low for sure, it's going to result in constant refilling and the paint on the cab front and tank is going to get damaged too quickly. I'd suspected already they weren't going to be used because of the access from the driving position, pretty certain now. After I'd finished work on Saturday morning, I set to and did some more milling for my engine. I've now finished off the boiler expansion brackets and these are ready for jig drilling the frames and then painting. You've previously seen them when I roughed them out and silver soldered on a brass slipper plate 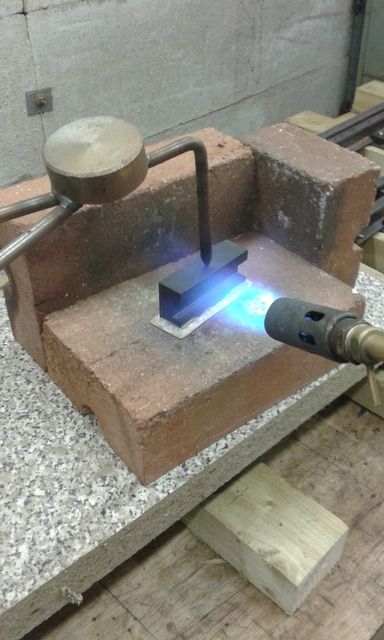 Since then I have trimmed the brass plate and skimmed the faces square again, it's a menial task that my mill is current capable of. To finish them off, I sat them on their backs and milled out the slot to the finished depth and sufficient to make the height. 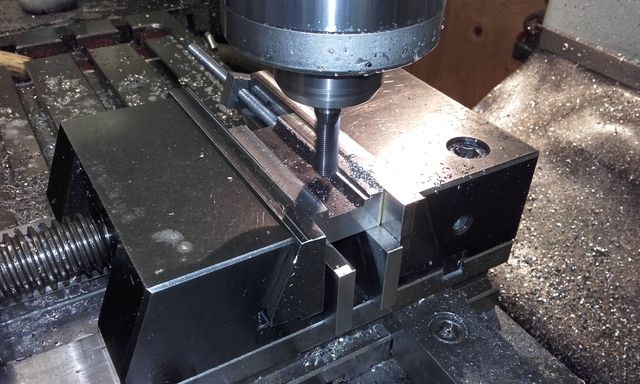 I them skimped on the photo taking, but I stood them up in the vice and clamped in the slot with a parallel, and whipped off the extra piece turning the channel into an angle. I then set them up again with the backs uppermost, and machined the width and the profile, before drilling the four holes that will bolt them to the frames.  And seeing as we STILL seem to have people who are convinced that CNC means there's a slot somewhere where you stuff in the paper drawing and miraculously the finished component comes out the other end without any kind of skilled input from the operator, you can see where I slightly cocked up to. Originally these didn't have rounded corners, but I changed my mind. I had the drawing for the next piece with me, which does have rounded corners, so rather than redraw the proper drawing I thought I'd rob the figures off that.... so I popped it in the control and ran it...luckily only .1 deep...you can see the witness on the top one...forgot that the next piece is 1/4" shorter  Here's the next piece. Just milled this on the face of a piece of bright bar and then whipped the back off. They have bent, being bright bar, but it doesn't matter for what they are. On the prototype the expansion brackets on the frames wrap around the part that is attached to the boiler, and they're mounted to the outside with bolts on the inside. I felt that it was making life (in miniature) a bit too awkward so changed the design to have four vertical studs which I could access much easier when fitting and removing the boiler, but I thought I'd add these little plates to make it look a bit more real...hopefully they'll look right when they're on.....that said...you'll not see either side of it anyway! Because they sit on the outside and under the main bracket, they're 1/4" shorter, and that's the bit I forgot when I programmed the profile on the bracket...easy done. 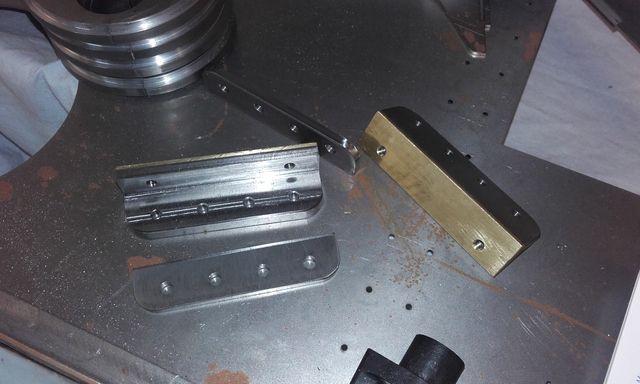 And this is how they'll fit, although not where - cab's sat on the back end at the moment and I didn't want to move it. 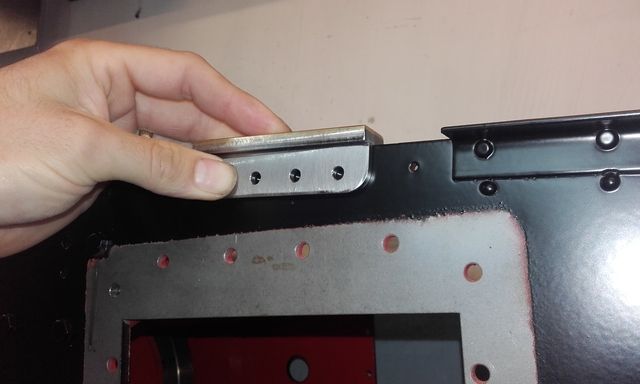 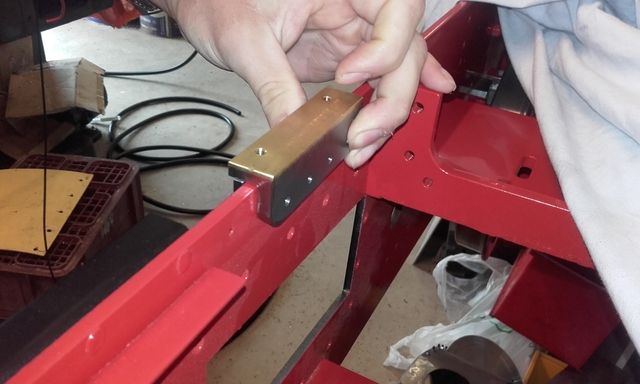 |
|
|
|
Post by ejparrott on Oct 1, 2015 10:49:51 GMT
I've been out in the workshop this morning and done a bit more work, this time on the smokebox dart. I'm building this up from some 7/16" Silver Steel, and some 30mm Silver Steel pinched from work. A slice of the 30mm 1/2" wide is drilled and tapped M8, and a corresponding length of the 7/16" is screwcut M8, maybe slightly on the sloppy side but I finished it with a die - no screwcutting tips the right pitch...long story. I've then cut the 7/16" to length, screwcut the front end to 5/16" Whitworth, and then bored a 5C square collet block from work and milled a section 5/16" square behind it for the dart handle. I'll solver solder the 2 pieces together next, then the whitworth thread is still oversize and I'll clean that up last. With the two joined together I'll then mill the 30mm bit to be flat to slide through the dart bar. 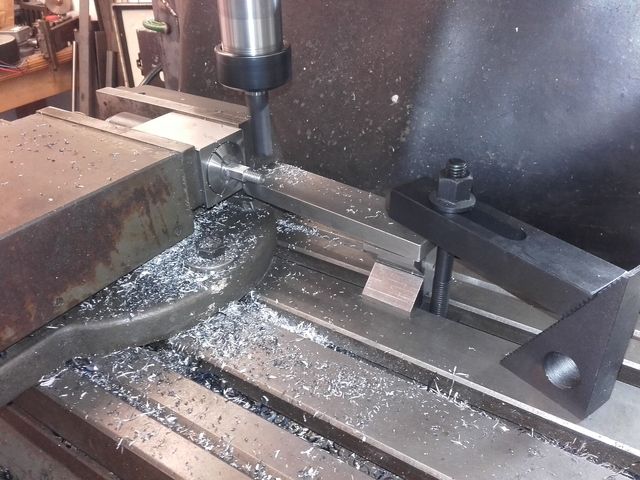 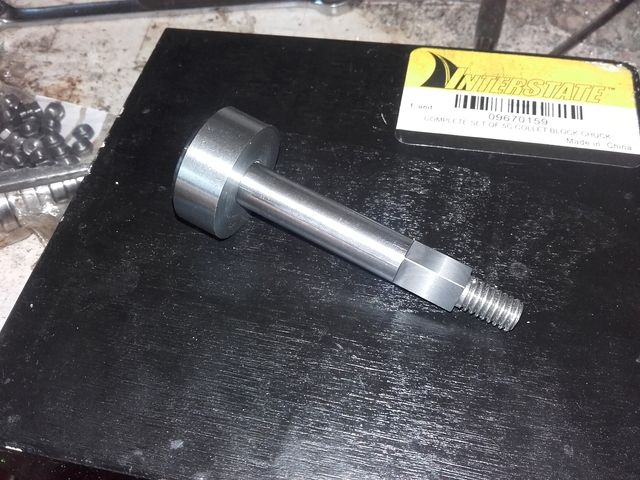 Also, had a crack with the 3D CAD to produce the model for the locking handle. On the original drawing she has a single lever handle for the dart, and a locking wheel, not the two straight handles she carries now, or even the door she carries now. As it's an incomplete drawing I've had to use what's available, and then create the missing bits from good engineering practice and by eye. I can't be sure the spokes are the right size, or even the right number, but I'm happy with it, and I challenge anyone to prove me wrong. 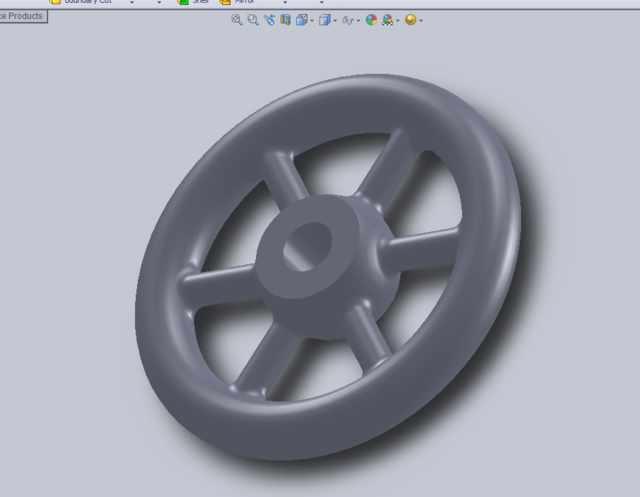 I'd like to have this in Stainless Steel, so it won't rust. I haven't got the means to make a CAM file from this which means I can't machine it from the solid. I might send it to Shapeways for 3D printing direct in Stainless, or I might see about getting a wax 3D printed which can then be lost wax cast in stainless. If I can get the two handles done I'll be happy, and if I can then get the two compound-curved hinges done as well I'll be even happier |
|
|
|
Post by ejparrott on Oct 11, 2015 13:42:34 GMT
The Facebooker's amongst us will have seen this developing, but I've finally cracked the design for the smoke-box door furniture today 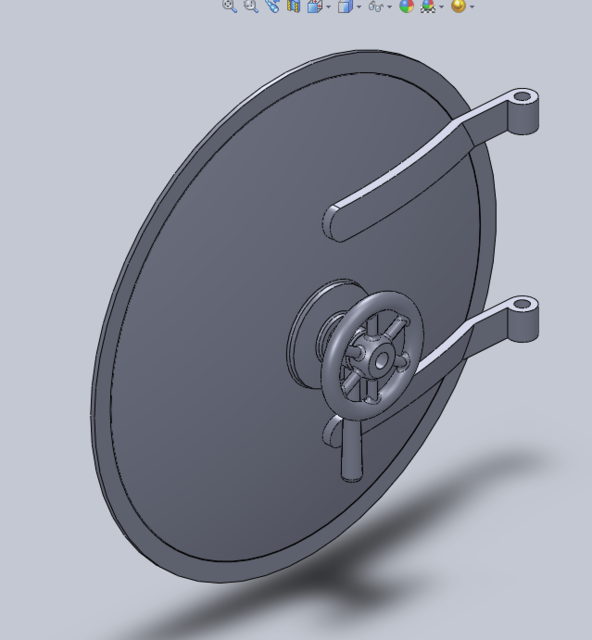 Getting there with the 3D CAD, still takes me a while to do stuff but it's happening. I now need to decided on the manufacturing method with these. I might send them off to Shapeways and see about direct printing in Stainless. It's either that or lost wax casting in Stainless. |
|
|
|
Post by Deleted on Oct 11, 2015 14:54:04 GMT
looking good Ed.....not sure I've seen this on FB?....mind you knowing how my mind works these days I've probably already liked it....lol
|
|
|
|
Post by ejparrott on Oct 11, 2015 15:44:49 GMT
It's on the 3D printing group
|
|
milky
Seasoned Member

Posts: 120
|
Post by milky on Oct 12, 2015 9:39:49 GMT
Could you post a link to the FB group on 3D printing.
Thanks
|
|
|
|
Post by ejparrott on Oct 12, 2015 10:43:04 GMT
|
|
milky
Seasoned Member
Posts: 120
|
Post by milky on Oct 13, 2015 8:29:26 GMT
It did, thanks very much. Awaiting approval to become a member.
|
|
|
|
Post by ejparrott on Mar 4, 2016 13:14:55 GMT
Just a little update, now I've finally found my thread, residing on page 9 of the board!
I've just placed an order with Michael in New Zealand for the 4 bits of furniture for the smokebox door. He sent me a very nice price which I couldn't resist, and which has nicely lifted my spirits this morning after my 2 day's in bed. It's progress, albeit very small.
However!
The milling machine has come to life over the last fortnight (apart from the last 2 days obviously!) and it won't be long before I can start making some real progress on the engine again. I've a few bits to get out of the way for the club, and I've promised David a few bit's for his 9F too, if I can find a tool with 3mm corner rad, I've got a plan in my head for doing the brake hangers next. They've been rough machined and stress relieved quite some time ago, just waiting for the mill to become available.
Watch this space!
|
|
|
|
Post by Roger on Mar 4, 2016 13:41:25 GMT
Just a little update, now I've finally found my thread, residing on page 9 of the board! I've just placed an order with Michael in New Zealand for the 4 bits of furniture for the smokebox door. He sent me a very nice price which I couldn't resist, and which has nicely lifted my spirits this morning after my 2 day's in bed. It's progress, albeit very small. However! The milling machine has come to life over the last fortnight (apart from the last 2 days obviously!) and it won't be long before I can start making some real progress on the engine again. I've a few bits to get out of the way for the club, and I've promised David a few bit's for his 9F too, if I can find a tool with 3mm corner rad, I've got a plan in my head for doing the brake hangers next. They've been rough machined and stress relieved quite some time ago, just waiting for the mill to become available. Watch this space! Glad you hear the head's stopped pounding. Can't you 3D machine the radius with any cutter you like? Sometimes I even use a flat bottomed cutter to create the radius, just use a finer feed than usual. |
|
|
|
Post by ejparrott on Mar 4, 2016 13:49:35 GMT
Walking before running Roger, walking before running!
The machine certainly is capable of doing that, it is a full 3-Axis machine. I certainly do have 3-axis programming skills...in as much as I did the course about 6 years ago, but I've not used it since! It's one of the things I need to re learn, but for now, using the built in CAM and a cutter with a rad will do what I want. Once I've got used to the machine then I will tackle full on 3D jobs.
|
|
|
|
Post by GWR 101 on Mar 4, 2016 14:08:58 GMT
Ed sorry to hear you have been unwell, keep up the good work on the 7 1/4" it will be some impressive locomotive. We are fitting cylinders at present but have found the smoke box support brackets do not allowing as much clearance when removing the valve chest covers as we would like. So looks like some milling required on the "big" miller on Sunday. Regards Paul
|
|
|
|
Post by vulcanbomber on Mar 4, 2016 16:23:44 GMT
There's probably 3mm here or at least 1/8th...
|
|
|
|
Post by ejparrott on Mar 4, 2016 17:54:16 GMT
1/8" would be ok  |
|
|
|
Post by vulcanbomber on Mar 4, 2016 18:23:34 GMT
All you need to do now is ask nicely.... Or remind me Monday morning.
|
|
|
|
Post by ejparrott on Mar 5, 2016 9:22:21 GMT
I'll make your tea |
|


