jma1009
Elder Statesman

Posts: 5,901
|
Post by jma1009 on Nov 16, 2014 11:55:28 GMT
hi paul,
i dont want to re-open the wheel tread debate, but i would machine your drivers truck wheels to the same profile as used on your club passenger trolley wheels.
cheers,
julian
|
|
|
|
Post by GWR 101 on Nov 16, 2014 13:02:40 GMT
Many thanks Julian, I shall check that out on Tuesday.I have turned the profile on 3 of the 4 for 5" gauge for the elevated track which is for use with the Juliet which has tapered treads so I am hopefull that it will be ok. The blanks for the 7 1/4" ground level track are only roughed out at present so they can be either, if I recall correctly the elevated track is rail section but the ground level is flat bar so they could be different. Regards Paul
|
|
|
|
Post by GWR 101 on Nov 16, 2014 13:54:13 GMT
Julian just a quick update, I have managed to get a photo of the club's 7 1/4" gauge wheel and axle checking gauge and it has an angle on the treads, for both the standard and narrow gauge wheel arrangements. I will still enquire regarding this on my next visit, apologies for the quality of the photo's and to Dan for high-jacking his thread (again). Regards Paul 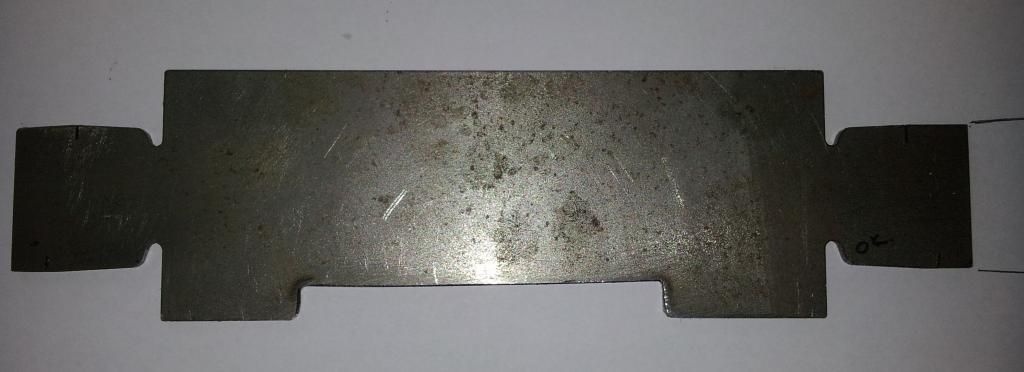

|
|
dc309
Seasoned Member

Posts: 146 
|
Post by dc309 on Nov 16, 2014 19:30:42 GMT
Hi all, many thanks for your replies! I only managed a few hours in the workshop today - After a tidy up, I got the backs and flanges "skimmed", got the 4 jaw up on the lathe and was half way through setting the first wheel up before I was called away  I wish somebody would stop stealing my weekends... It only seems 2 minutes since it was Friday afternoon! |
|
|
|
Post by GWR 101 on Nov 16, 2014 23:35:43 GMT
Dan it goes like that sometimes, but any progress no matter how small is an achievement and the satisfaction you get when a part is completed, well as the saying goes "that's priceless" Regards Paul
|
|
dc309
Seasoned Member
Posts: 146
|
Post by dc309 on Nov 22, 2014 18:51:49 GMT
Got a few hours in the workshop and managed to get my wheels machined!  I'm not entirely happy with them, but they'll have to do - I do have to get 1 replacement casting as I misread the dial for the first one and took 100 thou too much off the length which is pretty disappointing  Crankpin holes still to be machined. I'm thinking about getting the frames painted pretty soon, I don't have a spray gun but I'll probably give aerosol cans a go. For the main colour I'm taught between S&DJR blue, as seen on No.88 at the West Somerset, or Umber Brown! (Well, the Halfords/B&Q equivalent anyway!) Here's a picture anyhow   |
|
|
|
Post by Rob on Nov 22, 2014 20:47:01 GMT
Looking good Dan, how did you find doing the radius' on the flanges? Did you grind up a custom tool? Don't feel too bad about the casting, I killed one of my hornblock castings when something moved in the less than rigid setup I had been using a vertical slide in the Myford |
|
smallbrother
Elder Statesman
Errors aplenty, progress slow, but progress nonetheless!
Posts: 2,269
|
Post by smallbrother on Nov 22, 2014 21:38:56 GMT
After hours of painstaking work trying to square up the buffer beams to the frames, I discovered one of the frames has a bit of a warp. No wonder the one end would not line up true. Aaaaarrrrrgggghhhhhh.
Another lesson learned. Spy down the length of the frames before attempting to fix the buffer beams.
Pete.
|
|
|
|
Post by Roger on Nov 22, 2014 22:04:48 GMT
Good progress Dan, and don't ponder too long over things that don't work out right. Everyone does it even if we don't always broadcast the fact. It's best glossed over once you've learned the lesson else it can put a real blight on what was otherwise a positive session. I don't know why, but it's human nature to beat ourselves up more readily than give ourselves credit and a pat on the back.
I messed up a horn block and asked the nice lady at Reeves how often it happens. I'm assured that it's very common indeed and some people have been back so many times it's embarrassing. Such is life.
|
|
dc309
Seasoned Member
Posts: 146
|
Post by dc309 on Nov 23, 2014 8:56:44 GMT
I filed the radius on by hand and used a radius gauge to check it. Easier than grinding a tool to suit! I'm sure it won't be the last cockup but I'll be more cautious next time!
|
|
|
|
Post by GWR 101 on Nov 23, 2014 12:38:05 GMT
Hi Dan, there is a saying "that the only ones who have never made a mistake are those who have never done anything".  Looks like with the help of our friend in the south doing some design work I will be making a new exhaust system to replace the 'T' on the original drawings. I will keep you posted but I am not sure of the steam chest design on your version so you may need to make additional mods, that's assuming yours isn't already ok. Regards Paul |
|
dc309
Seasoned Member
Posts: 146
|
Post by dc309 on Nov 23, 2014 20:24:00 GMT
I'm a bit undecided whether to go down the slip eccentric route as it is a lot simpler and I guess for an engine this small it won't matter so much. We shall see!
|
|
|
|
Post by Roger on Nov 23, 2014 20:52:07 GMT
I'm a bit undecided whether to go down the slip eccentric route as it is a lot simpler and I guess for an engine this small it won't matter so much. We shall see! I think you'll enjoy the driving experience more to have a reversing lever to deal with too. If you're going to do an LBSC style imagining being on the footplate of the real thing, you'll need all the controls. |
|
dc309
Seasoned Member
Posts: 146
|
Post by dc309 on Nov 26, 2014 16:37:34 GMT
Waiting for my replacement wheel casting to arrive, so I've started to make the hornguides. I did originally have the castings for this but there was so little meat on them, mixed with my inexperience rendered them scrapped! I got some 2" x 3/8 flat steel from a local fab shop (which cost me the price of a pint) and started to make them out of this. Marked out and cut out by hand leaving a 1/16" machining on them which was just right (for once). I machined around the edge to slot it into the frame and then drilled and fastened them in position with M4 countersunk bolts. The axle boxes slide up and down lovely with very little play in them! I'll upload a picture of them shortly Dan |
|
|
|
Post by Roger on Nov 26, 2014 18:17:20 GMT
It's quite lot of work machining from solid without CNC. You need a capable mill and a rotary table to be able to offer the job to the cutter at the right angles. If you take your time and plan out how you are going to hold it for each operation then you can do it. I mounted mine on a mandrel and everything was referenced to the centre of that and one end
|
|
dc309
Seasoned Member
Posts: 146
|
Post by dc309 on Nov 26, 2014 18:27:25 GMT
I used my friends workshop this afternoon, he's got a nice big Chester Mill and a Chester lathe. They have turned out nicer than I expected though and will be far sturdier |
|
|
|
Post by Roger on Nov 27, 2014 9:06:55 GMT
There's no substitute for a big mass of metal in the construction of a mill or lathe. You can't easily boss metal around unless you're a lot stronger than what you're cutting!
Somehow the SmartPhone I borrowed to use while I was away made me thing your previous post was about machining cylinders from solid, hence the slightly obscure reply. Take no notice, I momentarily lost the plot.
|
|
|
|
Post by ejparrott on Nov 27, 2014 9:46:39 GMT
As opposed to the rest of us.....never had the plot....
|
|
dc309
Seasoned Member
Posts: 146
|
Post by dc309 on Nov 27, 2014 18:49:44 GMT
What day is it again...?
|
|
|
|
Post by Deleted on Nov 28, 2014 2:08:27 GMT
PAYDAY !!!
|
|


 I'm not entirely happy with them, but they'll have to do - I do have to get 1 replacement casting as I misread the dial for the first one and took 100 thou too much off the length which is pretty disappointing
  Crankpin holes still to be machined.


 Looks like with the help of our friend in the south doing some design work I will be making a new exhaust system to replace the 'T' on the original drawings. I will keep you posted but I am not sure of the steam chest design on your version so you may need to make additional mods, that's assuming yours isn't already ok. Regards Paul