|
|
Post by springcrocus on Nov 16, 2019 11:04:58 GMT
I like the way that you make the ring but would I need to use the tailstock as you have done ? Jock, I am just using the centre as a safety device. Trepanning is, in my opinion, one of the lathe operations most likely to go wrong. I have seen some major crunches back when I had my factory and it invariably ended in a broken tool at least and damaged chuck or toolpost at worst with a lump of metal flying through the air. Regards, Steve |
|
|
|
Post by Jock McFarlane on Nov 16, 2019 19:16:42 GMT
I like the way that you make the ring but would I need to use the tailstock as you have done ? Jock, I am just using the centre as a safety device. Trepanning is, in my opinion, one of the lathe operations most likely to go wrong. I have seen some major crunches back when I had my factory and it invariably ended in a broken tool at least and damaged chuck or toolpost at worst with a lump of metal flying through the air. Regards, Steve Steve , Thanks for the enlightenment. Its always better to be forewarned of these dangers rather than finding out the hard way ! Use of the G clamp also noted. Regards Jock |
|
jma1009
Elder Statesman
  
Posts: 5,922
|
Post by jma1009 on Nov 17, 2019 0:18:59 GMT
"We are going to need some more solder around the firehole but it has probably sealed already because of the shoulder on the firehole ring." Read more: modeleng.proboards.com/thread/10476/5-gauge-britannia-build-diary?page=47#ixzz65UJtMaRTI hope I am proved wrong, Steve, but you have a big challenge there with the firehole ring into the backhead! Plus no foundation ring sections silver soldered at all yet. No doubt easy to rectify with Oxy-acetylene, but with propane...? And what of your comment "has probably sealed"? If the silver solder hasn't penetrated, or there is no silver solder, it is a bad joint. Full stop. Same comment for the foundation ring sections. In my experience the foundation ring sections are the most problematic plus the firehole ring to backhead, if not tackled in the right order. You might just 'get it done' if you can get hold of 8 or 10 rods of large diameter old Easyflo 2, with very very careful work with propane, without causing most of what you have already done to melt, and the endless chasing up of leaks on test of stay heads and much else. If I had presented a firehole door to backhead as exemplified in your pics of 9th November lacking silver solder, and all those stay heads showing no signs of silver solder, to IWMES boiler inspector Arthur Grimmett, he wouldn't have even bothered to test it and it would have been a 'window job' if Arthur could lift it. Cheers, Julian |
|
|
|
Post by springcrocus on Nov 17, 2019 18:37:52 GMT
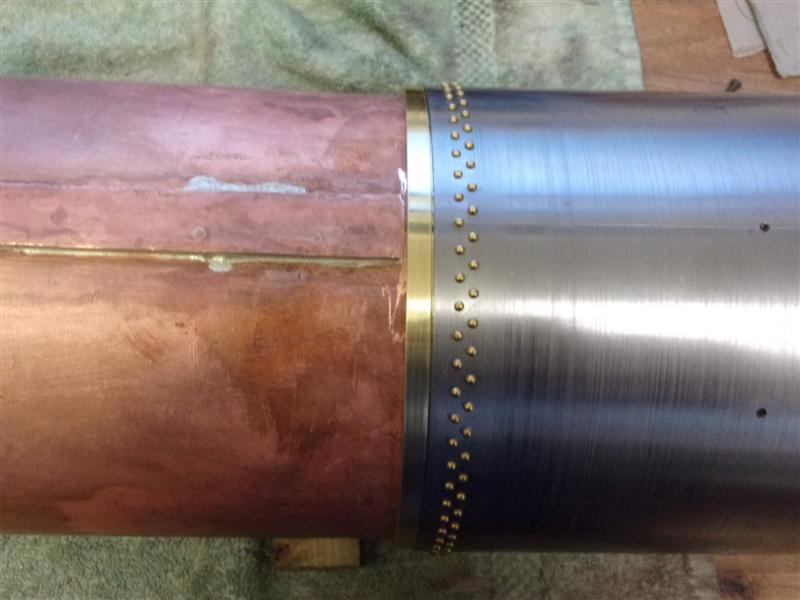
After scratching around for something to act as a faceplate - I don't have a proper faceplate for this lathe - I gave up and decided to hold it as loose as I dare and turn the diameters with very gentle cuts. The first operation was face, turn the O/D to forty five thou below the smokebox diameter for the cladding and bore to suit the O/D of the boiler. I had to use 3mm packers to bring the ring forward enough to machine the O/D which were, obviously, removed before starting the lathe.  Second op was to hold in the previously turned bore and turn the O/D to the bore diameter of the smokebox, looking for a snug fit.  The front of the boiler barrel was a little out-of-round after all the work of late so had to be gently tapped to shape until it fitted firmly to the ring. This will be soldered into place a little later.  Mind you, now that Julian has trashed my boiler maybe I shouldn't be wasting my time with this.  Steve |
|
|
|
Post by Jim on Nov 17, 2019 20:13:04 GMT
It all looks brilliant Steve and I'm sure, as are others on this site that you boiler will pass with flying colours and be an inspiration for many.
Jim
|
|
|
|
Post by simplyloco on Nov 17, 2019 20:28:37 GMT
It all looks brilliant Steve and I'm sure, as are others on this site that you boiler will pass with flying colours and be an inspiration for many.
Jim
Agreed. John |
|
|
|
Post by coniston on Nov 17, 2019 22:40:55 GMT
Excellent and inspirational work, just lovely seeing how others tackle different operations. I will be building a Pansy boiler sometime in the future so following this part with particular interest. Keep it up please.
Chris D
|
|
|
|
Post by springcrocus on Nov 22, 2019 19:28:06 GMT
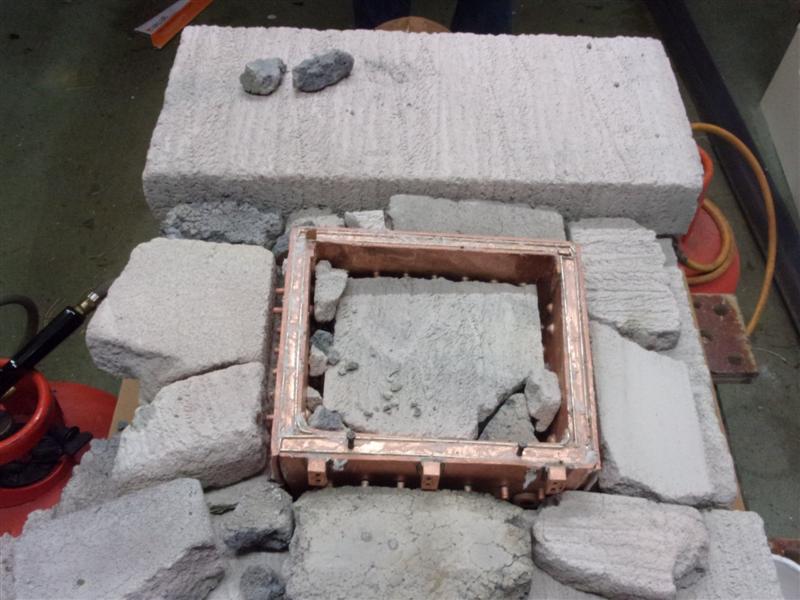
The sections for the foundation ring are made from 10mm square copper bar except for the rear section which is 1/2" bar. This is to compensate for the slightly shorter base of the inner firebox. Although they are a tight fit in the spaces, I have used a pair of bronze 4BA screws to hold each piece against the outer wrapper. There are also two offset holes in the upper of the rear section to enable removal prior to soldering. All of these holes are blind, of course.  Generous chamfers have been filed on the upper edges to create a well for the solder to lay into and assist making the fillet and light sawcuts down the sides to encourage solder flow into the joints. Wedges have been fashioned to fill the corners and are slightly tapered so that they can be gently tapped into place at the right time.  The parts were assembled dry to check the fit and the sides tapped up tight to the bars. 4BA screws have been set in the final section to aid removal.  After fluxing and reassembly, the boiler was set up on the hearth with the grate area pointing upwards. Thermal blocks were packed all around and in the firebox leaving just the top inch or so of the foundation ring area showing. 1.5mm dia rods of 55% silver solder were laid in the gulleys on each side of the segments and another generous helping of flux added all round.  The next picture shows how we packed the whole boiler in thermal blocks leaving just the top section showing for heating.  Using both torches the exposed areas were heated gently until the flux started to melt, then the power was increased and we quickly brought the working area up to temperature. My colleague worked the outside with the 2943 burner and I worked the inside with the same size burner. Concentrating on one segment at a time, we were able to chase the melt around the box, starting above the blowdown bush at the front, going clockwise around the ring and finishing back at the blowdown bush. The thinking here was that we didn't want to have a re-melt in the corners because of the filler pieces, much safer to have any re-melt in the middle of a segment. This picture was taken a few seconds after finishing.  And that's it! We had already done the front of the longitudinal stays last week and I did a few touch-up jobs during the week. This went into the pickle after cooling and will be inspected in the morning. There's bound to be some leaky joints and some weeping stays that will need attention and these will come to light during testing. Steve |
|
|
|
Post by springcrocus on Nov 23, 2019 22:07:11 GMT
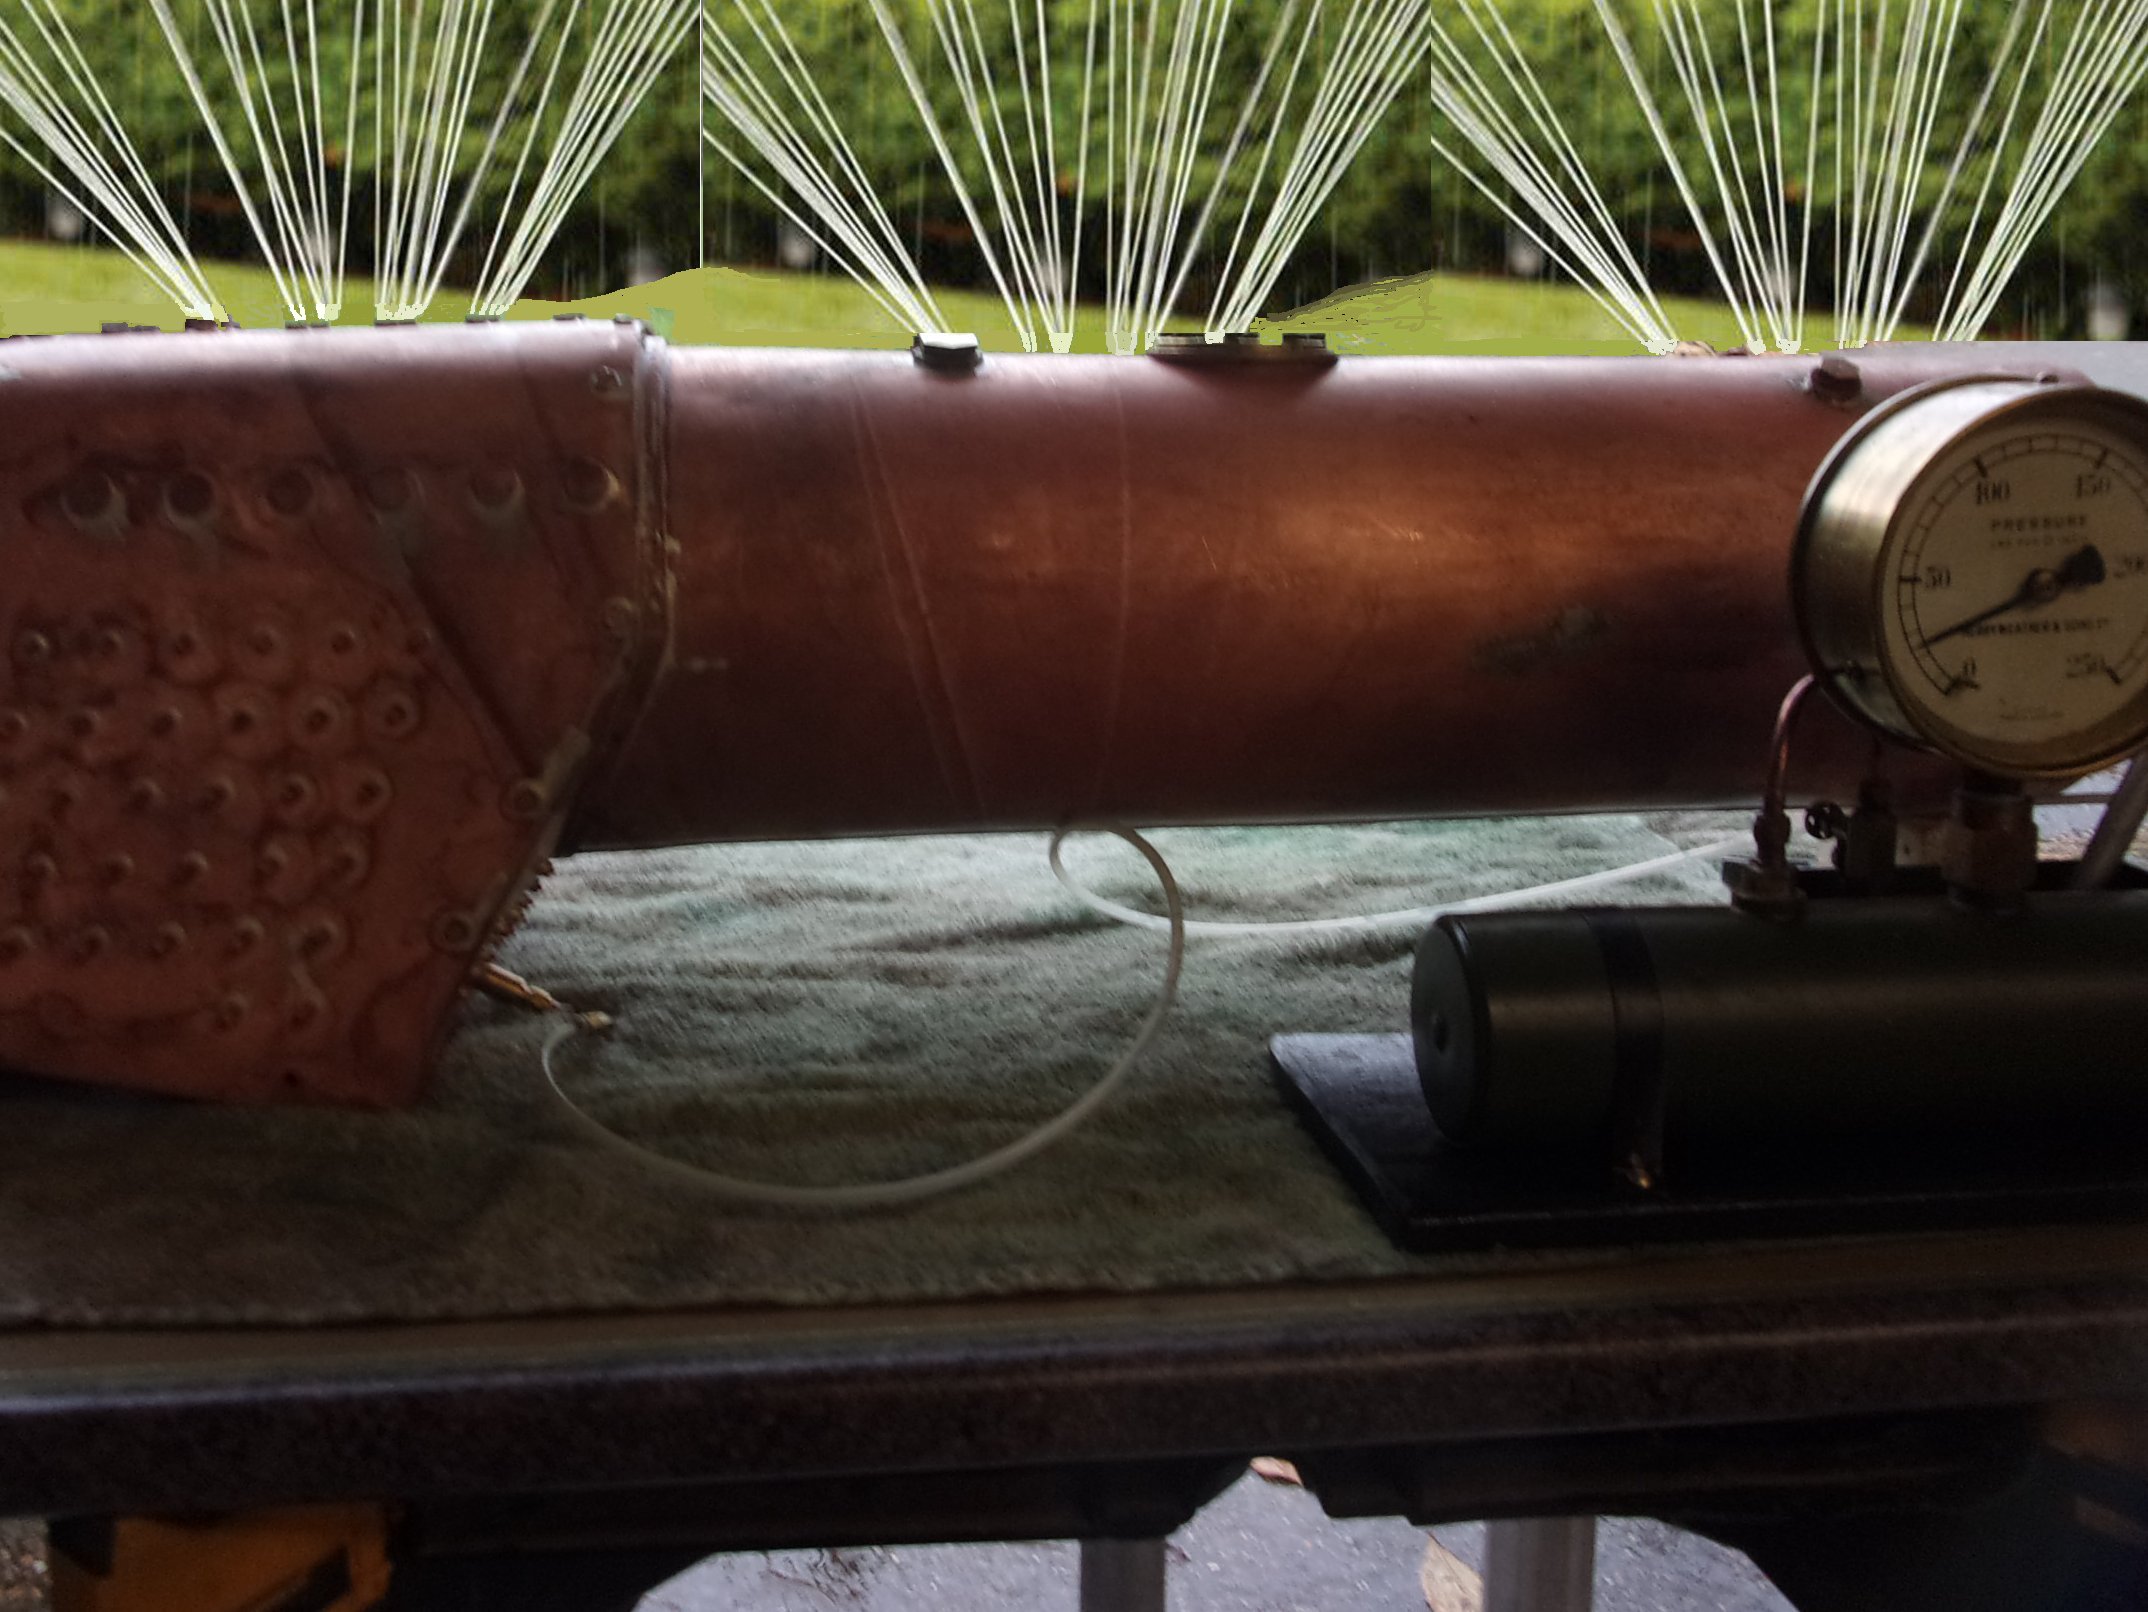
So today I filled the boiler with water and hooked it up to the test rig. As the pressure increased there was a small escape of water but, with some vigorous pumping, I was able to maintain a pressure of 25 psi for about five minutes, after which time I was puffed out.  There is obviously an issue here that needs addressing but there is a reasonably simple solution. I shall now return to the workshop and make a bigger pump. Steve |
|
twombo
Seasoned Member

Posts: 120 
|
Post by twombo on Nov 23, 2019 22:09:42 GMT
Steve.
From this vantage point, she looks really good! When she is Cool and all cleaned up. I think your “Eyeball, Mk. 1” will get a good workout! The spelter seems to have made good use of its Capillary nature. It certainly looks, based on your description, that the joints took the expected amount of alloy, but not excessively or, unexpectedly,so! The extra effort you are taking in the ‘fitup’ is something Expressed as essential by every great writer on the subject.
Fit it well, keep it clean, and control the heat! Your practice and Great team effort, is really the added Advantage, that keeps growing! I keep getting out Alec Farmers book and Comparing notes with your work! Some techniques are, simply, universal! Currently looking for a source for those thermaliteBlocks. Here in the US.
It is almost as difficult as finding a Myford! DAMMIT! Pardon my “French!” HAHA,
Keep at it, Sir! Loving the “Film!
Mick
|
|
jma1009
Elder Statesman
  
Posts: 5,922
|
Post by jma1009 on Nov 23, 2019 22:56:06 GMT
Hi Steve,
Looks like you borrowed the IWMES test rig made by Arthur Grimmett and Freddy Dinnis. It does not need a bigger pump. It can cope with a 5"g loco with a leaky regulator. I won't comment further.
Cheers,
Julian
|
|
|
|
Post by simplyloco on Nov 23, 2019 23:15:17 GMT
Hi Steve, Looks like you borrowed the IWMES test rig made by Arthur Grimmett and Freddy Dinnis. It does not need a bigger pump. It can cope with a 5"g loco with a leaky regulator. I won't comment further. Cheers, Julian Why the unpleasantness? Steve is doing his best to pass on his knowledge, as I and other like me do, and all you can do is criticise. Such behaviour is certainly not in the spirit of this forum, and similar past utterances by you and others like you have driven away many valuable contributors. John |
|
jma1009
Elder Statesman
  
Posts: 5,922
|
Post by jma1009 on Nov 23, 2019 23:51:47 GMT
Hi John,
Pure statement of fact, as I have not seen the IWMES test rig for boiler testing for some 17 years, and noticed it's appearance in Steve's pic.
The IWMES test rig that is in Steve's pic could cope with some significant leaks. It does not require a bigger pump. I used it for 16 years on boiler tests.
In the nicest possible way I suggest you consider editing your above post. I personally don't worry at all what you and Steve say about me on here, but what you have implied in your post needs reconsidering, as it affects how others might consider things.
Cheers,
Julian
|
|
|
|
Post by Cro on Nov 24, 2019 9:28:51 GMT
All I need to say here Julian is, Steve was joking....
But your posts do come across as harsh criticism on occasions, support and a helping hand instead of I told you so’s make a big difference.
Keep it up Steve. Great work so far and no doubt nothing you can’t handle.
Adam
|
|
johnthepump
Part of the e-furniture
 Building 7 1/4"G Edward Thomas
Posts: 494 
|
Post by johnthepump on Nov 24, 2019 10:56:46 GMT
The IWMES test rig mentioned, I have known from the 1970's. In recent times it had become worn out and seldom used. One of the Wednesday team who is also one of our boiler inspectors took away for a complete strip-down overhaul and paint. the pressure gauge was brought to the Pumphouse to be checked against mine which is which is sent away for calibration as required in the boiler test code 2018 (white book). The IWMES test rig is now available for members to pretest their boilers before submitting them to the boiler inspectors.
I do feel that Steve apparent boiler leak would be much reduced if he turned the garden hose sprinkler off.
Regards John.
|
|
|
|
Post by delaplume on Nov 24, 2019 11:20:30 GMT
April 1st has come early it seems ??......Nice one Steve !!...LoL
|
|
JonL
Elder Statesman
   WWSME (Wiltshire)
Posts: 2,990
Member is Online
|
Post by JonL on Nov 24, 2019 11:41:00 GMT
That did give me a chuckle!
|
|
|
|
Post by gwr14xx on Nov 24, 2019 12:40:17 GMT
These 'Islanders' have a wonderful sense of humour, but apparently, it tends to evaporate when they emigrate too far west!
|
|
|
|
Post by springcrocus on Nov 24, 2019 13:33:48 GMT
Oops! Too big.  Hi Steve, It does not need a bigger pump. Cheers, Julian Hook, line and sinker! Yes, there are a couple of small leaks, one next to one of the infill segments in the foundation ring and the blowdown bush has lost some of it's solder, probably because it got too hot. It was the start and finish point, after all, and both should be relatively simple to fix. I would also expect to see a few weeping stays once pressure is applied. I will document and photograph the fixes as they get done but I have a busy week ahead so not much will get done before Friday. Steve |
|
twombo
Seasoned Member

Posts: 120 
|
Post by twombo on Nov 24, 2019 20:43:52 GMT
Hi Steve!
As you have stated, you are in ongoing consultation. with your boiler inspector, no worries, here! Your picture is HILARIOUS!.
Yes, Sir, Captain, HOOK, line, and ‘Sink Her!”
COLANDER, my ‘RRRRS’! HAHA!
I was not sure what what “eye” was seeing in the ‘phirst’ photo!
If my little ‘tea Kettle’ is half as nice as your work... I will be... Doubly pleased! And grateful for your sharing!
Cheers!
Mick
|
|