

Post by mbrown on Jun 12, 2016 18:57:09 GMT
I promised I would start some threads on the boiler fittings on my Burma Mines 0-6-0. I thought I'd start with the pressure gauges as the other fittings are all assembled and I don't want to dismantle them until after she's been steamed.
Commercial pressure gauges are unrealistically deep and have a clumsy union fitting. Doug Hewson, in his Standard 4 series, showed how to add a brass ring to represent the flange but he didn't modify the union. My gauges are commercial 3/4" ones and my flange is turned from cored brass bar, just under 1" dia, parted off at about 3/64" thick. It has three 1/32" brass rivets in it to represent the screws.
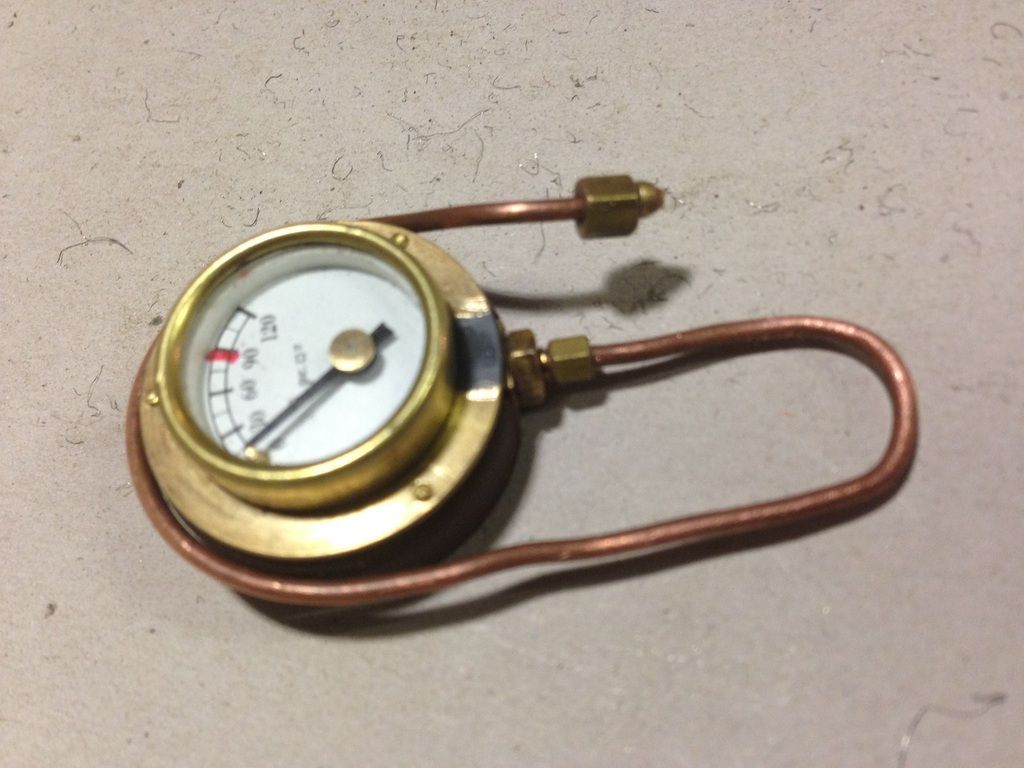
I wanted a much smaller union - 6BA for a 1/16" copper syphon tube. Having practiced on an old gauge, I know it works and I have used this technique on both the vacuum and the pressure gauges on the current model.
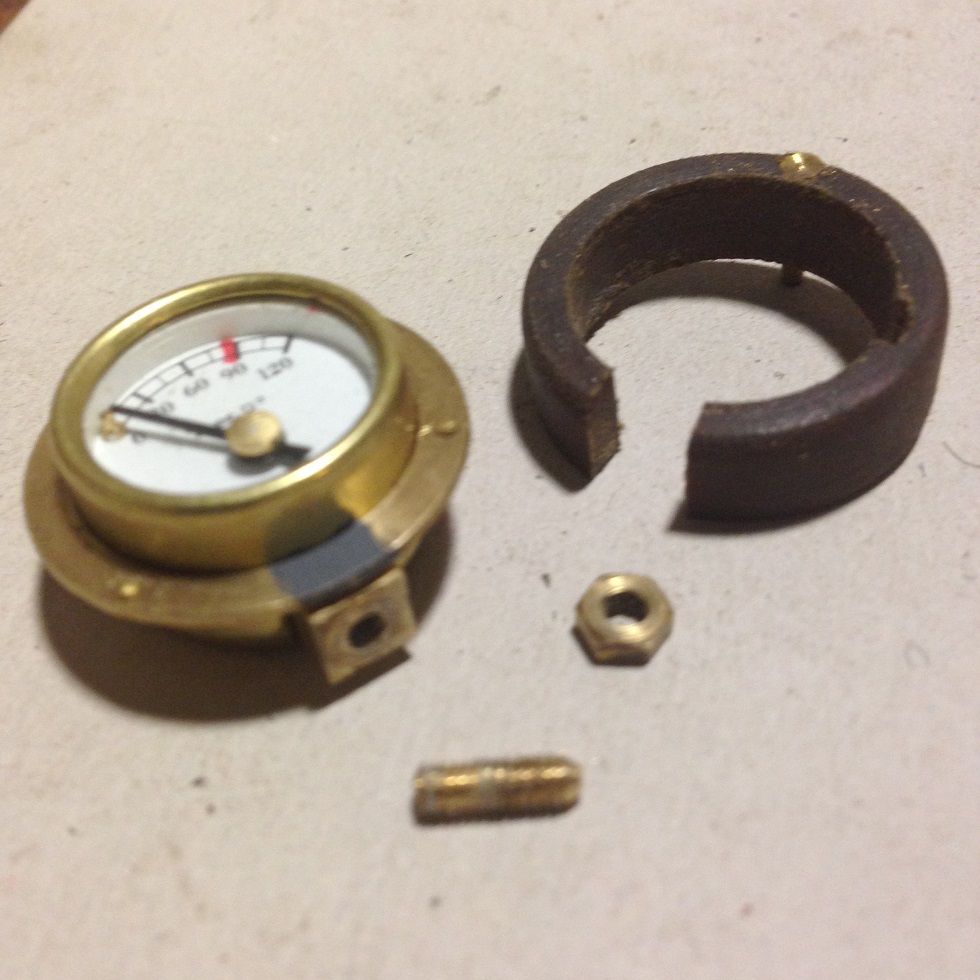
I cut off the 3/16" x 40 threaded tail with a fine piercing saw and smoothed the end with a few strokes of a needle file. I tried at all times to ensure that chippings fell outwards and didn't go up into the Bourdon tube - they may have shaken out, but it seemed sensible to avoid them getting into the mechanism in the first place. On my practice gauge, holding it in the vice cracked the glass (although I did make a new one OK) so using the pin vice enabled me to hold the gauge lightly in the other hand. I opened out the hole to 6BA tapping size using successively larger drills in a hand-held pin vice for the same reason, and tapped it 6BA being careful not to go too far in and damage anything. The stem is a short length of 6BA threaded brass drilled through at No.60 and screwed in with a small trace of liquid thread seal and a 6BA brass half nut as a lock nut.
The whole thing sits in a ring turned from Tufnol, 1" dia, with a cut out to accommodate the tail of the gauge. The Tufnol ring is screwed to the cab front with a 10BA brass screw which is concealed when the gauge is in place and looks like the wooden back plate on which prototype gauges would be screwed.
The one thing wrong is, of course is that the flange comes in front of the union connection, and I felt this looked wrong - hence the dab of paint which just completes the optical illusion.
It was all a bit heart-in mouth as a pressure gauge is not so cheap that you can risk writing one off - but this worked for me and I think they look the part.
Malcolm

Commercial pressure gauges are unrealistically deep and have a clumsy union fitting. Doug Hewson, in his Standard 4 series, showed how to add a brass ring to represent the flange but he didn't modify the union. My gauges are commercial 3/4" ones and my flange is turned from cored brass bar, just under 1" dia, parted off at about 3/64" thick. It has three 1/32" brass rivets in it to represent the screws.
I wanted a much smaller union - 6BA for a 1/16" copper syphon tube. Having practiced on an old gauge, I know it works and I have used this technique on both the vacuum and the pressure gauges on the current model.
I cut off the 3/16" x 40 threaded tail with a fine piercing saw and smoothed the end with a few strokes of a needle file. I tried at all times to ensure that chippings fell outwards and didn't go up into the Bourdon tube - they may have shaken out, but it seemed sensible to avoid them getting into the mechanism in the first place. On my practice gauge, holding it in the vice cracked the glass (although I did make a new one OK) so using the pin vice enabled me to hold the gauge lightly in the other hand. I opened out the hole to 6BA tapping size using successively larger drills in a hand-held pin vice for the same reason, and tapped it 6BA being careful not to go too far in and damage anything. The stem is a short length of 6BA threaded brass drilled through at No.60 and screwed in with a small trace of liquid thread seal and a 6BA brass half nut as a lock nut.
The whole thing sits in a ring turned from Tufnol, 1" dia, with a cut out to accommodate the tail of the gauge. The Tufnol ring is screwed to the cab front with a 10BA brass screw which is concealed when the gauge is in place and looks like the wooden back plate on which prototype gauges would be screwed.
The one thing wrong is, of course is that the flange comes in front of the union connection, and I felt this looked wrong - hence the dab of paint which just completes the optical illusion.
It was all a bit heart-in mouth as a pressure gauge is not so cheap that you can risk writing one off - but this worked for me and I think they look the part.
Malcolm
