|
|
Post by keith1500 on Apr 3, 2020 22:48:31 GMT
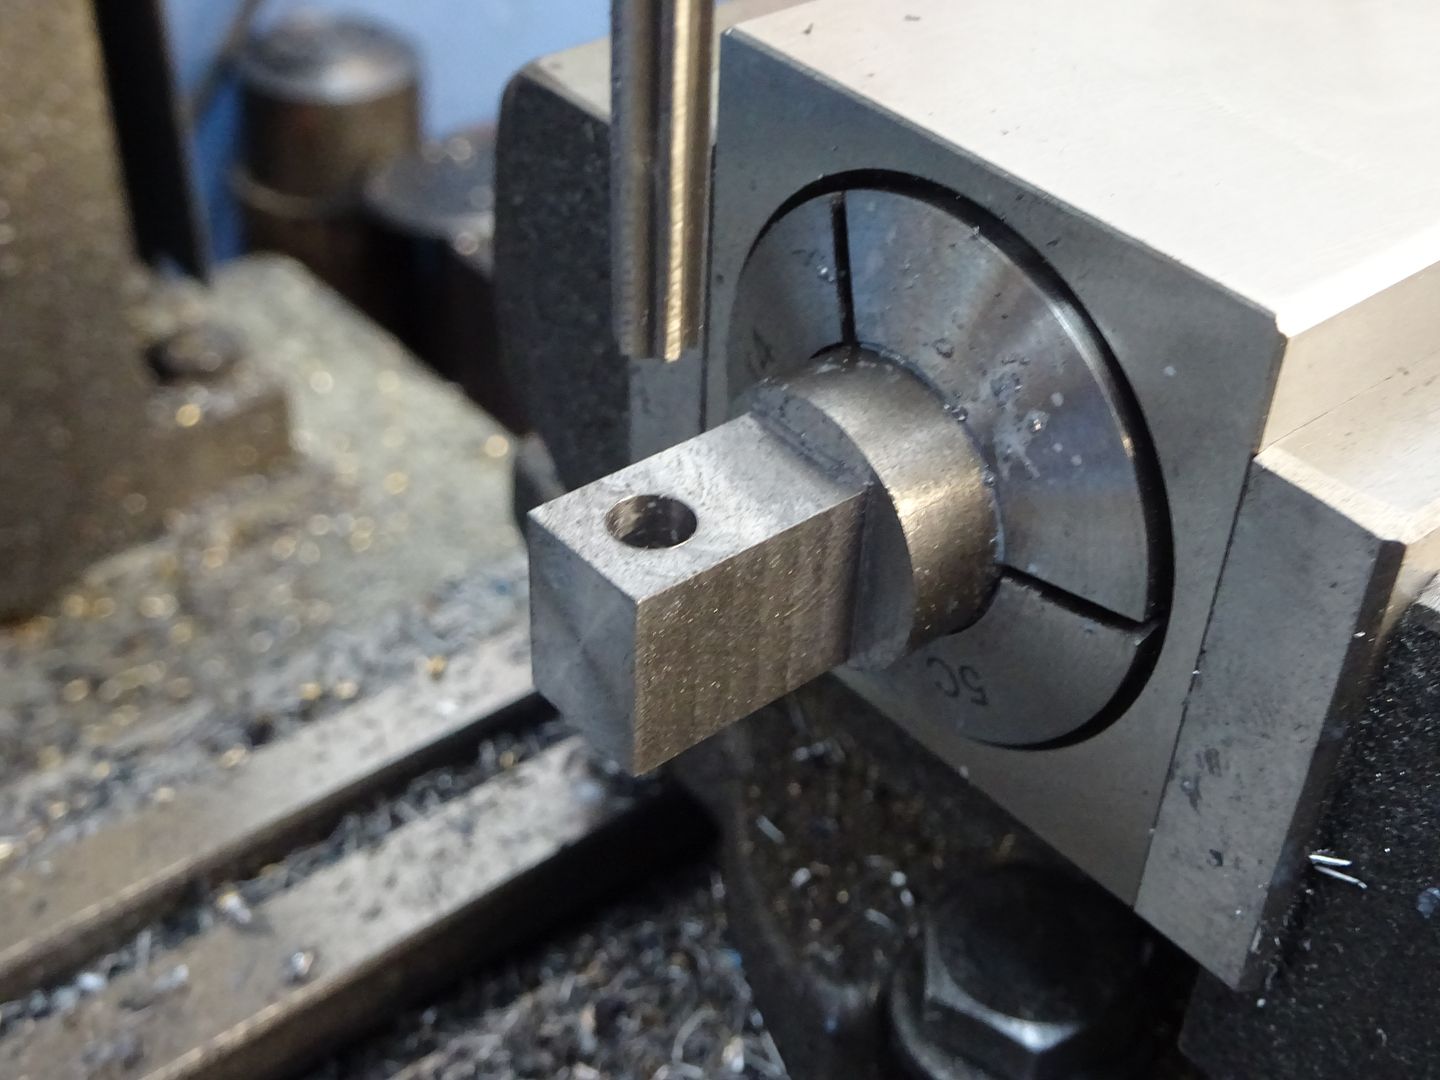
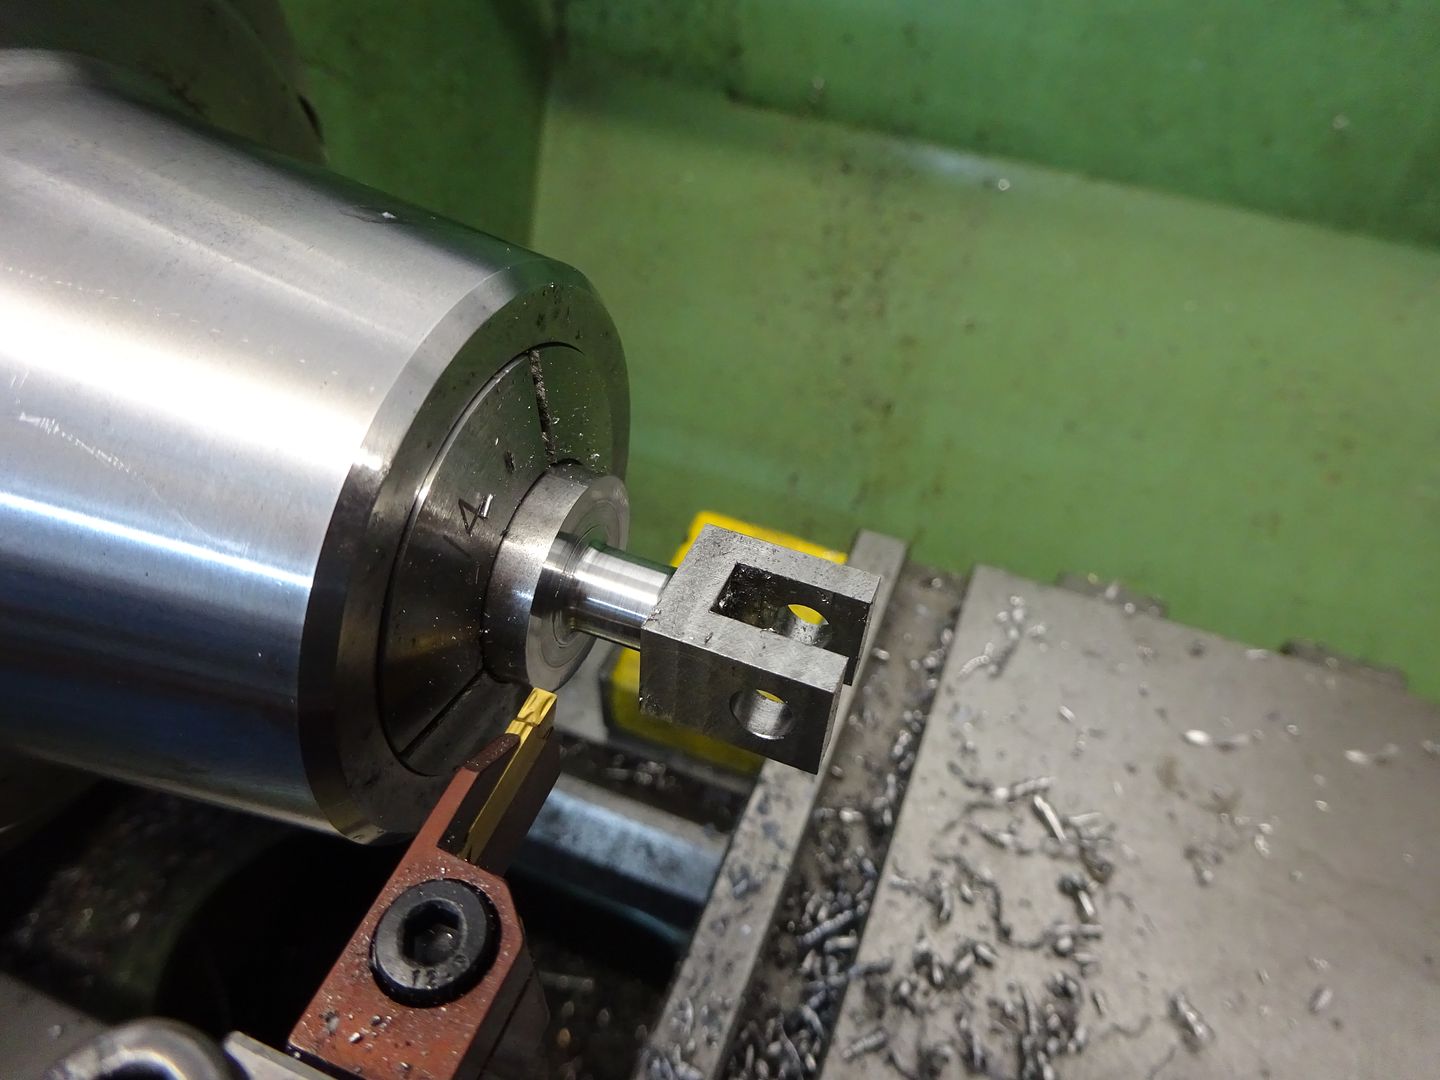
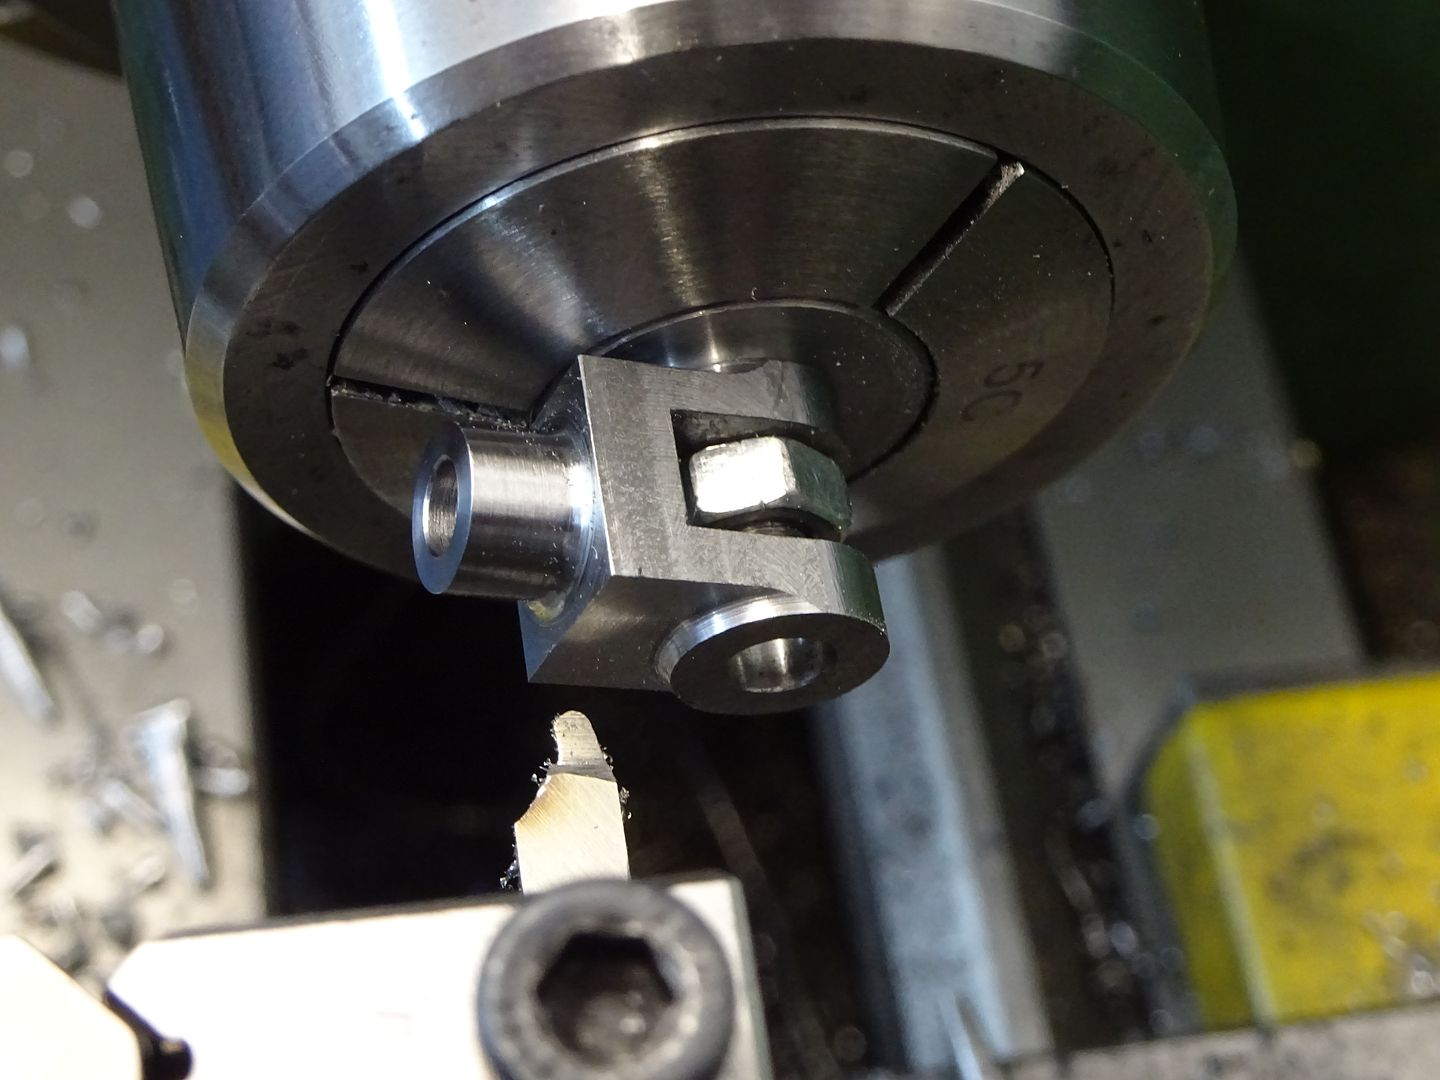
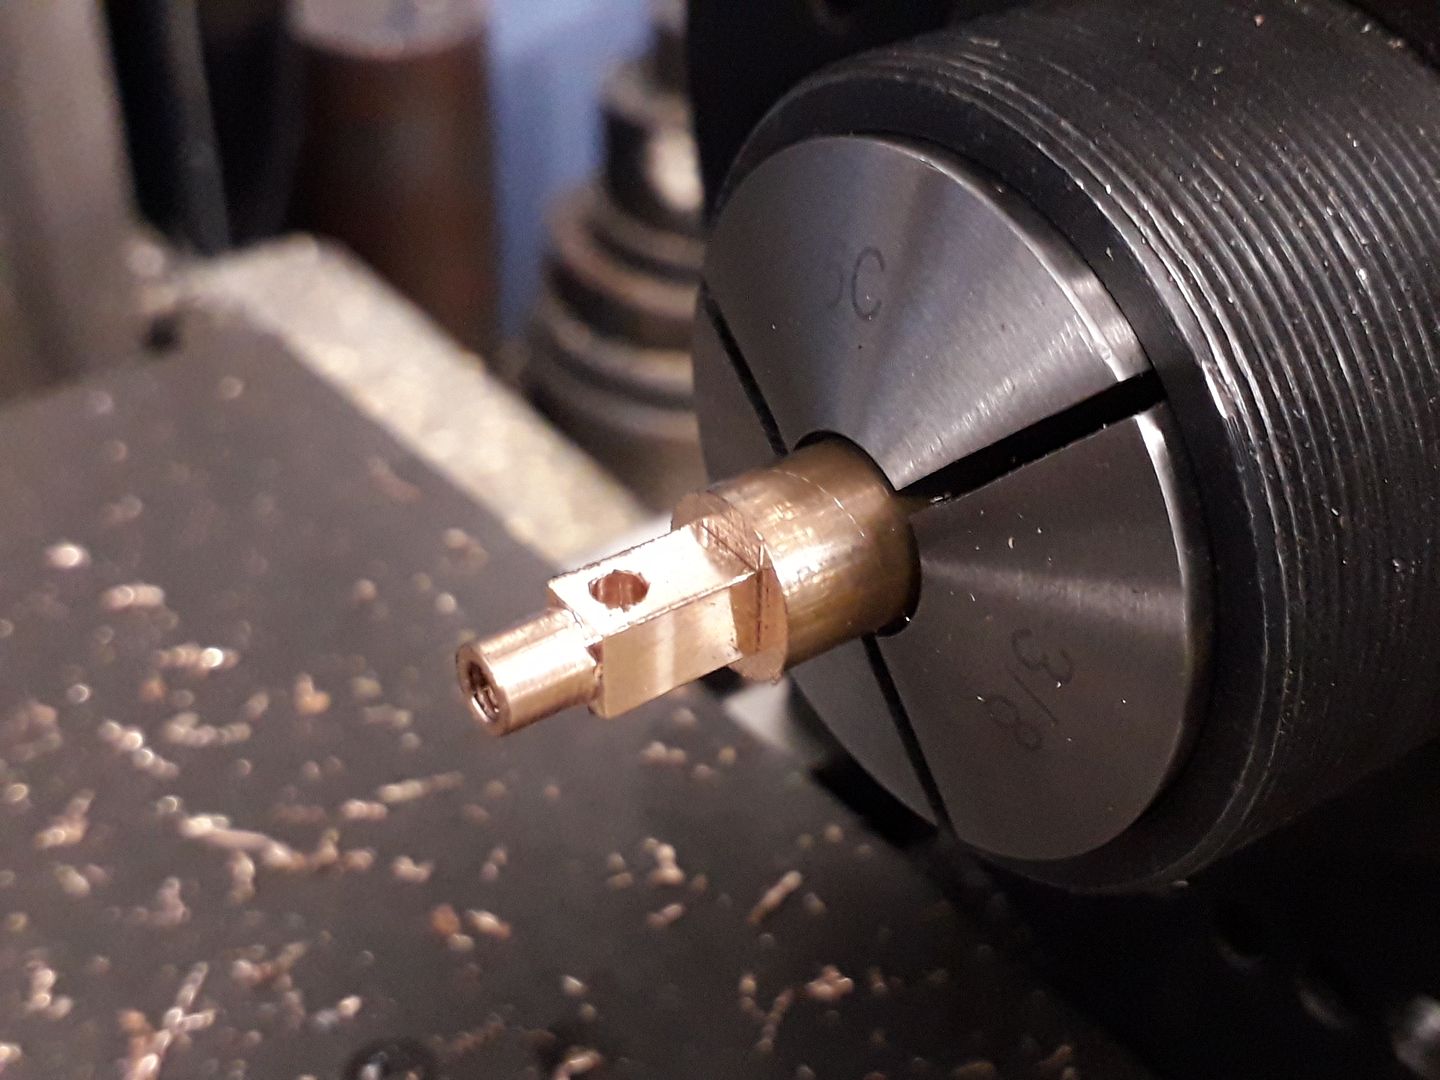
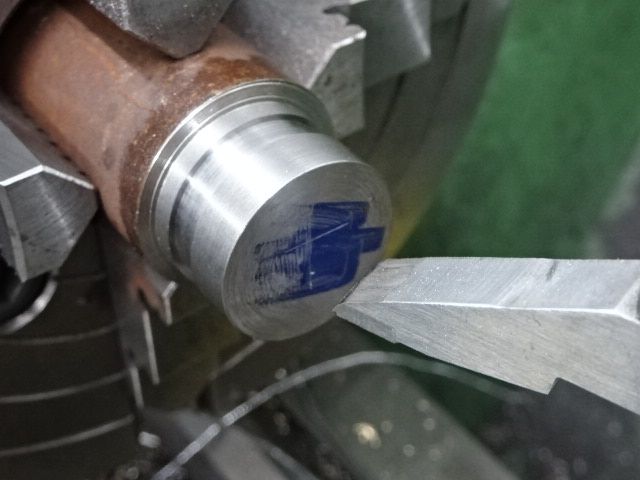
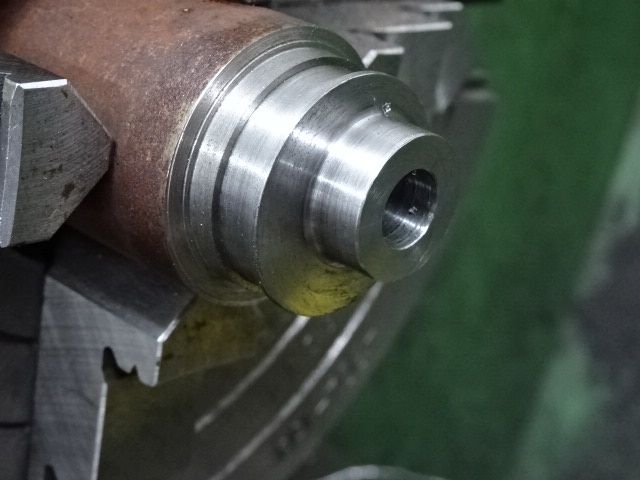
Completed the valve body today by positioning the two holes that connect with the cylinder ports. Quite pleased with these as they seem to line up quite well in so far as I pushed a pipe cleaner through each and popped out I the cylinder! To be honest I was expecting a slight misalignment in which case I would have simply machined a slot in the valve body to allow the holes to connect. It it seems fine.  Simple single cylinder steam engine Simple single cylinder steam engine by GL5Keith1500, on Flickr With the valve body completed the next logical step is the valve. I used a scrap piece of stainless steel lead screw to make the valve. My approach was to machine it to size such that it fitted the valve body. Then, mark out the bobbins and start by marching the space between the two bobbins. This was checked using slip gauges. Next was to machine the 6mm bobbin followed by the 9.5mm space to the valve spindle. 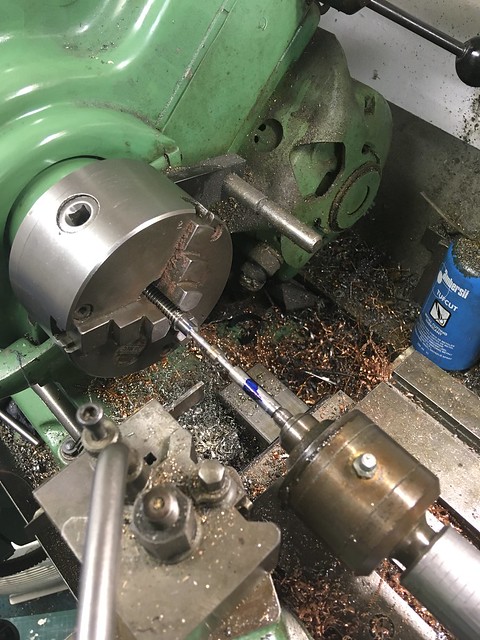 Simple single cylinder steam engine Simple single cylinder steam engine by GL5Keith1500, on Flickr The next job is the cut it off and complete the 6mm top bobbin flollowed by facing to length the spindle and placing the 4mm thread. |
|
|
|
Post by keith1500 on Apr 4, 2020 22:05:00 GMT
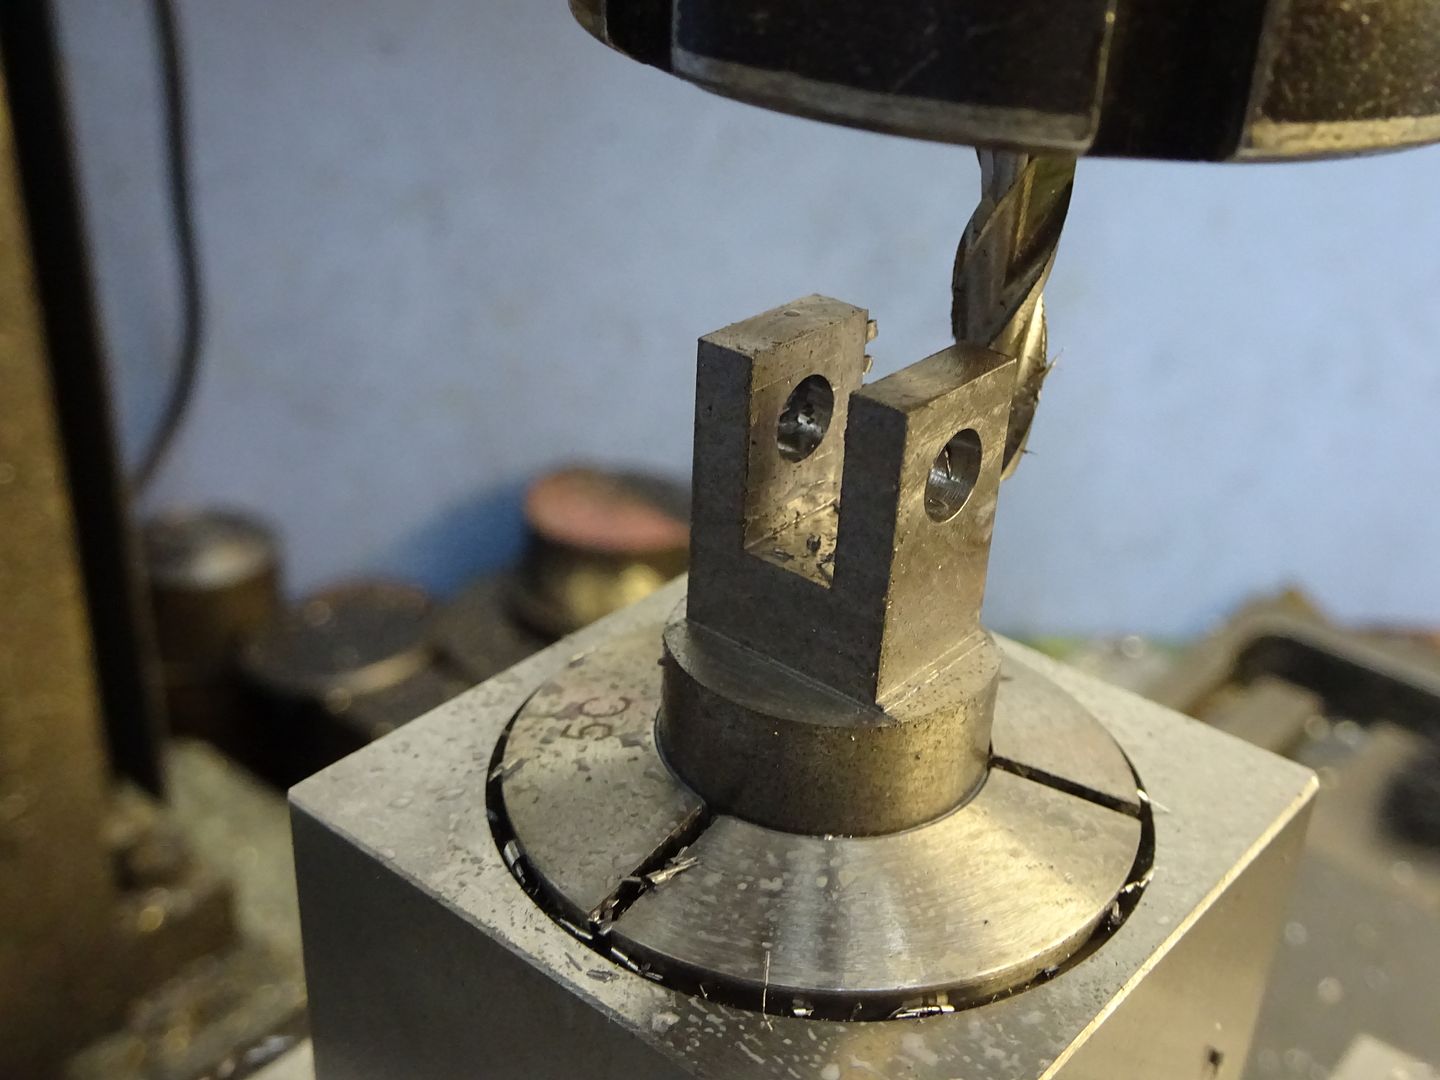
Finished the valve today. The last job was face off the ends and Drill and tap the thread. Then fettle the valve into the valve body. This was done using 800 grit paper and oil, and carefully checking for high spots with the micrometer. Then, moving on to making the next component, the brass adjustment. The valve slides nicely and looks to be right, for the exhaust port just opens before the opposite inlet port.  Simple single cylinder steam engine Simple single cylinder steam engine by GL5Keith1500, on Flickr Made a start on the eccentric strap. Component 2-06.3 got me puzzled. Realistically I couldn’t see how this could be made in one piece so opted for silver soldering two bits together. Here are the two bits. To aid location of the threaded collar I left a pip that is the tapping of the thread.  Simple single cylinder steam engine Simple single cylinder steam engine by GL5Keith1500, on Flickr |
|
jasonb
Elder Statesman

Posts: 1,209
|
Post by jasonb on Apr 5, 2020 6:15:27 GMT
|
|
|
|
Post by keith1500 on Apr 5, 2020 15:52:04 GMT
Jason, Thanks for posting your technique, very useful. It is the fact the drawing shows the thread not going all the way through that pushed me down the two part route. With just 5mm to the bottom of the blind hole and with the given tap I would be lucky to 3mm of thread. I guess I could have ground the tip off the tap?  Simple single cylinder steam engine Simple single cylinder steam engine by GL5Keith1500, on Flickr |
|
|
|
Post by Roger on Apr 5, 2020 15:59:30 GMT
Hi Keith,
You can easily get to within one thread of the bottom of a hole by grinding off the tip of a tap. You can't start a thread with such a tap, so you need to have at least a Second and then a Plug to modify. You only need a Taper tap if you're freehand tapping which I never do. Getting the tap vertical is vital, so I always set that up in a machine or use a block.
|
|
|
|
Post by keith1500 on Apr 5, 2020 16:06:02 GMT
Roger,
Thanks for that tip. I never associated the tapper and hand tapping.
I’ll get a few spare plugs and grind the tips down. Make sense .
Far easier, I think, to make that part in one than soldered it and clean it up!
|
|
|
|
Post by Roger on Apr 5, 2020 16:17:57 GMT
Roger, Thanks for that tip. I never associated the tapper and hand tapping. I’ll get a few spare plugs and grind the tips down. Make sense . Far easier, I think, to make that part in one than soldered it and clean it up! As you know, I'm a big fan of making from solid wherever possible. I think you get a more accurate job which is also stronger. It generally doesn't take, any longer in my opinion than messing about with separate pieces, assembling them and then having to clean it all up. |
|
jasonb
Elder Statesman
Posts: 1,209
|
Post by jasonb on Apr 5, 2020 16:44:49 GMT
I think all my taps that came with pointed ends have had them ground off. Like Roger I like to tap the hole while the work is still in teh machine from drilling the hole that way you can bet the tap supported directly inline with the hole. I'm also going over to Spiral flute taps for all the common and even less common sizes as unless it's a very sghallow blind hole you only need the one tap as the lead in is very short.
|
|
|
|
Post by andyhigham on Apr 5, 2020 17:11:15 GMT
Spiral point taps are also useful, especially for deep through holes as the swarf is pushed out ahead of the tap
|
|
|
|
Post by springcrocus on Apr 5, 2020 17:45:18 GMT
Like Andy, I prefer spiral point taps where I can use them. I've also ground the front off some s.p. taps to get closer to the bottom, running them in after tapping with a standard s.p. tap
I'm not a lover of spiral flute taps, especially in tough materials. They have a much thinner web and are far more likely to break if the tap bottoms out. I can be a bit heavy-handed, however, so it's probably down to me.
Regards, Steve
|
|
|
|
Post by Roger on Apr 5, 2020 18:11:10 GMT
Like Andy, I'm a fan of Spiral Point taps, not to be confused with Spiral Fluted taps. Spiral Fluted taps are intended for single operation blind hole machine tapping so as to remove the swarf in the manner of a drill ie back up the flutes. That trouble with them is, as Steve points out, they are nowhere near as robust as Hand or Spiral Point taps. This doesn't matter on machine tools, because in production you change the tap long before you start to get to the point where it will break, and you never run into the bottom of the hole. Neither of those things are true for MEs, who like to get the most life out of their tools and can easily run into the bottom of the hole and break the tap.
Personally, I always back off the tap between each forward cut, unless it's a really sharp tap or easy material to cut. I use my taps until they are almost unusable because they're expensive. Sooner or later, even Spiral Point taps in Steel will require backing off between forward cuts. It's just a habit I have, and it reduced the amount of force required to cut the thread.
|
|
|
|
Post by keith1500 on Apr 5, 2020 22:09:20 GMT
Eccentric strap pretty much done. 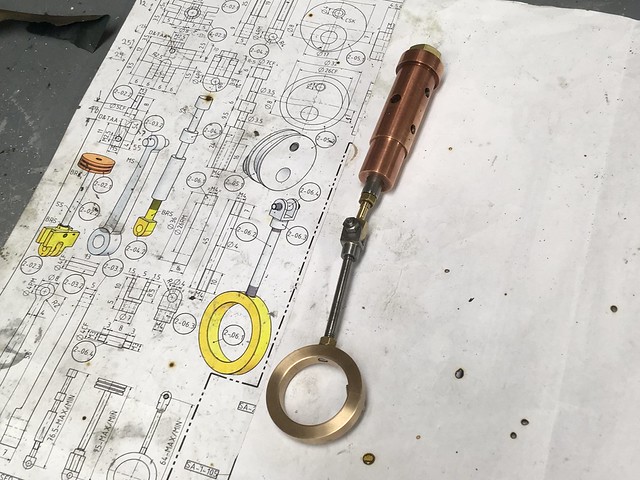 Simple single cylinder steam engine Simple single cylinder steam engine by GL5Keith1500, on Flickr The next item will be the eccentric. Not made one of those before and this one is a little unusual. What’s the best technique for setting the hole over the right amount? |
|
|
|
Post by delaplume on Apr 6, 2020 1:29:54 GMT
Hi Keith, You can easily get to within one thread of the bottom of a hole by grinding off the tip of a tap. You can't start a thread with such a tap, so you need to have at least a Second and then a Plug to modify. You only need a Taper tap if you're freehand tapping which I never do. Getting the tap vertical is vital, so I always set that up in a machine or use a block. I used to carry a selection of "top-hats" in my pocket when out on the workshop floor ..... a smaller version of your block idea and made from either short bolts with the head machined flat or various clevis pins.. In my 5" gauge restoration work, or if modifying a loco chassis forinstance they still come in useful.. ( Helpful hint for the newer people---- Two hex nuts soldered together give an included angle of 120 degrees which is just a fraction off the 118 degrees for a standard drill angle.. ).. |
|
jasonb
Elder Statesman
Posts: 1,209
|
Post by jasonb on Apr 6, 2020 6:16:20 GMT
|
|
|
|
Post by keith1500 on Apr 6, 2020 21:52:48 GMT
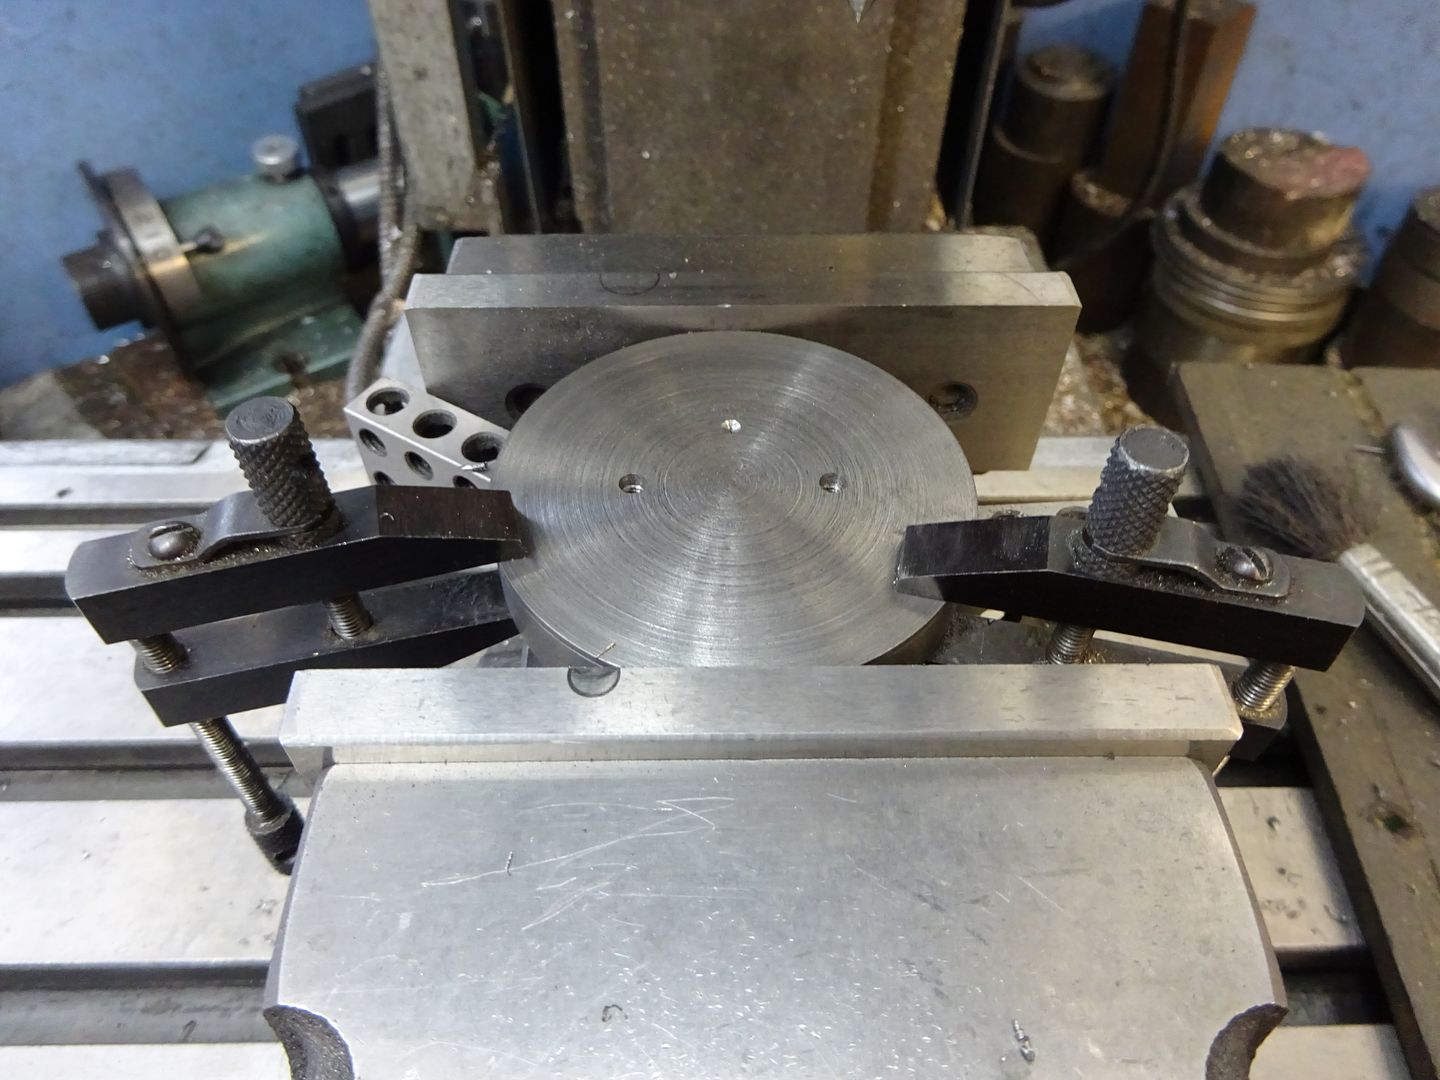
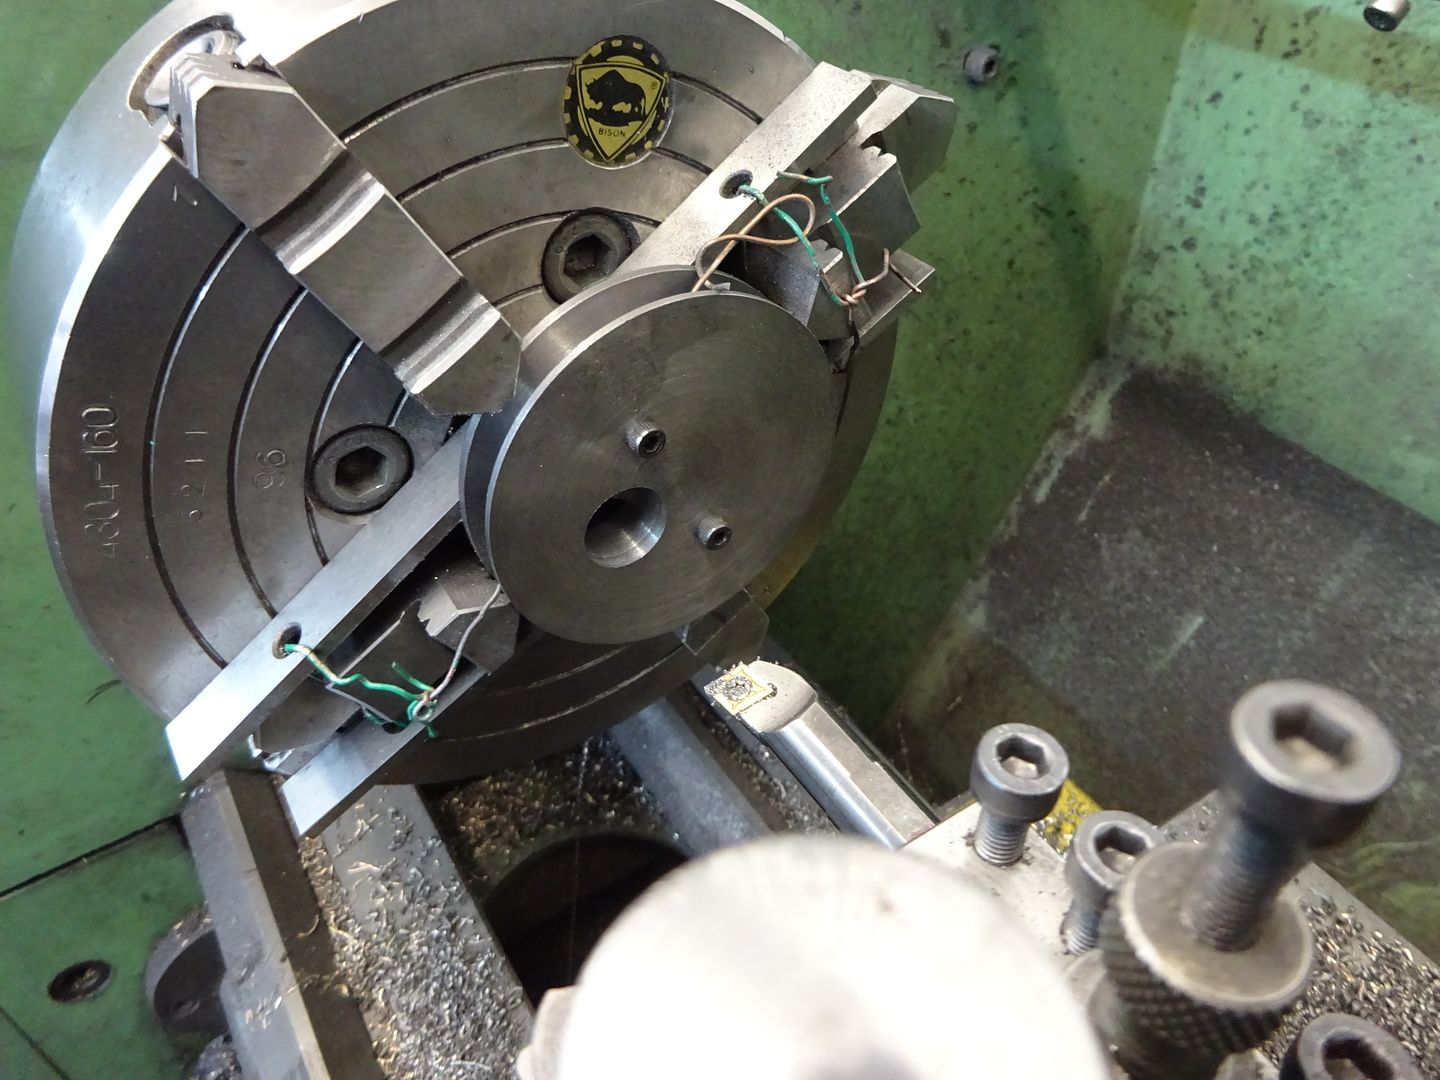
Thank you for your posting. Suitably inspired I have set about machining the first part of the eccentric. Tomorrow I’ll do the marking out using a vernier height gauge. Makes perfect sense the move to a four jaw and take it from there...
|
|
|
|
Post by keith1500 on Apr 9, 2020 22:11:10 GMT
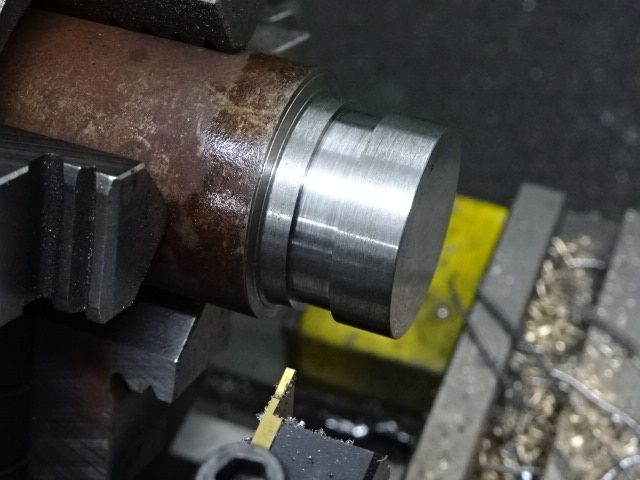
Here is the finished eccentric. I can not say I enjoyed making this component. If I had to make it again I would hold the assembly together using two screws which I think is a feature of Jason’s example on the previous post. It was such a challenge that I forgot to photograph the process. The steel I used was pretty horrid too. It machine ok but every now and then would rough cut like it had impurities in it. In fact trying to get a decent final finish proved impossible for each skim the tool found a spot which left a scratch. In the end I polished it out as best I could.  Simple single cylinder steam engine Simple single cylinder steam engine by GL5Keith1500, on Flickr |
|
|
|
Post by Oily Rag on Apr 9, 2020 22:44:38 GMT
Like Andy, I'm a fan of Spiral Point taps, not to be confused with Spiral Fluted taps. Spiral Fluted taps are intended for single operation blind hole machine tapping so as to remove the swarf in the manner of a drill ie back up the flutes. That trouble with them is, as Steve points out, they are nowhere near as robust as Hand or Spiral Point taps. This doesn't matter on machine tools, because in production you change the tap long before you start to get to the point where it will break, and you never run into the bottom of the hole. Neither of those things are true for MEs, who like to get the most life out of their tools and can easily run into the bottom of the hole and break the tap. Personally, I always back off the tap between each forward cut, unless it's a really sharp tap or easy material to cut. I use my taps until they are almost unusable because they're expensive. Sooner or later, even Spiral Point taps in Steel will require backing off between forward cuts. It's just a habit I have, and it reduced the amount of force required to cut the thread. |
|
|
|
Post by Roger on Apr 10, 2020 7:25:21 GMT
Like Andy, I'm a fan of Spiral Point taps, not to be confused with Spiral Fluted taps. Spiral Fluted taps are intended for single operation blind hole machine tapping so as to remove the swarf in the manner of a drill ie back up the flutes. That trouble with them is, as Steve points out, they are nowhere near as robust as Hand or Spiral Point taps. This doesn't matter on machine tools, because in production you change the tap long before you start to get to the point where it will break, and you never run into the bottom of the hole. Neither of those things are true for MEs, who like to get the most life out of their tools and can easily run into the bottom of the hole and break the tap. Personally, I always back off the tap between each forward cut, unless it's a really sharp tap or easy material to cut. I use my taps until they are almost unusable because they're expensive. Sooner or later, even Spiral Point taps in Steel will require backing off between forward cuts. It's just a habit I have, and it reduced the amount of force required to cut the thread. You're welcome, there are a couple of other little things that I do that you might find useful. You may well know this already, but I don't think it's common knowledge. When backing off between each forward cutting rotation, I was taught to go right back over the resistance you feel as the chip break. This certainly works, but in difficult materials, small taps or where they're worn, that can take a considerable and unnecessary force, and you can break the tap. I've found that you don't need to do that. I just wind the tap backwards until I feel resistance, but stop before going right over the really tight spot. I find that the chip breaks off anyway when you do that. You're still left with having to get past the tight spot when you get the the bottom of the thread and you have to withdraw the tap. However, in that circumstance, I go back and forth gradually going a little further each time until the tight spot is passed. Of course, all of this is unnecessary if you have sharp taps, easy materials and large threads. The other thing I do for very difficult materials, besides slightly opening up the tapping size, is to keep swapping taps. When you've got the tap fully engaged and cutting, there's a large surface area causing a lot of resistance. Sometimes you'd be unable to cut the thread because the tap would break. In that situation, I stop and switch to a different tapered tap, say from a second to a plug. I might only get one very small forward rotation before it gets too tight again, so then I switch back to the second tap, and go another bit forward. Any progress forward is a victory, and with patience you can cut a thread in almost anything, even with blunt taps. Using this method you can tap full depth M1.4 threads in gauge plate is you want. The key to this that you reduce the length you're cutting on, thus reducing the force necessary to make the cut. Simple, but effective. |
|
|
|
Post by delaplume on Apr 10, 2020 10:00:37 GMT
Hi Roger, Whoooppss...I just mis-read that for Spinal Tap !!....... Somehow mate I didn't think that was quite you. eh ??........LoL !! ( en.wikipedia.org/wiki/Spinal_Tap_(band) ) For hand tapping I think Phos. Bronze, Copper and Aluminium are the ones most likely to give the embryo tyro a spot of bother....mainly due to "stiction", especially if not lubricated....Old text books used to quote Paraffin or Tallow at one time but nowadays these can be in short supply....I've found WD40 ( or cheaper equivalents ) to give good results, especially on my mini-lathe.. |
|
|
|
Post by andyhigham on Apr 10, 2020 10:07:40 GMT
Hi Roger, Whoooppss...I just mis-read that for Spinal Tap !!....... Somehow mate I didn't think that was quite you. eh ??........LoL !! The dials go up to eleven |
|