|
|
Post by Cro on Nov 7, 2023 12:43:57 GMT
Hi All, Well I just can't help myself when it comes to a good project and I've taken on another - this is a loco I have always wanted to build and had planned to one day, this just saves me a little work. 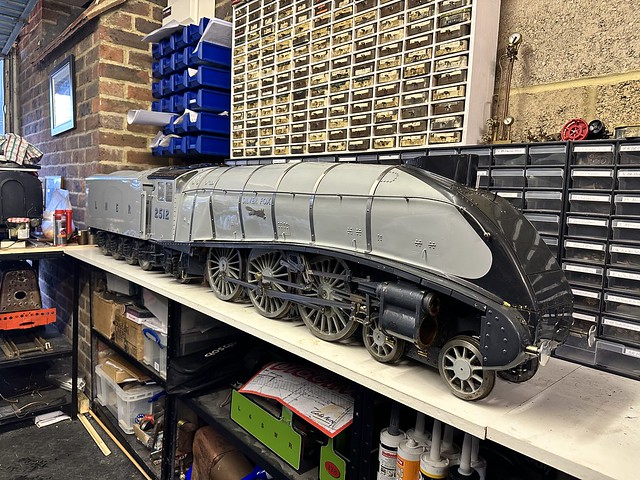 Untitled Untitled by Adam Cro, on Flickr The idea was to put it under the bench and forget about it for a while as other things are higher up the pecking order but once it was home I couldn't resist getting stuck in. The loco was built around 2008 as a commission build and has hardly run after what appears to be a couple of initial test runs. It was apparently reported to have been asthmatic and then stripped down and left in this state. There is no boiler history other than a receipt from Devon boilers (for the grand sum of £2750) so the first job is a shell test. Below are some photos of the loco.  Untitled Untitled by Adam Cro, on Flickr 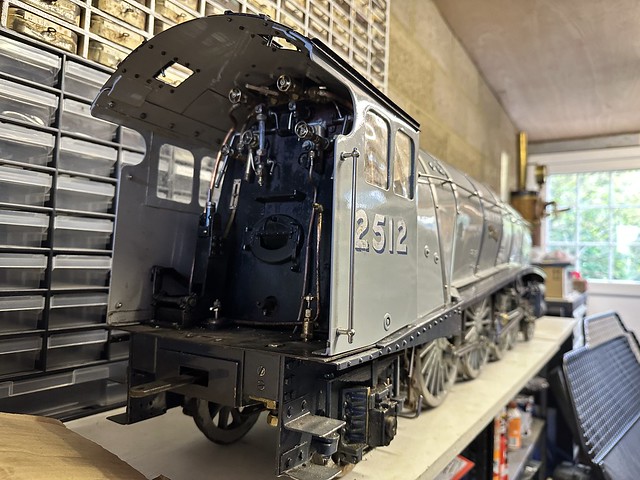 Untitled Untitled by Adam Cro, on Flickr  Untitled Untitled by Adam Cro, on Flickr 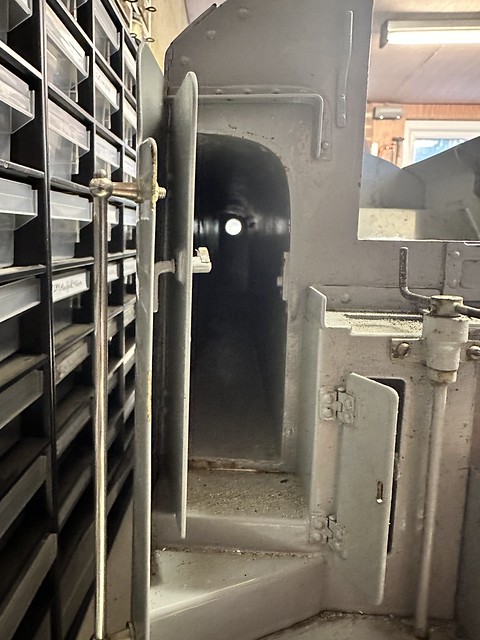 Untitled Untitled by Adam Cro, on Flickr  Untitled Untitled by Adam Cro, on Flickr I'll document the work I do to get her back into steam and some of the fun I've had so fun but my first question is regarding superheaters. I've read a thread from back in 2019 regarding concentric superheaters but I'd like to hear if anyone has first hand experience and can advise if I should leave well alone or remake. At the moment it has 3 fully radiant concentric style superheaters which I believe are delivery down the outside and return through middle (will confirm later). They are well made and everything was easy to disassemble and as you can see they are pretty clean backing up the "run a few times" story so I'd rather not re-make them but if they are going to prove ineffective then whilst it's in bits it's the time to do it. So far I've had mixed reviews but would like some more info from those with experience. 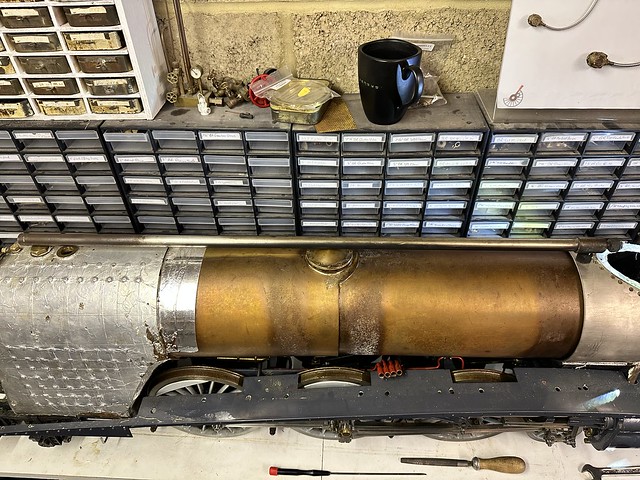 Untitled Untitled by Adam Cro, on Flickr 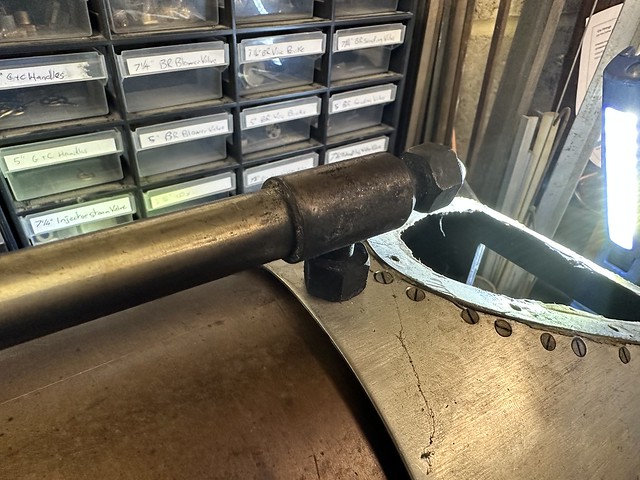 Untitled Untitled by Adam Cro, on Flickr 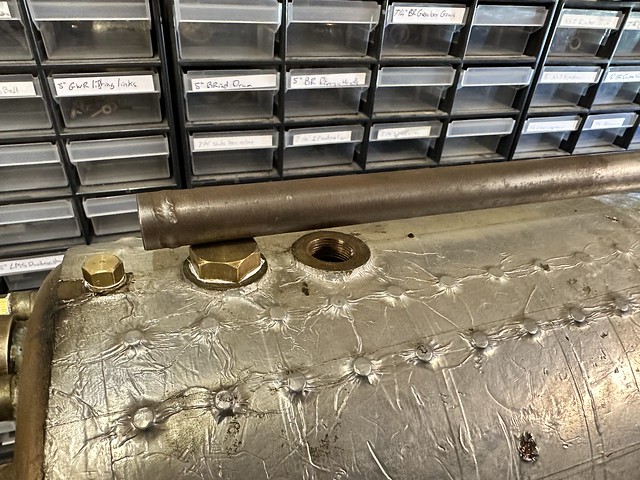 Untitled Untitled by Adam Cro, on Flickr Thanks all, Adam |
|
mbrown
Elder Statesman
  
Posts: 1,786
|
Post by mbrown on Nov 7, 2023 13:35:43 GMT
Looks like the A4 version of Don Young's "Doncaster". I love the corridor tender! Lovely all round.
No advice on radiant superheated though - I've never tried them.
Malcolm
|
|
|
|
Post by flyingfox on Nov 7, 2023 16:26:23 GMT
Greetings Adam, like you I love the A4 class, my 71/4 version is finished, not steamed, and because of my failing health & old age is now for sale, as will my A3 when our local track goes at the end of 2024.
I love the livery carried by Silver Fox, but knowing one other grey loco, it needs some work to keep it clean, even the big ones suffered on that score, but it is superb.
Re superheaters, the concentric type are very poor, the incoming cooler steam wastes heat trying to cool the out going warmer steam, both my A4 & A3 have them, and I would like to change them to spearhead radiant type. The A3 exhaust is always "woolly" and the loco does not have the punch the other A4 I have driven with the spearhead radiant type, even though the valve gear was set by the same man.
Regards
Brian B
|
|
|
|
Post by Cro on Nov 7, 2023 18:24:45 GMT
Hi Brian,
Good to hear from you and sorry to hear health isn’t good, I had seen photos of the A4 it looks great!
Thanks for the input on the superheaters, this is my fear with them but they are so well made and the alignment and fit with the pipework is so good in loathed to start making changes. The pipe bends out of the wet header into the tubes may be too much for bending.
Adam
|
|
|
|
Post by chris vine on Nov 7, 2023 20:19:49 GMT
There is one advantage of low superheat: the steam from the chimney will be more visible!
Unless there are major restrictions the loco should still run well with what you have.
If this style was hopeless we would all know about it definitely I would think??..
Looks wonderful!
Chris
|
|
|
|
Post by Cro on Nov 7, 2023 21:50:23 GMT
Chris,
This was my thinking exactly but when you ask people no one has a confident answer about them being good so it’s a tricky one.
Just checked and the inner tube is the delivery to the cylinders with 3/8” tube but the fitting that goes onto the wet header only has a bore of 0.15”. The main delivery tube is 0.5” bore so there is a restriction in terms of CSA of the pipes.
Was this possibly why it was stripped for being asthmatic….?
Adam
|
|
|
|
Post by chris vine on Nov 7, 2023 23:05:31 GMT
Hi Adam,
Yes, 0.15" bore for the main steam passage seems very small.
On Bongo, admittedly 7.25" gauge but with only 2 cylinders, the bore is 1/2" from regulator into the superheater. After that, 2 pipes to cylinders are some 3/8" bore each.
I think that might be definite area to look at. Especially if it saves a lot more work!
Chris.
|
|
|
|
Post by simon6200 on Nov 8, 2023 3:11:18 GMT
My Springbok has 4 stainless radiant spearpoint elements, 5/16 o.d., and when I overfill the boiler such that water is bubbling out the safety valves, it will still pull upgrade with a load normally as the superheaters make flash steam. I can’t imagine the concentrics doing that. It depends on your intended use to some extent. Our engines work hard on our busy runnings days, with steep grades and tight curves.
|
|
|
|
Post by Cro on Nov 8, 2023 7:04:32 GMT
My Springbok has 4 stainless radiant spearpoint elements, 5/16 o.d., and when I overfill the boiler such that water is bubbling out the safety valves, it will still pull upgrade with a load normally as the superheaters make flash steam. I can’t imagine the concentrics doing that. It depends on your intended use to some extent. Our engines work hard on our busy runnings days, with steep grades and tight curves. The more I think about it the more I’m convincing myself it’s the right thing to do. Like you, I like to work my engines, we pull big trains on a long track and for me the bigger the load the bigger the challenge. My B1 is regularly doing 3 6’ cars, 15 or so people for an afternoon and she loves it. Adam |
|
oldnorton
Statesman
  5" gauge LMS enthusiast
Posts: 720
Member is Online
|
Post by oldnorton on Nov 8, 2023 9:32:48 GMT
Excellent new engine Adam, well done! Yes I agree that taking on a 90% built loco (or in this case a 99.5%), where all the metal is bent and machined well, there is a good boiler, but something is not right and the paint work is awful, is a good alternative to 5+ years starting from scratch.
My Britannia still has its Modelworks pair of concentric superheaters, so I am in the same position. We are all agreed that concentric heaters are not thermodynamically efficient because of the return path giving up heat to the incoming path, but we also know from some work done (Ewing?) that most all the heat input comes from the portion exposed to the radiant fire and very little heat from the time spent in the flue tubes. This led me to conclude that two big concentric tube outers might pick up a good deal of heat in the firebox, to offset their inefficiency in the flue tubes. But this is guesswork. It would need proper thermodynamic analysis.
However, in the real world of Gilling East and the eyes of the seniors sat at the steaming bay, my Britannia in a cool March was showing consistent visible steam emission while other 'large and medium sized' engines had little visible steam. This can be taken as evidence that the concentric superheaters were not working as well as 'other' unknown superheaters. Of course, a proper comparison would be against another Britannia with known small-tube radiant superheaters, pulling the same load and running at the same speed.
On that day my Britannia was invariably 'waffling' past the steaming bay, even with all the coaches, and the fire would have been a dull red. So would small-element superheaters have worked better? I don't know. Do I need to go to the trouble of replacing them just so that the steam looks dry on a cool day? I don't doubt that with a three-passenger carriage load and a nice yellow fire the steam will heat up.
There is much suggestion by Doug that a big nest of 5/32" tubes will reduce the engine's water consumption, because the hotter steam contains more energy. Most of us might intuitively feel that eight 5/32" tubes are going to pick up more heat than four spear-points at 1/4" and both of those doing better than two 3/8" concentrics. But if you only have two flues in the boiler then how many smaller tubes can you fit, and will bunching them together ruin the heat transfer? That is what will stop me messing with my Britannia. I might refill the tender once in a one hour steaming session so water use is not an issue.
Norm
|
|
|
|
Post by coniston on Nov 8, 2023 22:51:09 GMT
|
|
|
|
Post by Cro on Nov 9, 2023 16:05:25 GMT
Hi Chris, I remember reading this at the time, really useful info. I've been chatting with Steam Technology on producing something as they are only 40minutes from me at work. Shell test tomorrow and we will go from there. A friend is trying to encourage New Years Day running, lets see what happens. Adam |
|
|
|
Post by Cro on Dec 11, 2023 16:08:08 GMT
Well its been an interesting month of owning the A4. I'll start with the good bit and then how we got there - the boiler has passed its shell test holding 200psi but this was after 3 weeks worth of work to get us to this stage.  Untitled Untitled by Adam Cro, on Flickr Rewind back to 12th of November and a day was booked in with the BI at the club, after checking the drawings over and making sure it was all as expected we started to pump. A few leaking bungs and gasket on the wet header but otherwise everything seemed ok, flipped it over to look in the firebox and that's when the smile left my face! Two large wet patches and no real clue as to why. After some poking around and lots of inspecting it looked to either be a stay or a seam where the inner firebox throat plate meets the 'combustion chamber' and inner firebox wrapper. It wasn't a drastic leak, certainly not spraying but enough to cause a problem so the decision was made to clean things up and take another look which revealed my biggest fears buying second hand with no tickets - Comsol. This lead to more questions than answers initially but then it all dropped into place - this is no pro boiler just a very good amateur boiler with paperwork from the estate that confused matters. 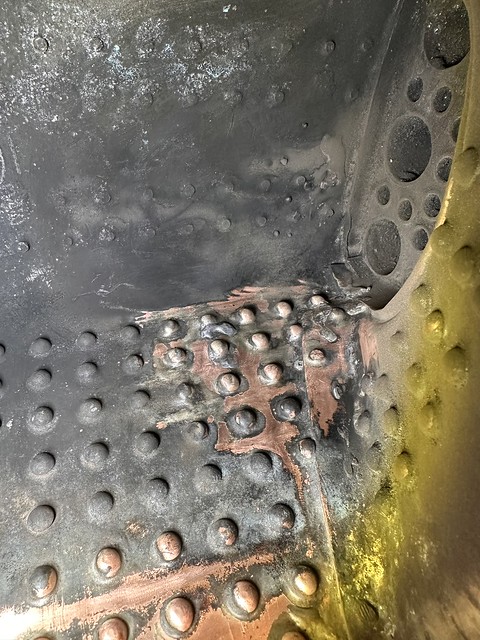 Untitled Untitled by Adam Cro, on Flickr  Untitled Untitled by Adam Cro, on Flickr Two options - send it back and get money back and leave the seller with a chassis and duff boiler or crack on and see what we can do. Comsol means Silver Solder is out the question but as things stand I can't see what or why its leaking so first job was to clean it up and our new neighbours at work have a nice size shot blaster which made light work of the dirt. 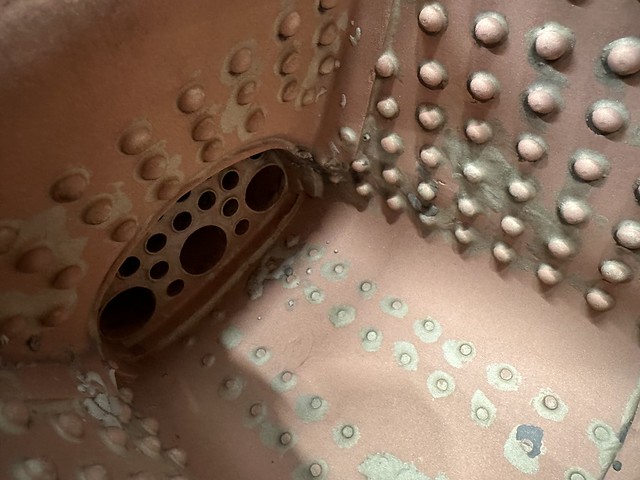 Untitled Untitled by Adam Cro, on Flickr 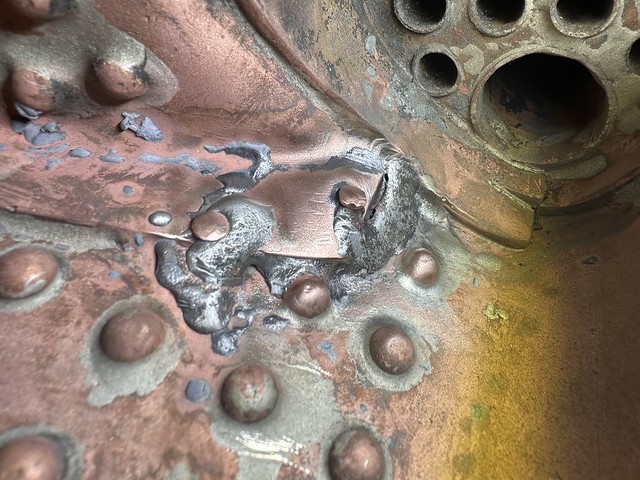 Untitled Untitled by Adam Cro, on Flickr 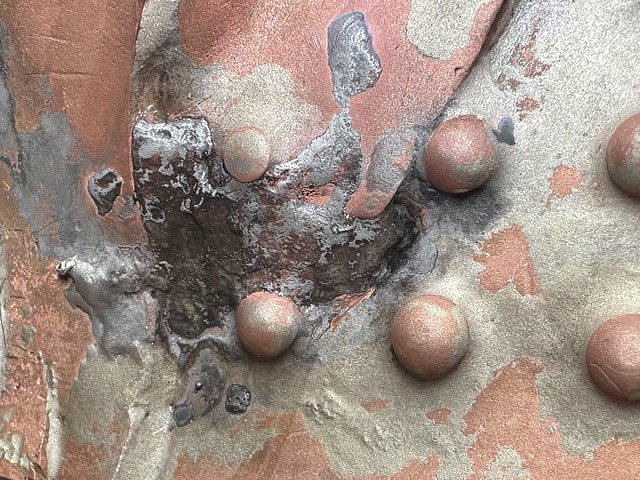 Untitled Untitled by Adam Cro, on Flickr This still didn't really tell much so next job, clear out the old Comsol and see what we are left with, luckily I decided to buy a dremel a few months back with a flexy drive and burs as the position of this all made it almost invisible to see the actual issue. The bur dug out the Comsol very easily and left us with a pretty obvious hole on both sides.  Untitled Untitled by Adam Cro, on Flickr  Untitled Untitled by Adam Cro, on Flickr I decided the best option was to fill the hole prior to trying to reapply Comsol and this was done by drilling and tapping in a 1/8" copper rivet, again not easy place to work as so little space. This gave us something to air for with the torches and an area to cover with the solder.  Untitled Untitled by Adam Cro, on Flickr 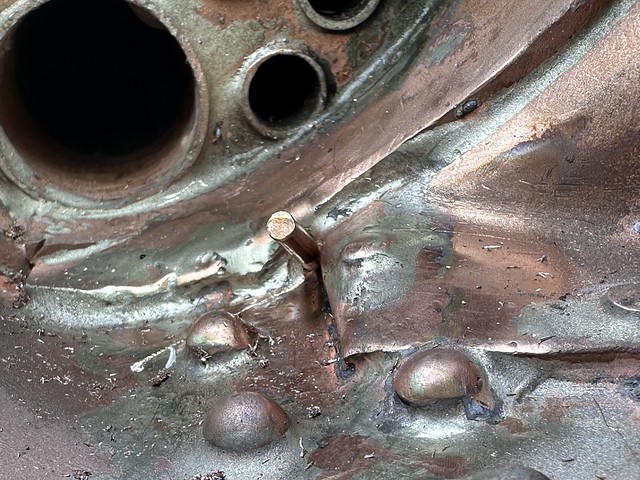 Untitled Untitled by Adam Cro, on Flickr I never got any photos when soldering as I had one torch providing background heat and feeding Andrew with the solder in solder stick holders whilst he had the cyclone burner through the firehole door doing the hard work. It was amazing the amount of heat that we needed to provide to the outside of the throatplate to help things get molten enough and not blob/puddle. The first attempt we certainly didn't get this right and although the sticks were melting they then just clumped and sat on the surface and provided no seal. The end result is two very neat joints that have solder the problem and we are pretty pleased considering the space constraints and difficulties of getting the solder to flow where you wanted it.  Untitled Untitled by Adam Cro, on Flickr 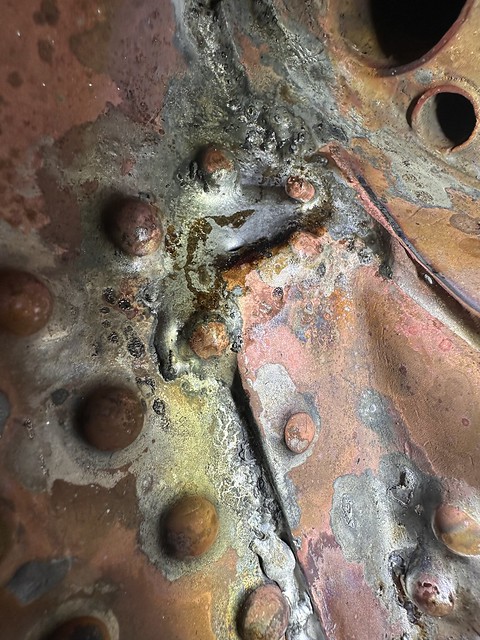 Untitled Untitled by Adam Cro, on Flickr The focus has now turned to getting the boiler back together and new superheaters so I can get the 1.5WP test done and put the boiler to one side so I can move to the cylinders (material already in hand ready to go). I wouldn't be me if I didn't take the opportunity to add some detail and tidy things up. Some holes I decided were no longer needed such as how a valve had been fitted for the hydrostatic lube (going in the bin) plus a few other bits and then it was into etch primer and then satin black.  Untitled Untitled by Adam Cro, on Flickr  Untitled Untitled by Adam Cro, on Flickr Loosely assembled for now, I need to work out how to make some of my backhead valves work with the boiler mounting pads. Weirdly my 7 1/4" version looks more in keeping with the backhead so I will be trying to use these. I finally decided to use one of my FSD collection, the loco deserves it.  Untitled Untitled by Adam Cro, on Flickr Superheater material going on order soon, Had a chat with Chris about his bent 1/4" OD version but think I'm going to look at 5/16" but two per flue with welded spearheads and keep the CSA of the tube as big as possible. That's all for now! Thanks, Adam |
|
|
|
Post by flyingfox on Dec 11, 2023 16:29:34 GMT
Well done Adam, a story of triumph over adversity.
Regards
Brian B
|
|
|
|
Post by simon6200 on Dec 11, 2023 20:26:10 GMT
A very satisfying approach with a threaded plug in a confined space. Well done, I hope all is well now.
|
|
|
|
Post by Cro on Dec 12, 2023 7:18:03 GMT
Thanks both, yes very satisfying resolution as I really didn’t want to give it back and learned a lot about the boiler in the process.
Adam
|
|
|
|
Post by Cro on Jan 4, 2024 12:47:39 GMT
Happy New Year all, hopefully the holiday period gave you time in the workshop. As tradition for me I made sure I had the last day of the year in the workshop, something I've done inadvertently for the last 8 years! This has turned into a bit of a long one so hang on in there! A4 progress is going well in between other jobs and the focus at the moment is still on the boiler to get the new fittings and plumbing done including a new set of superheaters. This will allow me to do my 1.5WP test and then put the boiler to one side whilst I look into the chassis and cylinder work. Starting with the new superheaters I went round a few options but decided I would try to maximise heating surface area with flow so I opted for 8mm OD, 1mm Wall tube with 2 spearheads per flue giving me 12 tubes to machine. I started off by making a machining jig to support the tube to then fly cut the 10deg angle. The jig itself was machined to be a snug fit in a quick change tool holder so I could hold things firmly, set the compound slide round to my angle for machining, and easily remove it for changing over the tubes and reset things without worrying about the angle. 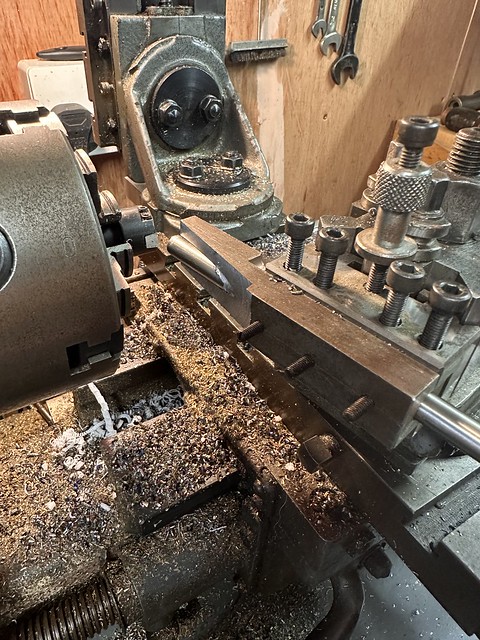 Untitled Untitled by Adam Cro, on Flickr 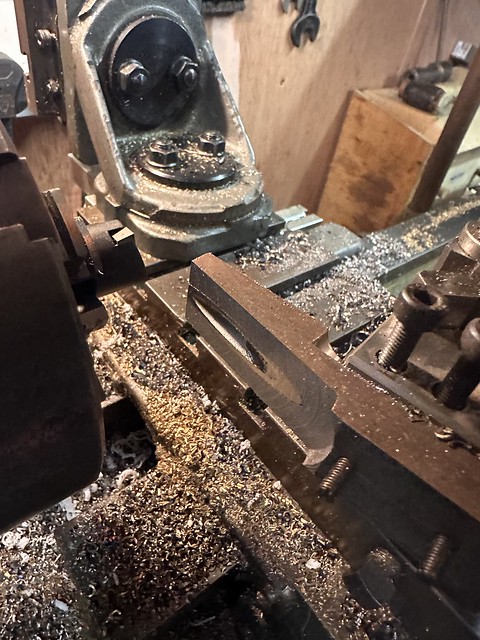 Untitled Untitled by Adam Cro, on Flickr This takes some time so I decided after the first few to run them through the band saw first to remove the majority and then tidy things up. Once all 12 were done they were deburred, machine marks removed and then two setting jigs were made, one for holding the two tubes together and the second is a block machined at 20deg to allow the welder to align the two faces correctly for setting in the holding jig.  Untitled Untitled by Adam Cro, on Flickr These are now with the welders we use at work for all of our vacuum components and they are like magicians with their welds! I have explained how I've seen it done, or should I say how Roger showed us how they can be done, and left them to play with them, I'll be checking in later today to see how they are doing. Once they are back I'll cut them to the required length and make up the new set and dry header arrangements using the fittings and parts on the existing set to get the alignment and fits to work without too much messing about. Up the other end of the boiler I'm working on the backhead combined injector steam valve and clacks where I am actually using the 7 1/4" Scale castings as they look more in keeping with the cab than 5" would in my opinion. Due to the dimensions of the Don Young mounting pads I've had to come up with an adaptor plate that goes between the boiler and the fitting which has been quite a task in itself to work out where everything needs to seal and align correctly - lets just say I didn't get it right the first time and its evolved as its gone on. Let's start with the CAD model to help explain the plan.  Untitled Untitled by Adam Cro, on Flickr The above section shows the fitting, the boiler bush and the adapters required, as you can see the centres are quite different. The aim here is make the adaptor with a threaded section that screws into the boiler for the delivery clack (it will later had a tube extension taking it passed the firebox) there is then a second adaptor screwed into the steam delivery bush with an o-ring in the pocket (which will also have a long pickup tube to the dome later on), the thickness of this is set so that when tightened up it will align the fitting in its correct orientation. To do this I used feeler gauges to get the thickness required, machined slightly over and then trial fitting and adjusting for the valve to sit where I wanted it.  Untitled Untitled by Adam Cro, on Flickr  Untitled Untitled by Adam Cro, on Flickr Once this was done I realised I had got the angle holes too high so some plugging and re-machining was done. Now all that was left was to make the fittings up, this is nothing I've not shown before so here is a selection of photos.  Untitled Untitled by Adam Cro, on Flickr 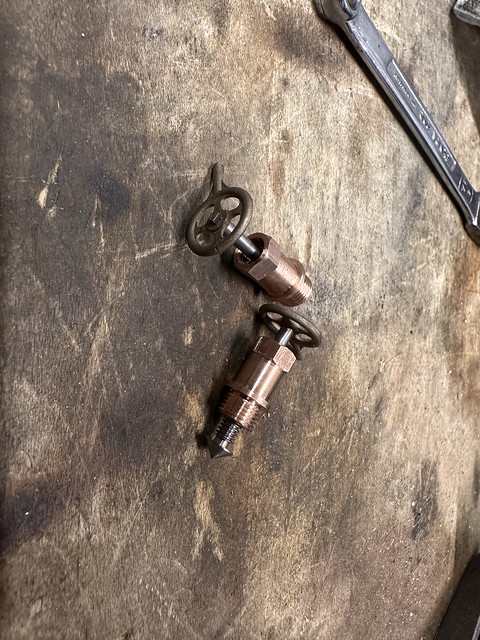 Untitled Untitled by Adam Cro, on Flickr  Untitled Untitled by Adam Cro, on Flickr Last parts to make were the pipe nuts, these were a bit of fun with the 1mm slitting saw and then to make a C spanner to suit. I machined the slots first and ended up with enough material to make 10 nuts, I thought whilst set up I might as well use it all, shame I couldn't get 12 out of it so I had 2 sets for when I next have to make some of these fittings.  Untitled Untitled by Adam Cro, on Flickr 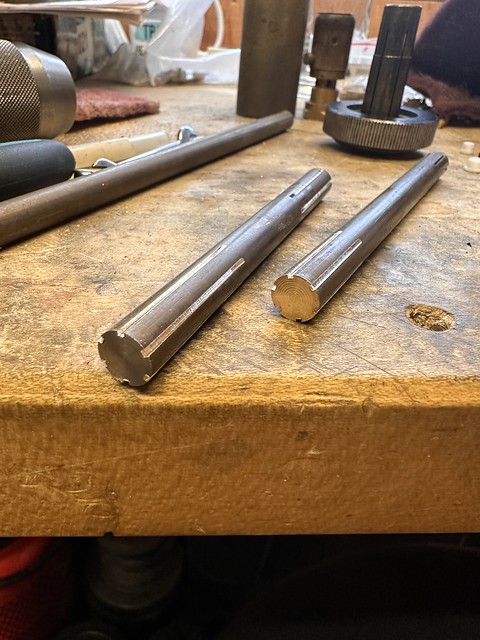 Untitled Untitled by Adam Cro, on Flickr 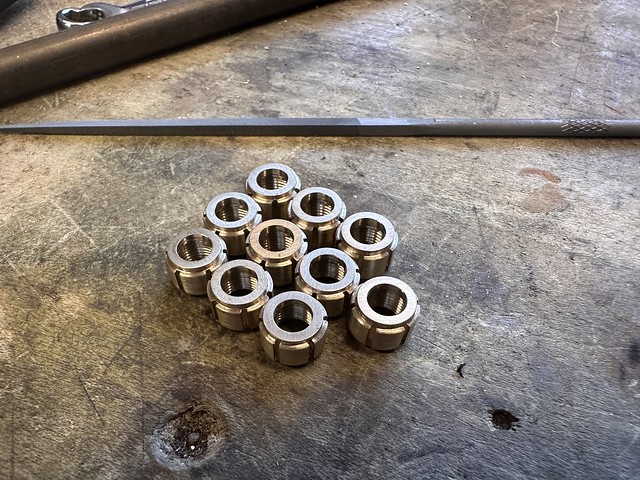 Untitled Untitled by Adam Cro, on Flickr For the spanner I decided to machine the radius and then silver solder on the tab and file to fit, it's worked pretty well and I'm quite pleased with it. 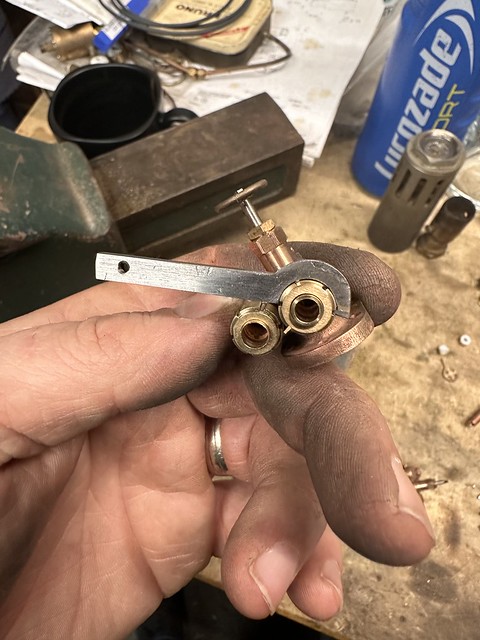 Untitled Untitled by Adam Cro, on Flickr  Untitled Untitled by Adam Cro, on Flickr Next up is plumbing in the injectors and the rest of the cab as I've completed changed it compared to how it was. Couldn't resist fitting some dummy pipes and popping the cab back on for a photo. 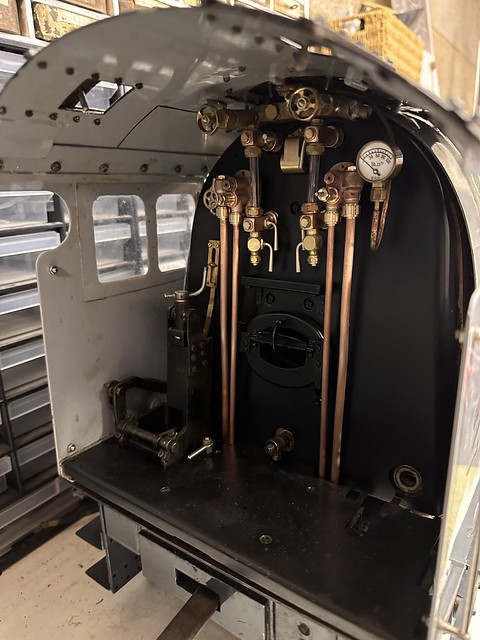 Untitled Untitled by Adam Cro, on Flickr Sorry its a bit long, been a busy few weeks off over the holidays, trying to get in the workshop as much as I can before a certain little person arrives! Thanks, Adam |
|
|
|
Post by flyingfox on Jan 4, 2024 16:22:04 GMT
Very fine Adam, looks good.
Regards
Brian B
|
|
|
|
Post by simon6200 on Jan 4, 2024 20:49:07 GMT
Certainly not a bit long, and beautiful work. I’m very interested in the superheater welds so please post photos of finished welds.
|
|
|
|
Post by Jim on Jan 5, 2024 0:07:21 GMT
As always simply superb craftsmanship in creating a beautifully detailed model of a famous locomotive. Thanks for the updates.
Have a great new year.
Jim
|
|
 Untitled by Adam Cro, on Flickr
 Untitled by Adam Cro, on Flickr
 Untitled by Adam Cro, on Flickr
 Untitled by Adam Cro, on Flickr
 Untitled by Adam Cro, on Flickr
 Untitled by Adam Cro, on Flickr
 Untitled by Adam Cro, on Flickr
 Untitled by Adam Cro, on Flickr
 Untitled by Adam Cro, on Flickr
 Untitled by Adam Cro, on Flickr
 Untitled by Adam Cro, on Flickr
 Untitled by Adam Cro, on Flickr
 Untitled by Adam Cro, on Flickr
 Untitled by Adam Cro, on Flickr
 Untitled by Adam Cro, on Flickr
 Untitled by Adam Cro, on Flickr
 Untitled by Adam Cro, on Flickr
 Untitled by Adam Cro, on Flickr


