jasonb
Elder Statesman
  
Posts: 1,236
|
Post by jasonb on Jan 4, 2010 19:07:13 GMT
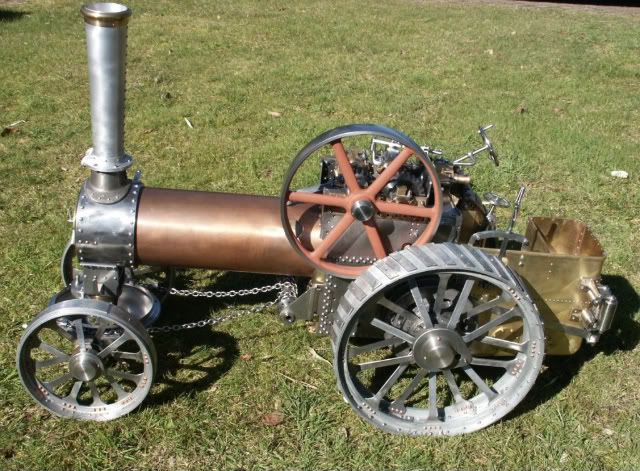
Its been a while since anyone posted something in this section so here are photos of progress on the Fowler First job was to make a ball turner to do the curves on the conrod. I then used my new rotary table to complete the conrod and crosshead. 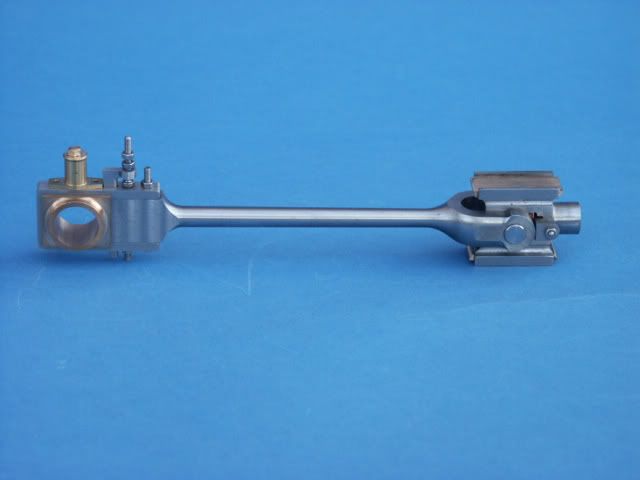 With this done I then moved onto the weightshaft bracket which is cast virtually to finished size so no room for error on the bore for the weight shaft. Lifting link, arm and rod were then tackled 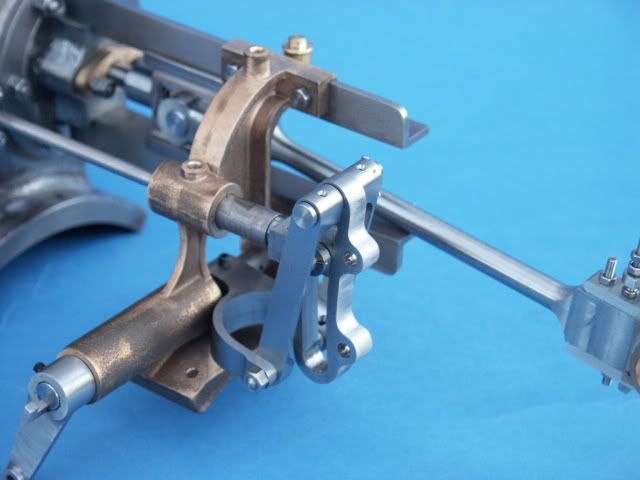 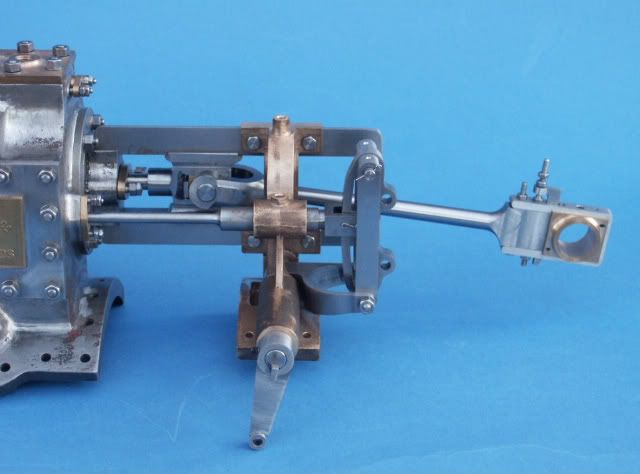 The expansion link radius was small enough to do by hanging a bit of 1/4" flat off the side of the rotary table 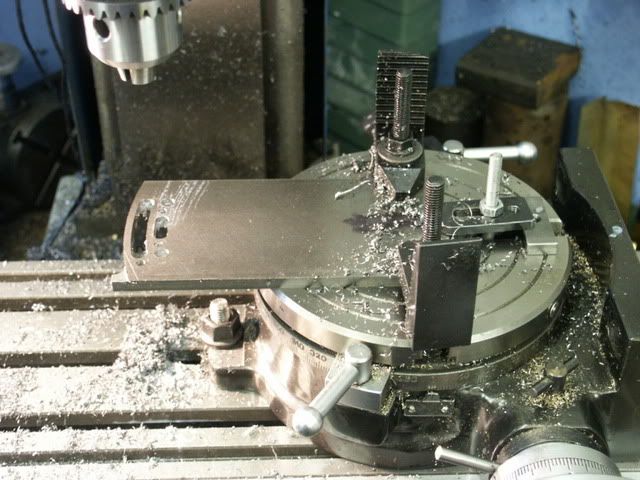 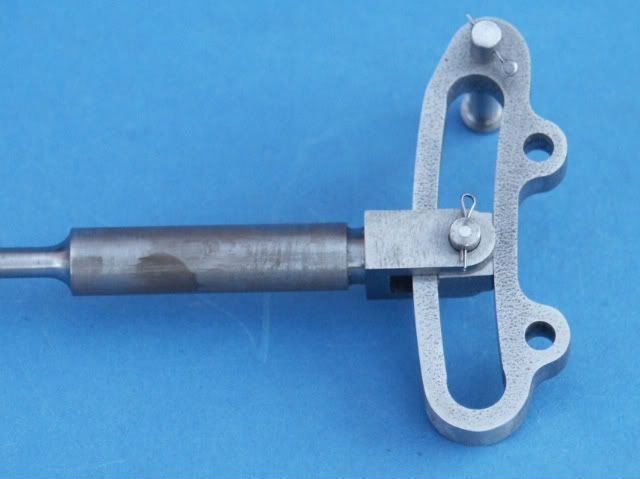 Next on the list were the eccentrics, I did the pump one at the same time as its basically the same just a bit wider. The rods were milled from solid after sorting out an error on the drawings. Still have to drill the forked ends but will wait until the cylinder & weightshaft are mounted to get exact length. 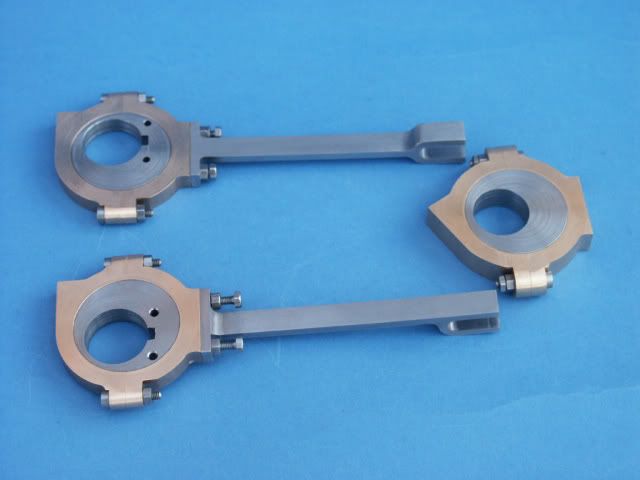 With all these bits done it was time to make something to work them with so did the reversing lever, quadrant etc 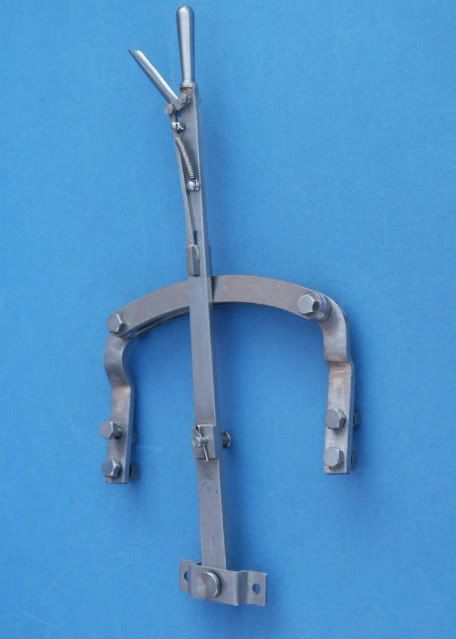 While I was doing levers the regulator one and its bracket were fabricated, took a while to work out how to approach this one but did the main bracket in two bits silversoldered together. 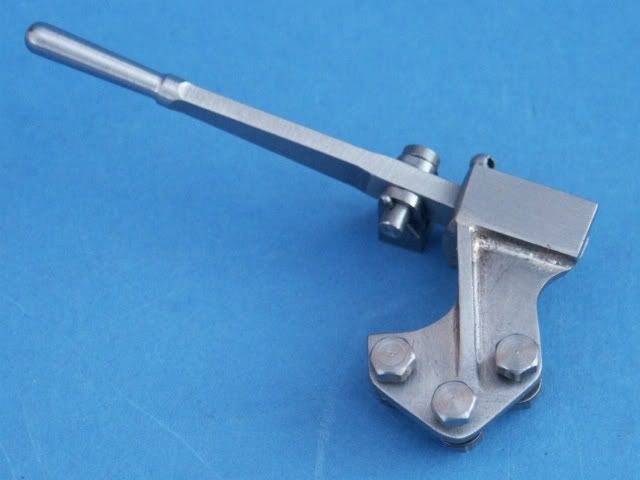 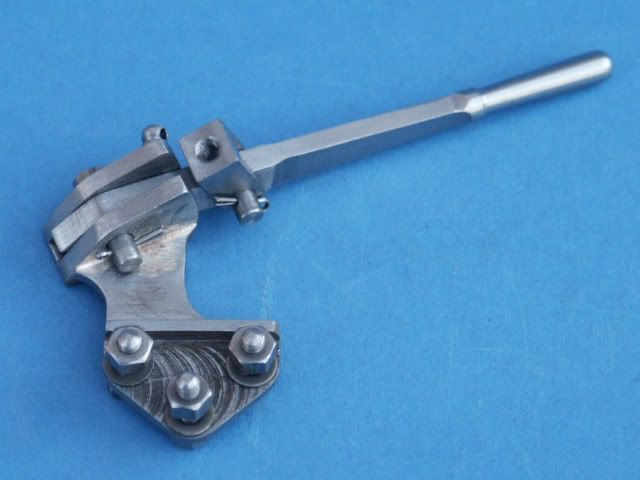 Oops, left some machining marks on that:o Used a bit of steel that I'd cut off one of the eccentric blanks to make the screw eyes for the steering chain and bent up the big links that go on the end. Not decided yet whether to make my own scale chain or just solder up the joints on some I got from MJ thats not quite the right shape link 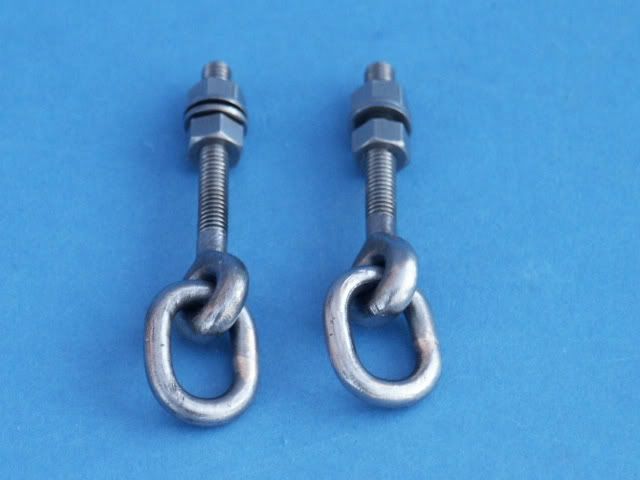 As I'd not screwcut on a lathe before I thought I would leave this 'til over the xmas hols. Quite pleased with how it all turned out. Also made the handwheel as MJ have not had this in stock for a few years, think the stainless steel does not flow well into the thin rim. 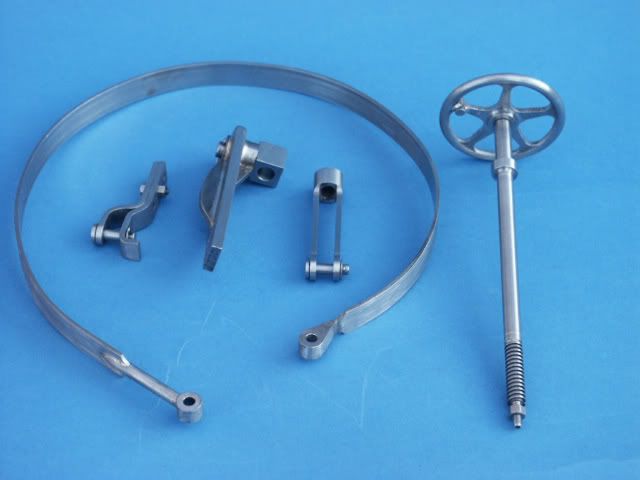 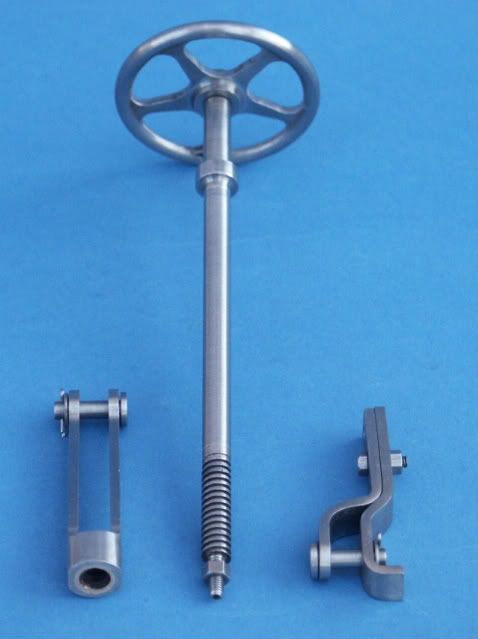 With all these bits done I could test fit onto the tender sides and then there were no more excuses for putting off riviting it all together, all 292 of them, Hope my neighbours hadn't been out celibrating as I knocked most of then in on New Years Day. 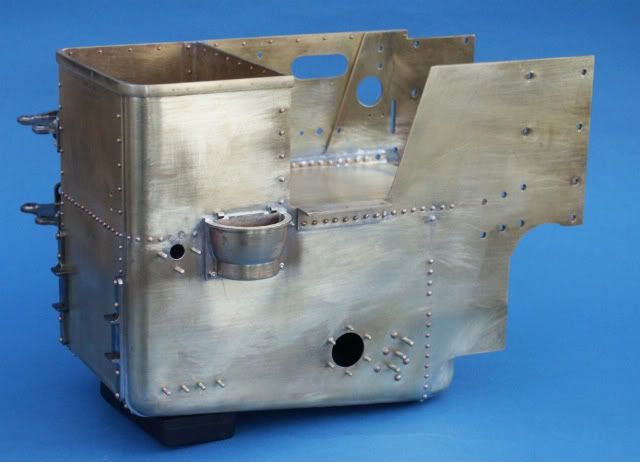 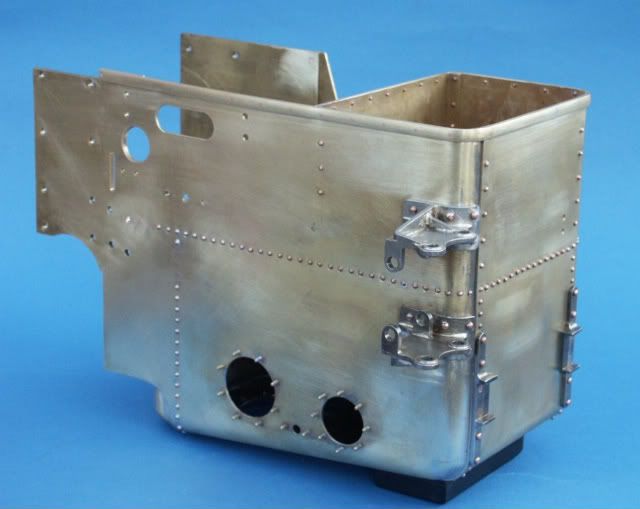 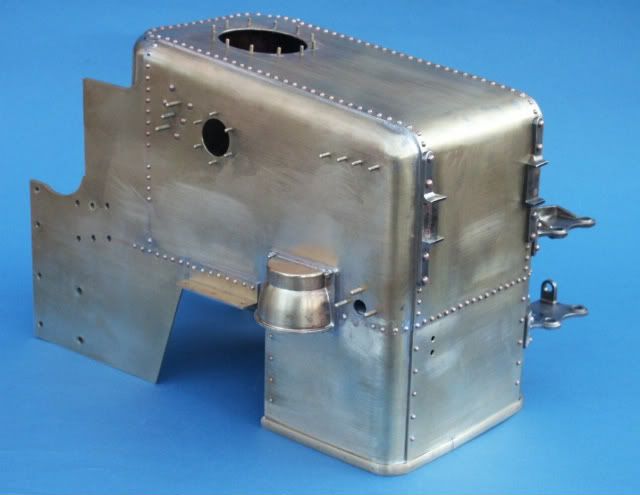 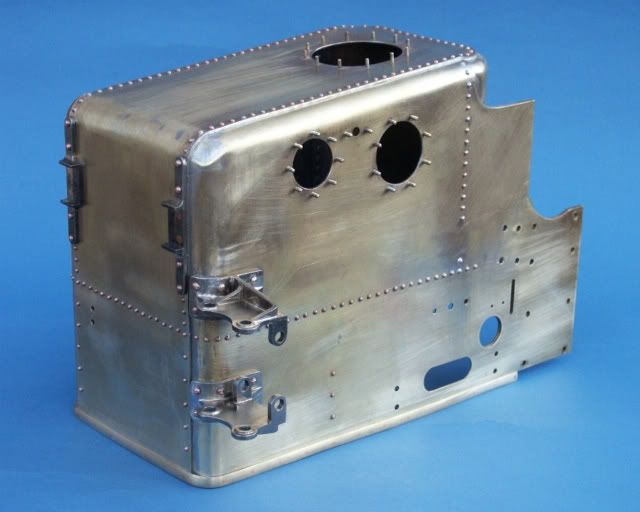 No thats not a dent in the bottom corner, just the way the light is catching it. Next is to get the cylinder mounted and work towards running on air. Jason |
|
|
|
Post by Deleted on Jan 4, 2010 19:23:30 GMT
Jason. Lovely tin bashing and general work. On the subject of machining marks, I'm like Baggo: I don't worry about surfaces that can't be seen. Some people seem to think that I'm a Perfectionist: I'm not really, I'm more of an 'Adequatist'. By this I mean that if I'm going for an Exhibition finish, then it will be just adequate, nothing more!
And I thought that I'd been busy...
JB
|
|
|
|
Post by drumkilbo on Jan 4, 2010 21:11:56 GMT
Lovely load of work Jason, great finish on everything, beautifully illustrated too with the blue background, look forward to seeing more.
Ian.
|
|
|
|
Post by welshy on Jan 4, 2010 23:09:30 GMT
Very nice work Jason, make the links for the streering chain yourself though, I Know it is a lot more work but you will be far more satisfied the chain on the Burrell that my father and i built was made from stainless to the correct profile and size and looks so much better than the commercial stuff
Nice to see a traction engine for a change on here as well.
Mike
|
|
jasonb
Elder Statesman
  
Posts: 1,236
|
Post by jasonb on Jan 5, 2010 8:05:38 GMT
Thanks for the kind words guys
Welshy, I had not thought of stainless, should keep it reust free, I think 303 is the one for bending. The large links went quite easily at 1/8" and the chain is a bit thinner so will probably go for it.
Jason
|
|
brozier
Part of the e-furniture

Posts: 335
|
Post by brozier on Jan 5, 2010 9:34:37 GMT
Hi Jason,
Really excellent work. Do you have any pics or tips on rivetting?
Something I'm not very comfortable with....
Cheers
Bryan
|
|
|
|
Post by engineernut on Jan 5, 2010 16:38:21 GMT
Brilliant Jason.
If I can get my 1 1/2" Allchin to anywhere near that standard I will be well pleased. ;D
Dave
|
|
jasonb
Elder Statesman
  
Posts: 1,236
|
Post by jasonb on Jan 5, 2010 17:30:56 GMT
Its not my favorite job either. Just plenty of practice, go drill 20 holes in a bit of scrap and bash away.
Try to support the work so you have both hands free, a few well placed blocks of wood on or around the vice help
If its not going right, have a break and do something else, then try again another day.
Jason
|
|
|
|
Post by welshy on Jan 5, 2010 19:45:32 GMT
There are several advantages of using stainless for things such as chains:
They look better, they do not rust and more importantly for me the stainless is a lot easier to clean up after silver soldering.
Just been looking at your photos again, really nice workmanship there i look forward to seeing more in the future, the Fowlers were lovely looking engines too.
Mike
|
|
|
|
Post by klendo on Feb 4, 2010 11:37:15 GMT
Great piece of work there.
Lovely looking engine, always wanted a full sized A4 or A7 fowler single, just somehow ended up with a full sized 3 speed burrel instead....
One of by biggest beefs and im sure wont happen here is that so many people really do make a fantastic job of a model traction engine but spoil it with a chimney top that has the complete wrong profile which resembles a dustbin lid or a chimney top which is the correct profile but is far to thick by a factor of x 100 and looks completely out of scale.
Keep up the good work
|
|
jasonb
Elder Statesman
  
Posts: 1,236
|
Post by jasonb on Mar 7, 2010 18:59:52 GMT
|
|
redmog
Part of the e-furniture
 Not Morgan weather
Posts: 461 
|
Post by redmog on Mar 7, 2010 19:23:24 GMT
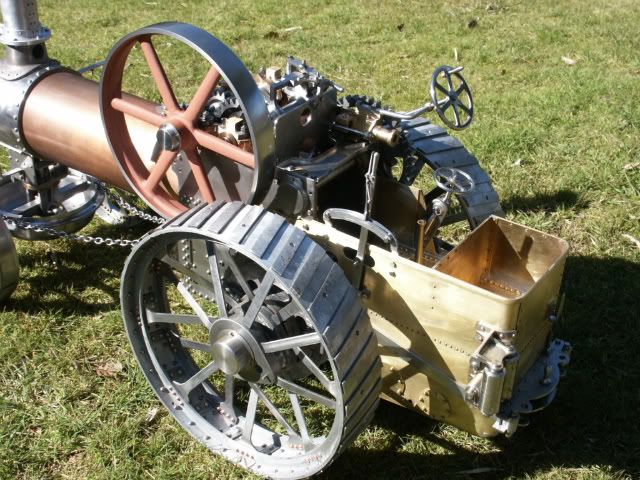
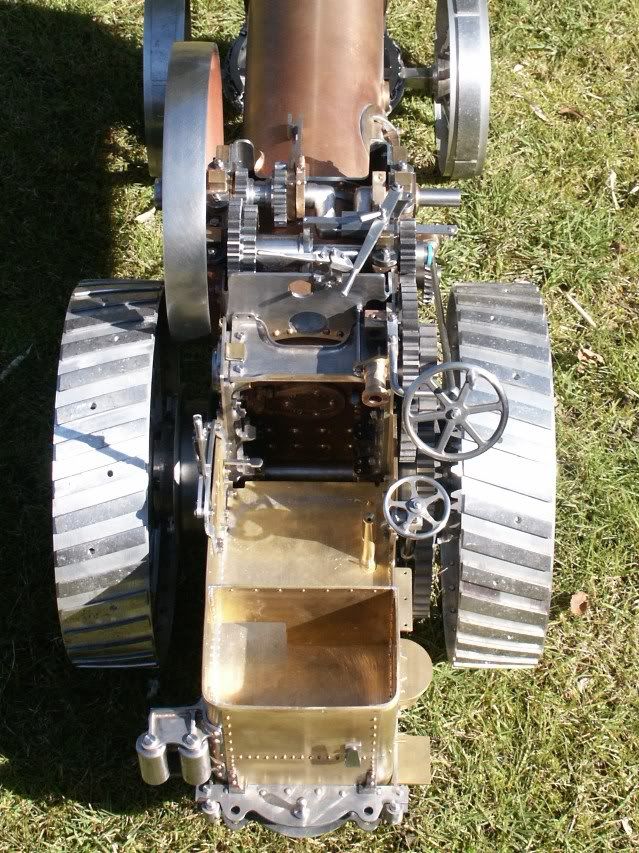
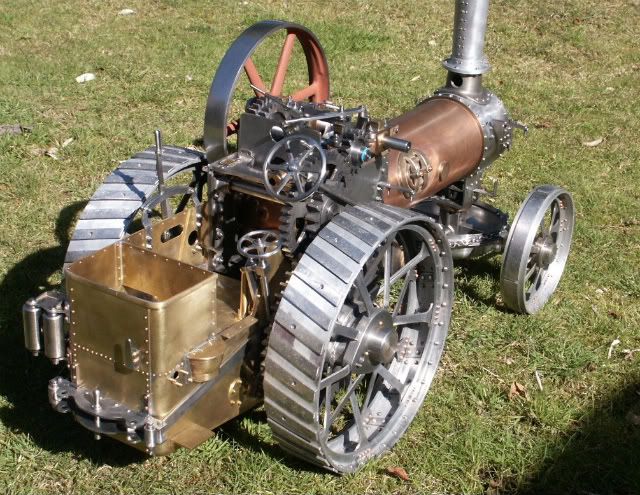
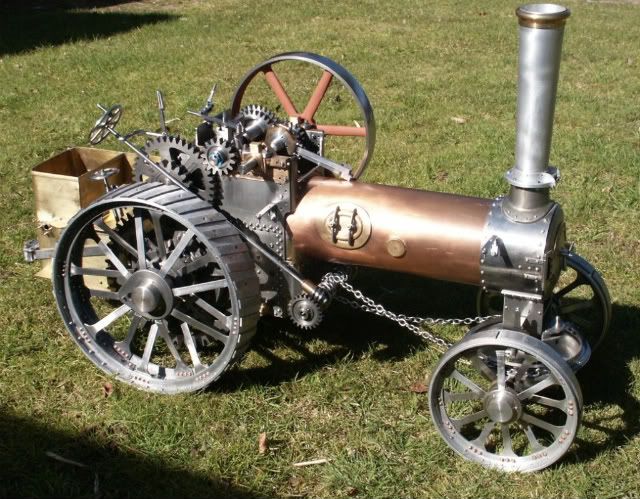
Looks Great. As I bolted all the bits together to take the engine down to a gathering a mostly MJ Engineerings engine builders and the sun was shining I thought I would take a few pics to show the current state of play. Jason Jason. It looks great! I'm not a traction engine man, therefore do not know what model it is, but thanks for sharing the photos with us. Silly me - It must be a 2" Fowler. Chris
|
|
ace
Statesman
 
Posts: 528
|
Post by ace on Mar 8, 2010 1:03:57 GMT
That's fantastic workmanship Jason, its a shame though that one day you will paint it and hide all that hard work you've done. ;D I have a small stationary crane that I built and I am so proud of the work I did on it I decided I will leave all the various metals bare to show off the detail.
Excellent pic's and it's nice to see it coming along.
ace
|
|
jasonb
Elder Statesman
  
Posts: 1,236
|
Post by jasonb on Apr 25, 2010 13:40:59 GMT
Well it seems that the last month or so has been spent turning lengths of bronze and brass bar into an expensive pile of swarf as I have been working my way through the various bits of plumbing on the Fowler. All the parts still need to be buffed up but I will leave that until painting time. First up were the two cylinder draincocks which have to be fabricated to get the correct angle. 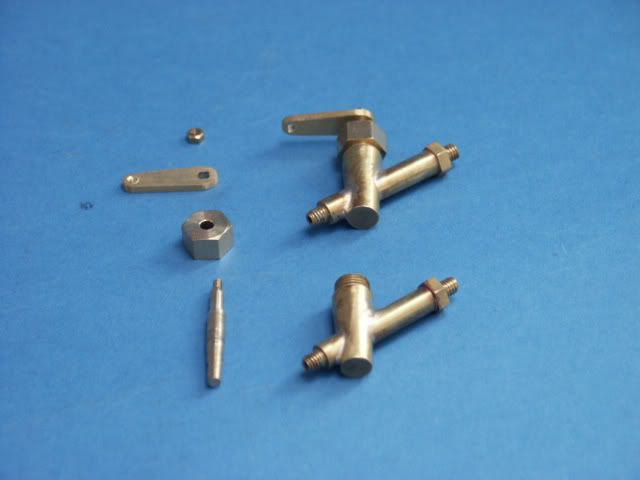 Next was the waterlifter, the ball turner was put to good use on the "T" joint and the elbow is fabricated. I went for a drilled tubular strainer rather than the gauze spec'd on the drawings 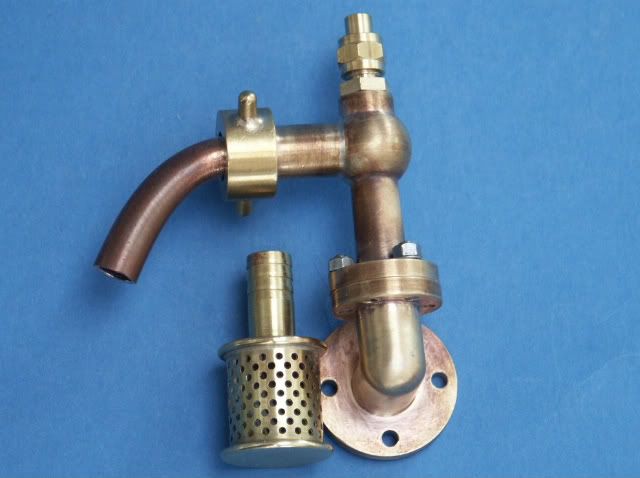 The displacement lubricator and pump clack were both similar fabrications 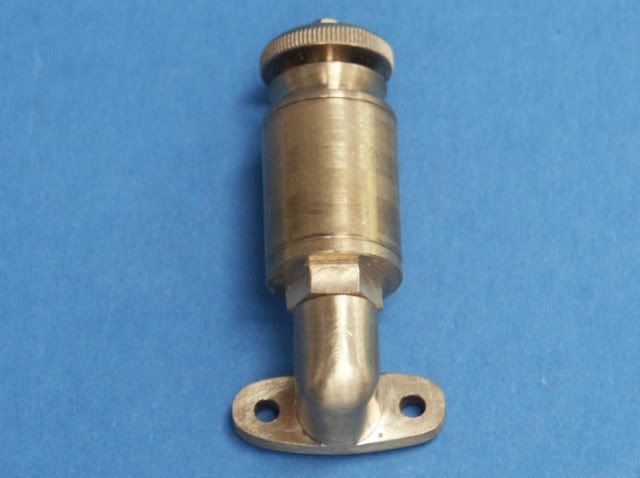 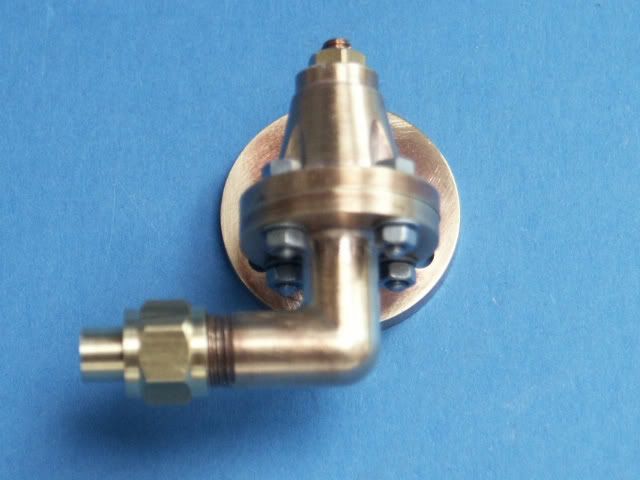 For a break from the pluming I then tackled the governor, balls are again turned from solid rather than joining commercial ones to the arms. I will probably up the 10BA grubscrews that hold the pully & gear to the horizontal shaft to 8BA as its hard to tighten then with such a small slot. Gears are from MJ and just need a little work as they are stock gears. 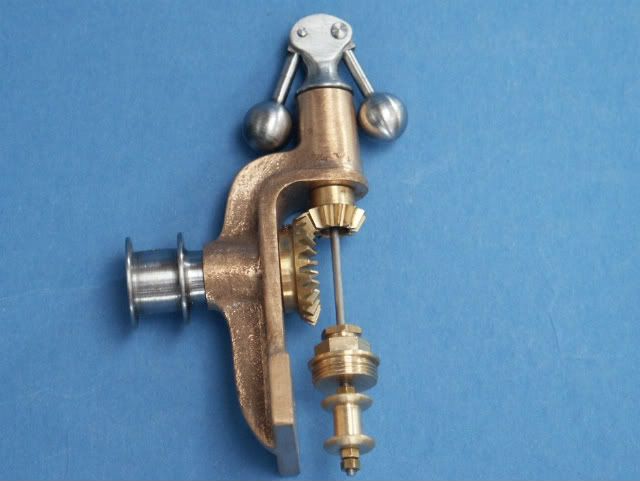 Back to the plumbing and the last casting left to be machined was the manifold, I intend to take the watergauge top feed from one of the bolt holes as the drawing has it off the manifold face which is now not allowed. Can't take credit for the globe valves they are from Steamfittings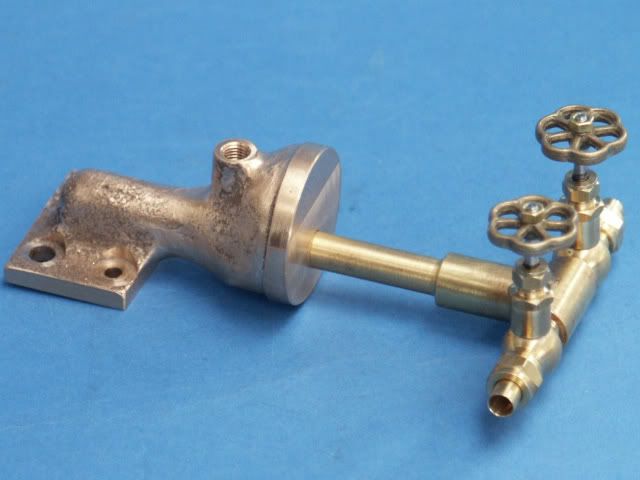 This is the back end of the pump, just need to do the tapered spindle for the tap. 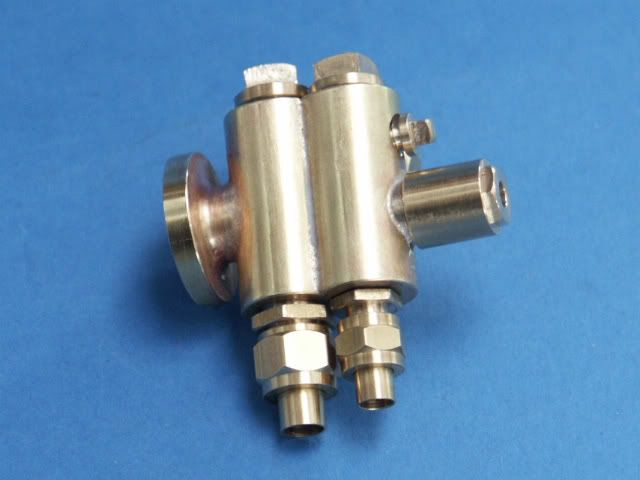 The brass bits for the whistle are done, was just waiting for some 1/16 stainless rod for the valve which has now arrived. 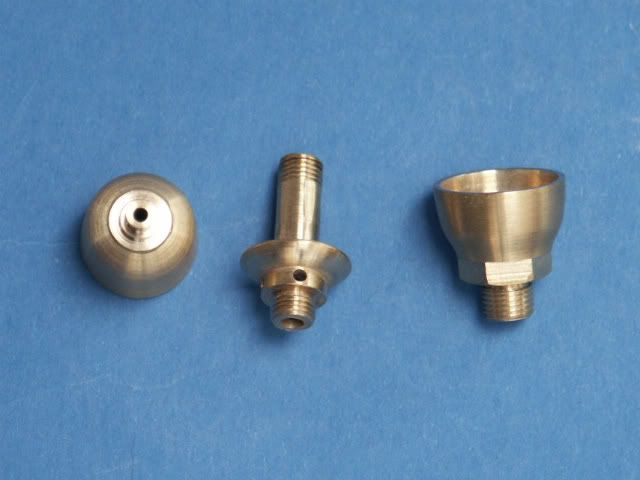 I also bashed out the ashpan over a hardwood former and silver soldered on the mounting flange. I opted for stainless steel hinges etc rather than the mild specified. 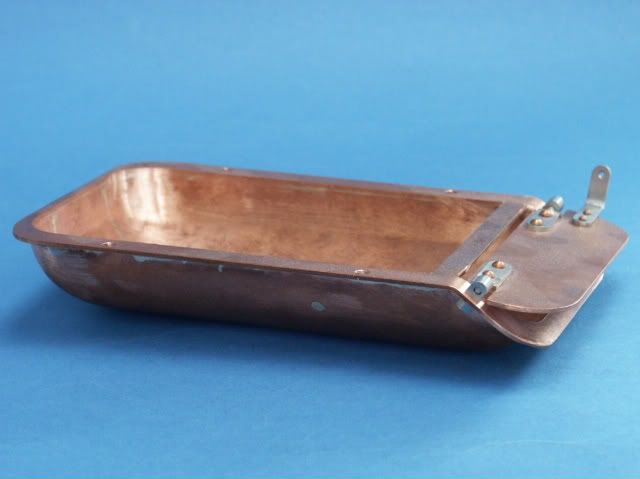 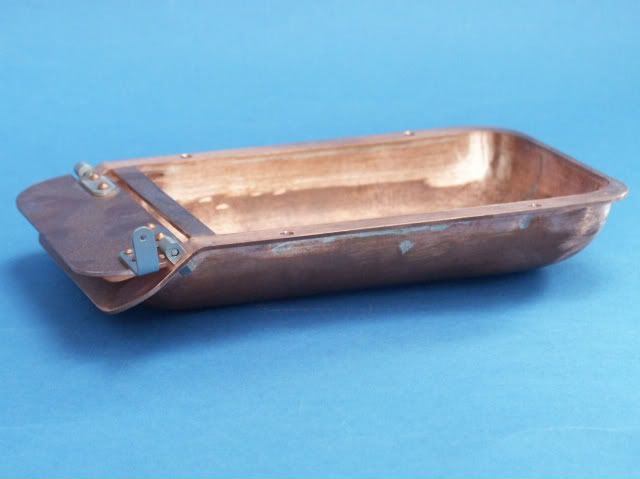 And lastly for this update the cylinder is now bolted to the boiler, I turned up bolts from stainless hex with a dimple on the end to look like studs. 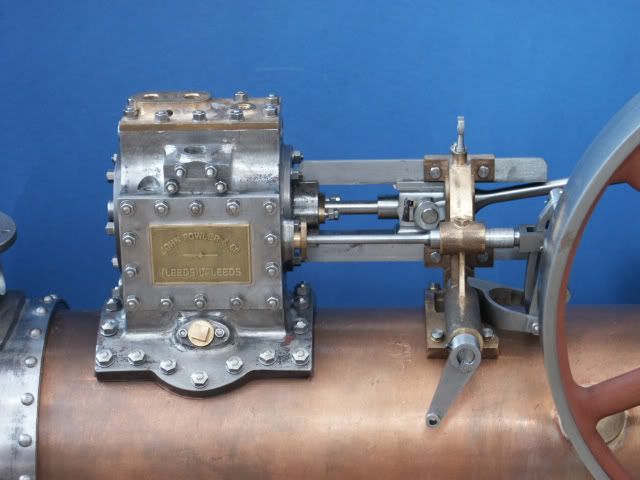 Jason |
|
|
|
Post by jgb7573 on Apr 25, 2010 16:23:47 GMT
Great work there. And smashing photos to go with it. Thanks Jason.
|
|
|
|
Post by Deleted on Apr 25, 2010 17:55:27 GMT
, I turned up bolts from stainless hex with a dimple on the end to look like studs.  Jason I DO like the dimple on the nut head idea! Ruddy clever! JB |
|
|
|
Post by alanstepney on Apr 25, 2010 20:20:04 GMT
I DO like the dimple on the nut head idea! Ruddy clever! JB I also like the fact that it is the correct length of stud and not the three miles (slight exageration) of thread that one often sees. |
|
|
|
Post by Deleted on Apr 26, 2010 8:50:35 GMT
I DO like the dimple on the nut head idea! Ruddy clever! JB I also like the fact that it is the correct length of stud and not the three miles (slight exageration) of thread that one often sees. Ah! But do they have the regulation two thread pitches showing.....? Aspiring Rivet Counter! |
|
|
|
Post by klendo on Apr 27, 2010 19:47:17 GMT
Again great piece of work there Jason.. Also again being a bit of a rivet counter here but the profile of the con rod is actually wrong at the end of the little end. Take a look at the full size www.prestonservices.co.uk/traction.htmAdmitadley its a class R3 however there is actually no real noticeable difference between the A and the R class except for the boiler dimensions |
|
jasonb
Elder Statesman
  
Posts: 1,236
|
Post by jasonb on Apr 28, 2010 6:29:13 GMT
Yes I took 0.050" too much off  so it looks mor rounded than D shaped Jason |
|





 so it looks mor rounded than D shaped