|
|
Post by drumkilbo on Apr 28, 2010 20:29:03 GMT
Jason, I think it all looks superb, well done, and again as I've said before, beautifully illustrated, thanks for posting.
Ian.
|
|
jasonb
Elder Statesman
  
Posts: 1,239
|
Post by jasonb on Dec 27, 2010 19:16:15 GMT
Can't believe its been so long since I posted an update on progress, must admit its been a bit slow as I've been sidetracked by a Hit & miss Engine. (see here for its build) One of the major parts that have now been done are the gear guards, I don't much care for sheet metal work but was quite satisfied how they turned out. I made a former from MDF topped with Corian which is a very hard plastic and formed the outer edge around this. 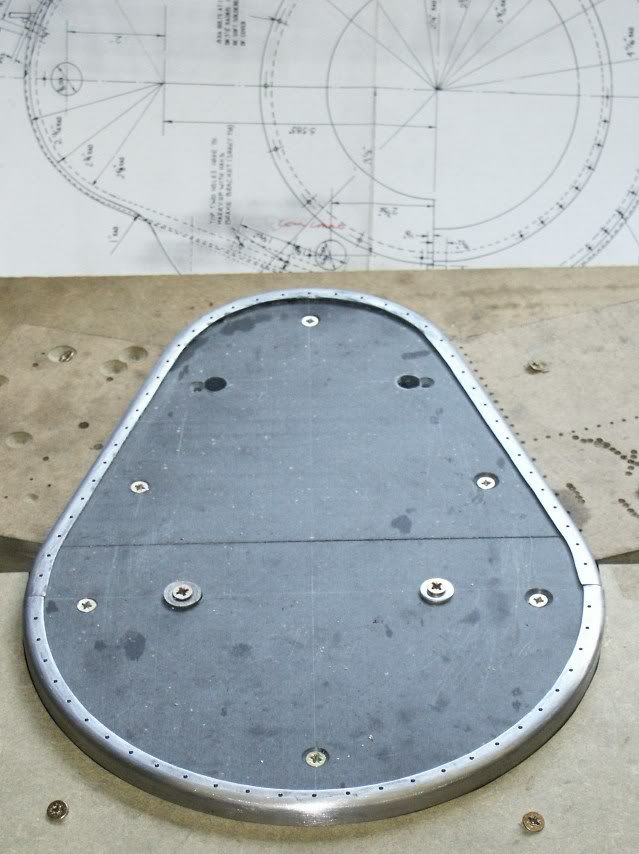 Next the flat outer plates were cut to profile and drilled for the rivits. 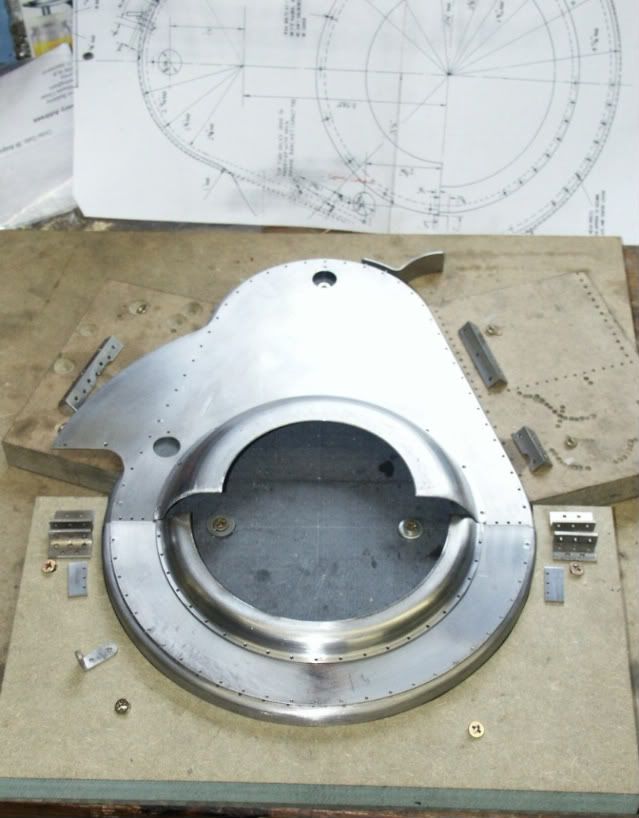 This shows the outer shape being offered up to the engine to get the position for the various mounting brackets and cut outs. Anyone else building this engine should check the depth of the gaurds as mine came very close to teh final drive gear which required the backs of the rivits grinding down to clear everything. 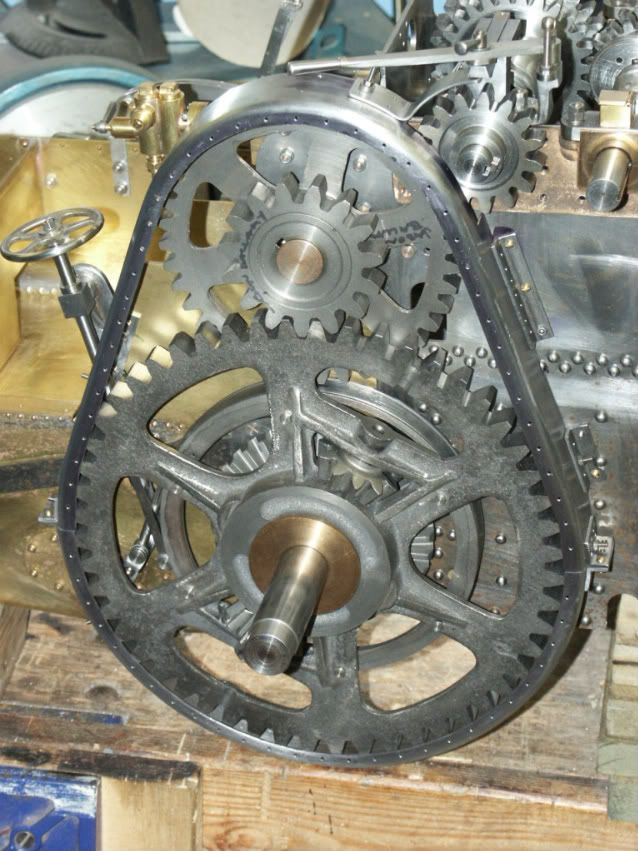 And here they are complete with the two half round spinnings that are supplied by MJ. 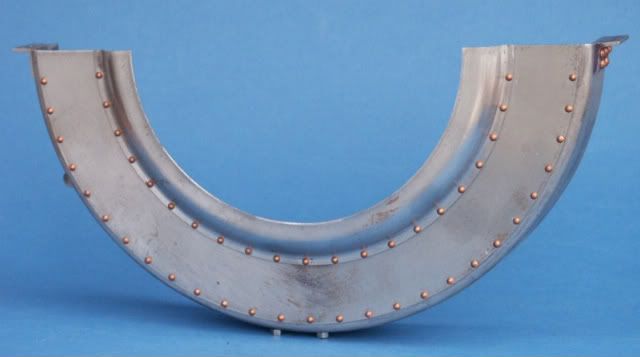 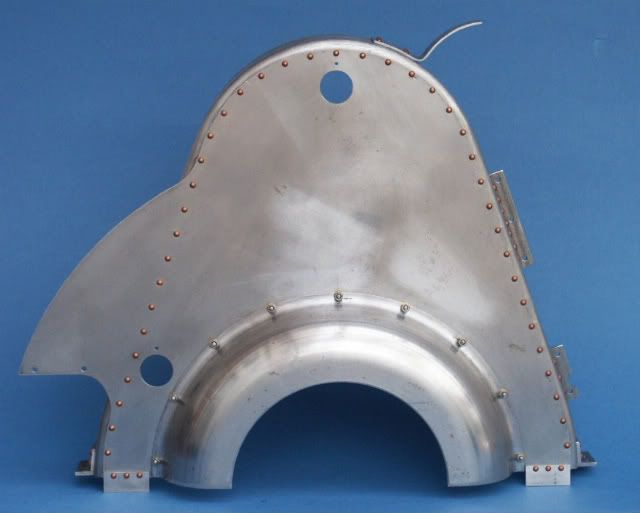 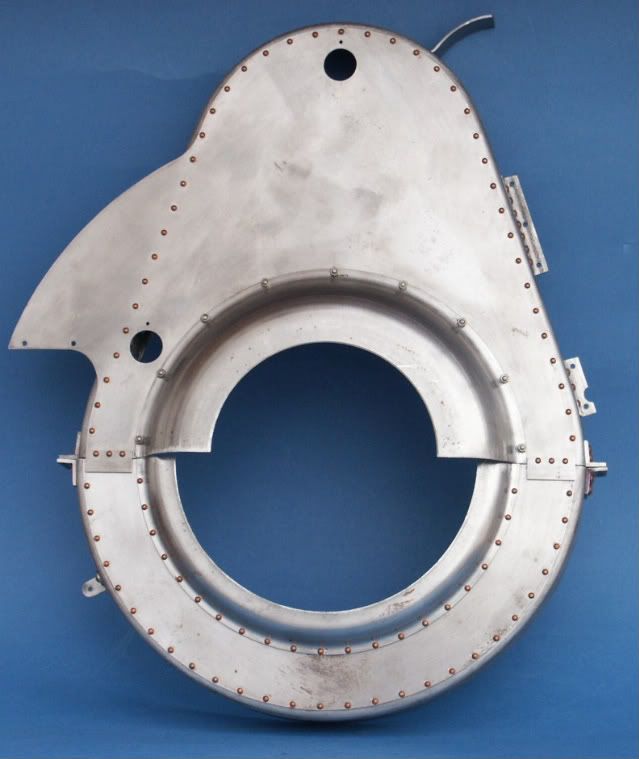 The drawings show the exhaust pipe at 7/16" dia with a bent end to form the nozzel, in order to get this bend into the chimney base requires a 3/4" dia hole and some way has to be found to fill the gap. I deviated and turned a bronze elbow that screws onto the pipe and is a snug fit in the 3/4 hole, this also allows me to change blast nozzel sizes if need be. While at that end I walso did the blower pipe. The bends in teh actual pipe were formed following fellow A& builder Doug's method of multiple cuts almost all the way through the pipe then silversolder up teh gaps 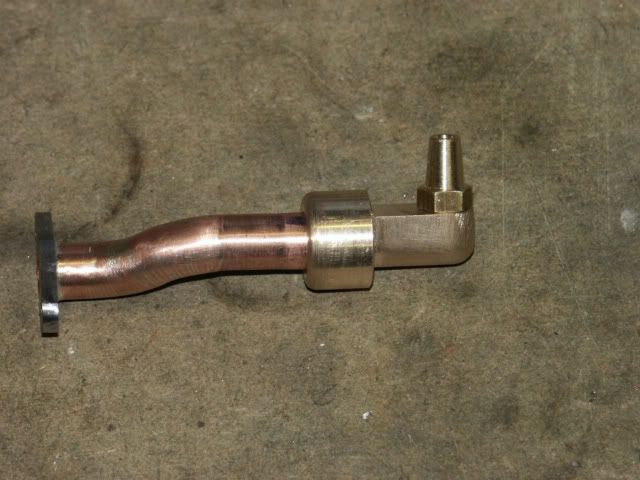 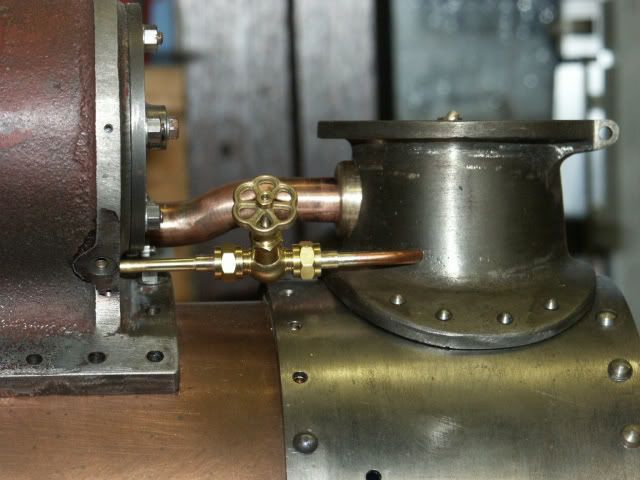 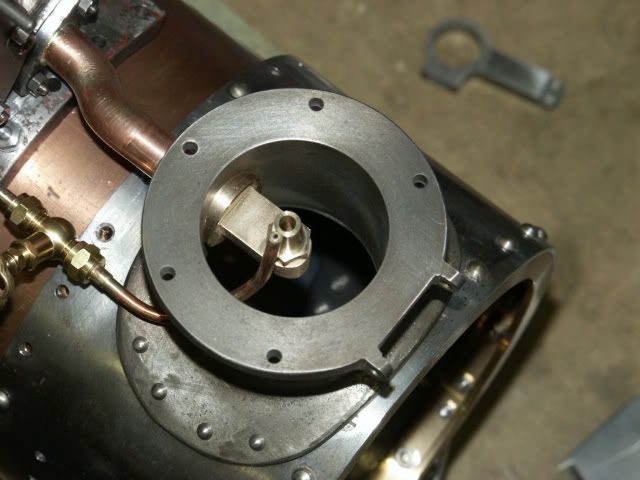 The eccentric rods were drilled and reamed to length which allowed me to set the motion and determine the length of teh reversing rod which needed quite a bend to clear the injector clack that is not shown in the drawings 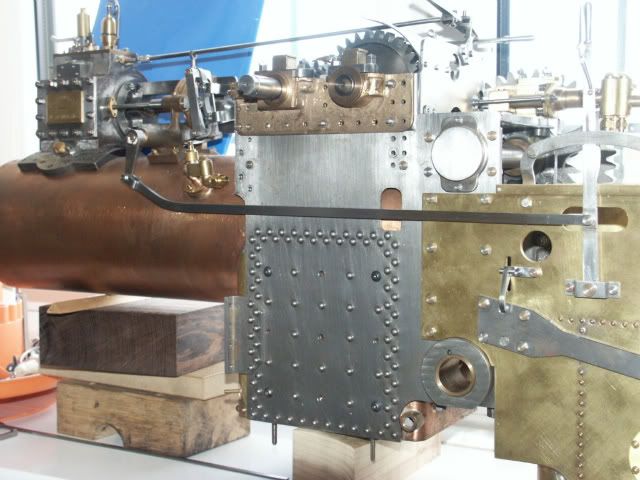 I also got the safety valves and whistle finished, does not make a lot of noise when I blow through it but it gets my dogs attention! 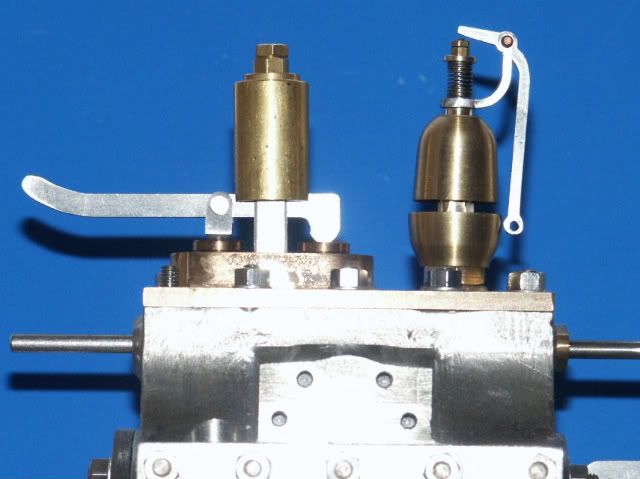 There are quite a few other bits and bobs done but nothing much worth taking pics of Jason |
|
|
|
Post by drumkilbo on Dec 28, 2010 13:20:44 GMT
Another superbly illustrated bit of work Jason, thanks for sharing.
Ian
|
|
|
|
Post by johnbuyer2 on Dec 31, 2010 17:39:50 GMT
wow looks like it will win a few medals once completed...what lathe/mill have you used for this engine Jason
|
|
jasonb
Elder Statesman
  
Posts: 1,239
|
Post by jasonb on Dec 31, 2010 17:49:37 GMT
The first half eg whole front end, shafts and some gearing, rear wheel hubs, drive ctr, brake and winding drum were all done on my old Emco Ecomat 8.6 (8" swing, 600mm between cts) I then changed to a Warco WM280V-F so that I could fit teh 9" dia flywheel and final drive gear onto the machine. All milling has been done on a X3 type machine You can see all the build pics hereJason |
|
|
|
Post by johnbuyer2 on Dec 31, 2010 18:24:37 GMT
Did you bend the gear guard cold or after annealing? Looks perfectly formed as though you used a press!
|
|
jasonb
Elder Statesman
  
Posts: 1,239
|
Post by jasonb on Dec 31, 2010 18:45:36 GMT
First I bent the flat strip over a bit of 3" bar to get the basic radius at the top, I then hammered it at the ends to follow the edge of the former where the flat sides join the larger circle.
Next two MDF blocks were screwed against the straight edges to hold the strip in place and a clamp run top to bottom after which I used a hide hammer to flange over the edge. I stopped when the bend was 75-80 degrees and annealed the steel before puting it back in the former and completing the flange. It would probably have gone without annealing but I didn't want to take a chance with a kink.
Bottom half was done in the same way, both were done about 1" over length each end and then trimmed to the joint line, its easier to get the end to follow the curve that way.
J
|
|
|
|
Post by welshy on Jan 2, 2011 12:04:28 GMT
Very nice work Jason
Mike
|
|
russell
Statesman
  Chain driven
Posts: 762
|
Post by russell on Jan 7, 2011 19:21:22 GMT
Looks superb Jason.
Russell.
|
|
jasonb
Elder Statesman
  
Posts: 1,239
|
Post by jasonb on Mar 27, 2011 20:03:47 GMT
Its been a while since I posted any progress so as the sun was shining I thought it about time to get the camera out. As you can see the gear gaurds that had just been completed in my last update have now been fitted 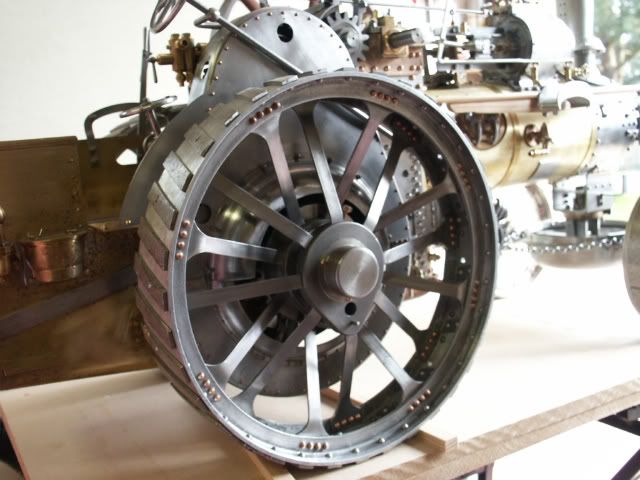 The next job was to rivit the hornplates to the spec & motion plates and also the bearing brackets to the horns, I mostly used copper rivits for this to avoid damage to the gunmetal castings. 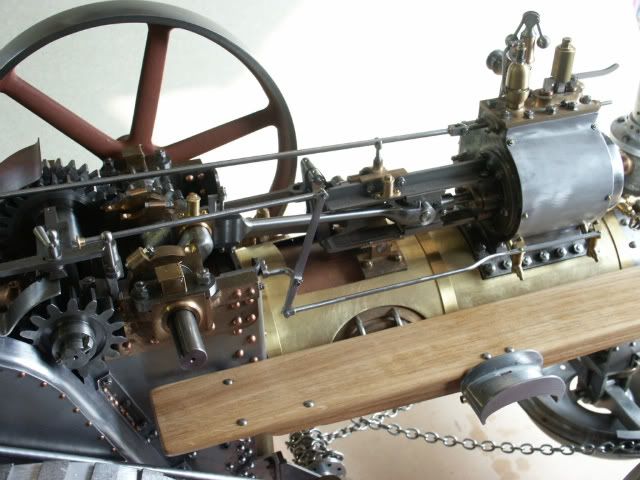 With the engine assembled I could get the lengths for the reach rod, drain cock linkage and the (out of sight) damper rod. As a change from metalworking a scrap of oak was machined up to make the footboard and some little coachscrews to hold them together, the hose bracket now had something to fix to as well 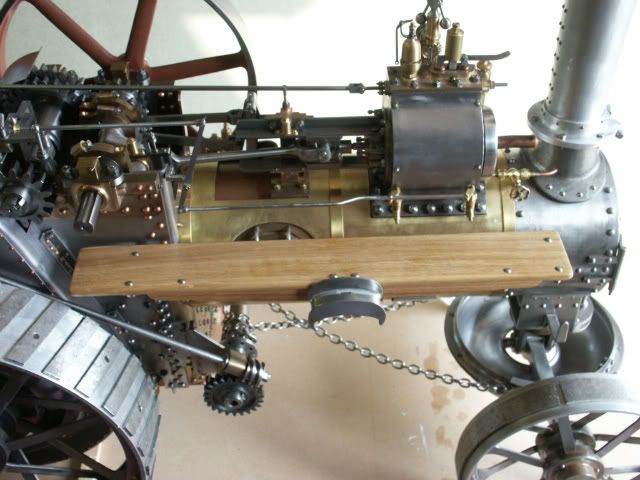 As you can see the boiler cladding and bands have also been done, these are supplied by MJEng as two rolled half circles and just need trimming to size and then lots of trial fits followed by cut/filing a bit more off until a snug fit is obtained around all the various fittings. I still have the trim around the manhole and drip tray to do 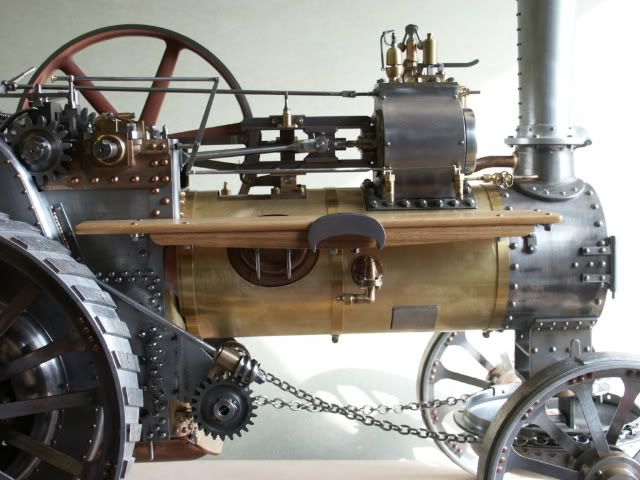 This shot from the other side shows the steel rubbing plate better 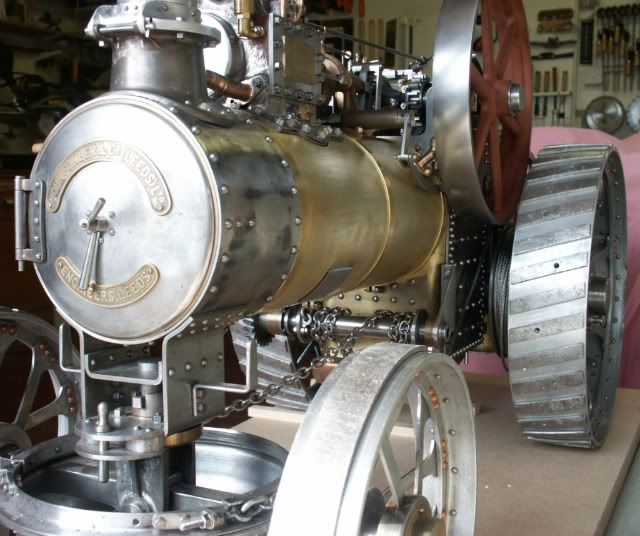 And a couple of pics from above showing the motion, etc 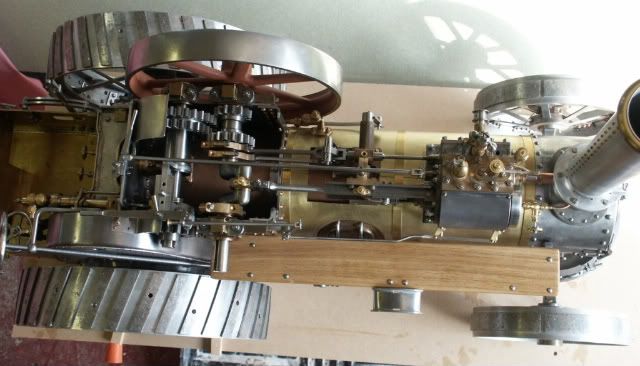 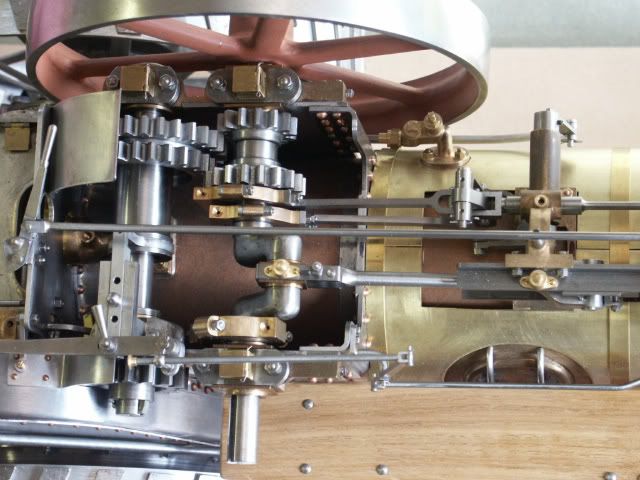 And a full frontal!! 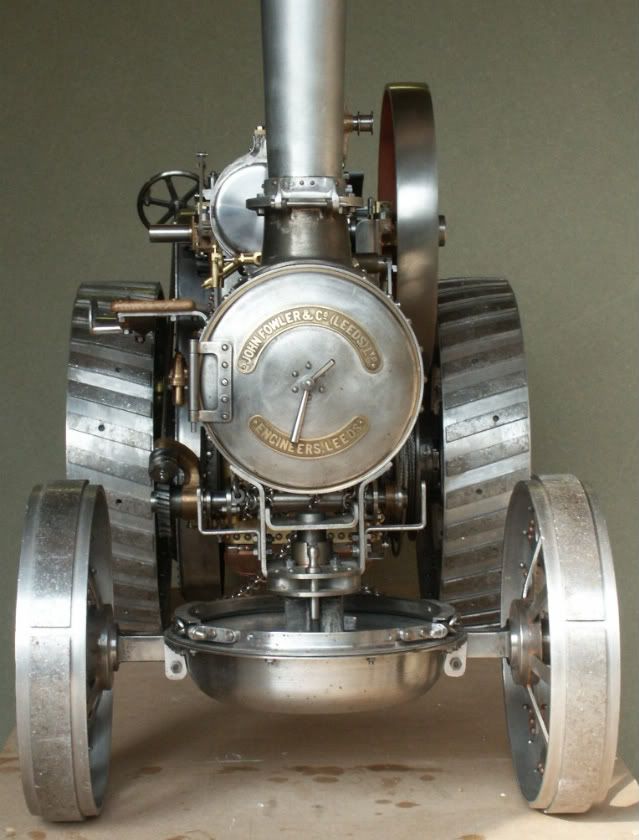 I then pushed it out for a few overall shots 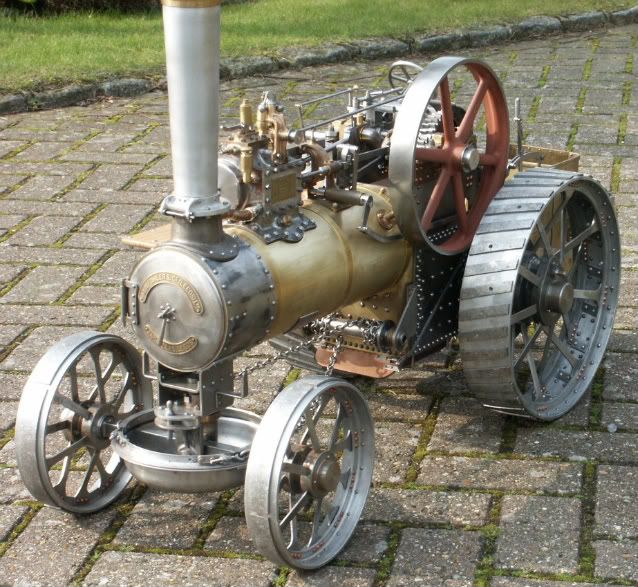 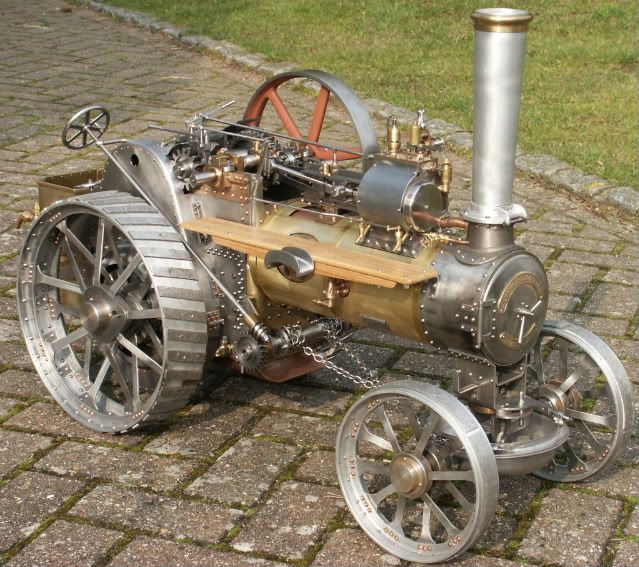 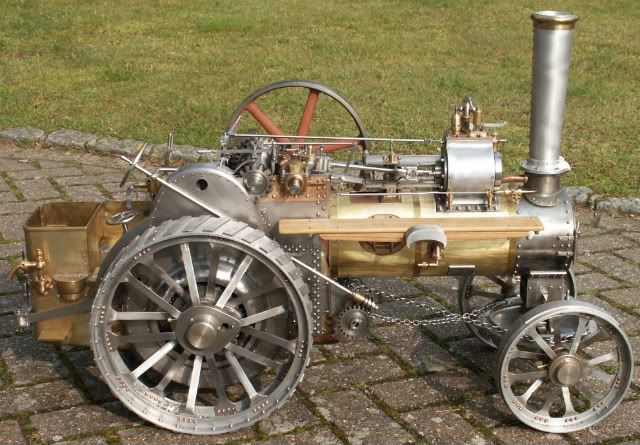 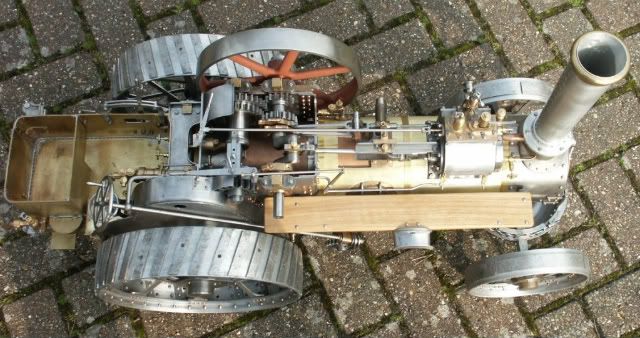 Plumbing it all up is the next job, this is the end 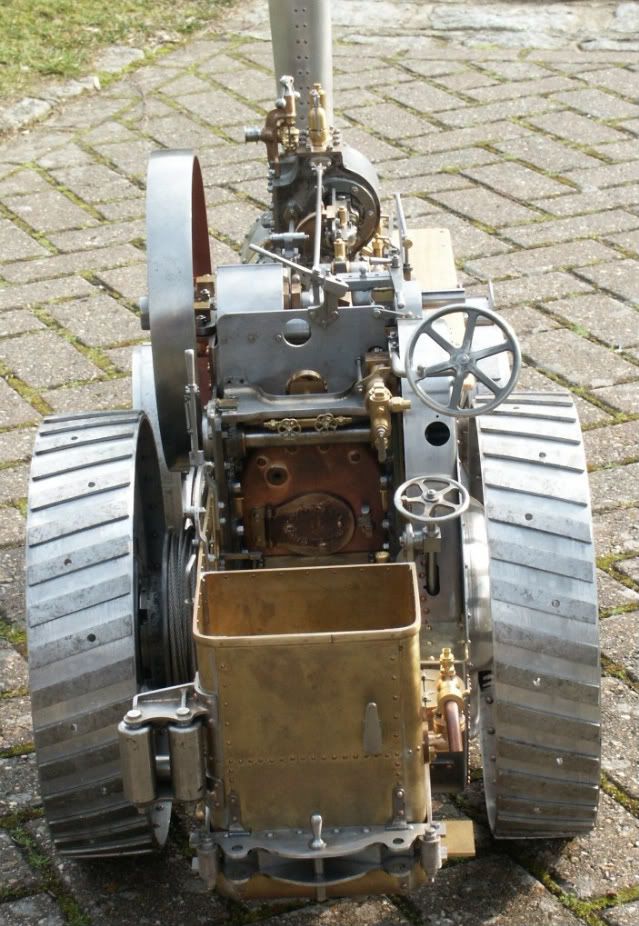 |
|
|
|
Post by fostergp6nhp on Jun 7, 2011 19:04:49 GMT
Very nice indeed. I dare not let my wife see it as she would badger me to build a 4" scale one.
Just out of interest what DP are the different gears? as the final drive looks like its a bigger tooth form than the rest.
|
|
jasonb
Elder Statesman
  
Posts: 1,239
|
Post by jasonb on Jun 8, 2011 6:32:03 GMT
Crank/2nd shaft are 10DP
2nd/3rd shaft are 8DP
3rd/final drive are 6DP
J
|
|
|
|
Post by Deleted on Jun 8, 2011 8:50:51 GMT
It's the first time I've seen this Jason, I have to say what an absolutely fantastic piece of work. My hat off to you sir, very nice indeed...
Pete
|
|
|
|
Post by fostergp6nhp on Jun 8, 2011 20:46:41 GMT
Thanks for the gear info.
|
|
|
|
Post by welshy on Jun 12, 2011 19:28:30 GMT
Looks superb Jason, very well done.
Mike
|
|
|
|
Post by ettingtonliam on Jun 13, 2011 8:49:19 GMT
When I see work like this, I look at my own, then go off into the corner and cry! A pity to cover it up with paint, but I suppose you will have to.
Congratulations
Richard
|
|
russell
Statesman
  Chain driven
Posts: 762
|
Post by russell on Jun 13, 2011 10:06:30 GMT
Fantastic piece of work. Quick as well.
Russell.
|
|
|
|
Post by fostergp6nhp on Jun 18, 2011 12:03:57 GMT
When I see work like this, I look at my own, then go off into the corner and cry! A pity to cover it up with paint, but I suppose you will have to. Congratulations Richard If you did not want the paint finish you could always clear laquer it.  |
|