|
|
Post by Deleted on Oct 28, 2011 7:49:25 GMT
My sympathies Jim, I'm on my second smoke box and I've lost count of the paint jobs necessary to get it right!
JB
|
|
|
|
Post by Jim on Oct 28, 2011 11:30:34 GMT
G'day Shawki and JB Thanks for the commiserations JB, it is good to know that I'm not on my own with my rebuilds/repaints.  A friend once said to me 'How can you bear to re do that?' but I honestly think redoing things to get it the way you want it is part of the hobby, I'm probably a bit of a masochist there. I've been following your ash pan build with interest JB, especially the idea of doing away with the outer pans in favour of shallow sloping ones leading into the main centre and more accessible pan. Hope you don't mind if I copy that idea. I got the notion of trying concentric extended petticoat pipes from an article in AME sometime back. The reasons for doing it were exactly as you describe Shawki and your experiences would suggest it's an idea worth following. The next job now will be to make up and attach the smoke box sealing skirts for the steam pipes then the paint can go back on to to make the poor girl decent again. Jim. |
|
|
|
Post by Jim on Oct 29, 2011 6:47:41 GMT
It's nice to get back working on Boadicea especially now I have sorted out the cylinder steam pipes to my liking. The photo shows the new fittings including the nipples for the steam oil feed in and the very compact cast elbows which I salvaged from my late son's chandlery stock.  The drawing in the background is for the original nut and tail assembly which also called for a tight bend to the pipe once inside the smoke box to take the steam line back to the regulator. Once the sealing flanges are fitted to the pipes I can then repaint the smoke box and all will hopefully be right again. Jim  |
|
Andrew C
Part of the e-furniture

Posts: 447
|
Post by Andrew C on Oct 29, 2011 7:17:20 GMT
Hi Jim Glad to see you have managed to escape into the workshop and are making progress again. I always think so long as things are changing it's progress... of a sort. That double petticoat is an interesting idea. Do you intend to make it detatchable so you can get at the regulator etc behind? My other engine Dolly Stephens (See a mistery design under images) has always been a bit of a shy steamer I think I might try this on her. Dare I ask hows the boiler comming along? Keep up the great work and the post comming  Andrew |
|
|
|
Post by Jim on Oct 29, 2011 11:50:35 GMT
Hi Andrew, The boiler? Ummmm well I have cut the tubes to length if that can be counted as progress. Actually I had thought of putting an electric motor in the tender with rubber traction tyres on the tender wheels to create a 5" gauge Hornby model. The club said 'No!'  The petticoat pipe concept was published in Australian Model Engineering (AME) a couple of years back and I think I'm right in saying it's a type of single Kylchap system. The author claimed it improved draughting and interestingly in the process produced a distinctly louder "chuff". No dimensions were given in the article unfortunately but I intend to make mine removable so I can access the regulator and steam pipes. The lower pipe will be adjustable too. I'll keep you posted on how it works.....when I've done the boiler  Jim |
|
|
|
Post by Shawki Shlemon on Oct 30, 2011 9:24:35 GMT
Why the club says no for a motor in the tender , its your engine , Your club have some huge petrol engines , why no for you ?  |
|
|
|
Post by Jim on Oct 30, 2011 10:14:36 GMT
My apologies Shawki for creating a misunderstanding and unintentionally misleading you, I certainly didn't intend to do that. As you so rightly point out as modellers we can build whatever we like and however we like.
It's been a bit of a joke among my friends that my tardiness in building the boiler was because I was secretly building a 5" Hornby model with a big smoke generator in the smoke box and a sound system in the boiler barrel.
My club is a great club with a strong leaning towards scale 5" locos and rolling stock, the members are very friendly and supportive and would never in reality say 'No' to any member's project.
Again my apologies Shawki for creating a misunderstanding. Your support and encouragement is much appreciated by me and many others on this site.
Jim.
|
|
|
|
Post by Shawki Shlemon on Oct 30, 2011 10:28:01 GMT
I used to go Canberra special run in September quite often , one of the years my Z13 won the most popular model for the weekend . I still go to conventions once every two years , even that is becoming a bit too much for me . Canberra club is great and I enjoyed every trip there and the people are very friendly and that is why I was puzzled with your statement . ;D ;D
|
|
|
|
Post by Jim on Oct 30, 2011 10:37:16 GMT
Thanks Shawki, I look forward to meeting you there sometime.
Jim
|
|
|
|
Post by Jim on Nov 1, 2011 11:18:49 GMT
Photos of paint drying don't do much for me so I thought I'd back track a bit to before the strip and repaint of Boadicea's smoke box to when I installed her three chime whistle. The plans called for a whistle hidden behind the left hand smoke deflector. Apart from the fact that I didn't like the location the whistle I had was too big anyway. So I decided to locate it inclined, between the frames in the space beneath the smoke box. In the event of the whistle needing attention it can be easily removed by rolling the loco forward and dropping the front bogie. I don't anticipate that happening too frequently however says he hopefully. I had thought of running a steam line to the dummy whistle on the smoke box side but decided after a soothing ale that that was going to a lot of pain for no gain. Operation of the whistle will be via suitable cable to the cab. I have since painted all the nuts and primed areas in the photo.  Jim  |
|
|
|
Post by Jim on Nov 4, 2011 6:41:47 GMT
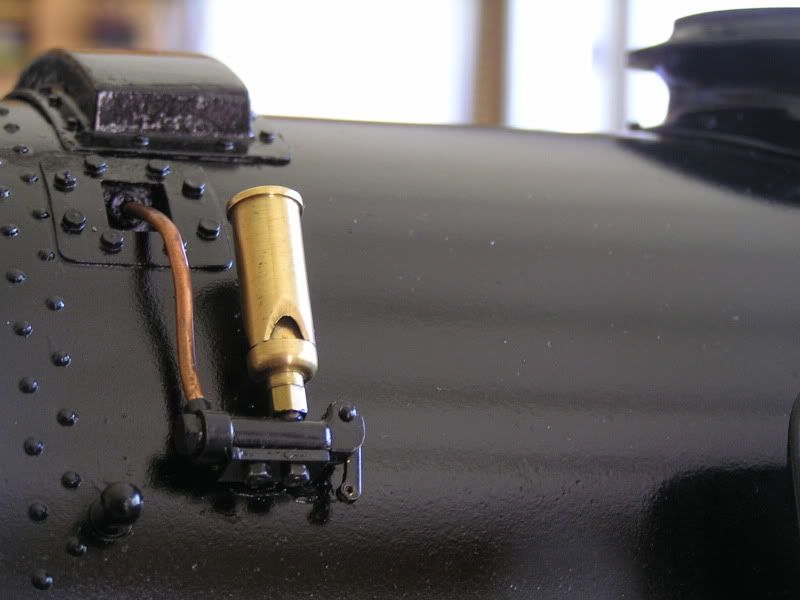
This is Boadicea's dummy 3 tone chime whistle which I made from bits of brass tube and rod with a bit of copper wire for the steam delivery pipe. The three tone whistles were fitted as standard on the Britannias but from what I've read some were later swapped for two tone or single tone whistles at various sheds depending on the shed foreman. Evidently some signalmen prefered the single tone whistle as they felt the sound carried further. The whistle was operated by a rod from the cab running through the hollow hand rail. Jim  |
|
|
|
Post by Jim on Nov 5, 2011 8:23:25 GMT
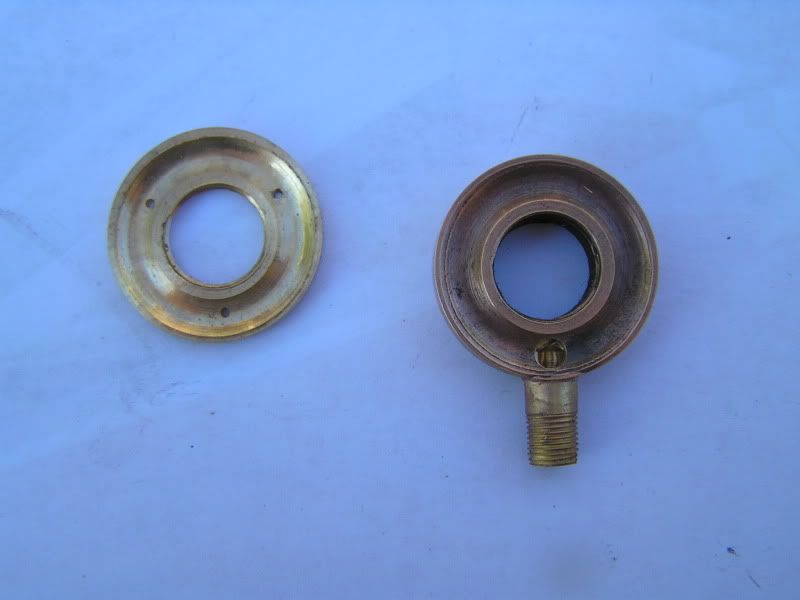
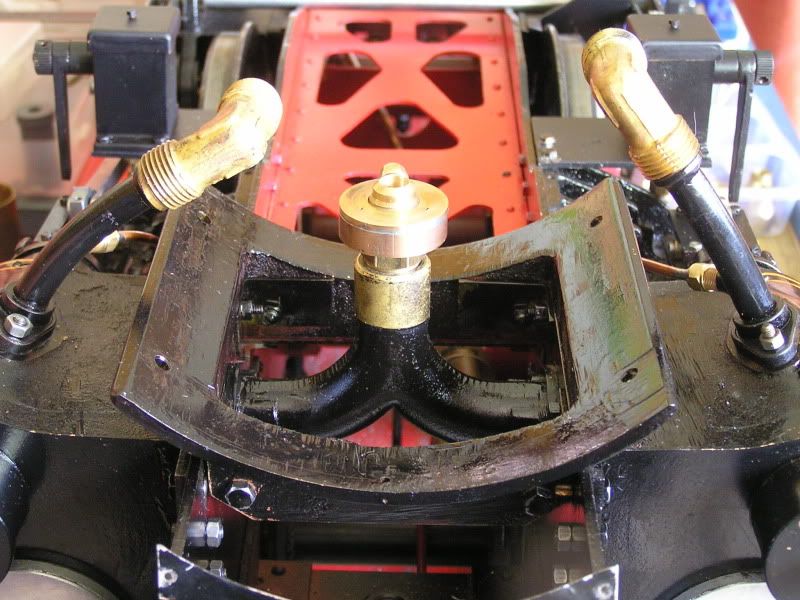
It was a lovely day today so I spent the day making the blower ring. As the pics show it is nothing very remarkable and made from an odd off cut of bronze I had. In making the annular groove I tried for the first time a round cutter (ex broken 1/8" end mill) in my old tangential cutter holder and it worked a treat. Ads for a newer version of the tool holder appear in the ME mags and they are a very handy and versatile bit of kit as the photos in the link show. www.eccentricengineering.com.au/index.php?option=com_content&view=article&id=2&Itemid=17I believe these cutters were originally designed for use by novice machinists in factories during WW2. The photos basically tell the story: blower body was threaded to screw onto the blast pipe with a threaded tail silvered on to take a 1/4" nut and tail connection to the steam pipe. Oh dear I suppose that means I'll have to start on the boiler.  The trial fit of the bronze offcut .  the blower components  The blower pretty much as described by Henry Greenley, in place  Phew! all this calls for a soothing ale to to restore the tattered nerves  Jim |
|
|
|
Post by Deleted on Nov 5, 2011 9:04:23 GMT
Looking good Jim... I'm also at the blower ring stage, not been able to do anything over the last 4 weeks due to work but today's the last day of the shoot so I'll be updating soon. Keep up the good work mate.......  Pete |
|
|
|
Post by Jim on Nov 5, 2011 12:16:47 GMT
Good to hear from you Pete and look forward to the updates to FS now that that activity called 'work' is coming to an end.
Jim
|
|
|
|
Post by Jim on Nov 7, 2011 1:09:49 GMT
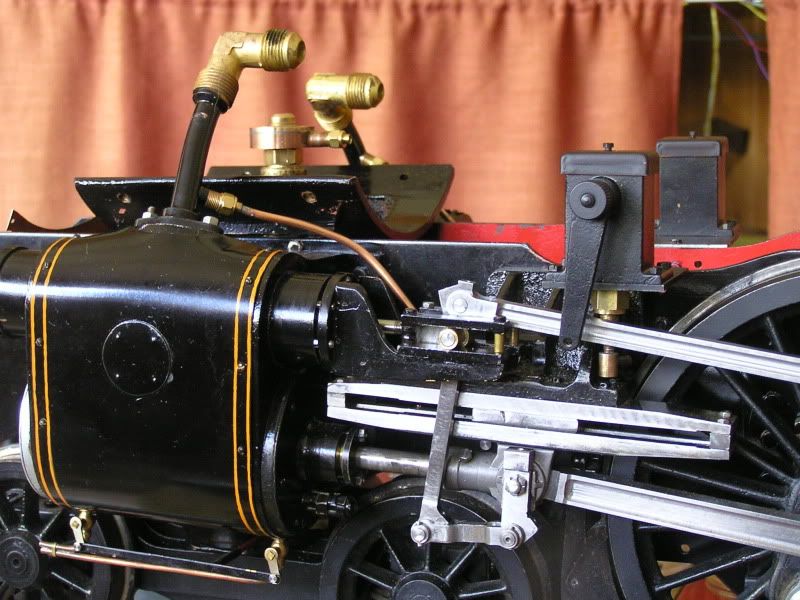
The progress is slow but things are being fitted to Boadicea. Recent work has centred on the lubricators and steam pipes and because of the confined space available to connect the the oil line to the lubricator I decided to make up a pair of mini banjo fittings ensure the pipe lined up properly and to give me a right angled turn in the feed line. I won't go into the words said to stop it all turning into a couple of blobs of solder but it worked!  The next job I thought would be fairly straight forward as all I had to do was solder the pipes into the banjo fittings bend the annealed pipe to run behind the cross head brackets and so to the nut and tail fitting into the steam pipe. The first worked with out a hitch then disaster struck. As second pipe was soldered to the fitting it caused the banjo to unsolder. With tiny part headed for floor hand shot out and caught it brilliantly only to discover it was B..... hot.  Hand and part in bucket of cold water while trying to stop soldering iron from burning a hole in the work bench when voice from door said 'Having problems are we dear?  '  Eventually all was sorted and in place and now awaits the boiler.  The final two pics show the general layout of the blower and steam pipes and the oil pipes connecting the lubricators to the cylinder steam lines. Jim  For those interested the exhaust steam pipe that the blower sits on is a commercial 'Yorkshire' fitting called from memory 'a swept branch'. Whatever the name it certainly beats trying to make one and they are not expensive.  |
|
brozier
Part of the e-furniture

Posts: 335
|
Post by brozier on Nov 7, 2011 14:26:46 GMT
Hi Jim, A quick look suggest 15mm Double Sweep Tee might fit the bill but they seem quite expensive £15-30!  Cheers Bryan |
|
|
|
Post by Jim on Nov 8, 2011 2:53:54 GMT
Ouch! When I bought mine (I got two) they were about 9 quid each. about $A13.00. that was 3 or 4 years ago.   Jim |
|
Andrew C
Part of the e-furniture

Posts: 447
|
Post by Andrew C on Nov 8, 2011 7:32:41 GMT
Hi Jim Nice to see some progress again. The lubricators look a nice neat fit. I notice you have not fitted a second non return valve between the lubricator and the steam pipe. Is that wise? In my experience I end up with steam in the lubricating oil  Keep up the great work I have had a bit ofa disaster but more in another thread Regards, Andrew |
|
|
|
Post by Jim on Nov 8, 2011 11:57:42 GMT
Hi Andrew,
In this case the return valve is part of the lubricator which wasn't the case on the Burrell where I used a car tyre valve, which I must say has worked brilliantly.
Progress has been slow due to other jobs intervening but things are starting to happen again and of course the boiler tubes sit as a reminder that the boiler is the next big job.
Jim
|
|
Smifffy
Statesman
  Rock'n'Roll!
Posts: 943
|
Post by Smifffy on Nov 8, 2011 12:00:46 GMT
Jim,
I've amended your last sentence for you:
Progress has been slow due to other jobs intervening but things are starting to happen again and of course the boiler tubes sit as a reminder that the boiler is the next big job too many soothing ales.
;D
|
|