|
|
Post by Jim on Jan 20, 2012 7:50:05 GMT
To day it was back to heating and belting but at the end of the day most of the work of the throat plate was complete. The first job after annealing the work was to clamp it securely to prevent the flange round the barrel from deforming. A very large pipe clamp was used for this and it proved very effective. Other clamps and strong backs from the off cut bin were also used ensure that the flange was formed without deforming the rest of the job. As the photo shows it all looks a bit Heath Robinsonish but it worked. 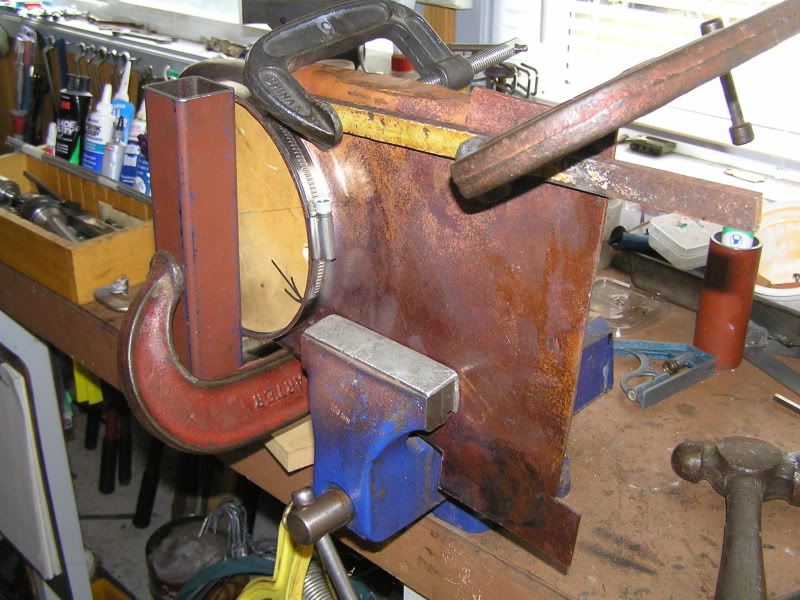 The next photos show the throat plate test fitted to the boiler barrel and with the waste removed. 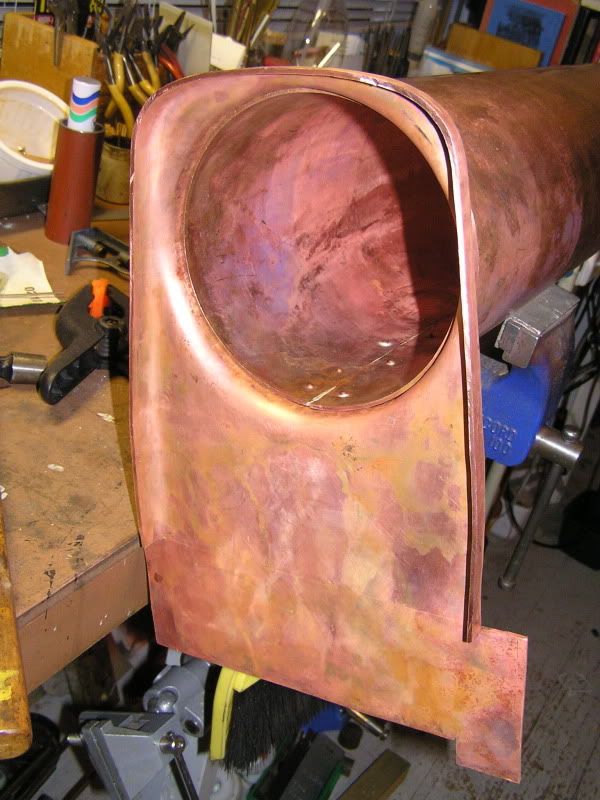 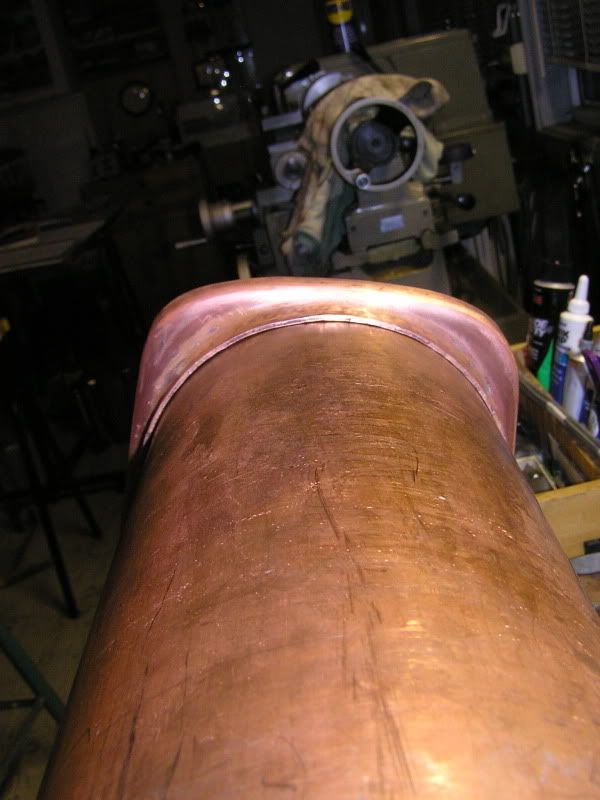 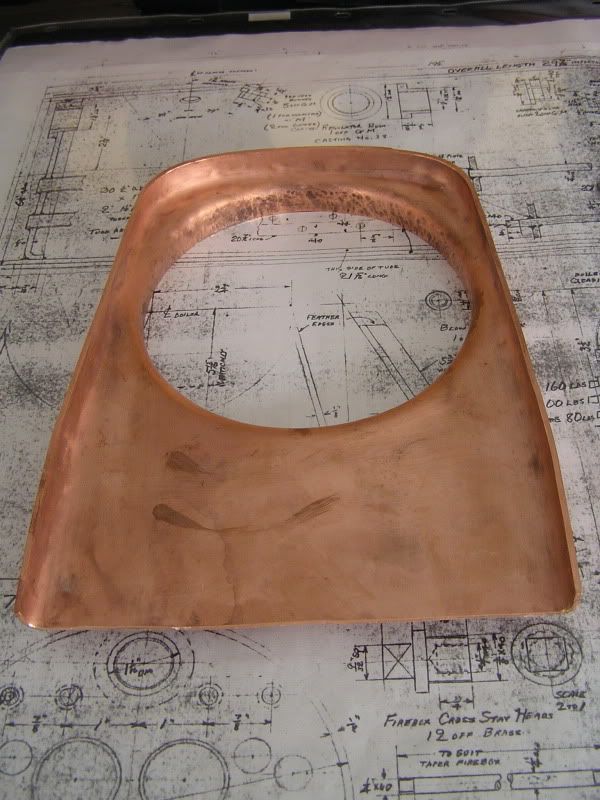 Afer years of dodging the issue I think I can see Boadicea's boiler actually becoming a reality.  Jim Last edit: I updated the photo of the throat plate, |
|
|
|
Post by Shawki Shlemon on Jan 20, 2012 8:20:45 GMT
Well done Jim , it is not as hard as it appears in the first instance , once you have a go , overcome some issues and you are there . Once you have the confidence you will do even better and faster .Been there done that . ;D
Good luck
|
|
|
|
Post by Jim on Jan 20, 2012 9:46:43 GMT
Thanks Shawki, you're right of course once started things start to fall into place. I think I might just wait a bit for the weather to cool down though before I start the silver soldering ;D
Jim
|
|
|
|
Post by Deleted on Jan 20, 2012 11:19:05 GMT
Very nice Jim, you've certainly impressed the hell out of me, keep up the good work mate...  Pete |
|
Smifffy
Statesman
  Rock'n'Roll!
Posts: 943
|
Post by Smifffy on Jan 23, 2012 13:54:06 GMT
:-)
|
|
|
|
Post by arch1947 on Jan 23, 2012 21:40:55 GMT
Looks good Jim, initially I found I was not annealing often enough but was I realised that there wasn't really too much annealing things went smoothly. The Throat plate looks great.
Cheers,
Arch
|
|
|
|
Post by Jim on Jan 23, 2012 22:08:31 GMT
Good advice Arch, it takes a few goes before you start to get a 'feel' for the job and what you're trying to achieve. I freely admit I'm still feeling my way on this but I'm lucky in having a very experienced boiler inspector who is more than willing to share his knowledge and that is a great help even if he is 300kms away.  Jim |
|
|
|
Post by Jim on Jan 28, 2012 11:19:19 GMT
Slowly getting there with the backhead flanged today. It's a slow process, making the formers, cutting the copper etc etc. but there are only the 2 firebox plates to go.  Then it's off to the club inspector for him to check the work. 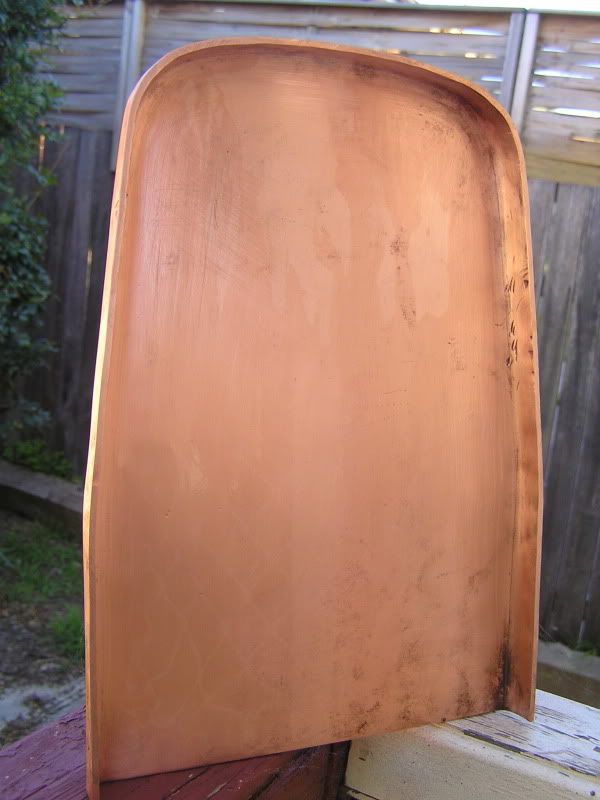 Jim. |
|
|
|
Post by donashton on Jan 28, 2012 19:21:31 GMT
Nice work, Jim. You say it's a slow process - what other major part of the engine could you do so quickly? And not even time for soothing.
Take care to keep a centreline throughout as you put the pieces together - I've seen expensive lumps the will not line up with the smokebox!
Best wishes
Don
|
|
|
|
Post by Jim on Jan 29, 2012 5:20:26 GMT
Don I'm not game to pause for a soothing ale in the current summer heat, I'd never get started again.  it's currently 31C and rising while poor Peteh in WA of Northumbrian fame is basking or should that be baking in 40C  I shall certainly heed your advice and include some safety checks of my own when it comes to assembling all the boiler bits. I have heard some horror stories of badly aligned boilers and I certainly don't want to add to them. I have enough problems as it is.  |
|
|
|
Post by Jim on Mar 9, 2012 20:55:20 GMT
I thought it might be time I gave a progress report on Boadicea to show that I hadn't over done the soothing ales or been washed away in the floods.  The ash pan is now completed along with the rosebud grate and its guides. 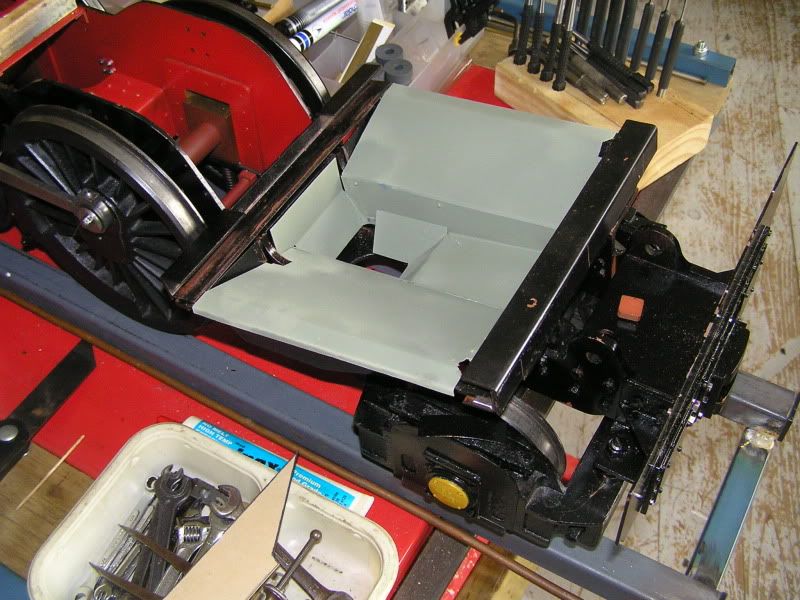 The throat plate has been trimmed and shaped to sit on its supports. 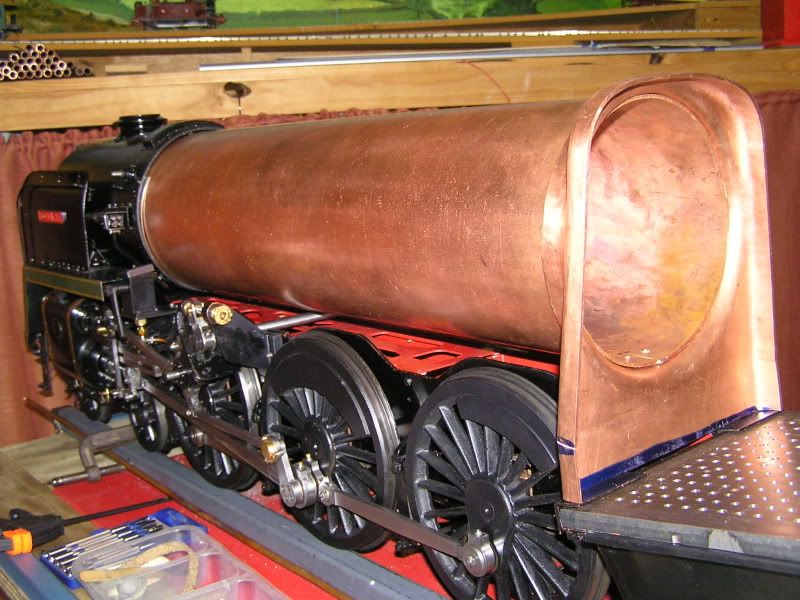 And finally after a lot of muttering I managed to get the tube stack together in a trial assembly and get a photo before it all fell over. ;D ;D 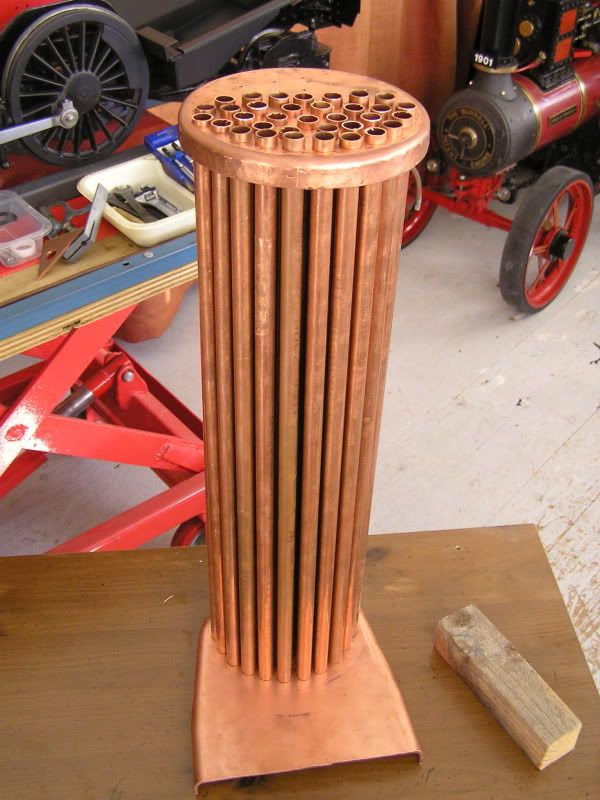 Jim |
|
Smifffy
Statesman
  Rock'n'Roll!
Posts: 943
|
Post by Smifffy on Mar 10, 2012 21:07:40 GMT
...now go have a soothing ale.
You deserve one :-)
|
|
|
|
Post by Deleted on Mar 10, 2012 21:48:22 GMT
Fantastic work Jim......I agree with Smifffy, time for a soothing ale...  Pete |
|
|
|
Post by Jim on Mar 11, 2012 0:23:04 GMT
Thanks Smiffy and Pete I'll take your advice with pleasure  I know I'm probably spending more time on this than most but as a first time project I want to be sure I have things right as I feel my way slowly through the maze. I have now put the bend in the fire box tube plate and with the front section of the foundation ring in place set the plates up to make sure everything will line up. I also wanted to check the measurements for the side foundation ring. The test set up also gives me a clear idea of how much I need to trim off the bottom of the plate for it to sit nicely on the grate. Jim 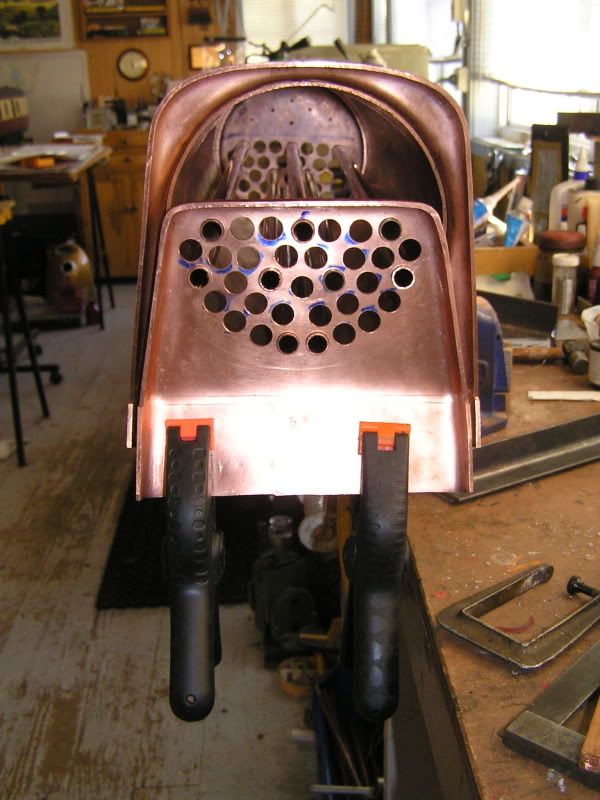 |
|
Andrew C
Part of the e-furniture

Posts: 447
|
Post by Andrew C on Mar 11, 2012 7:44:07 GMT
Hi Jim Thing look to be progressing well.  Might I make a suggestion ? Don't cut the bottom of the firebox tube plate until almost the last minute. well not until the crown stays are in. What type of crown stay are you going to use? rods or a pair of I sections? Before you ask I have had one failed boiler attempt due to doing stupid things like cutting the tube plate too sort  It has father put me off making them till now. Andrew. |
|
|
|
Post by Shawki Shlemon on Mar 11, 2012 9:09:53 GMT
Looks great Jim , I second Andrew advice , once all silver soldered , the excess can be trimmed as required .
|
|
|
|
Post by Jim on Mar 11, 2012 10:53:32 GMT
Hi Andrew and Shawki, Thanks both of you for your advice which I will certainly heed, the last thing I want is to cut a plate in the wrong spot or put a hole where it shouldn't be.  On that score I've just about worn out my ruler, measuring and checking, checking and measuring. In answer to your other question Andrew the crown of the fire box will have rod stays. I'm taking this particular job very slowly and carefully with a now well thumbed copy of Alec Farmer's book in one hand and the phone in the other with my thumb on the speed dial to Barry our very patient club boiler inspector. |
|
Andrew C
Part of the e-furniture

Posts: 447
|
Post by Andrew C on Mar 11, 2012 22:33:27 GMT
Glad to hear you are a) taking your time. B) checking, checking and er... Checking. And c) have the boiler inspector on speed dial!  Just had a thought that I can't remember anyone mentioning about making sure that the clearance bottom of the lowest tubes to the bottom of the barrel is realy important not to be too close restricted circulation could cause you problems later. Overheating tubes etc. A properly designed and constructed boiler will out live you, your kids and grandkids even if you like me don't have any yet! Keep the great post comming  Andrew |
|
steam4ian
Elder Statesman
   One good turn deserves another
Posts: 2,069
|
Post by steam4ian on Mar 11, 2012 23:02:31 GMT
G'day Jim
Thank you for the inspiring pictures of your progress.
I like the one with the firebox tube plate in temporary position.
You should have a great boiler to steam, plenty of water space over the firebox crown and then a square steam space from the Belpaire outer wrap.
BTW did you put your boiler design through Baggo's spreadsheet?
I am waiting to see how you do the stays.
Regards
Ian
|
|
|
|
Post by Jim on Mar 12, 2012 1:23:19 GMT
Thanks Ian and Andrew for your reassuring comments. I don't know what it is about making boilers but the whole process makes me go weak at the knees, white around the gills and sends the heart into palpitations and I suspect I'm not alone though I hope I am. Andrew's observations about boilers outliving their builders and even grandchildren could well be true. I can see the inscription on my head stone now: "Here lies poor Jim, He was building a boiler 'till sadly it did for him."  Now if I don't run out of soothing ales I'll certainly keep you posted on the stays Ian...when I eventually get there. ;D ;D Jim |
|