|
|
Post by ejparrott on Nov 10, 2013 20:32:18 GMT
Sorted out a few jobs on the Land Rovers in good time, so I got an hour in the workshop this afternoon. Started working on the other two chassis stretchers that I will need completed if I'm to get the chassis assembled at Christmas... 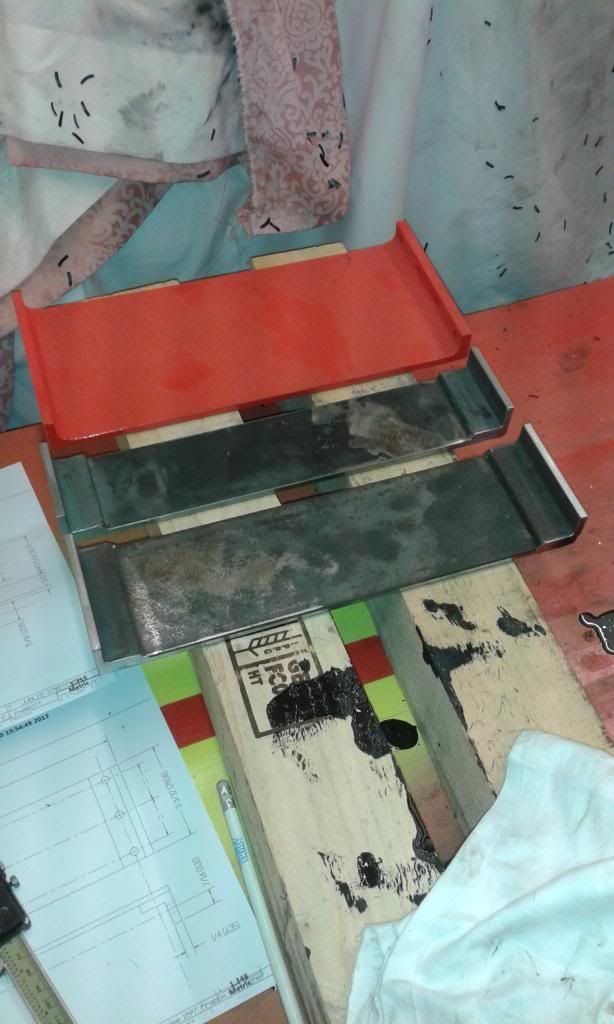 These two are made from 25x25x5 steel angle welded to 5 or 6mm steel strip, in such a way that it won't be visible on completion. I've machined them to width and thickness today, I need to set them up and machine the length now, to fit between the frames. Then it'll be drilling the holes for the rivets, dummy in the case of the ones holding the angle to the bar but important all the same. The ends then need drilling ready for the fitted bolts holding them to the frames. The finished front stretchers is also in shot. |
|
jma1009
Elder Statesman

Posts: 5,901
|
Post by jma1009 on Nov 10, 2013 21:51:36 GMT
hi ed,
wonderful work and a most interesting project as i polished JUBILEE once at tywyn so know certain bits of the fullsize loco quite well!
cheers,
julian
|
|
|
|
Post by chris vine on Nov 10, 2013 22:35:02 GMT
I liked the picture of an "our sized" chuck in a rather bigger chuck!!
Chris.
|
|
|
|
Post by vulcanbomber on Nov 11, 2013 20:47:09 GMT
I liked the picture of an "our sized" chuck in a rather bigger chuck!! Chris. The last place I worked (where me and Ed made his fitted bolts) I use to work a lathe with a 12 inch chuck, that had a 5 inch chuck in it on a regular basis, and also had a 5C collet chuck mounted in it regularly as well... Its not ideal but it works well. |
|
|
|
Post by chris vine on Nov 11, 2013 22:31:26 GMT
When I was an apprentice at Rolls Royce (Leavesden Watford helicopter engine division) I put something in a lathe which made the ordinary jaws in the 3 jaw chuck stand a little beyond the body of the chuck.
Nothing unusual for us of course. (I have often had things gripped with just one tooth of the jaws engaging on the scroll!!)
The instructor was appalled when he saw the jaws a few mm beyond the body. "Never use a lathe beyond its capacity Lad" etc. He just went off and found a bigger lathe.
Chris.
|
|
bhk
Part of the e-furniture

Posts: 458 
|
Post by bhk on Nov 12, 2013 0:32:20 GMT
(I have often had things gripped with just one tooth of the jaws engaging on the scroll!!) Brave man! |
|
|
|
Post by ettingtonliam on Nov 12, 2013 7:08:53 GMT
Needs must when the devil drives!
|
|
|
|
Post by Deleted on Nov 12, 2013 16:41:01 GMT
My Scrolls !!--------My Scrolls!! It's "UP POMPEII" all over again !!
|
|
|
|
Post by ejparrott on Nov 12, 2013 19:00:53 GMT
Here's a turn up for the books....I've been in the workshop...midweek!! Milled the centre stretcher to length, I did the width on Sunday. There is a reason....There's a miller at work scrating round for work...and I need a radius milling in the top to clear the boiler! 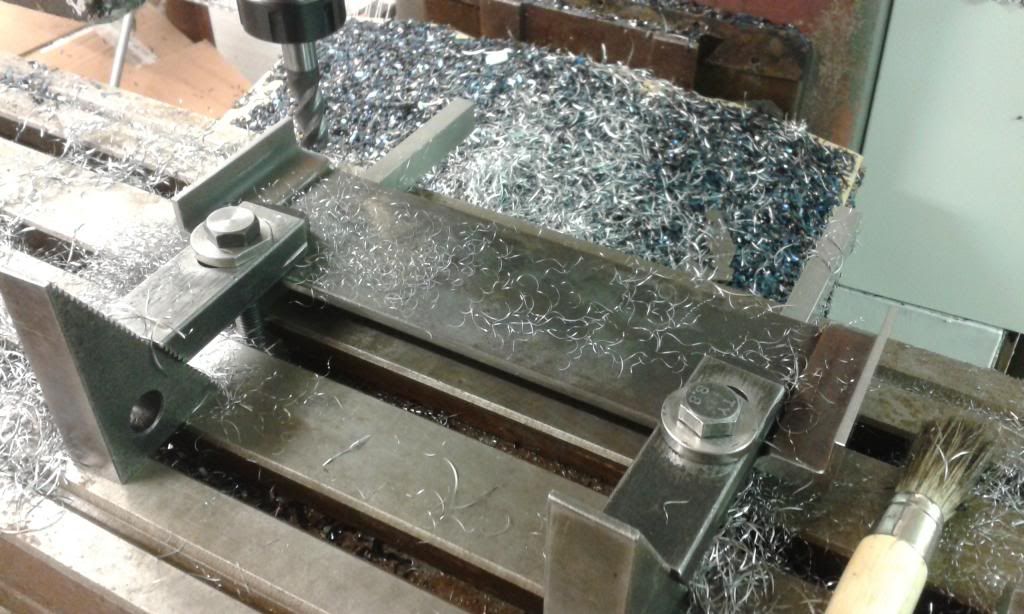 This stretcher on the prototype has an angle rolled and riveted to the top to support the boiler barrel, and it also serves to support the guides for the valve rods. I still need to draw up the guides, if I can do that tonight he might even put the holes in for me too! |
|
|
|
Post by ejparrott on Nov 14, 2013 16:20:55 GMT
I've got no work so I've been making bits of the brake gear today. Started fabricating the brake cylinder, an also made the brake adjusters... 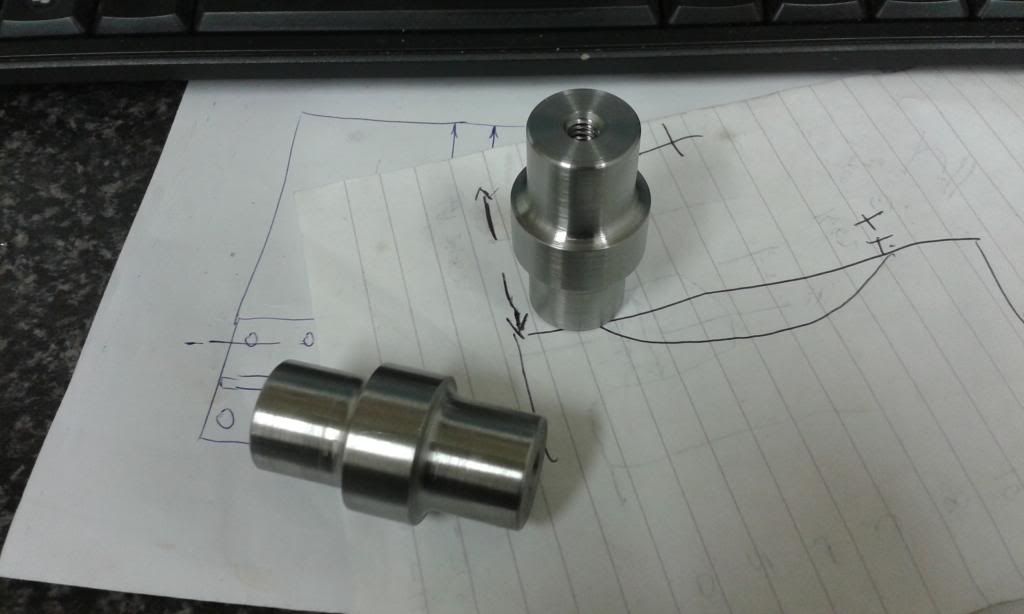 Just need a couple of spanner flats each now and they're done. They are threaded 1/4" x 20 Whitworth, left and right hand. I've got the material to make the clevis', and I've ordered a square collet to hold it, but they will need a long slot milling in them first, then I can turn the stalks and thread them. If I get on and get the drawings done for the shaft bearings, I could get those turned as well. |
|
|
|
Post by Deleted on Nov 14, 2013 20:26:14 GMT
That looks suspiciously like a CAD print-out there, young Mr Parrot !!..Not going "modern" on us are you ??......Nice bit of turning---what's the material ??
|
|
|
|
Post by ejparrott on Nov 15, 2013 8:59:17 GMT
Cardboard Aided Design...you're not wrong!
En16T for those, I'm sure there's no need to use a high tensile steel, but we had some!
|
|
springbok
Statesman
Building a Thompson Class B1 in 5"g Plus restoring a 3" Fowler steam road Engine "The Wanderer".
Posts: 570
|
Post by springbok on Nov 15, 2013 9:38:43 GMT
Hi EJ
You are so lucky to have access to all this kit, I can only dream
Bob
|
|
|
|
Post by Deleted on Nov 15, 2013 11:02:32 GMT
Dreams of an IMPIRICAL past, maybe ??.. ( Deliberate misspelling _
|
|
|
|
Post by Nigel Bennett on Nov 15, 2013 19:24:37 GMT
Good Grief, laddie - how d'you find the time to do it, post all this about it, work for a living and still keep Holly sweet? Your time-management and inter-personal skills don't lack for much...It's looking really good. Your Dad would have been proud of you.
|
|
|
|
Post by ejparrott on Nov 16, 2013 8:48:52 GMT
Its hard...very hard! I'm pushing on at the moment because I've got the opportunity to get the frames assembled at Christmas, that will be a huge milestone that both the wife and I are really looking forward to, and its been too long coming! I'm also seizing the chance while I've got no work to get a bit done - that's going to come to an end any day soon, and its very likely I'm going to working a night shift for a number of weeks, once several lorry loads of material arrive! If I'm on nights, nothing is likely to happen, so the more I can do now the better! Still having nothing to do, I turned up these two bearings for the brake shaft on the Colchester. I'm going to pop in a little bronze bush for a bearing surface, and planning ahead for when it does wear, then I'll just have to make a new bush, and not a whole new carrier too.... I'm fitting the original handbrake to the engine, plus a steam brake. Vacuum will be fitted for passenger hauling duties, and I'd like to fit a combined brake valve for the steam and vacuum. The brake shaft will get a fair bit more use than normal then, so for the few extra minutes it takes to make a bearing, I think it's worth doing. 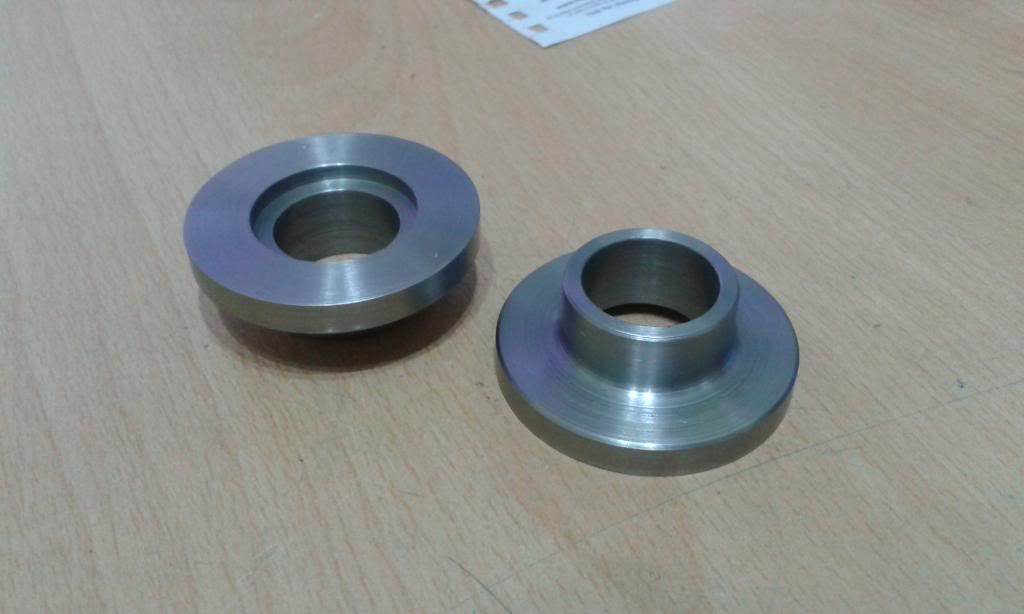 With one of the millers having nothing to do as well, I also got one of the stretchers finished off. I actually only asked for the radius to be put on, and I could use the DRO on a friends mill to put the holes in, but they were on the drawing and he just carried on and did it for me....bonus! 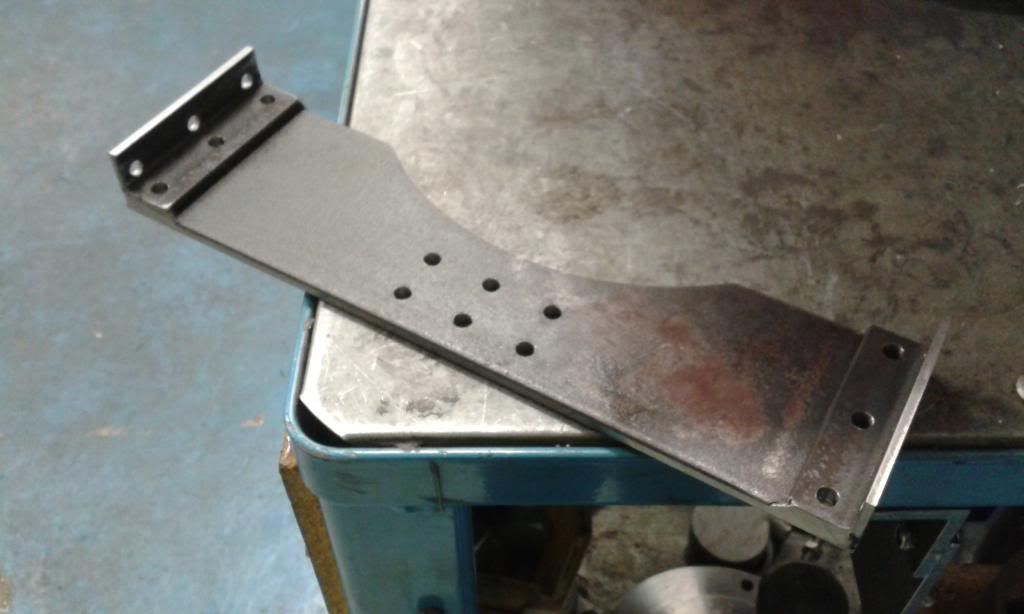 Stopped a little after work and started drilling some of the bolt hole too, and this is where that stretcher will be fitted.... 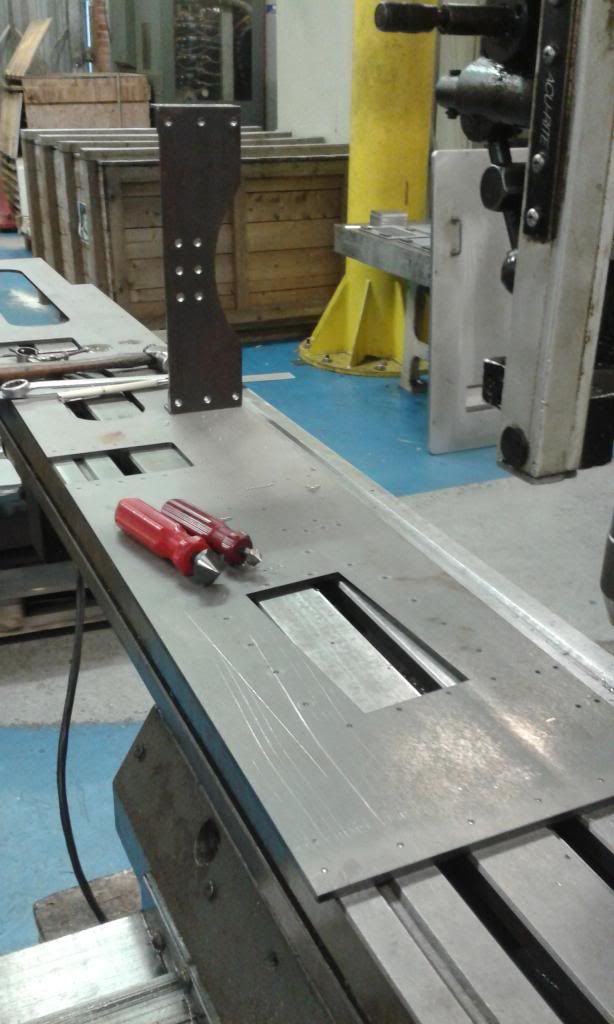 The 6 holes in the middle are to mount a bracket on, which carries the water pump and the valve spindles. I've had to deviate from prototype with this. Its a very complicated casting, and try as I might I just cannot get at it to properly study it and measure it. I've done the best I can with bits that are attached to it, and I'll have to design a representation of it to do the job. There's only 3 bolts in the middle for example, but because I can't see where two of them go through lack of access, I don't know what they fix too! What I really need is to get the engine over an inspection pit, but I'm afraid that's never going to happen..more's the pity... |
|
|
|
Post by ejparrott on Nov 16, 2013 8:54:01 GMT
Hi EJ You are so lucky to have access to all this kit, I can only dream Bob It's been a long hard road, but don't give me more credit than I'm due! At the moment I'm limited to manual turning on the works Colchester with 2-axis DRO, and my mill... well... My mill finally has a spindle again, so I can remove metal. However, it doesn't have a DRO, nor does it have graduated collars except on the knee. It's part way through being re-fitted for CNC, but I ran out of pennies! I'm waiting on some compensation money for an accident we had last January, courtesy of an uninsured illegal immigrant. When that finally comes through I'll be able to finish it off, then hopefully I'll be able to make some real progress! If there's anything fancy like curves that have been machined, you know it wasn't me! |
|
|
|
Post by ejparrott on Nov 17, 2013 17:44:53 GMT
Had a bit of a Disaster, set up to press the second crank on the leading axle....found a fracture in the casting, split it wide open  I've got the spare bits of material from the middle of the tyres, I'll machine a new one out of the solid. Bit of a set back but hey, no-ones died! |
|
bhk
Part of the e-furniture
Posts: 458
|
Post by bhk on Nov 17, 2013 17:54:07 GMT
Had a bit of a Disaster, set up to press the second crank on the leading axle....found a fracture in the casting, split it wide open I've got the spare bits of material from the middle of the tyres, I'll machine a new one out of the solid. Bit of a set back but hey, no-ones died! At least it showed its ugly head now rather than under steam resulting in untold damage, great work! |
|
|
|
Post by ejparrott on Nov 18, 2013 16:12:01 GMT
Today I've made and fitted the bronze bearings into the brake shaft supports, and I've started turning up the steam brake cylinder, the end of which I silver soldered on yesterday. I've not taken any pictures, but both will still need a bit of finishing off work so they'll come...
|
|


 I've got the spare bits of material from the middle of the tyres, I'll machine a new one out of the solid. Bit of a set back but hey, no-ones died!