|
|
Post by Jim on Nov 5, 2012 11:19:24 GMT
Since cutting the blanks for the tender frames things have moved on a bit. The blanks were marked out and the main openings for the horn blocks cut, chain drilled and the waste removed. At the same time the two large openings in the frames between the wheels were drilled to size to establish their end profiles and the whole outline marked out. 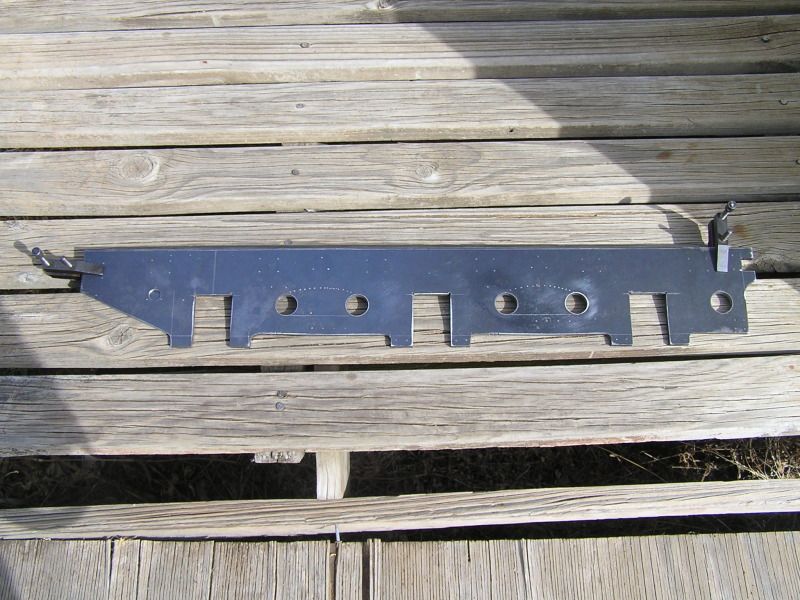 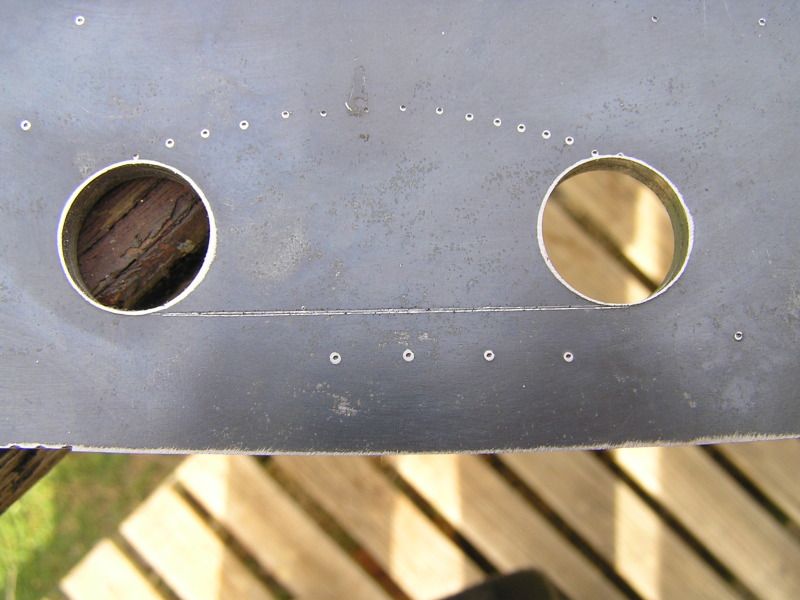 For cutting out these shapes I find my old B&D jig saw fitted with a metal cutting blade works brilliantly, the job must be firmly clamped down however. 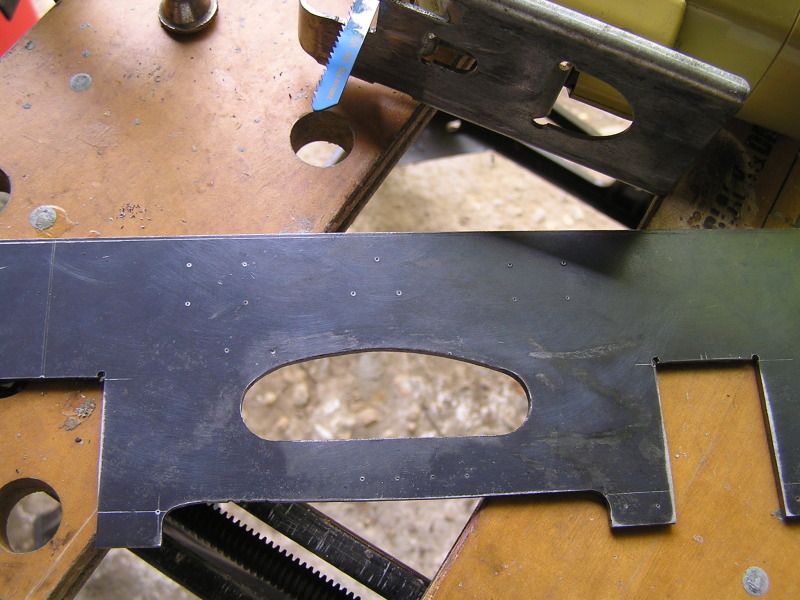 With all the major openings established and the overall profile completed a test set up just had to be done and a photo taken before it all fell apart. ;D 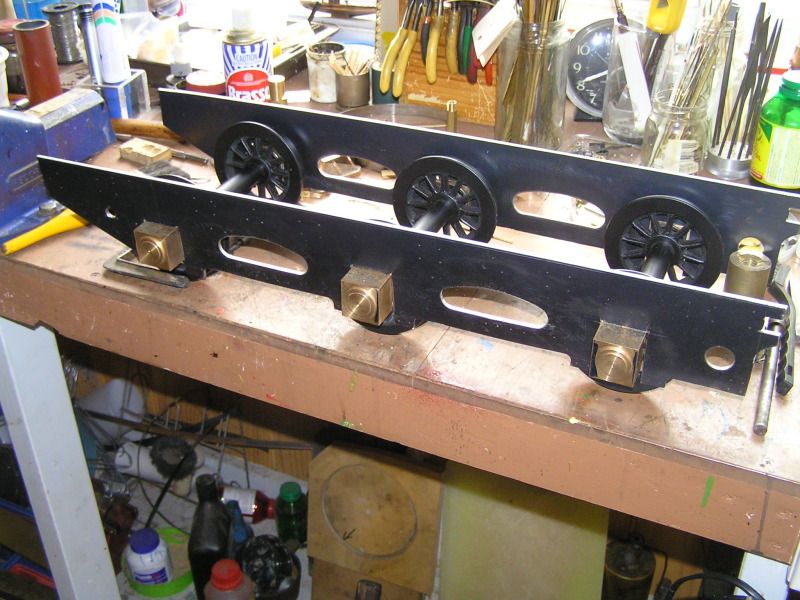 . I should add I frequently use paper patterns taken from the plans as an aid to marking out. I find they work well especially for establishing profiles and the location and shape of major openings. I must say I'm indebted to Geoff's Clan build thread for his detailed photos of his tender which have filled in a lot of detail in the more faded parts of my plans. Thanks Geoff.  Jim |
|
|
|
Post by Deleted on Nov 5, 2012 11:28:23 GMT
Very nice Jim, I'm impressed with your accuracy from using a jig saw...top work as per usual from your workshop...  Pete |
|
|
|
Post by Jim on Nov 5, 2012 12:24:02 GMT
Thank's Pete, I must say the jig saw does do a good job with only a little bit of work with a file to fair in the curves. I think the secret is to make sure you have the plate clamped to a firm surface and to hold the saw down firmly on the job then let the saw do the cutting. I confess to having tingling hands and the jittering trembles afterwards.  but a soothing ale quickly cures all.  |
|
|
|
Post by digger on Nov 5, 2012 15:21:38 GMT
I tend to use very close chain drilled holes, not quite touching the inside of the intended cut line, then follow with a slightly larger drill, this then removes the remaining metal between the previously drilled holes, the waste part then usually falls out.
It's a lot of drilling though, you need to be accurate and patient.
Digger
|
|
|
|
Post by Jim on Nov 5, 2012 20:56:51 GMT
Hi Digger, You're quite right, chain drilling is an alternative and the method I used for breaking out the tops of the cutouts for the horn blocks. I should have been a bit clearer and explained the jig saw works best where a hole exists that will accept the blade and where gentle curves or straight lines are to be cut as in the cut outs in the frames. The blades are cheap and do wear fairly quickly as the jig saw has a very short stroke so you end up wearing the top 1/2" of teeth with the rest untouched.  Jim |
|
jma1009
Elder Statesman
  
Posts: 5,922
|
Post by jma1009 on Nov 6, 2012 0:29:47 GMT
hi jim,
excellent progress! i hope you arent putting off the inevitable on the boiler making!
ive always had a problem securing the blades in my black and decker jigsaw, so any tips and help would be gratefully appreciated, as from your excellent work i should be using mine more often! ive got quite a lot of brass to cut up for STEPNEY's tanks, and steel sheet to cut up for the cab etc and without a bandsaw the task is pretty daunting! not something ive done for awhile, when a hacksaw with the blade at 90 degrees sufficed when i had more time and energy!
cheers,
julian
|
|
|
|
Post by Shawki Shlemon on Nov 6, 2012 9:58:52 GMT
Nice work Jim , once the frame is made it quickly grows , and with the grow the interest get stronger and hopefully closer the end result . ;D
|
|
|
|
Post by Jim on Nov 6, 2012 10:11:54 GMT
Hi Julian & Shawki, Errr yes the boiler. Well it does look rather comfortable in place on Boadicea's frames..such a shame to disturb it but I suppose the day is fast approaching...  Can't offer much help with securing the jig saw blades Julian other than in my little B&D jig saw the blade is held by a single screw and it holds regardless of the make of blade used. I've used the saw without problems to cut out the boiler plates from a 6'x4' sheet of 3mm copper with the obvious proviso that I had some form of firm support under the point being cut. As always I'm sure others have other methods and tools for doing the same job but the jig saw is very versatile I must say. I hope those long awaited castings of yours Shawki are inching closer to your workshop  Jim |
|
|
|
Post by Geoff (Carlisle) on Nov 6, 2012 22:09:07 GMT
:)Hi Jim, firstly i'm on the Yellow Tail Merlot from down your way, secondly i'm admiring your tender and the speed at which you'r working at and nice work to. But beware of the actual tender/ loco draw bar on page 4 of JP drawings ,as the length is too short so measure it in situ and not like me.Any excuse to have a drink , as i made the tender lamp irons and fitted them on with 3/64" copper rivets today.
Geoff (Carlisle)
|
|
|
|
Post by Jim on Nov 7, 2012 2:45:54 GMT
Thank you Geoff I had wondered about the drawbar. I've made mine as per JP but have made allowances for replacing it...now I know I'll have to.
I'll wait until I have the tender chassis is assembled and then measure the correct length of the drawbar, as you suggest.
Yellow Tail is a wonderful aid to modelling I've found, it clears the brain for sharp concise thinking and leads to very clever solutions. The secret is to immediately write down the solution as I've found that after 10 minutes and a second glass, Yellow Tail wipes the slate clean ready for the next problem. My problem is that it takes me 11 minutes to find a writing pad! ;D ;D ;D ;D
Jim
|
|
|
|
Post by Jim on Nov 21, 2012 2:59:09 GMT
Progress on Boadicea is slow (like me  ) but I'm enjoying the journey and for me that's the real fun rather than the destination. So far the tender chassis is starting to come together with one small glitch, the 'part set of castings' I'm using includes only 5 dummy spring castings of the 6 needed. The photos show the frames to date Jim  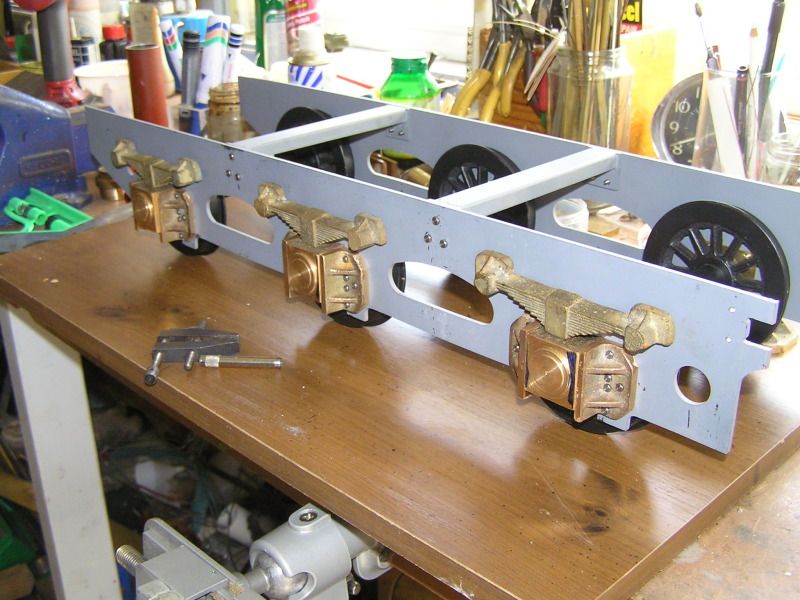 |
|
|
|
Post by Geoff (Carlisle) on Nov 23, 2012 22:23:44 GMT
Hi Jim, firstly i'm having a Yellow Tail merlot from down your way. But before we put the paint job to bed for the time being, I went into the model shop to get the Humbrol paint with the same book opened at P.51 and he was looking at the computer and he said that there was'nt a paint that shade. It was what i mentioned on my thread that a customer said to mix signal red with a touch of grey. Take care. Geoff (Carlisle).  |
|
RLWP
Part of the e-furniture

Posts: 319
|
Post by RLWP on Nov 23, 2012 22:28:23 GMT
A jigsaw to cut the frames - brilliant! I've been puzzling how to reprofile my Hall tender frames, now I have a solution!
Richard
|
|
|
|
Post by Jim on Nov 28, 2012 12:13:07 GMT
Hi Richard, Glad you found using a jig saw helpful for reworking your frames. I also used the jig saw to cut out the rough shapes of the boiler plates from the main copper sheet, that was a very awkward job where the jig saw really proved its worth. Back on Boadicea's tender, as previously mentioned I had only 5 of the 6 spring castings required. After considering various options I decided simplest method for me would be to fabricate the missing spring set. The photos show the spring stack beside one of the castings to check the overall dimensions.The second photo shows the spring with the part completed hanger brackets and the buckle. It's in place to see how it fits in alongside the original castings. With the brackets completed and all painted the whole spring set will hopefully blend in with the original castings.  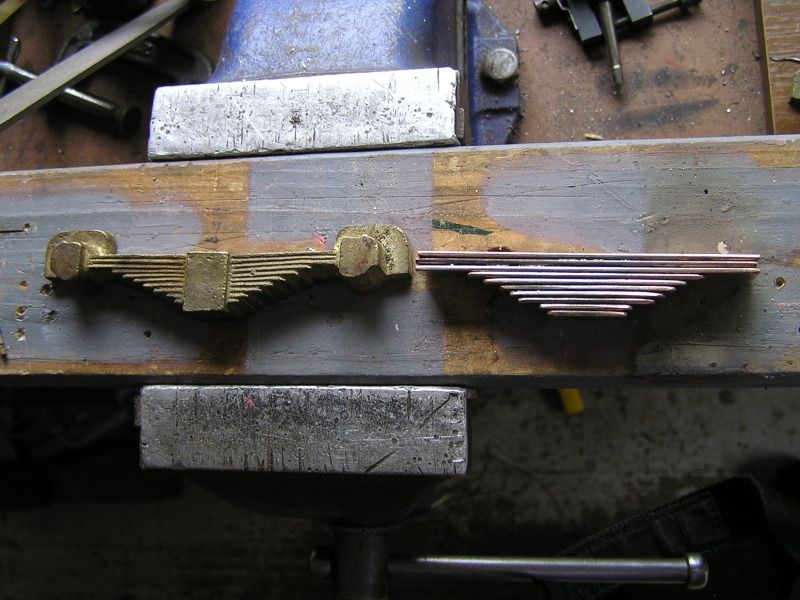 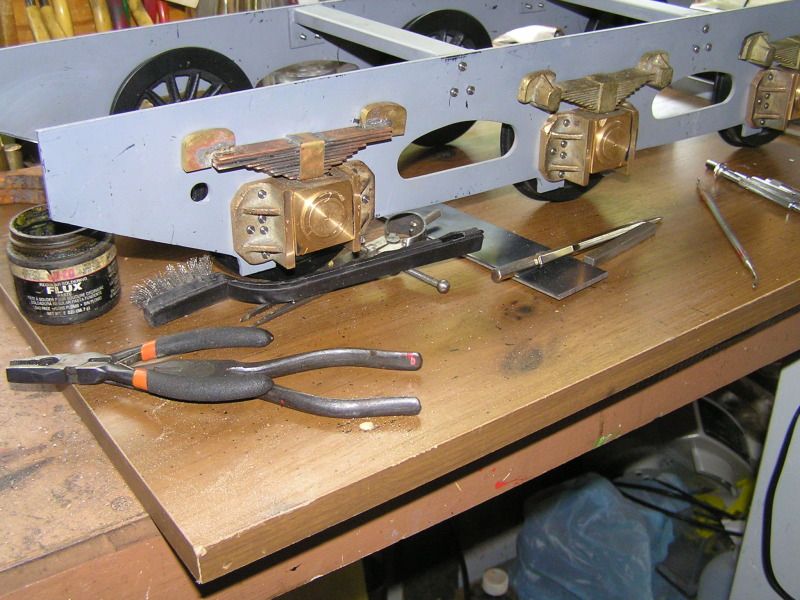 |
|
|
|
Post by Deleted on Nov 28, 2012 12:57:41 GMT
Nice match Jim, who needs castings...  Pete |
|
jma1009
Elder Statesman
  
Posts: 5,922
|
Post by jma1009 on Nov 28, 2012 23:30:12 GMT
hi jim,
if you soft soldered the 6th spring assembly to the mounting plates i think you will find same will have a propensity to shear off. i would have used silver solder.
cheers,
julian
|
|
|
|
Post by Jim on Nov 29, 2012 4:57:38 GMT
Thanks Julian I was aware of the joint shearing and took that into account in designing the way the securing plates were attached to the spring stack. I'll further strengthen the assembly when I add the brackets that in real life retain the ends of the top leaves. There's still a lot of filing and shaping to do yet before it's completed.  Jim. |
|
|
|
Post by Shawki Shlemon on Nov 29, 2012 8:05:43 GMT
Jim , when it is all finished and painted , no one can tell the difference , well done .
|
|
RLWP
Part of the e-furniture

Posts: 319
|
Post by RLWP on Nov 29, 2012 8:58:11 GMT
Jim , when it is all finished and painted , no one can tell the difference , well done . And if they can tell the difference, it will be that the one you made puts the castings to shame Nice work Richard |
|
|
|
Post by Geoff (Carlisle) on Dec 2, 2012 20:07:30 GMT
Hi Jim, I can't see my-self making much for the next few weeks as the U.K. has just been engulfed in a severe frost from the Artic, a few model engineers will not venture far from the living room fire. Mean-while you carry on Jim, as it must be getting warm down there. All the best Jim.
Geoff (Carlisle).
|
|