peteh
Statesman
  Still making mistakes!
Posts: 760
|
Post by peteh on Jan 2, 2013 1:50:23 GMT
New 'Sod Spray' (c) Removes all sods from workshops - if only ;D
I guess this is where you decide how much of a rivit counter you wish to be - as far as 'I am concerned looks great. Looks like one of your wishes for the New Year at least has come true, I spent almost 2 hours this morning working on Northumbrian before I started cooking.
Pete
|
|
|
|
Post by Jim on Jan 2, 2013 2:50:19 GMT
I think Auto Cheap stocks 'Sod Spray' Pete, it's called 'Sod Off' but they didn't have it when we were there just a while back..something to do with someone called Murphy.  If anyone asks about the tread I'll just say it was a trial under taken in 1955 while at Stratford before reverting to the dimple style. ;D ;D It is a bit cooler today, the west is really copping it heat wise this summer which as you say, makes it pretty unbearable not forgetting the ever lurking menace of fires too. I'll keep my fingers crossed that you get a cool change. Back in the workshop and between odd jobs managed to fit the rear stretcher to the tender frames along with a temporary fixing of the buffer beam which still requires a lot of detailing. Once the tender frames are sorted I should get back to the boiler. Jim 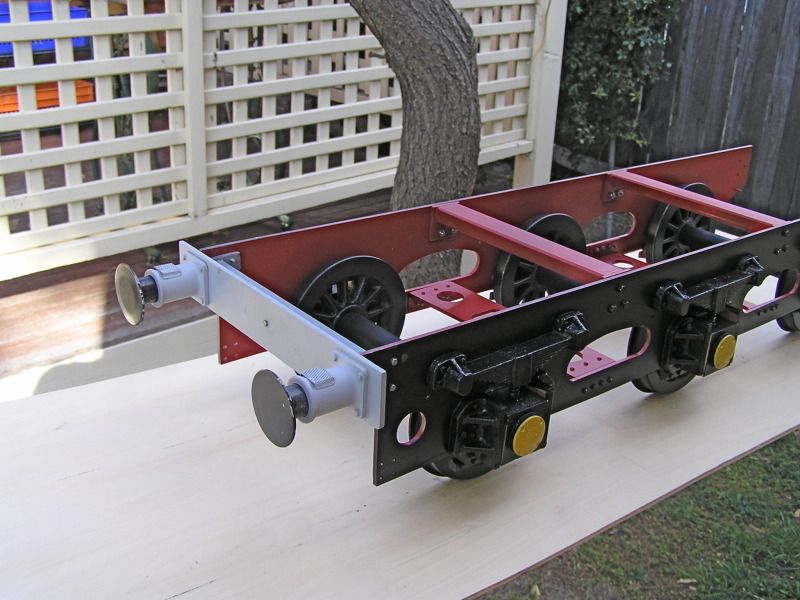 |
|
|
|
Post by Deleted on Jan 2, 2013 9:31:03 GMT
Once the tender frames are sorted I should get back to the boiler. Jim The plate work was daunting for me and I found lots of reasons to avoid it. However, once started it hasn't been too bad! I like the 'development' ruse: I'll keep that one in my pocket for later! HNY JB |
|
|
|
Post by Geoff (Carlisle) on Jan 18, 2013 18:43:30 GMT
Hi Jim, it is ironic, as this time of the year we tend to get on in the workshop as there are no other distractions like painting and doing the garden, but here i'm going to lose some time. We heard that the temp in Sydney yesterday was 45cent, it's unbelievable. Now the question of castings, I think that the patterns were Willie Waugh's of Glasgow but sold on after his death. Now sent here is a drawing showing the cut- outs at the bottom of the tender front plate, to clear the forks, this is also shown on Winson loco's.I hope this is some help to you, and to-night is yellow tail night as i got 10 bottles off santa. I also hope this keeps the vinners busy down your way. Keep up the good work Jim. Geoff (Carlisle) . Attachments:
|
|
|
|
Post by Jim on Jan 19, 2013 10:42:54 GMT
Hello Geoff, Thank you very much indeed for the detailed drawing of the tender front. It will be invaluable as I start the Tender body....when it cools down a bit that is. I'm sure others following these builds will find the drawing very useful too.  I was unaware of the origin of the Wilwau name. The castings that I have are excellent and a tribute to the pattern maker. Luckily I'm only missing the easily fabricated castings such as the spreaders for the tender under frame and all the loco spring hangers brake, to name a few. Thanks again Geoff and enjoy a well earned Yellow Tail it is a nice drop., Jim |
|
|
|
Post by Geoff (Carlisle) on Jan 19, 2013 21:51:42 GMT
Hi Jim, I'm not sure how this photo comes out , but its an advert from the M.E. Dec 1954 for Wilwau castings, but i do recall a reply from Willie to someone criticising the price of his castings and this guy was shot down in flames by Willie. Note whats on LH side of the picture. Carry on Jim.  Geoff (Carlisle). Attachments:
|
|
|
|
Post by Jim on Jan 19, 2013 23:51:51 GMT
The photo is very clear, again thanks for going to the trouble to photograph the article and post it Geoff. I've often wondered about the history of my castings which do have Wilwau marked on the back of the drivers but apart from that the rest was a mystery. I presume John's (Simplyloco) 3.5"G Britannia is from the castings described in your 1954 article. Aaah 1954, and memories of high school and pimples, Wilwau's motto 'Every casting a time saver' struck a chord too. ;D ;D Good to see you have some model engineer's throat lubricant handy too Geoff. a very important item.  Now I'd best get back to 70036's tender before the hot weather returns. Jim. |
|
|
|
Post by Shawki Shlemon on Jan 20, 2013 8:52:11 GMT
Hi Jim
It looks good , you paint as you go , this is the way I do it , I finish with some scratches which I touch up ( not as good as strip and paint ) but one is sure everything is painted and no rust during process no matter how long it takes . It is matter of choice .
|
|
|
|
Post by Geoff (Carlisle) on Jan 23, 2013 12:44:22 GMT
Hi Jim came across this old photo , guess who the driver is ? It's about 1966 and I was 14.00 Hrs. Saturday on the coaling on my home shed of Carlisle Kingmoor. Geoff (Carlisle).  Attachments:
|
|
|
|
Post by Jim on Jan 23, 2013 23:27:24 GMT
1966, ah the 'good old days'! The amazing thing is Geoff, you haven't changed a jot, that's one of the side benefits of a glass of Yellow Tail.  I'm still looking for the drawing of the 1/4x40tpi union that I believe connects the steam water release valve to the top of the steam brake cylinder. JP has put it in somewhere on one of the 21 sheets of drawings.  Jim |
|
|
|
Post by Deleted on Jan 24, 2013 21:45:10 GMT
Hands up all those who noticed the engine is the unique Stephenson's link Black 5!
|
|
|
|
Post by Jim on Jan 25, 2013 4:39:50 GMT
I reckon you get the prize Superseven. Well spotted   |
|
|
|
Post by Geoff (Carlisle) on Feb 13, 2013 16:10:00 GMT
Hi Jim, I noticed on your page 10 the photo showing the steam brake, well the question is did you drill all the tiny air holes on a rotary table as the first attempt i made without a table was a waste of time, as the holes were not in line.? All the best, Geoff (Carlisle) Attachments:
|
|
|
|
Post by Jim on Feb 13, 2013 22:07:20 GMT
Yes Geoff the holes were done on the rotary table using suitable number drill. Sadly I don't have any proper details as I just did it as a, 'Lets see if this this will work.' type job. I could get the details though if it woulld be any help to you.  Once I was satisfied with the layout I filled the holes with black paint to highlight them. I'm also going to re do the brake pedestal to look more like the original rather than the simple square tube that JP has drawn. With the correct style pedestal and a bit of juggling I should be able to fit the blower valve into it's correct location too. Jim |
|
|
|
Post by Jim on Feb 14, 2013 4:38:55 GMT
To add to the above this is the brake valve as it currently is sitting on the square section tube pedestal. 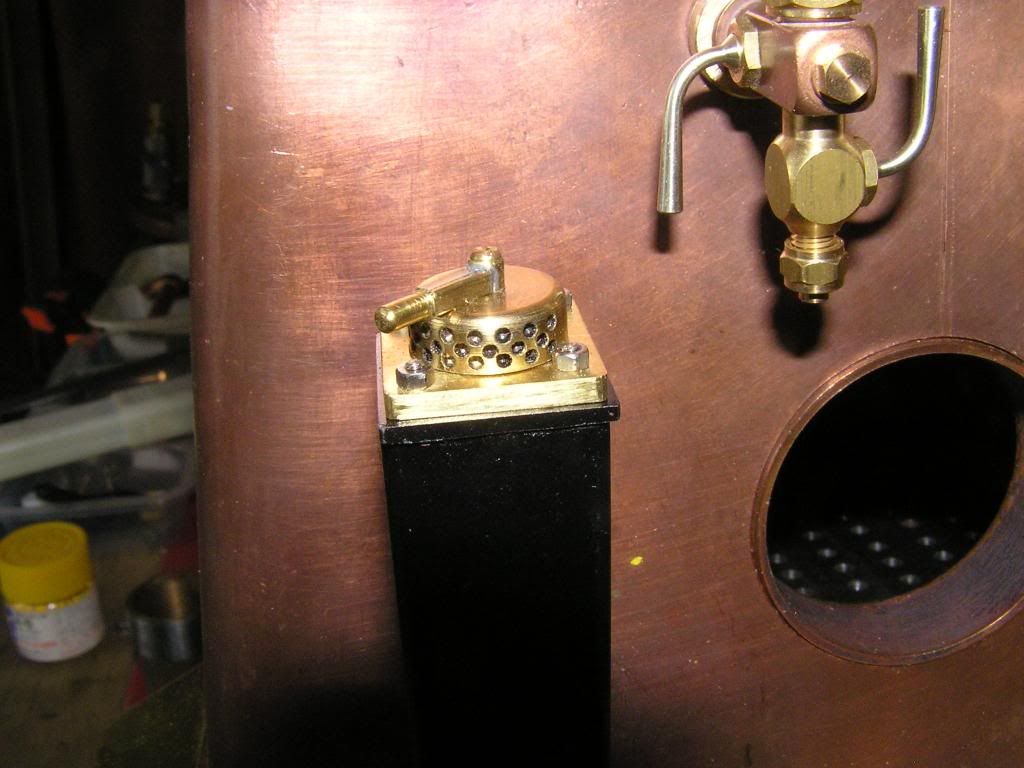 |
|
|
|
Post by Geoff (Carlisle) on Feb 14, 2013 9:10:09 GMT
Hi Jim,thats O.K. now i'm admiring your gauge glass frames.
Geoff (Carlisle).
|
|
|
|
Post by Jim on Feb 27, 2013 7:31:06 GMT
At last a nice cool day so the decision was made to get on with silvering the the clack and safety valve bushes in place. Before starting on the bushes for the clacks I screwed the clacks in and marked the bush so that when it was silvered in place the clack would line up more or less correctly. The bushes are longer than normal so that when working cold water won't spray on the steam collection pipe. Not shown are the two stepped buttons I made to protect the internal threads of the bushes from the direct heat of the blow torch. The photos show the boiler still cooling and after a good scrub up in the citric acid pickling bath. The splash of silver solder is where I started to get the shakes with all the stress ;D ;D  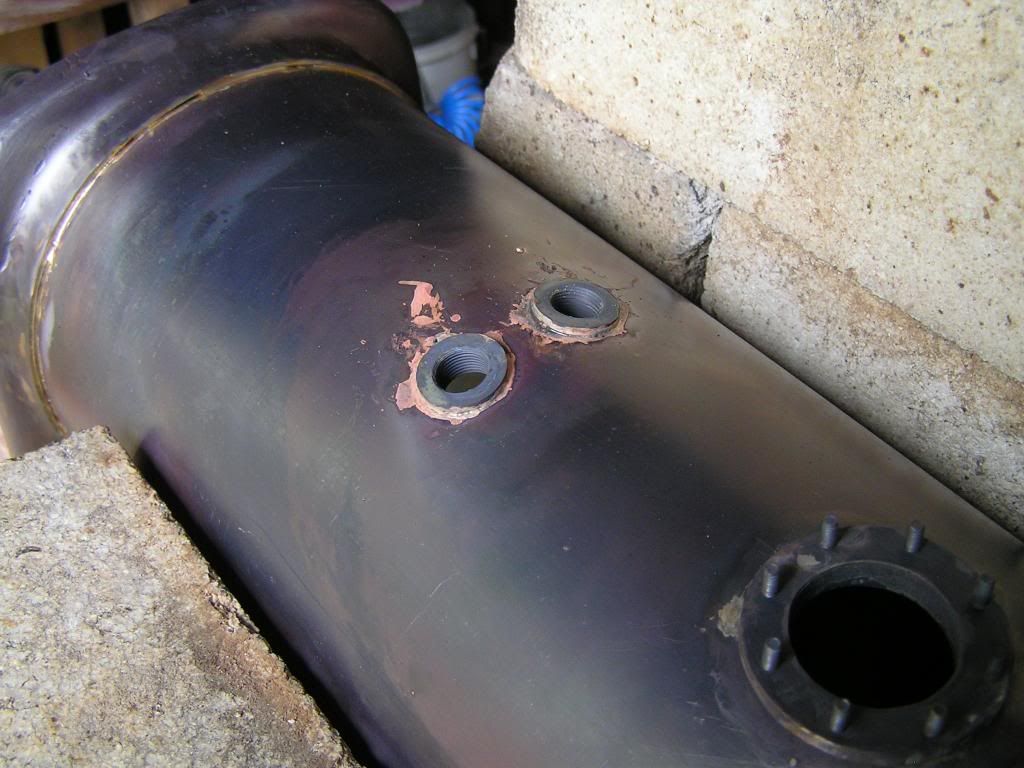 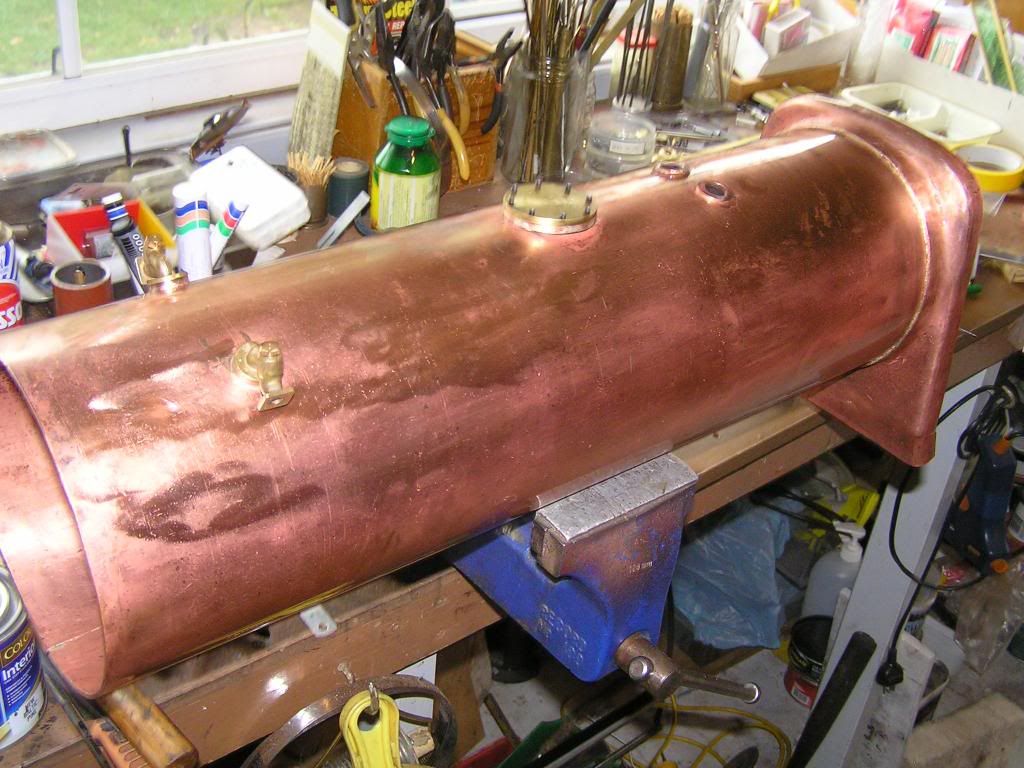 Now I really do need a soothing ale.  Jim |
|
Smifffy
Statesman
  Rock'n'Roll!
Posts: 943
|
Post by Smifffy on Feb 27, 2013 8:10:31 GMT
And well deserved too :-)
|
|
|
|
Post by Geoff (Carlisle) on Feb 27, 2013 16:05:57 GMT
Hi Jim,I'm admiring your boiler and if you carry on the way you've started it will be a good looking job. Also your idea regarding the length of the top feed bushes ,I shall take note.Well thats the idea behind Proboards , for mutual improvement. The other thing i would like to mention is the cylinder 'bobbins' which i have in the lathe at the moment, I'm going to reduce the centre portion to 1/2" dia. as the way J.P. has it, i don't think it would deliver much steam. Geoff (Carlisle).  |
|
|
|
Post by Jim on Mar 1, 2013 10:17:57 GMT
I was all set to start silvering up the inner fire hole plate but it was a miserable windy day so spent time rechecking the location of the longitudinal stays to ensure that the 'as drawn' locations were still correct on the real 'as built' boiler. I also made a phone call to the boiler inspector to recheck that I had the longitudinal stays right. The photo shows the tubes located in the smoke box tube plate with a light line to show the crown of the fire box. 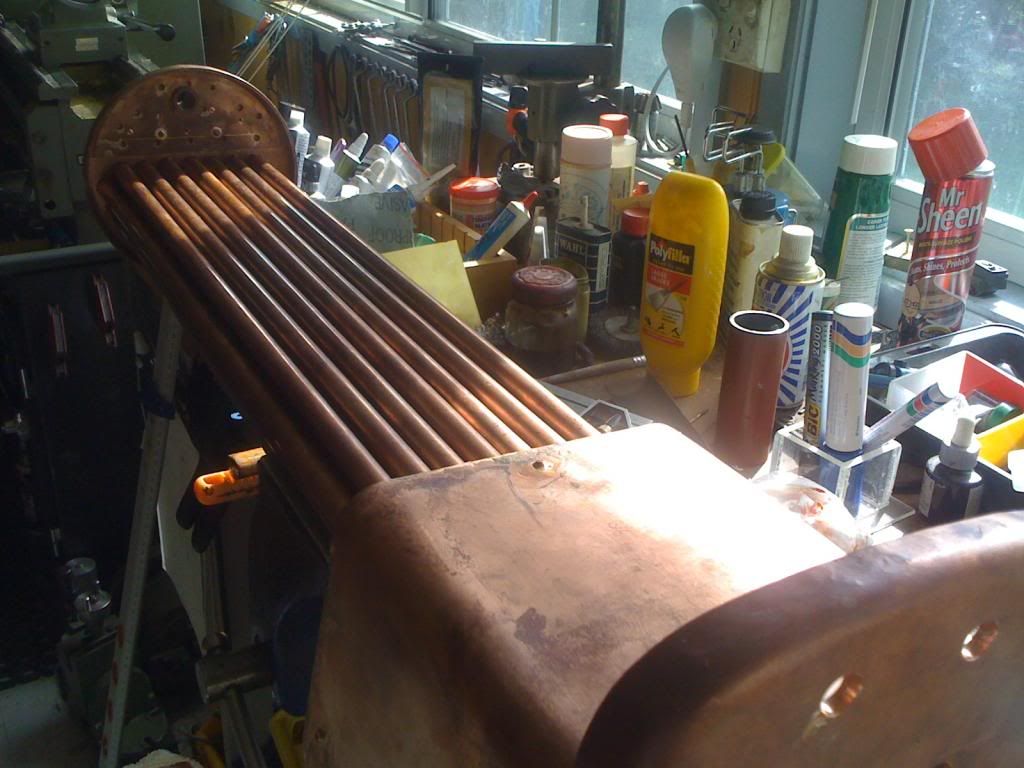 I'm taking this part carefully as I don't want discover after the hole has been drilled, that stay will rest on the fire box or intersect with one of the cross stays. There's not a lot of space to fit it all in. Jim ps. The clutter on the work bench is from a current model boat project.  |
|