|
|
Post by Deleted on Jan 25, 2015 15:10:17 GMT
Super Job Jim!
Tom
|
|
|
|
Post by Jim on Jan 25, 2015 18:23:38 GMT
Thanks John and Tom, I must admit they don't look too out of place especially after a couple of soothing ales!
Jim
|
|
|
|
Post by Deleted on Jan 25, 2015 18:46:25 GMT
now that looks the bizz Jim...nice work...
Pete
|
|
|
|
Post by GWR 101 on Jan 26, 2015 0:08:44 GMT
Yes Jim great work. Regards Paul
|
|
|
|
Post by springcrocus on Mar 15, 2015 23:32:16 GMT
Hi, Jim
Over on Johns' (simplyloco) build, you indicated that you had yet to build your tender and were considering leaving out the centre rivets to help locate your choice of transfer. Do a bit of research first because you will find mention of people who successfully applied transfers over rivets. Even Fox Transfers endorse this.
If your role model had the rivets in the centre, consider using them yourself, you may be pleasantly suprised with the results. (Not a grandmother / eggs thing, I hope you understand?)
Steve
|
|
|
|
Post by Jim on Mar 16, 2015 0:52:56 GMT
Thanks for the heads up Steve and you're quite right about settling the transfers over the rivets, it's just that by nature I'm a lazy sod and saw the chance to, a) leave out some rivets and b) have a flat surface for the transfer to locate on..way to go! Now you've gone and stirred my conscience and I'll have to go and check.  Jim ps: Been through a collection of photos sent to me by Stan another site member, and there is photo of Boadicea with a rivet free logo..heaves sigh of relief and reaches for soothing ale  |
|
|
|
Post by Geoff (Carlisle) on Mar 16, 2015 10:33:02 GMT
Hi Jim, I left a space on my tender side as someone said a while ago, don't try and put transfers over rivets as you could end up making a mess.
Geoff (Carlisle).
|
|
|
|
Post by Jim on Mar 16, 2015 11:03:27 GMT
Good to see you back on site Geoff. This is the photo Stan kindly sent me showing 70036 with the countersunk rivets to create a flat surface for the BR logo. At this stage the tender under frame is waiting until I've completed the boadicea's cleading which I've only just got back to after a bout of cellulitis in my leg.  Jim 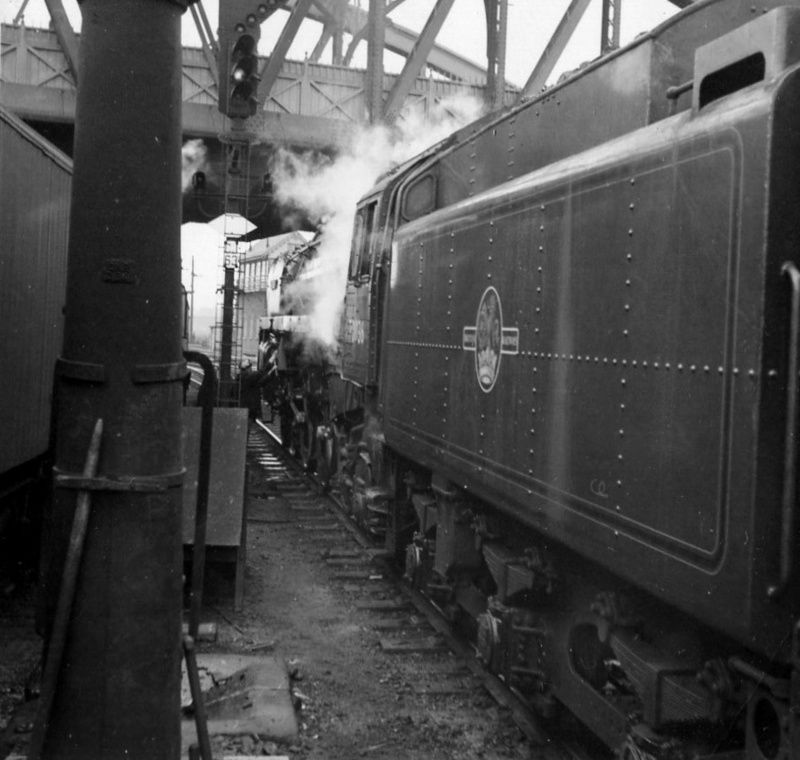 |
|
|
|
Post by Deleted on Mar 16, 2015 11:10:52 GMT
Just a heads up guys... if you do decide to put transfers over rivets don't try to do it using water only...use the proper softening fluids that can be found at the plastic aircraft outlets. There are a number of brands, I prefer the microset and microsol solvents....you'd be amazed what you can make a transfer do using these... There are many video's on youtube.. here's one that shows the results achieved over fine rivets.... you may think these are very small and thus easier to cover.... take a look at some of the complicated shapes other video's cover. I would advise that if you go this route to practice first... as they say 'practice makes perfect'....  www.youtube.com/watch?v=9Jv89DU9c3E www.youtube.com/watch?v=9Jv89DU9c3EPete |
|
|
|
Post by Jim on Mar 16, 2015 20:54:16 GMT
Hi Pete,
To the list you can add Solvaset which softens the transfers to form over any surface detail such as rivets and curved surfaces, I've used it extensively with my 'O' gauge Midland models.
As you say they work a treat. I suspect Solvaset may be ether based.
Jim
|
|
|
|
Post by Deleted on Mar 16, 2015 21:02:11 GMT
Hi Pete, To the list you can add Solvaset which softens the transfers to form over any surface detail such as rivets and curved surfaces, I've used it extensively with my 'O' gauge Midland models. As you say they work a treat. I suspect Solvaset may be ether based. Jim Hi Jim Talking or 0 gauge models have you seen the new 'Partworks Hachette' model of Mallard, not sure if it's available over there yet. I subscribed to it as I thought it would be a nice distraction from 4472 to spend a few hours each month on something simpler and more relaxing and also in not starting my Martin Finney 0 gauge model of 4472 which I know once started I wouldn't stop and probably loose a year on my 5" version. I have to say that it's a superb kit, very well thought out and extremely well detailed.. if/when it arrives on your fair shores it's well worth taking a look at it. Kind regards Pete |
|
|
|
Post by Jim on Mar 16, 2015 21:16:33 GMT
A Martin Finney model!!! You lucky lad. I have a framed centre spread of one of Martin's scenic dioramas hanging on the wall above my 'O' gauge layout as inspiration, the detail is amazing.
The build by installment A4 did appear here ..briefly.. then vanished again!
Jim
|
|
|
|
Post by Deleted on Mar 16, 2015 21:21:02 GMT
I think you can still subscribe....  well worth it if you want a good A4..... did you know that Martin is retiring this year and so far there's no news whether he's going to sell the business on or close it down.... a very sad day if that happens. |
|
|
|
Post by Jim on Mar 21, 2015 6:42:43 GMT
Making progress slowly with the backhead cleading now formed up. The holes for the water gauges and blower connection are in the correct spots with only the all important fire hole door to be cut out. I've decided to mark it out from inside the fire box when I lift the boiler off to sort out the Everlasting blow down valve, it has a slow drip so I'll try Julian's suggestion to Paul for fixing the slow leak described in 'Regulator Help' . The photo shows a quick assembly of the backhead cleading with the blower valve in place though possibly not its final location. The bushes for the water gauges still have the blanking off plugs in as the boiler has water in it and I wanted to test the blowdown at about 80psi to see if it would seal under pressure, it didn't the drip persisted. Much as I admire scale fittings in the cab my backhead is not to scale as I need to operate the engine with my full size fingers and see clearly the water level and pressure gauge plus I seem to be getting older despite my best efforts with soothing ales and the like  Slowly getting there, Jim 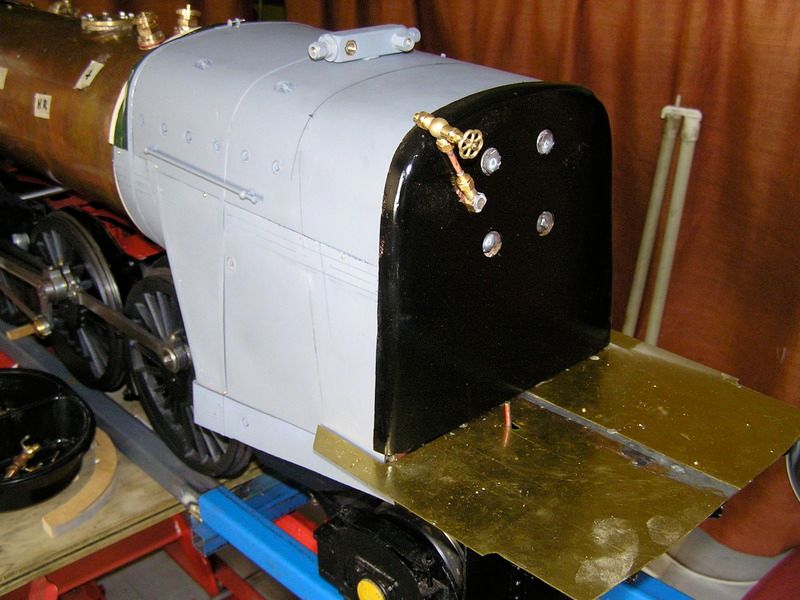 |
|
|
|
Post by GWR 101 on Mar 21, 2015 10:26:05 GMT
Great work Jim, looking good. Cant wait till get to that stage although I don't think I will cover the back head on mine but I admire your devotion. Regards Paul
|
|
|
|
Post by Jim on Mar 21, 2015 10:31:37 GMT
Thanks Paul but I must confess, my cleading is like builder's architraves, it covers up a multitude of errors.  Jim |
|
|
|
Post by donashton on Mar 21, 2015 18:44:23 GMT
Jim, your cleading only covers what you put on show in previous posts and it is all of immense use to encourage others.
Anyone who does such excellent work and shares it has not the mentality to cover up anything, nor needs to.
Don.
|
|
|
|
Post by Jim on Mar 29, 2015 0:33:35 GMT
Just for something a little different while I'm working on the fire hole doors I thought I'd post some photos I took yesterday at the club's annual New South Wales scale steam day where for the weekend, only 5"g scale models of NSW steam locomotives and rolling stock run. The first photo is of a NSWGR C38, 3801 waiting in the yard. 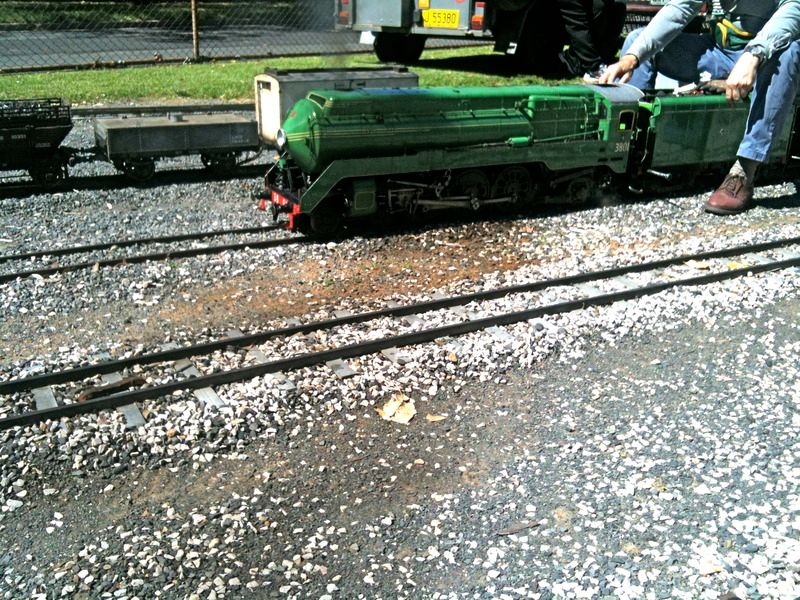 and the full sized version at speed, sadly I don't know who took this photo. 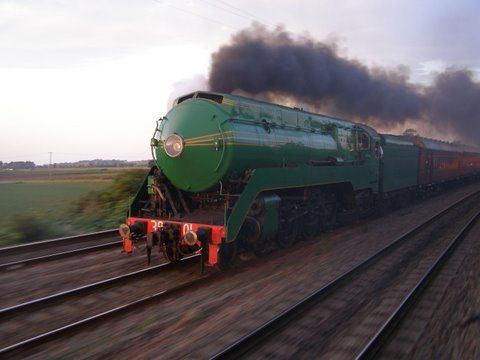 On display was this beautiful 30 class loco along with its detailed tender. 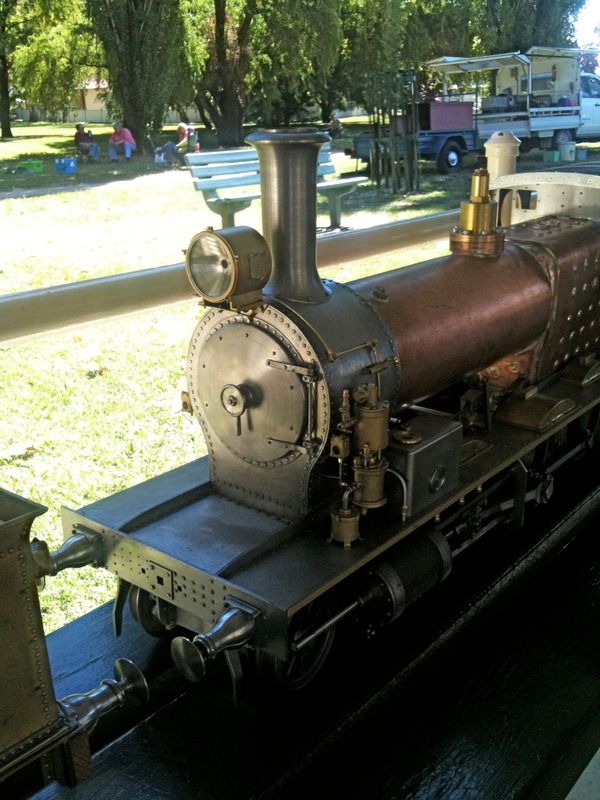 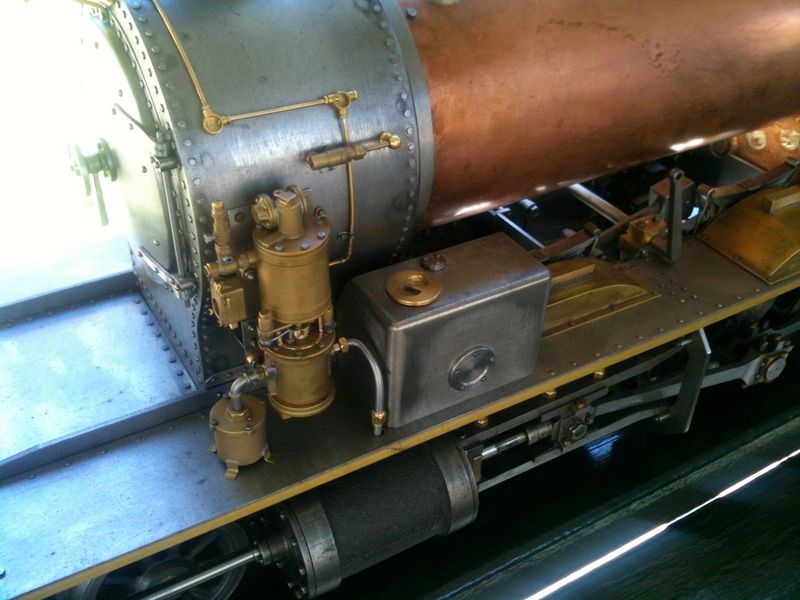 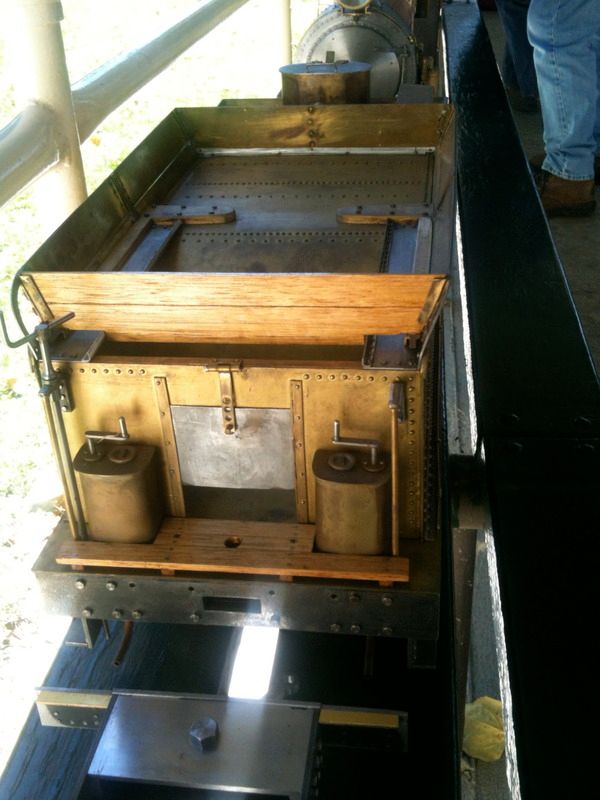 Jim |
|
|
|
Post by ejparrott on Mar 29, 2015 8:34:47 GMT
The 30 looks really nice  |
|
|
|
Post by Jim on Mar 29, 2015 10:43:47 GMT
The 30 class locomotives are nice Ed and are popular along with the tank version as subject to model. Just to round off the scale day, the photo below is of our club secretary and his superb 32 class loco in the pre war livery adopted the NSWGR. 3239 was named after the Macquarie River and one of three that I can think of named after rivers. The 32's were fast runners hauling express passenger trains on the short north, Sydney to Newcastle run among others. Ned (NSWRGR Steambuff) has more information on the class. 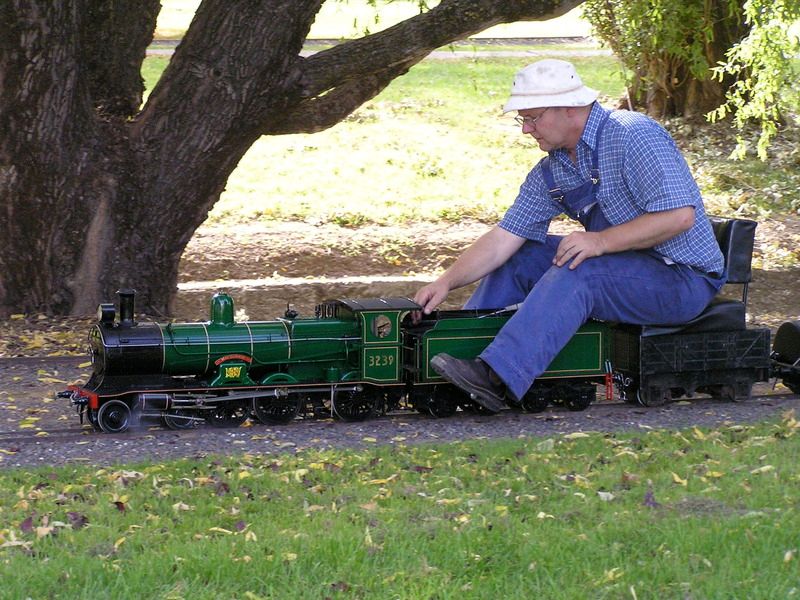 Back on Boadicea, I've lapped the faces on the Everlasting blowdown valve and it seals much better now and will be drip free once under pressure. Thanks Julian for the solution to Paul's question.  Also roughed out the upper and lower guides for the fire hole doors. They're not shown in the drawing but I'll be including spaces in the lower guide to clear coal dust that can clog the guide and make door closing a problem. Jim |
|