|
|
Post by Deleted on Jan 16, 2015 8:24:56 GMT
Very nice. I contemplated making those for mine but my excuse is that there wasn't enough room under the cladding!
John
|
|
|
|
Post by Deleted on Jan 16, 2015 9:02:34 GMT
lovely work Jim....lots of fiddly work involved there.......very nice..
Pete
|
|
|
|
Post by ejparrott on Jan 16, 2015 9:16:46 GMT
Nice one Jim...thinking you've earned a couple of ales for that one!
|
|
|
|
Post by Jim on Jan 16, 2015 11:39:10 GMT
Thanks fellas for the kind comments. I've now got the camera recharged so will take some photos to show there's actually not much to making them. As John commented I too will have a similar problem in terms of space between the cleading and the boiler for the rear pair closest to the backhead. A soothing ale and some creative thinking will be needed there. The other issue will be making neatly matching holes in the cleading for the mud hole doors to fit in as the Britannias didn't have flanges to the holes for either the washout plugs or mud holes doors that would have hiden any discrepancies.  Jim |
|
|
|
Post by Deleted on Jan 16, 2015 12:26:09 GMT
Very Nice indeed, Jim. It will be interesting to see how you made them.
Cheers
Tom
|
|
Andrew C
Part of the e-furniture

Posts: 447
|
Post by Andrew C on Jan 16, 2015 18:43:36 GMT
Very nice Jim.
You must be well happy. how many are you fitting? are you going to include the ones on the bottom corners of the firebox and up front on the Barrel?
This is going to look fantastic when you finish.
Well impressed
Andrew
|
|
|
|
Post by Jim on Jan 16, 2015 19:11:50 GMT
Thanks Andrew,
At this stage I intend fitting the pair at the front of the boiler but I'm still thinking about the pair on the bottom corners of the fire box. On Boadicea that section is removable to permit the rosebud grate to slide out so I need to come up with something that doesn't make things too difficult.
Jim
|
|
|
|
Post by donashton on Jan 16, 2015 21:50:00 GMT
Hi Jim,
Couldn't quite figure how your fine work related to the Thursday lunch, but I think I have it. The rosebud retrieval is automatic, like a toaster on its side! Hmmm.
Don.
|
|
|
|
Post by Geoff (Carlisle) on Jan 16, 2015 22:11:59 GMT
Hi Jim, make a few more and put them on a Qantas jet and send them to me , they are truly superb.
Geoff Carlisle.
|
|
|
|
Post by Jim on Jan 16, 2015 22:18:12 GMT
Well spotted Don, I wasn't going to reveal that little bit of information until I'd tested the timer at the first steam up. It's simple to operate just set the timer to say a 1 hour, then the time's up, 'Ping' the grate pops out, fire gone and all is clean.
Now I suppose everyone will want one.  
Jim
|
|
|
|
Post by Jim on Jan 16, 2015 22:26:15 GMT
Crikey Geoff I thought you'd written your last post with invisible ink, then I found out the awful truth half way down the page.... you want a plane load of mud doors!!!! Well only if you send me a plane load of soothing ales.  Jim |
|
jma1009
Elder Statesman
  
Posts: 5,922
|
Post by jma1009 on Jan 16, 2015 22:41:25 GMT
hi jim,
i cant work out how you made those excellent mud hole doors - they look superb! do tell us how you did it please!
cheers,
julian
|
|
|
|
Post by Jim on Jan 16, 2015 22:58:47 GMT
Thanks Julian I will post some photos now the camera is recharged.
Jim
|
|
|
|
Post by Jim on Jan 17, 2015 5:53:06 GMT
I've taken some photos to show how I've made the mud hole doors which hopefully may be of interest. I should say at the start the method I use is a bit agricultural compared with some of the superb work seen in other threads on this site. First up is a photo showing Perrier's drawing of how he suggested the mud doors should be made. Looking at photos of the prototype it was obvious the central square bar section should be round and the 8 BA hex head screw seemed over scale plus all the photos clearly showed it with a hex headed stud so I opted for 5/32" round bar and a 10 BA hex head stud. 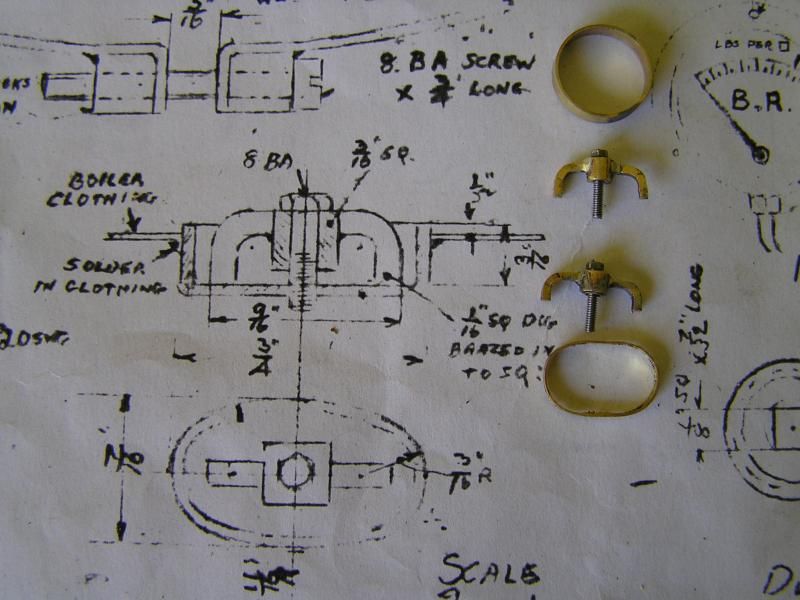 The oval side walls to the fittings were made from 19/32" x .014" brass tube (K&S 8142) and parted off in 3/16" lengths using a parting off tool made from a short length of old hacksaw blade ground to shape and retempered. The short lengths of tube were then annealed and bent to shape over a 3/8" round bar. 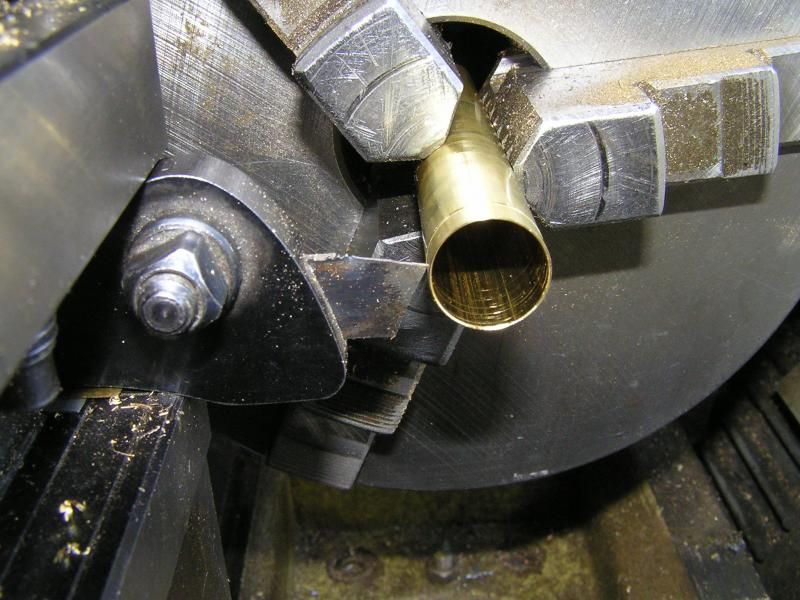 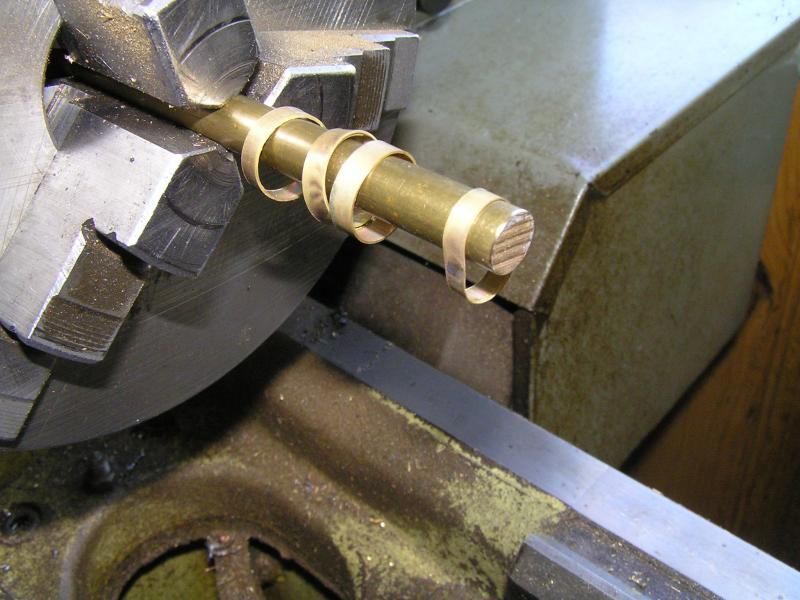 Next the the 5/32"D brass bar was spotted with a centre drill then drilled down the centre with a 1/16" drill before being removed and cross drilled with with a 2mm drill to accept a short length of 1/16" square bar cut from 1/16 sheet as I couldn't locate anything that size here.  This was then soft soldered in place and bent to shape using small wire bending pliers. 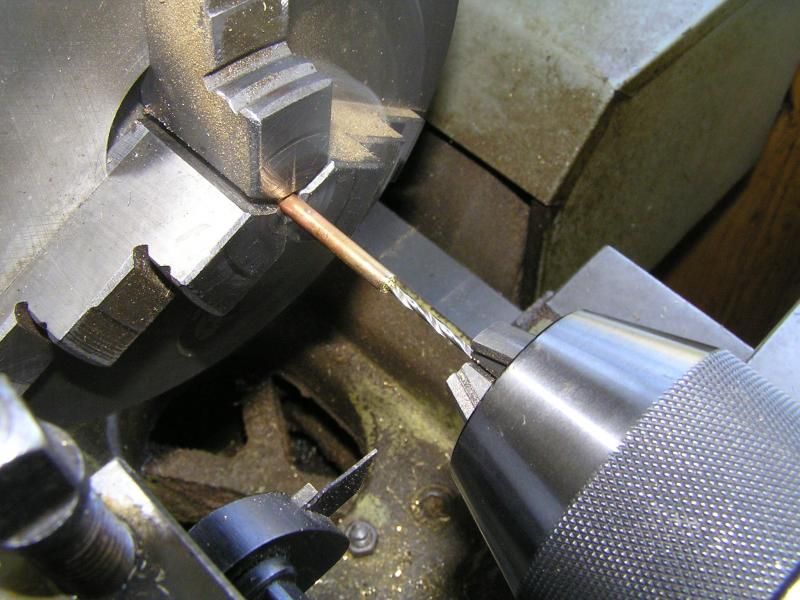 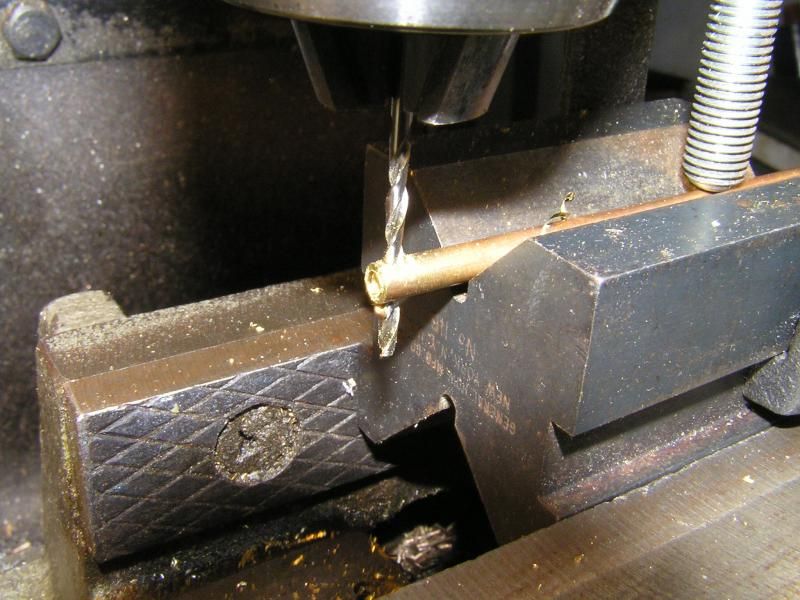 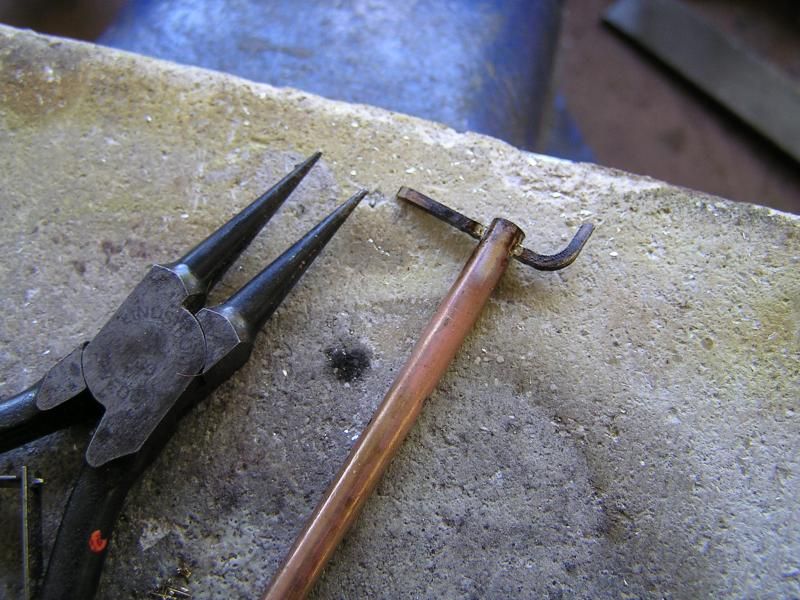 Before finally parting off the now formed strong back, the ends were trimmed to length, cleaned up with a file then returned to the lathe to carefully redrill out the mid section of the strong back so the 10BA stud could pass through. 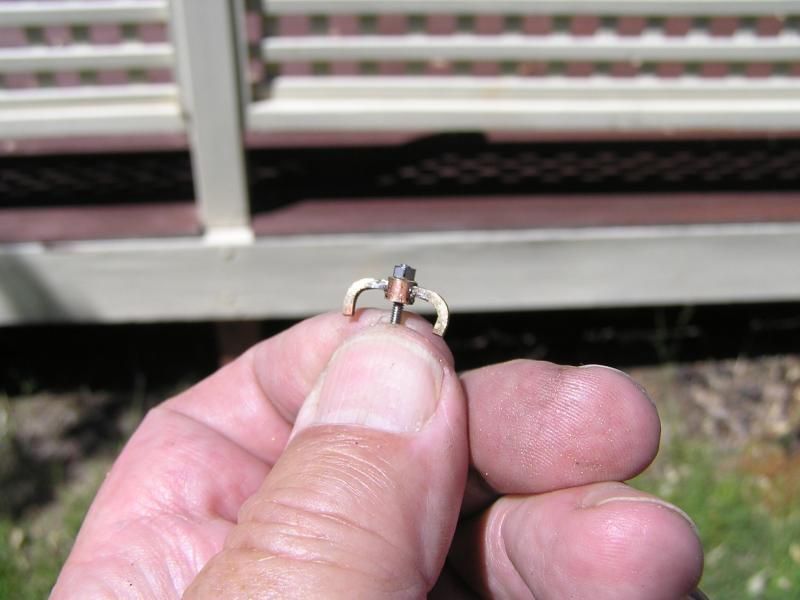 The final steps involve soldering the side walls on the base plate then drilling and tapping a 10BA hole in the base for the stud to screw into. For all the soldering and annealing I used a micro flame gas torch that a well know German Supermarket have on sale from time to time. It's very handy for this sort of work. Jim |
|
|
|
Post by Roger on Jan 17, 2015 8:04:30 GMT
Thanks for that Jim, as you say, it's simple enough when it's explained like that but the end result looks fantastic. I'm sure I would have struggled, probably by not realising that annealing would make life a whole lot easier.
|
|
|
|
Post by Deleted on Jan 17, 2015 8:43:39 GMT
great instructions Jim....details like this make such a difference to a model...your's will be superb..keep up the good work sir..
Pete
|
|
|
|
Post by Jim on Jan 25, 2015 6:21:36 GMT
A little bit more progress on the Boadicea's boiler cleading with the mud hole doors now fitted along with the washout plugs and handrail stanchions. I was pleasantly surprised to find there was enough room between the cleading and the top fire box to fit the rear pair of mud hole doors. Only a small amount of trimming of the side walls was needed to fair them off. As a result they are not as deep as the front pair but you need to look very closely to notice. Leaving plenty of length to the legs of the strong backs also proved valuable as I could trim them to just show above the cleading. The cleading it will have to come off again for me to test the Everlasting blow down valve and if all is ok fit the actuating lever. So why did I refit the cleading and not wait? I wanted to see how it looked.  Jim Edit: Cross checking some photos I have I think the mud hole doors should be lower down. That's the problem when drawings indicate one thing and photos another.....well that's where they now. 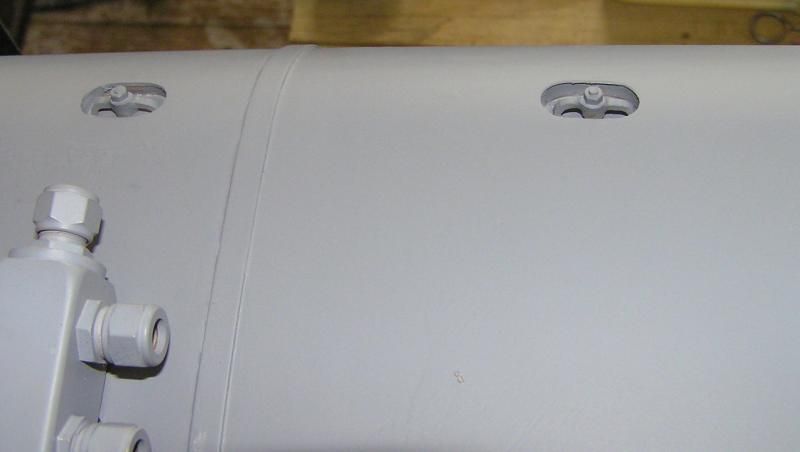 |
|
|
|
Post by Deleted on Jan 25, 2015 12:42:35 GMT
No pic showing Jim, although I'll bet the mud hole doors are super.
Cheers
Tom
|
|
|
|
Post by Jim on Jan 25, 2015 13:26:26 GMT
Not quite sure what happened to the first photo Tom but it is again. 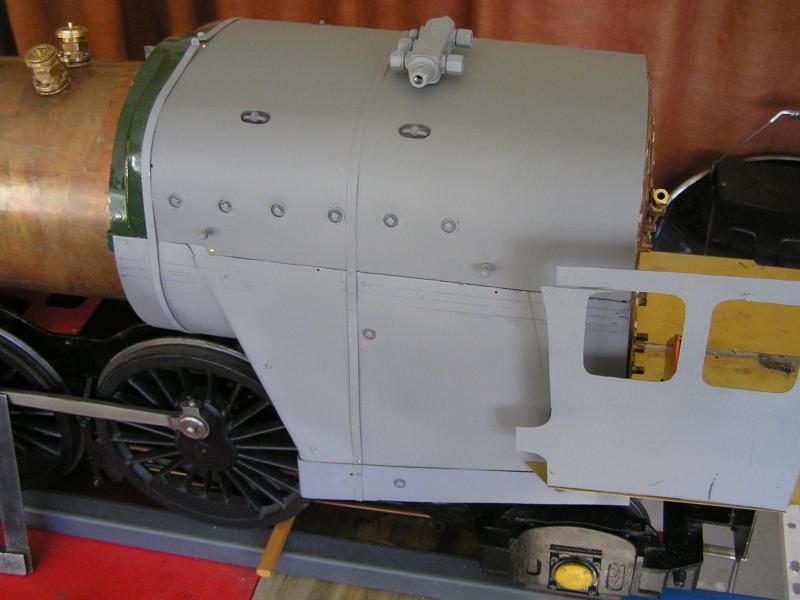 I've been out a rechecked and while I still think the mud hole doors should be a bit more into where the top curves down they do align well with references such as the regulator rod and hand rail. The grey primer tends to make the top look very flat too. Jim |
|
|
|
Post by Deleted on Jan 25, 2015 14:39:51 GMT
Mud holes rule OK!
John
|
|