|
|
Post by nick952 on Mar 6, 2017 16:53:47 GMT
Hi Bob, The company that I work for produce various items for Aerospace and use this:- www.silmid.com/ company for all the specified sealants. They have quite a range, so you may find something there. Nick. |
|
|
|
Post by 92220 on Mar 6, 2017 17:11:42 GMT
Thank you Nick. Looks like they may well have what I need; and it looks as if application is as easy as using a paint brush. I've just emailed them to find out what they recommend for the tender water tank. I'll let you know what they say.
Bob
|
|
|
|
Post by Jim on Mar 6, 2017 20:57:06 GMT
Hi Jim. Thanks for the info. I've also been doing a bit of 'digging'. Houseboats have steel water tanks and one of the paint companies (I think it is Johnsons Ltd) makes a bituminous coating, specifically for protecting drinking water tanks on boats. I may look into that as well. When I worked (many many years ago, in the design office of a company that built refuelling systems for oil rig helicopters, the fuel tanks were coated inside with a polyurethane coating, but that had to be applied by the suppliers, not the customer. Still - yet another possibility. Sounds like your idea is the easiest, if we can buy it over here. Bob. Hi Bob, There is also a newer product called Zincalume which is used for steel colourbond fencing and roofing which is even more durable. In my case I had a roll of the galvanized steel that the local metal merchant was selling off in job lots. As with all things, treated with respect and you will get good service. Jim. |
|
|
|
Post by Jim on Mar 7, 2017 3:28:46 GMT
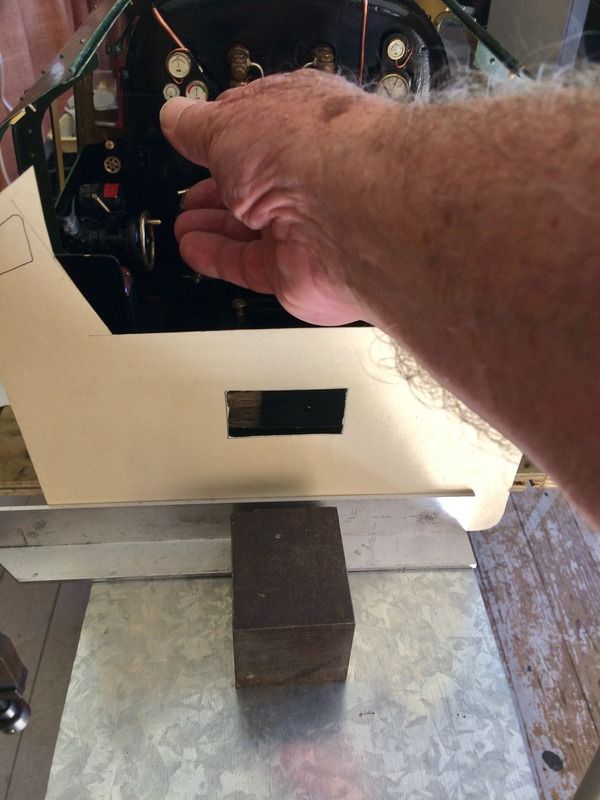
Following discussions and suggestions here and via PMs with Adam Cro a card template was made up with the proposed lift out panel taken across from the bottom edge of the driver's side locker. With this section removed the opening is both wide and low but not too low.  I had to try the cut out for access and after some fumbling and strange photos of nostrils I managed to get the camera pointing at the cab with a shot of my hand reaching into the cab.  I'm happy with this set up so will go with it. Many thanks for all the valuable suggestions and ideas. Following the discussion on the water domes on the rear of the BR1 tenders I went back to the works drawings and took this photo which I think explains Dan's comments about the higher domes allowing for an increase in water picked up. The low dome appears to restrict the out-flow far more than a higher dome would.  The plan drawing shows the dome but no sign of the small circular cover seen in the Hewson drawings.  Now as Paul earlier suggested it's time for a soothing ale.  Jim. |
|
|
|
Post by GWR 101 on Mar 7, 2017 17:44:43 GMT
Hi Jim, perhaps two. I am really impressed by the detail that you and others work to, I am afraid I am non-prototypical guy. Keep up the good work Paul.
|
|
|
|
Post by 92220 on Mar 7, 2017 19:14:51 GMT
Jim.
I'm sure I have seen references to drawings of trial water treatment equipment in my British Railways Drawings Register. I'll have a look again and see if I can find them again. If I find them I'll post the drawing numbers.
Bob.
|
|
|
|
Post by Jim on Mar 7, 2017 20:44:49 GMT
Bob,
I'm sure you're right about the water treatment trials and the existence of the dispensing hatch though not having had anything to do with it (NSW had generally soft water) I wonder why the treatment bricks couldn't have gone in through the main water hatch. There must be a reason though.
Jim
|
|
mbrown
Elder Statesman
  
Posts: 1,793
|
Post by mbrown on Mar 7, 2017 21:02:35 GMT
I believe the water treatment briquettes were held in a kind of perforated cage which allowed them to dissolve slowly in the water. The opening for the water hose needed to be unobstructed.
Malcolm
|
|
Lisa
Statesman
 
Posts: 806 
|
Post by Lisa on Mar 8, 2017 4:20:01 GMT
Different tender design obviously, but there's some footage of water treatment briquettes being add to Flying Scotsman's tender in '68. Based on the position and size of the treatment hatch, I'd hazard a guess that it was fitted by BR at some point to the same design as on Jim's drawing. Unless 4472 always had it (@greenglade might know), in which case BR might've based theirs on the LNER design. youtu.be/-6iSad-wi7Y?t=864Water treatment is added at about 14:20. |
|
|
|
Post by Jim on Mar 8, 2017 6:49:49 GMT
Ah this cooler weather, I love it! Got a bit more done today with the floor of the tender fixed to the chassis. Though it wasn't in the plans I've decided to fit a 1/32 sheet of ply between the floor and the chassis to give an even underbase to bolt the floor to.  A more detailed photo of the brass securing screws with a nice fillet of solder that has come right through the joint. The Micro flame torch was ideal for this job having first tinned the base plate to ensure a good joint.  Finally I made this small chest high work bench from and old cupboard door screwed to an off cut of timber and secured in the vice. I find it very comfortable to stand at for working on projects such as the tender.  Just saw the time and it's already soothing ale o'clock. Paul said I could have two for working so hard.    Jim. |
|
Lisa
Statesman
 
Posts: 806 
|
Post by Lisa on Mar 8, 2017 7:49:06 GMT
Ah this cooler weather, I love it! Glorious, isn't it?  |
|
|
|
Post by Jim on Mar 8, 2017 9:09:44 GMT
It certainly is!  |
|
|
|
Post by 92220 on Mar 8, 2017 9:18:49 GMT
Hi Jim.
I've found, what I think is the water treatment that you are referring to. I have found some drawings for the arrangement and details of the Alfloc water treatment equipment. I'm going to order copies of all the drawings, so when they come, I can compare them with the photos I have of the top of Evening Star's tender, which has an extra manhole cover on the rear left hand side of the top of the tender. When I get the drawings I will be able to confirm if this is what you are referring to.
Bob.
|
|
|
|
Post by Jim on Mar 8, 2017 10:50:56 GMT
Thanks for that Bob. I think even if not fitted it's always interesting to know that there were variations and the purpose for them.
All the best
Jim
|
|
|
|
Post by 92220 on Mar 8, 2017 11:01:51 GMT
Hi Bob, The company that I work for produce various items for Aerospace and use this:- www.silmid.com/ company for all the specified sealants. They have quite a range, so you may find something there. Nick. Hi Nick.
I've been in touch with the Silmid Technical Dept - very helpful. They made 2 recommendations - PR1005L and PR1440A. The first is a single pack product; the second is a 2-pack product. I am getting samples and will report back. Both retain elastomeric properties after fully curing.
Bob
|
|
|
|
Post by Jim on Mar 9, 2017 6:17:28 GMT
Hi Jim. I've found, what I think is the water treatment that you are referring to. I have found some drawings for the arrangement and details of the Alfloc water treatment equipment. I'm going to order copies of all the drawings, so when they come, I can compare them with the photos I have of the top of Evening Star's tender, which has an extra manhole cover on the rear left hand side of the top of the tender. When I get the drawings I will be able to confirm if this is what you are referring to. Bob. Hi Bob, Just out of interest I checked my Hornby OO model of 70036 Boadicea and found not one but two small circular lids on the back of the tender.  Jim |
|
|
|
Post by Jim on Mar 9, 2017 6:34:50 GMT
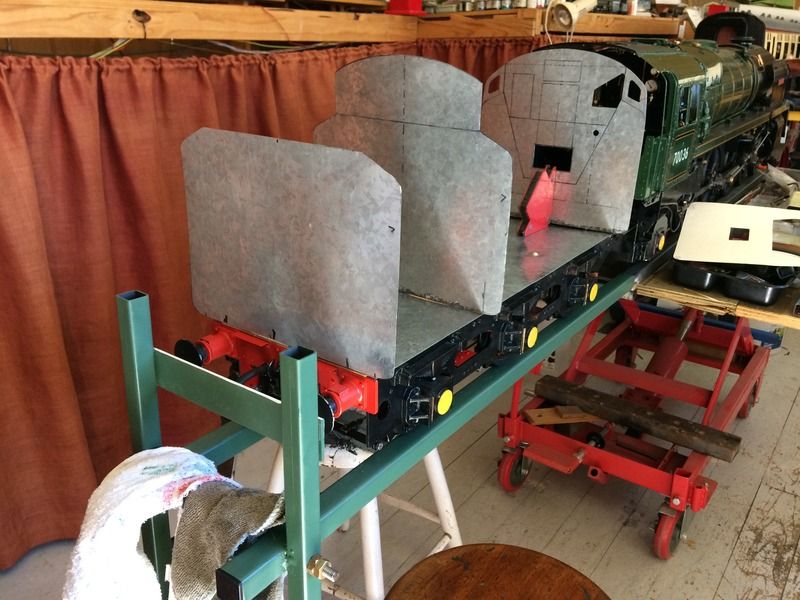
Having had a very nice seniors lunch at the German Club with the regular 5 other modeller suspects and all aglow after a nice pint of club's dunkel bier I decided to push on and cut out the rear wall of the coal bunker using the front wall as a pattern.  Now things are starting to take shape but not before openings are cut in the wall to permit the tank to fill with water.   Jim. |
|
|
|
Post by 92220 on Mar 9, 2017 9:14:17 GMT
Hi Jim.
The tender on Evening Star, at the NRM, only has one extra cover, and that is on the rear left hand side of the tender top. I have ordered some drawings which I hope will give us details but will have to wait for a few weeks before they arrive!! I have had a couple of long discussions with the Silmid technical dept. We came up with what I think will be the ideal sealer/corrosion preventer. It's used to seal riveted fuel tanks on small aircraft. You just pour it in, slosh it around and drain off the excess. Then leave it for 36 hours to fully cure and it is fuel and water proof. It also retains it's elastomeric characteristics so can withstand vibration too. It's arriving today so I am going to make a riveted steel container up , seal it and fill with water, and leave for a month or so, to see if it works. I'm sure it does but I want to see what the coating is like after immersion in water because it's main function is immersion in aircraft fuel, which is non corrosive! It is made by PPG so should be available world wide. I will report back when I have played with it.
Bob
|
|
|
|
Post by Jim on Mar 9, 2017 9:26:57 GMT
That sounds very interesting Bob. Look forward to hearing how the test goes and in the meantime I'll see if the product or similar is available out here.
As to the extra hatches beside the dome at the back of the BR1 tenders I think I'll will follow the works drawings for the time being.
Kind regards
Jim
|
|
|
|
Post by Jim on Mar 10, 2017 5:44:40 GMT
The sight of the tender taking shape got me cracking on the rear panel this morning. We were actually going out for lunch but I couldn't help myself, with some time spare before leaving I marked out the rear panel, cut it out and cleaned it up all without once getting my best clobber dirty.   I think the walls and floor to the bunker along with the tunnel for the fire irons may be next. First though I'll make up some card mock ups to check that I have the various shapes right. Jim. |
|