|
|
Post by mutley on Mar 10, 2017 9:32:18 GMT
Ive used the fuel tank sealer POR15, available from Frost Restoration, with good results for sealing steel and brass water tanks.
|
|
|
|
Post by Jim on Mar 10, 2017 10:19:32 GMT
Thanks for that Mutley, I'll check out its availability out here or if not available a substitute product.
Jim.
|
|
|
|
Post by Deleted on Mar 10, 2017 11:02:45 GMT
I can recommend POR15 products, I haven't used the tank sealer but have used their anti-rust coating on my classic car after some restoration work 2 years ago. POR15 is well known in the classic car restoration scene.
Pete
|
|
|
|
Post by fordfocus54 on Mar 10, 2017 20:32:03 GMT
Jim,
I have a drawing of the tool tunnel development, I'm sure it would be of help to you. Would you like me to scan and email it?
Frank.
|
|
|
|
Post by Jim on Mar 10, 2017 22:25:23 GMT
Frank that would be brilliant. Thank you very much indeed.
Jim
|
|
|
|
Post by Jim on Mar 11, 2017 6:55:57 GMT
Despite my best intentions not much as I intended was achieved today though I did clean out the gutters and take the mess to the tip. back in the workshop I managed to tack and glue three pieces of card together to give me an idea of how things should look at the front end of the tender then I should be able to add the long sides plus the sloping long floor to see how they all come together. As the photo shows things are pretty scrappy at present but at least I have an idea of how it will look. 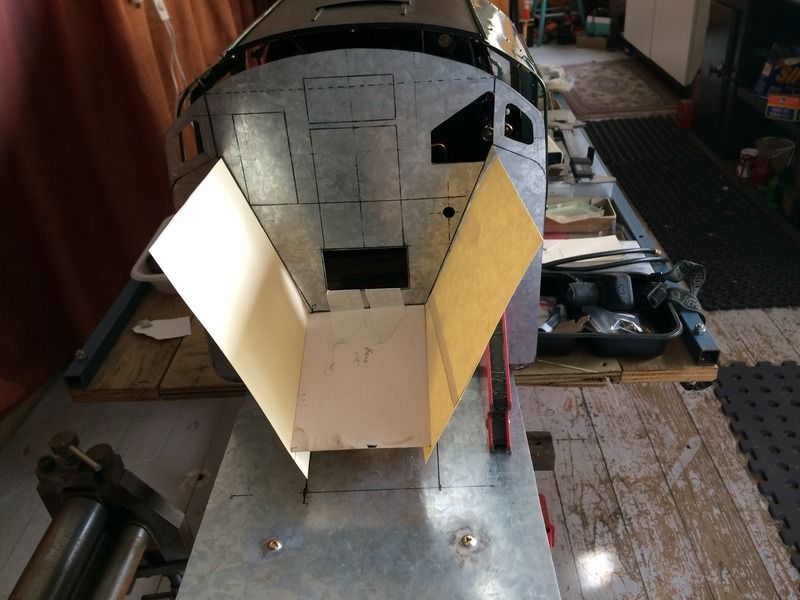 Jim |
|
|
|
Post by Jim on Mar 12, 2017 3:02:20 GMT
Started work on the floor of the bunker with the front plate done but still needing some tweaking and a card pattern made for the long sloping rear plate . The front plate is in place but not fixed that will be done after the cutout and details have been completed on the front of the tender wall.  Card pattern in a trial fit which will also give me an idea as to how the side walls will shaped.  There's still a lot more to do but at least the components are starting to come together and looking more or less as they should.  Jim |
|
|
|
Post by Jim on Mar 12, 2017 6:19:38 GMT
I couldn't resist the temptation to press on and cut out the long section of floor. A bit more tweaking was needed to get it sit reasonably square and in position.  Now I need to consider the next set of events. Jim |
|
|
|
Post by steamer5 on Mar 13, 2017 7:08:31 GMT
Hi Jim,
Just caught up on 68 pages! You're doing some great work! I've filled away some ideas when on get on to my Garratt! Keep it coming!
cheers Kerrin
|
|
|
|
Post by Jim on Mar 13, 2017 7:55:44 GMT
Thanks Kerrin for the kind comments though I think you deserve a medal for getting through the 68 pages. Hopefully it's a warts and all account and given it's me doing it there are a heap of warts.
Hopefully I'll get to do a steam trial in the not too distant future, the temptation is already there and hard to resist.
Jim.
|
|
|
|
Post by Jim on Mar 13, 2017 10:58:12 GMT
A bit more progress in getting the two floor plates soldered together and lined up properly. For this job I used low melt silver solder 430 and it did the job very nicely. It's a 'thicker' solder similar to plumber's solder, so making a good bond between the tags on the underside of the small plate to support and strengthen the joint between the two plates. The solder also made it easy to form a nice fillet along the seam to ensure all will be water tight. 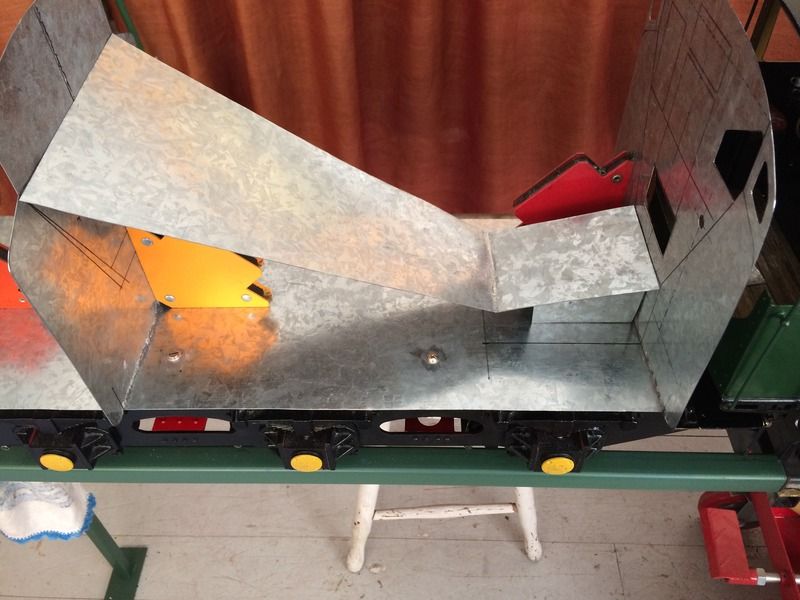 The next task will be to start on the front lift out section and detailing of the front plate so it can all be fixed to the tender floor. Jim |
|
|
|
Post by Jim on Mar 14, 2017 7:04:35 GMT
It must be the cooler weather but I managed to get some more done on the tender today in cutting out the lift out section in the front plate. I wasn't keen on using the cut off disc as the cut is relatively wide resulting in a poor fit when the slide in section is in place so I opted for my trusty jeweler's saw using a clamped guide to ensure a straight cut. The problem with the standard jeweler's saw is the shallow bow that limits the length of cut you can make. To get round this I cut down to where the long cross plate cut commenced having drilled a suitable sized number hole at the point where the cut changed direction repeating the process where the cut turned sharply to start the long cut. The holes take all the stress off the blade as it changes direction and is 'lost' when the job is complete. For the long cut I fitted a jeweler's saw blade to a standard Eclipse fret saw. It has a very deep bow which can become unwieldy if the cut is pushed. the trick is to let the blade do the cutting and set the pace. The picture shows the clamping method for the guide and the saw. 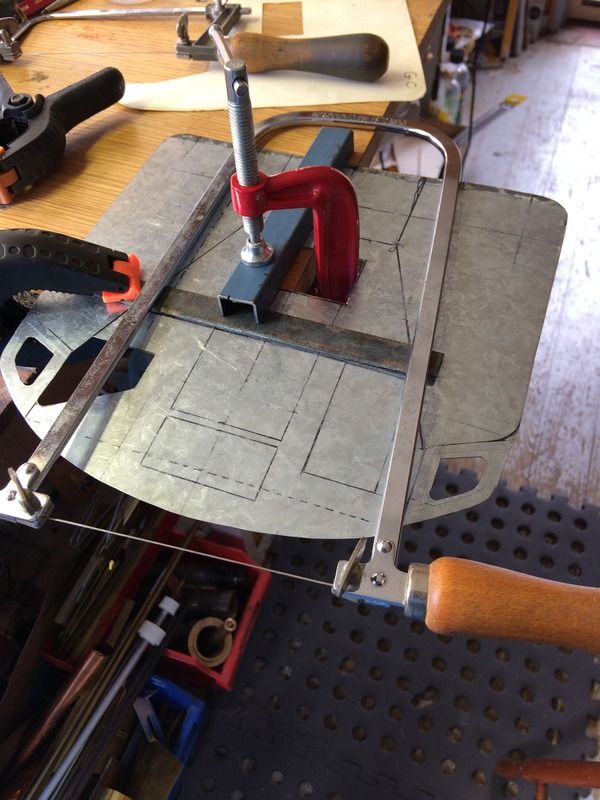 The lift out section cut out and cleaned up. 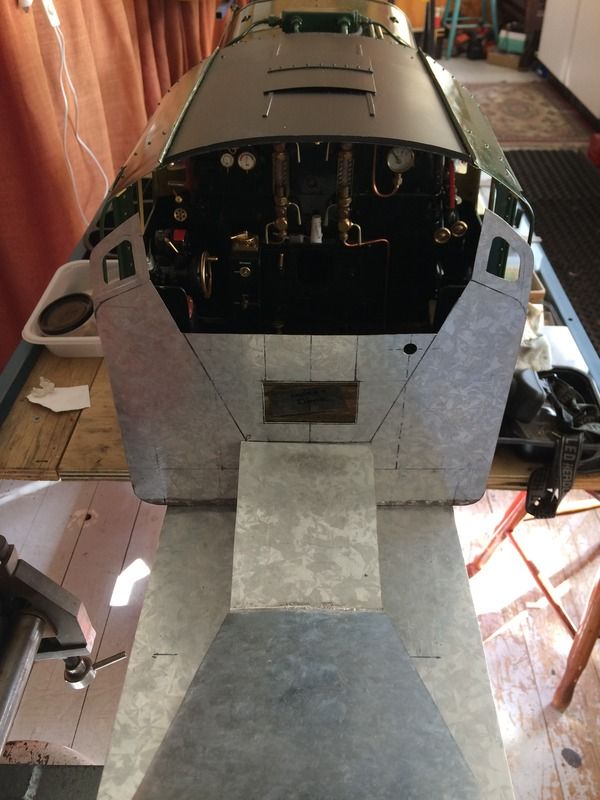 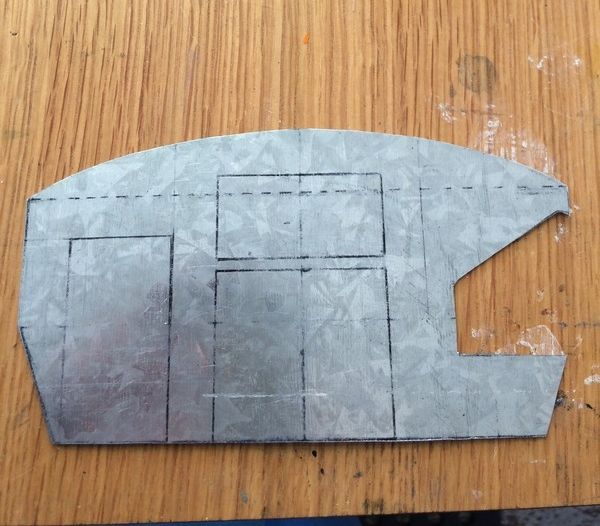 Next task will be to make the guides for the plate to slide into when in place. It's all coming along slowly, a bit like me.  Jim |
|
|
|
Post by 92220 on Mar 14, 2017 9:06:29 GMT
This is a photo of 9F Evening Star's tender that I took at the NRM in York some years ago, showing the hatch. I'm not aware of any Britannias with them. 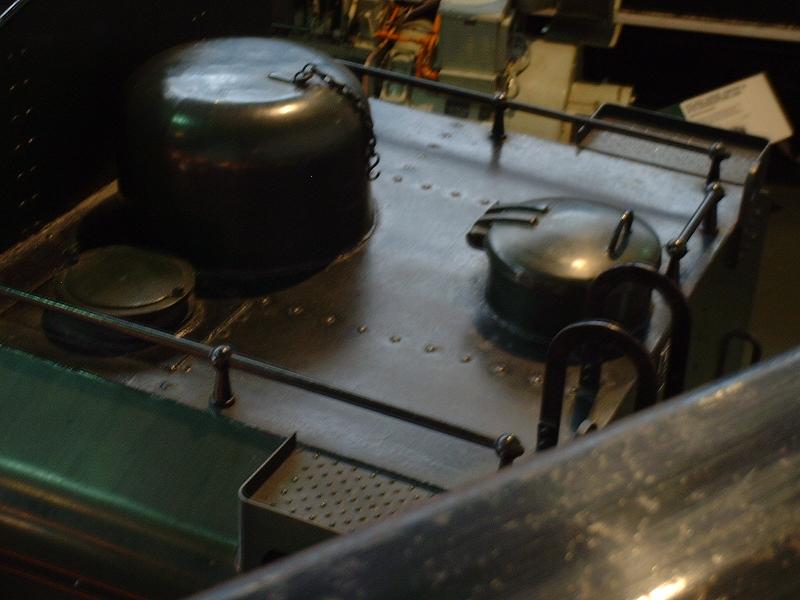 However, this recent photo of Oliver Cromwell shows a strange toolbox-like addition! Jim, I would agree that a wider opening on the top of the removable section at the front of the tender would make driving easier. I'm always catching my wrist or the shovel on the top corners. Regards, John
Looking through the thread again, I came across this post from jj. I think the small hatch at the side of the water scoop inlet dome, is the water treatment hatch. There is no reference to this hatch on any of the tender drawings I have, but looking through the drawing registers, I came across references to Afloc water treatment equipment on B1G tenders. I have ordered all the drawings that are referenced. When they arrive I will check them against my photos and report back. Hopefully with a definitive answer to this puzzle.
Bob
|
|
|
|
Post by 92220 on Mar 14, 2017 9:09:23 GMT
Forgot to add: Hopefully the drawing will also reference the tenders it was used on, which would be a great help.
|
|
|
|
Post by GWR 101 on Mar 14, 2017 19:30:34 GMT
Hi Jim, like your solution for cutting the shapes. A question if I may, you appear to be using galvanised plate. Now my soldering skill is nearly zero and my knowledge on the subject is even less, so do you use any special technique when soldering this type of plate. Regards Paul
|
|
|
|
Post by Jim on Mar 14, 2017 22:22:40 GMT
Hi Jim, like your solution for cutting the shapes. A question if I may, you appear to be using galvanised plate. Now my soldering skill is nearly zero and my knowledge on the subject is even less, so do you use any special technique when soldering this type of plate. Regards Paul Hi Paul, Galvanized steel is very easy to solder. I use Comweld 965 flux which is also used with the 965 low melt silver solder plumbers use and if memory serves me right, for caulking in our AMBSC boiler code. As with all soldering or brazing cleanliness is essential so I give the surfaces to be joined a good go over with steel wool first then then a brush of flux before I 'tin' both surfaces with solder to ensure a good sweated or full penetration bond. The local hardware store stocks a range of solders including the resin cored which I use for electrical and/or small components, it's not a 'filling' solder while for the tender I'm using 403 solder or plumber's stick solder which does form a nice fillet along the seams to ensure things are watertight. I should add I use an 80/100watt iron with a decent tip for tinning and general soldering and depending on the task a micro flame torch to add extra heat for sweating or more often in my case, to undo something I've stuck in the wrong spot or got askew. When you've finished the job give it a good scrub and wash off to remove any traces of flux. A couple of after thoughts, 965 solder will solder stainless and don't try to solder white metal, I did...once and was horrified to see the casting turn into a blob....nature can be cruel.  This is just what I do and what works for me Paul. I'm sure others here will have other techniques and approaches too. It's all fun. Jim |
|
|
|
Post by GWR 101 on Mar 14, 2017 23:33:03 GMT
Thanks Jim, a very precise answer to the question, thanks for taking the time to go into the detail. I think my concern was probably because at some time in the distant past I had problems when stick welding it. I am putting the poor memory down to old age.....and not too many soothing ales.  Regards Paul |
|
|
|
Post by Jim on Mar 15, 2017 2:18:13 GMT
My pleasure Paul and glad you didn't ask about stick welding. I can make welding rod go like a limp bit of spaghetti without any trouble at all. In fact I'm expert at it.  Jim |
|
mbrown
Elder Statesman
  
Posts: 1,793
|
Post by mbrown on Mar 15, 2017 12:17:55 GMT
Jim,
This question may have come your way already, but what primer do you use with galvanised steel plate?
I used galvanised steel for the plate work of my Bagnall back in the 1980s but after a few years the paint started lifting off in large areas. I had used zinc primer.
One day I want to give the old girl a repaint - but I haven't found a primer guaranteed to stick to galvanised steel.
Any tips from your experience?
Malcolm
|
|
|
|
Post by 92220 on Mar 15, 2017 13:38:10 GMT
Hi Malcolm.
I can tell you that. The only primer that has any real chance on galvanised steel is 2-pack etch primer. Unfortunately the oxidised layer of the zinc prevents almost all primers from adhering. It needs the extra acid in the 2-pack etch primer, to microscopically eat through the oxide to reach the virgin metal. Hope that helps.
Bob.
p.s. one trick that the construction industry used to use was to weather the galvanised steel, outside, for around 2 years. I'm not sure what the chemical action was but the oxide layer was converted over time, outside in all weathers, into something that normal primers would adhere to. Not something that we model engineers can use though.
Bob |
|