|
|
Post by Roger on Oct 8, 2021 18:49:31 GMT
Define excessive wear? How much do you plan to use it? That's a great question Jon. Excessive wear for me is that it only lasts five years before it needs bushing. |
|
|
|
Post by doubletop on Oct 12, 2021 18:46:48 GMT
Roger, so sorry to bring your battle damage to the notice of every one, still it is nice to know that we are not the only ones, I will keep my mouth shut in the future. very best wishes Jem No problem. It's annoying, because it really wasn't my fault. Such is life! As it is the movable jaw have you considered flipping it 180deg and putting the ding at the bottom? Out of sight out of mind Pete |
|
|
|
Post by Roger on Oct 12, 2021 19:05:09 GMT
No problem. It's annoying, because it really wasn't my fault. Such is life! As it is the movable jaw have you considered flipping it 180deg and putting the ding at the bottom? Out of sight out of mind Pete Hi Pete, That's an idea, I'll have to check if they are reversible. I once took the jaws of another vice, but ended up having to regrind it to get it true again. |
|
|
|
Post by doubletop on Oct 12, 2021 19:17:41 GMT
As it is the movable jaw have you considered flipping it 180deg and putting the ding at the bottom? Out of sight out of mind Pete Hi Pete, That's an idea, I'll have to check if they are reversible. I once took the jaws of another vice, but ended up having to regrind it to get it true again. That is a good point. Pete |
|
|
|
Post by Roger on Oct 13, 2021 11:28:02 GMT
Hi Pete, That's an idea, I'll have to check if they are reversible. I once took the jaws of another vice, but ended up having to regrind it to get it true again. That is a good point. Pete Hi Pete, It turns out that they are a Wedge shape, so the jaw would have to be replaced to remove the damage. It's annoying, but I just work around it. |
|
jem
Elder Statesman

Posts: 1,064
|
Post by jem on Oct 13, 2021 16:55:12 GMT
Could you fill them in with a bit of weld, and grind it back to good?
Jem
|
|
|
|
Post by Roger on Oct 13, 2021 19:01:38 GMT
Could you fill them in with a bit of weld, and grind it back to good? Jem Possbily. I might just see if replacements are available. |
|
|
|
Post by springcrocus on Oct 13, 2021 21:05:01 GMT
Could you fill them in with a bit of weld, and grind it back to good? Jem Possbily. I might just see if replacements are available. Does it matter? Tools are to be used, not showcased as pristine articles. It affects neither accuracy nor versatility.
Regards, Steve
|
|
|
|
Post by Roger on Oct 13, 2021 21:07:54 GMT
Slow progress due to family commitments and a paid job, but tonight I've started another two Rod End Caps for the Hydraulic Dampers. These are drilled 3.7mm, 3.8mm then reamed 4mm with the thread being roughed out with an 8mm End Mill plunged to depth. That was finished with one of those micro boring bars I bought from BangGood a while ago. I'm holding this in a 16mm collet so it doesn't slip while tapping it M11 x 0.75 (fine) I've just used a taper and then bottom tap.  20211013_213235 20211013_213235 by Georgia Montgomery, on Flickr This is the first of the tops for the front half bearings that provide the load directly to the axle from the Hydraulic Damper. This is a piece of 45mm diameter SAE660 I had left over from the company. The 'U' shape is under size so that the two halves can be mated and then bored to size.  20211013_215148 20211013_215148 by Georgia Montgomery, on Flickr The top mounts are all the same, just a simple forked piece and a piece of Silver Steel in a reamed hole with Loctite 601 retainer to make sure it's solid. The pins are secured using an E-clip. That will be left in place if it's stripped off the Locomotive. I'll just remove the two M4 bolts that hold the bracket to the frame.  20211013_215649 20211013_215649 by Georgia Montgomery, on Flickr |
|
|
|
Post by Roger on Oct 13, 2021 21:10:23 GMT
Possbily. I might just see if replacements are available. Does it matter? Tools are to be used, not showcased as pristine articles. It affects neither accuracy nor versatility.
Regards, Steve
Hi Steve, I've worked around it for years, so I'll probably just keep doing that. If I held something really firmly, they would leave a mark, but I'm aware of that so I avoid doing it. Many of my tools bear scars, it's not something that bothers me really. |
|
|
|
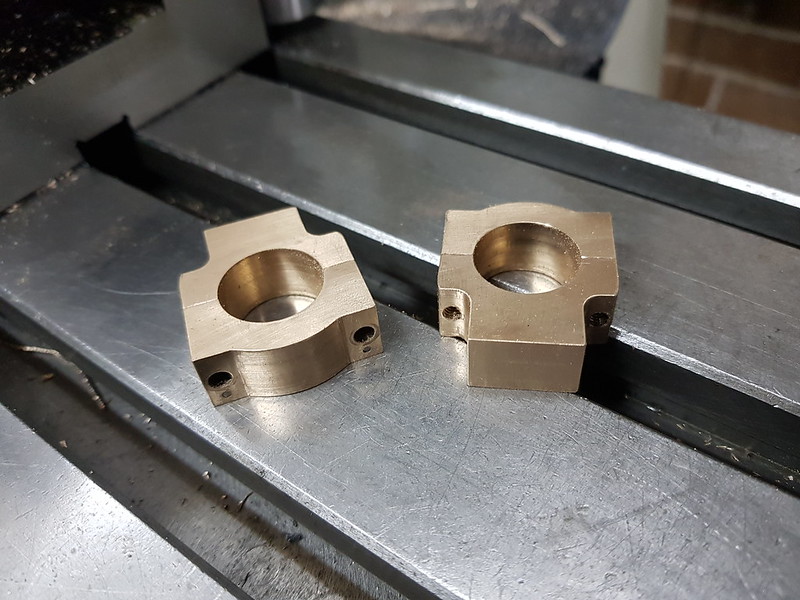
Post by Roger on Oct 14, 2021 21:42:43 GMT
This is the first of the Axle bearing top halves being parted off 0.3mm over length...  20211014_213534 20211014_213534 by Georgia Montgomery, on Flickr ... and here both of those are, tidied up with a file, ready for machining to the final thickness. 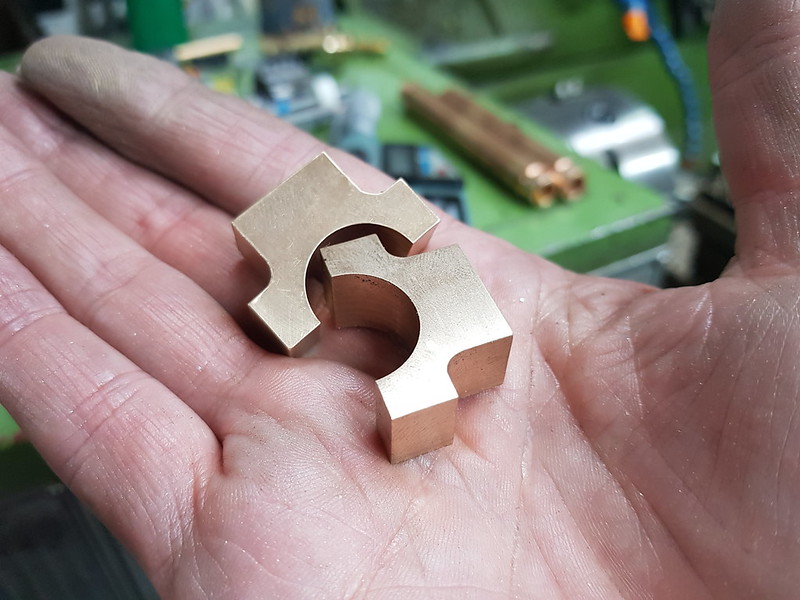 20211014_223404 20211014_223404 by Georgia Montgomery, on Flickr I already had the tool paths for the bottom half, because I'm using the same design as that for the Anti-Roll bar. Again, it's been roughed out with an 8mm cutter and 4mm deep cuts, 0.3mm over size, then finished off with a long series 4mm cutter to get a tighter corner radius.  20211014_221540 20211014_221540 by Georgia Montgomery, on Flickr Yes, I know it's very wasteful of material, but I've got lots of this size that's never going to be used for anything else, so I may as well put it to good use. I'm saving the swarf to sell to the scrap man, so it's not a complete loss. |
|
dscott
Elder Statesman
Posts: 2,438
|
Post by dscott on Oct 14, 2021 22:11:04 GMT
Lovely work as always Roger.
Yes saving swarf?
I am sure Lily's collection may return as Christmas decorations later this year.
The long spiral stuff is currently posing as some exotic plant in a dry vase in the summerhouse section of the workshop.
David and Lily.
|
|
|
|
Post by Roger on Oct 16, 2021 21:23:19 GMT
This is my 62mm diameter shell mill trimming the top bearing halves to 12mm width.  20211016_195616 20211016_195616 by Georgia Montgomery, on Flickr  20211016_200819 20211016_200819 by Georgia Montgomery, on Flickr I've just parted off the bottom halves, so they will get the same treatment next. The Belleville washers have arrived early from China, so I did a trial assembly. However, it soon became clear that this wasn't going to be satisfactory because it's going to be too difficult to fit them and bleed the air. 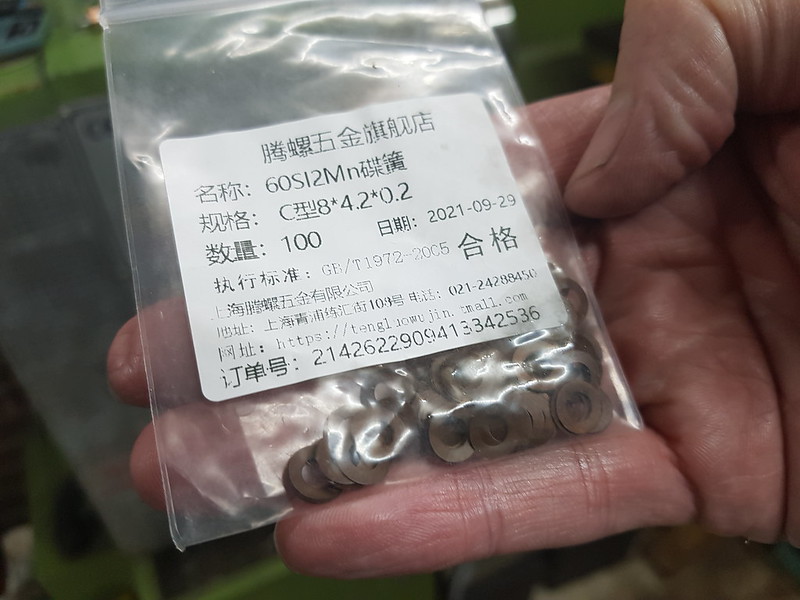 20211016_201619 20211016_201619 by Georgia Montgomery, on Flickr So I've modified the arrangement that centres the springs, replacing a Cap Screw for a Hex rod which will allow me to use a box spanner on the outside. The idea is that the air can be bled out of the system and the Hex rod is then replaced. The springs are then dropped over the outside of it. The Hex rod stands above the top spring, and the Hex enters a clearance diameter in the top cap. That way I can assemble it and the springs won't go everywhere. The outside of the hex is a clearance for the ID of the Belleville washers, and the inside has an M2.5 tapped thread to take a short length of thread. That will be secured with Loctite. The new arrangement is shown below, along with a modified piston to allow it to use an O-ring. I've reduced the nip on the O-rings to 10% to keep the friction to a minimum. I want the Hydraulics to provide the damping, not the friction. I might get Silicone O-rings to try, they will be quite a bit softer. I'll probably make the new style piston and rod assembly before trying it out. I may as well test what I think I'm going to end up with.  Hydraulic damper assembly1 Hydraulic damper assembly1 by Georgia Montgomery, on Flickr |
|
|
|
Post by Roger on Oct 17, 2021 20:58:53 GMT
|
|
|
|
Post by Roger on Oct 18, 2021 21:30:27 GMT
This is the slot where the lug of the Hydraulic Damper is located.  20211018_194612 20211018_194612 by Georgia Montgomery, on Flickr The bearing diameter was then bored to have 10-20microns clearance on the shaft.  20211018_215327 20211018_215327 by Georgia Montgomery, on Flickr And this is how they look on the Locomotive. I need to finish the Hydraulic Dampers and see how they feel. I'll probably have to make a split sleeve to keep the one on the left from sliding along the axle.  20211018_222112 20211018_222112 by Georgia Montgomery, on Flickr |
|
|
|
Post by gwr14xx on Oct 19, 2021 12:17:58 GMT
Roger,
I am sorry, but I can't see the point of having the dampers attached to the axles. Surely that is going to add to the drag on the axles - both where the damper mounting runs on the axle and by increasing the load on the axle boxes (as the damper will be opposing the movement of the spring). Surely, it would have been better to incorporate the damper mounting into the back face of the axlebox. That way, the damper and spring will be opposing each other without loading up the axle.
Regards,
Eddie.
|
|
|
|
Post by Roger on Oct 19, 2021 15:20:11 GMT
Roger, I am sorry, but I can't see the point of having the dampers attached to the axles. Surely that is going to add to the drag on the axles - both where the damper mounting runs on the axle and by increasing the load on the axle boxes (as the damper will be opposing the movement of the spring). Surely, it would have been better to incorporate the damper mounting into the back face of the axlebox. That way, the damper and spring will be opposing each other without loading up the axle. Regards, Eddie. Hi Eddie, Unfortunately, we have to start where we are, not where we would like to be. A damper ideally needs to act centrally on the axlebox, and be designed in from the start. I looked at several options for that, but it just wasn't practical with what's already there. Pressing on the back of the axlebox is just going to make it wear on the inside edge of the axlebox on the top and bottom. That's the last thing I want. The main load of the locomotive is carried on the axleboxes, while the dampers will float on the other bearings while there's no axle movement. Yes, there will be a small amount of drag, but there's only a load being carried when the axle moves. If it moves slowly, which is what it will be doing most of the time, there will be very little load on the bearing, just enough to move the damper. Large loads will only be carried when the axle displaces noticeably and at speed. This is why Hydraulic Dampers are so much better than friction devices or leaf springs. They strongly resist rapid displacements, while doing little when they're not needed. When the wheel is forced upward, the load on the axlebox is actually reduced, because the bearings for the hydraulic dampers will take some of the load that would otherwise be taken by the axlebox. The net result is that it's partially supporting the load, it's not working against the springs. Personally I think it's a good compromise, especially since it's easy to take it off for modifications and servicing if that's necessary. The intention is to get the proportions right and then it ought to just work for years without any attention, just like the ones on cars. Anyway, it's an interesting experiment, and hopefully we will all learn something useful. |
|
|
|
Post by keith1500 on Oct 19, 2021 21:11:18 GMT
Talking of experimentation. It would be interesting to see how much difference there is in having dampers, on all axles vs just the driven axle, given there is a lot of rock n roll derived from the piston forces.
( though I imagine it’s not possible to damp the rear axle due to the fire box)
Keith.
|
|
|
|
Post by Roger on Oct 19, 2021 22:28:14 GMT
Hi Keith, You're right about the rear axle being undamped, there's no way to do that without having some sort of lever arrangement or ultra compact damper. However, having damping on four wheels is going to limit the front to back porpoising as well as the rocking. I've also got the Anti-Roll bar on the driven axle which will help a little. It ought to be possible to have as much damping as you want, since it's controlled by the size of the holes drilled in the piston and the viscosity of the Silicone Oil. I've got some of the thinnest grade, so I'll start with that and see how it feels. This is the last of the four end caps...  20211019_171032 20211019_171032 by Georgia Montgomery, on Flickr ... and this is how the front ones attach to the axle bearing. I'm using E-clips on the 4mm Silver Steel pins. These have all got 0.7mm air holes in them now.  20211019_230242 20211019_230242 by Georgia Montgomery, on Flickr I've already machined the Rod End caps, but they need the spanner flats adding before I can part them off and tidy them up. I've currently got quite a lot of work on, hence the slow progress. Hopefully I'll get these all finished this week. |
|
JonL
Elder Statesman
WWSME (Wiltshire)
Posts: 2,907
|
Post by JonL on Oct 20, 2021 9:39:05 GMT
Will you have to use a very temperature stable oil for the dampers closer to the firebox? I'd imagine all of them will be getting quite warm
|
|