dc309
Seasoned Member

Posts: 146 
|
Post by dc309 on Mar 5, 2016 21:50:57 GMT
Managed to get a couple of hours this afternoon  I got the holes drilled in the horn castings, so I can now fasten them onto the frames. Using a DRO makes life so simple, along with an edge finder - touch on one side, zero. Touch on the other side, 1/2 the dimension on the X... bang on centre! I did the same on the fixed jaw of the vice, so I had a datum in the Y.     Starting to come together now! I've disassembled the chassis as well so I can get the plates painted, then I can assemble the frames for good then machine the horns. The holes were a bit baggy in the frames (picked up a 1/8 drill instead of 3mm  ) so I didn't want to machine them, then take the frames apart! Dan |
|
jma1009
Elder Statesman

Posts: 5,901
|
Post by jma1009 on Mar 5, 2016 21:55:34 GMT
hi dan,
fix the horns with 1/8" rivets in view of the above. ive got plenty if you want some.
cheers,
julian
|
|
dc309
Seasoned Member
Posts: 146
|
Post by dc309 on Mar 5, 2016 22:14:38 GMT
Hi Julian,
I'd got stainless M3 csk screws to fasten them on, along with nylock nuts. If they were racked up tight, do you think they would move on 6 fasteners? Would 7 thou make it shift, making it necessary to rivet?
Regards,
Dan
|
|
dc309
Seasoned Member
Posts: 146
|
Post by dc309 on Mar 6, 2016 12:00:36 GMT
Got my frame assembly apart and rubbed and cleaned everything down for painting this morning. I've used Halford's aerosol grey primer, which I am hoping will be alright! Gave everything one coat, had a bacon sandwich, then gave everything a second coat. The finish seems quite good, but that is end of play for today as I need to wait 24 hours according to the destructions on the tin! 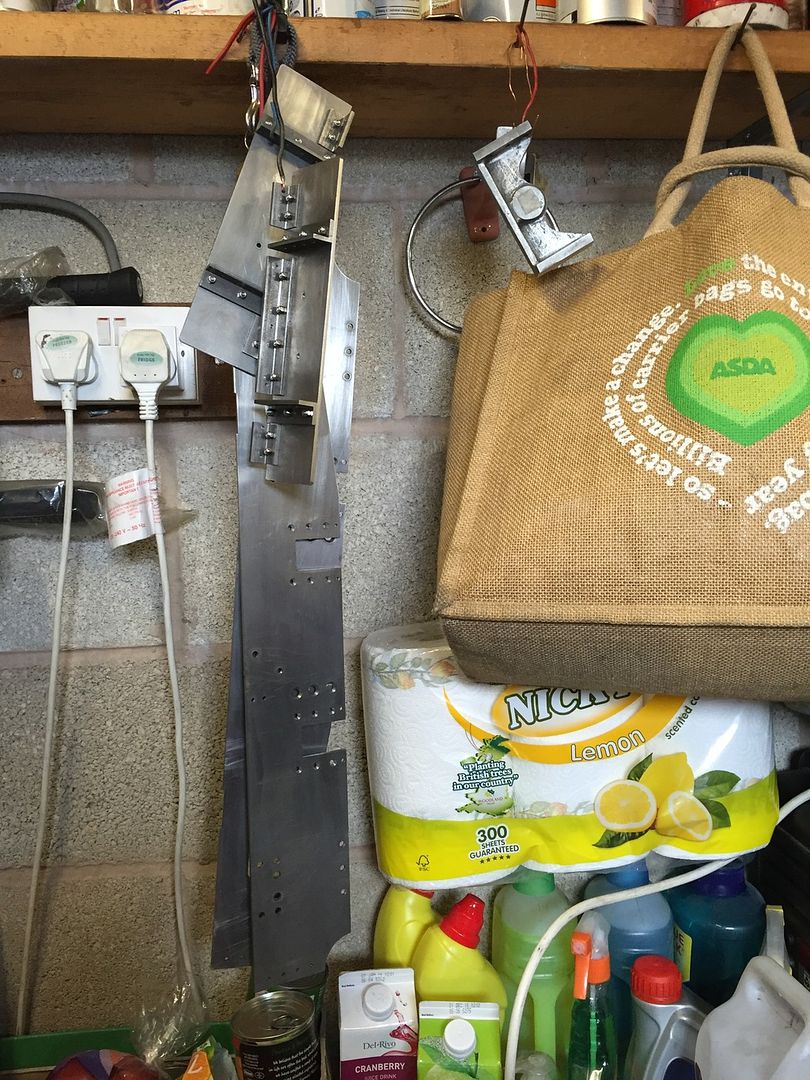 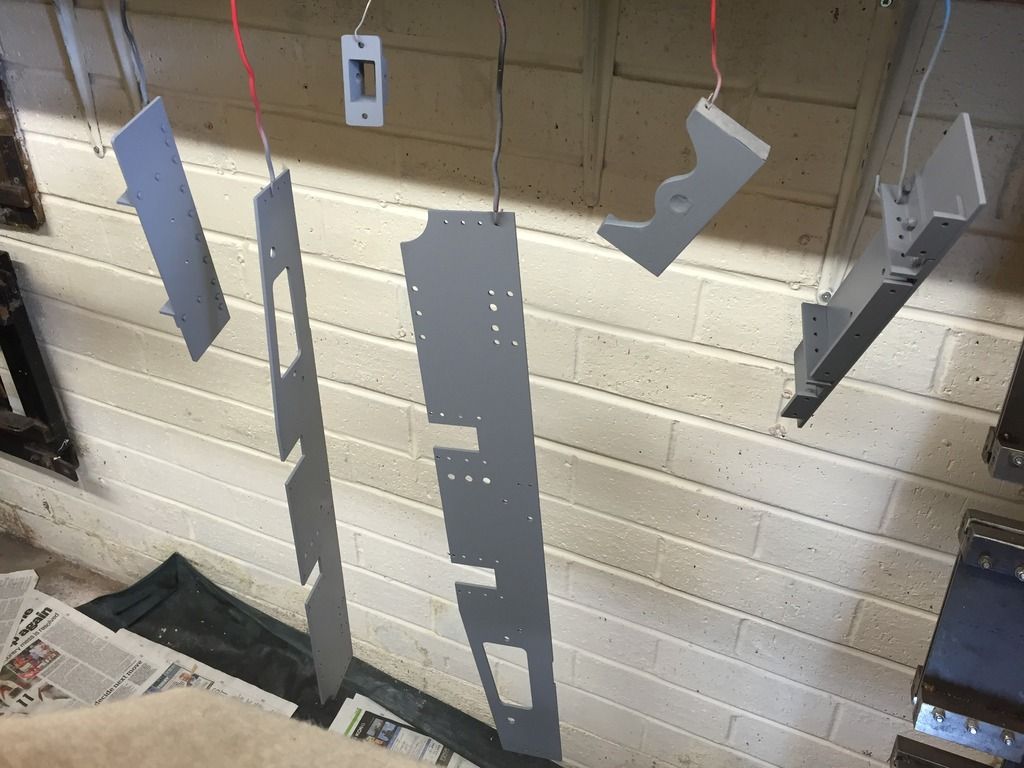 |
|
dc309
Seasoned Member
Posts: 146
|
Post by dc309 on Mar 7, 2016 17:55:15 GMT
Couldn't resist spraying the bufferbeams after work today - A splash of colour! 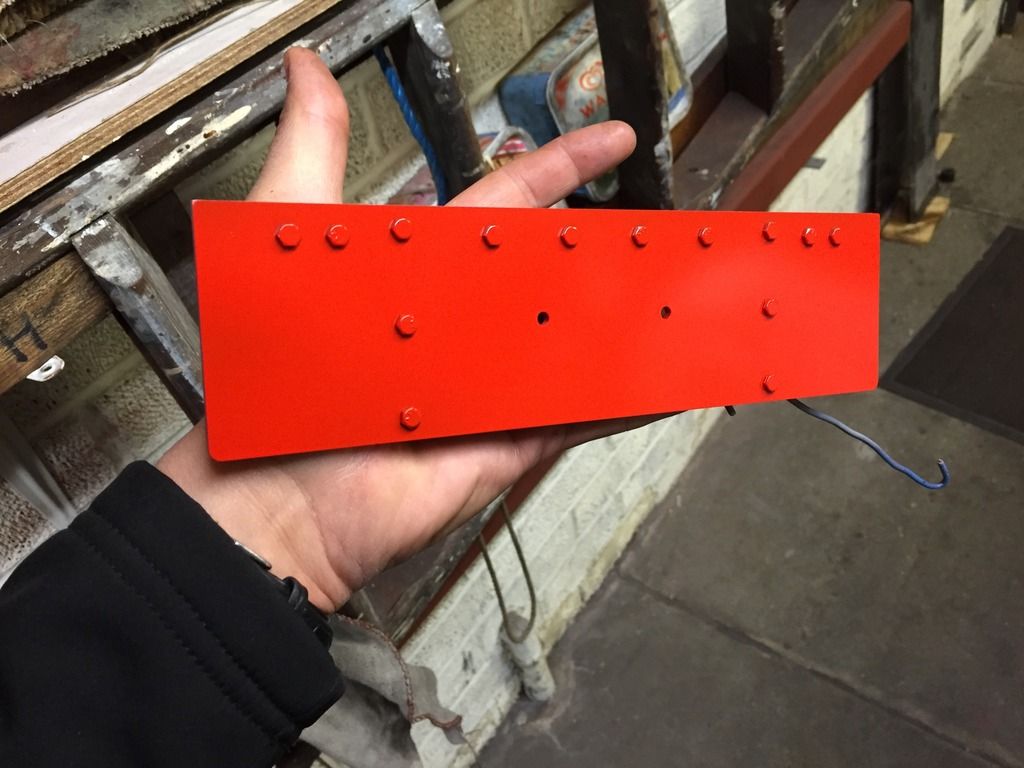 |
|
dc309
Seasoned Member
Posts: 146
|
Post by dc309 on Mar 12, 2016 18:43:22 GMT
|
|
dc309
Seasoned Member
Posts: 146
|
Post by dc309 on Apr 10, 2016 20:00:38 GMT
Hi all, Not managed any workshop time lately unfortunately for various reasons. I've drawn a few bits up in cad just out of curiosity (and boredom during some spare time at work!) to see if the bits fitted together. 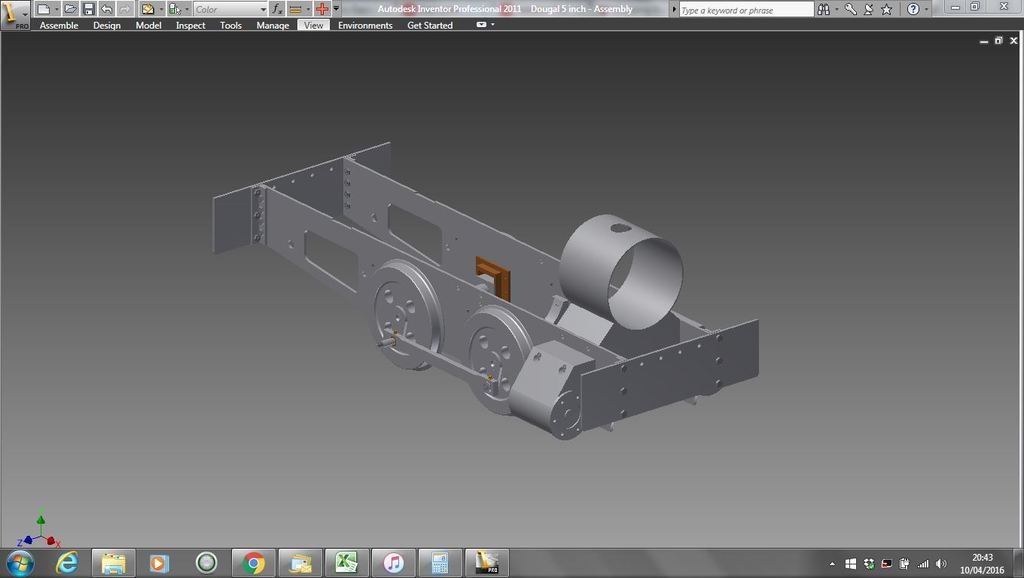 Hoping to get back in there next weekend, fingers crossed!  Dan |
|
dc309
Seasoned Member
Posts: 146
|
Post by dc309 on Apr 16, 2016 18:15:16 GMT
Got back into the workshop today and a very productive day it has been! I set the frames up onto the milling machine and machined the hornguides, with the help of my DRO they are within about half a thou 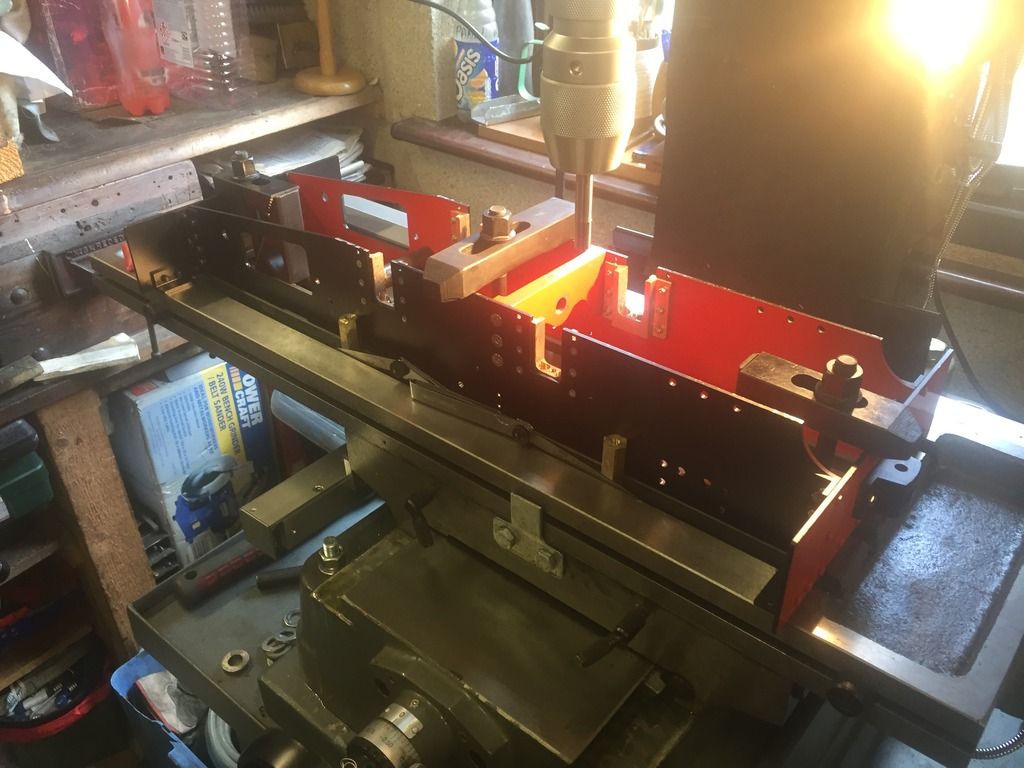 Setup on the front slot of the mill on 2 pieces of brass hex which were a tight fit into the slots, so the frames would be square to the front of the bed. 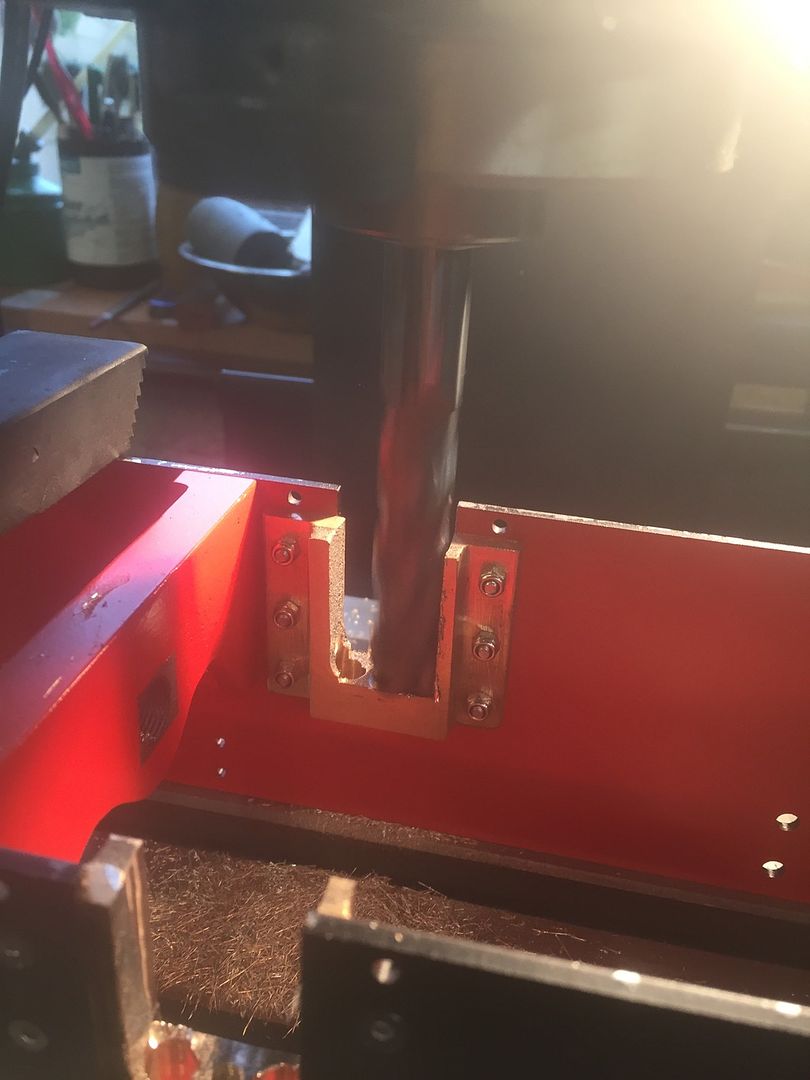 Long series endmill at work 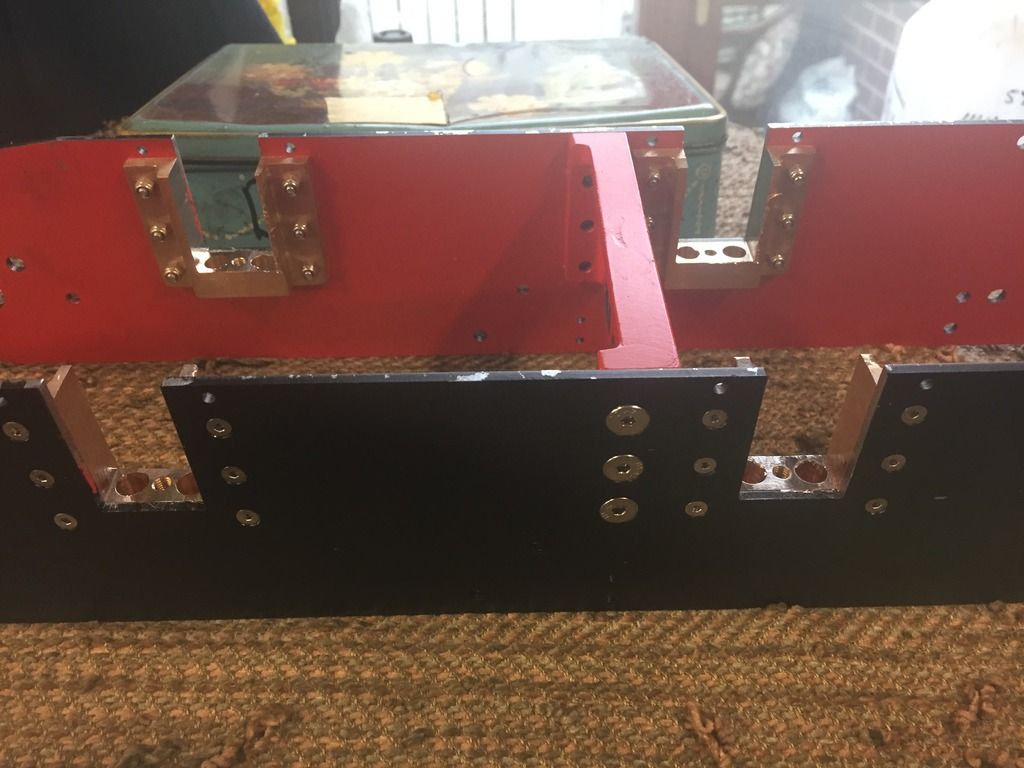 Finish machined, just needing to be deburred. Dan |
|
dc309
Seasoned Member
Posts: 146
|
Post by dc309 on May 6, 2016 20:03:59 GMT
Started on my axleboxes last weekend, but I didn't have chance to upload any photos. Started off with a block of Cast Iron and milled it down to the right size, then milled the slots in either side to suit the horn guides. Cut 4 boxes off the stick and milled them to length. To get the holes in the centre, I put them in the mill vice on accurate parallels and used an edgefinder to pick up the centre of each box. I then centredrilled, drilled and was planning to ream... until I found I didn't have a drill to suit! So I had to put a pilot hole in, then go over to the lathe and clock them in the 4 jaw and bore them out. I've got 2 finished, just another 2 to go I've lost the pictures of the mill setup, but I have the rest! I've given the axleboxes about 2 or 3 thou which has given me a nice sliding fit - Will this be enough? 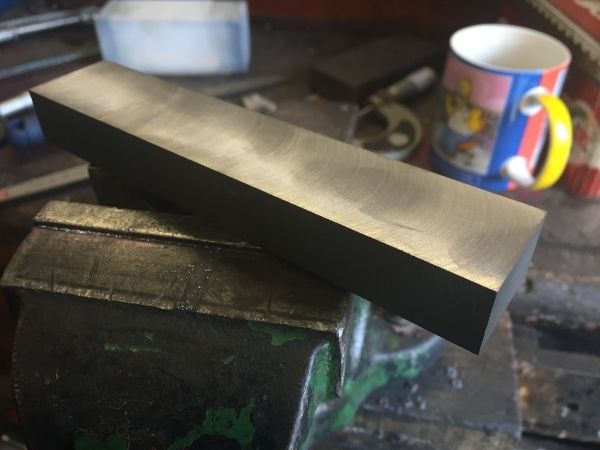 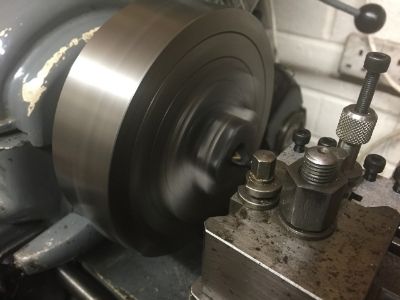 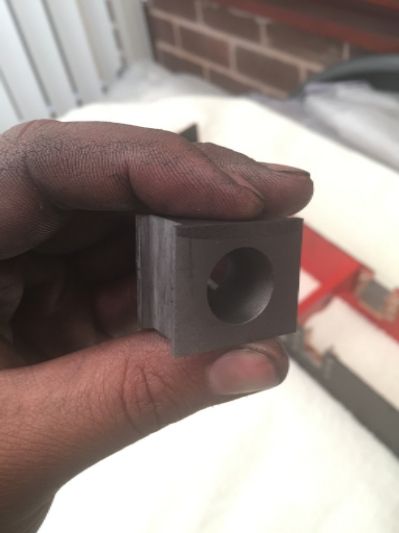 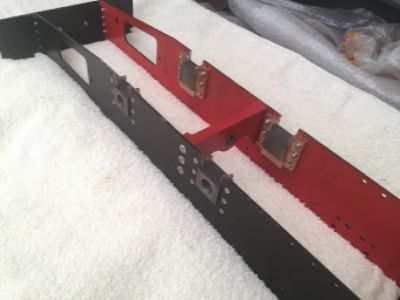 Dan |
|
dc309
Seasoned Member
Posts: 146
|
Post by dc309 on May 20, 2016 16:32:09 GMT
Got my axleboxes finished and to my surprise, they were perfectly aligned when I tried the axle material in! I've upped the size of the axle than drawing because as drawn it was a straight shaft, so I've gone a size up so I can have a shoulder for the wheel to sit up against. I'm yet to machine the axles, but I've got the silver steel to do it. 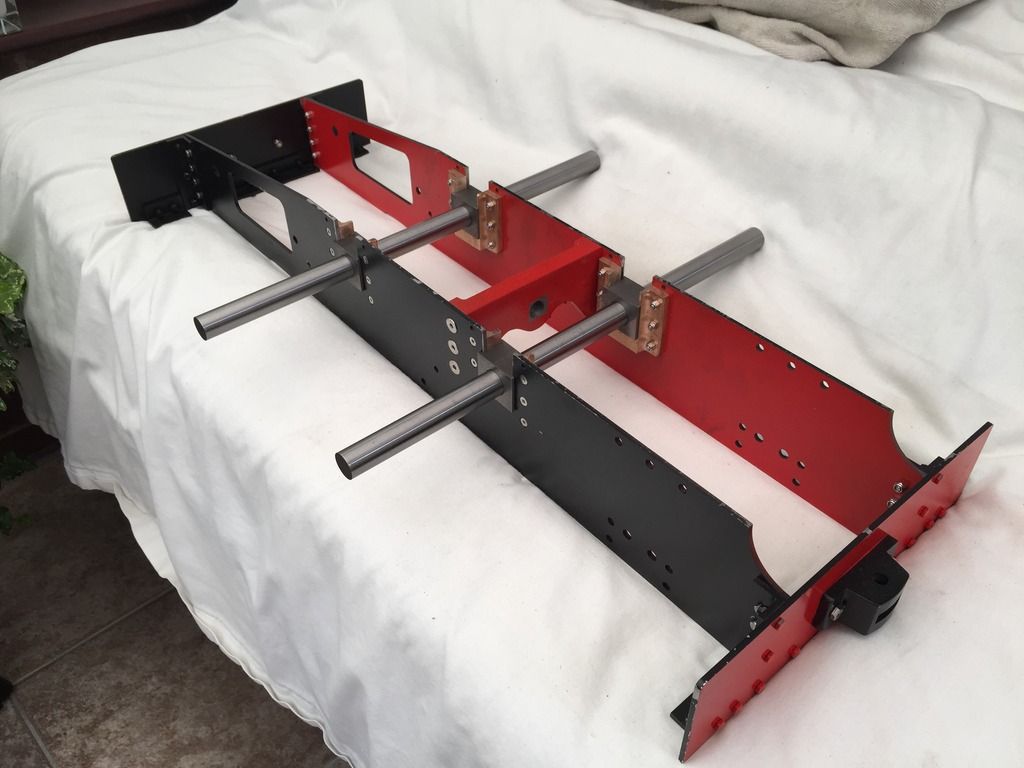 |
|
chrisb
Part of the e-furniture

Posts: 345
|
Post by chrisb on May 21, 2016 8:17:31 GMT
One point with you upping the axle diameter, you may need to reduce the throw of your eccentrics slightly or imcrese the sheave diameter as it puts the axle hole very close to the running surface, as I found out when I did the same with my 7 1/4" version.
|
|
dc309
Seasoned Member
Posts: 146
|
Post by dc309 on May 21, 2016 21:18:18 GMT
One point with you upping the axle diameter, you may need to reduce the throw of your eccentrics slightly or imcrese the sheave diameter as it puts the axle hole very close to the running surface, as I found out when I did the same with my 7 1/4" version. Thanks for that Chris, I'll bear it in mind when I come to do the eccentrics. I'm still in two minds whether to go for slip eccentric as per drawing or try and work out a valve gear for it. Cheers, Dan |
|
weibel
Seasoned Member
Posts: 116
|
Post by weibel on May 27, 2016 17:06:44 GMT
Absolutely beautiful work sir!
|
|
dc309
Seasoned Member
Posts: 146
|
Post by dc309 on May 30, 2016 18:08:34 GMT
Thanks for your kind words Weibel! Nothing flash by any means compared to the rest of the work done by other members of this forum |
|
dc309
Seasoned Member
Posts: 146
|
Post by dc309 on Jun 16, 2016 15:49:35 GMT
|
|
dc309
Seasoned Member
Posts: 146
|
Post by dc309 on Jun 16, 2016 15:55:48 GMT
Apologies for the huge photos. I've tried to resize them in photobucket but it just won't have it, so I've given up!
Dan
|
|
|
|
Post by Roger on Jun 16, 2016 18:37:54 GMT
Apologies for the huge photos. I've tried to resize them in photobucket but it just won't have it, so I've given up! Dan I can't see any picures, am I the only one? You shouldn't have to resize pictures in Photobucket, I think you can just select the size of photo you want the BBCode to link to. This is how it works with Flickr, and I'm pretty sure the software is almost identical. |
|
uuu
Elder Statesman
your message here...
Posts: 2,815
|
Post by uuu on Jun 16, 2016 19:12:31 GMT
I see them. The wheels have come out really well. I like the as-cast finish on the web.
And I'm a fan of those button-tip tools.
Wilf
|
|
smallbrother
Elder Statesman
Errors aplenty, progress slow, but progress nonetheless!
Posts: 2,269
|
Post by smallbrother on Jun 16, 2016 20:51:18 GMT
Hi Dan,
I started a wheel of my Juliet and have been diverted so didn't do more than machine the front and back.
Just wondering how you held the wheel in the chuck?
Nice work by the way!
Pete.
|
|
dc309
Seasoned Member
Posts: 146
|
Post by dc309 on Jun 19, 2016 22:57:12 GMT
Hi Dan, I started a wheel of my Juliet and have been diverted so didn't do more than machine the front and back. Just wondering how you held the wheel in the chuck? Nice work by the way! Pete. Thanks for your kind words Wilf and Pete! Pete. I grabbed hold of the wheel in the 3 jaw making sure that it ran fairly true, then took a skim off the back to a set measure having left enough on the front to have the webs the same thickness on the front when I turned them round. I also drilled, bored and reamed the holes out for the axle when turned round. I made a mandrel to hold the wheels, which was a piece of 3/4" MS turned down to 1/2" (a good fit) to take the wheel with an M10 thread on the end so I could tighten the wheel upto the shoulder. When I put them on the mandrel for machining I took a light skim off the flange side to make sure the back face was square to the front and the bore - I hope this makes sense? Cheers, Dan |
|


 ) so I didn't want to machine them, then take the frames apart!


