dc309
Seasoned Member

Posts: 146 
|
Post by dc309 on Jun 19, 2016 22:59:10 GMT
Apologies for the huge photos. I've tried to resize them in photobucket but it just won't have it, so I've given up! Dan I can't see any picures, am I the only one? You shouldn't have to resize pictures in Photobucket, I think you can just select the size of photo you want the BBCode to link to. This is how it works with Flickr, and I'm pretty sure the software is almost identical. I think I'm going to transfer my stuff over to Flickr as I can't get them to resize at all in the forum or on photobucket regardless of the options. |
|
dc309
Seasoned Member
Posts: 146
|
Post by dc309 on Jun 23, 2016 18:58:05 GMT
Got some more done on Dougal today! The wheelsets are now more or less complete, they are just missing the crankpins and quartering. Today I've drilled the holes for the crankpins, made the axles and crossdrilled them for axlebox lubrication. 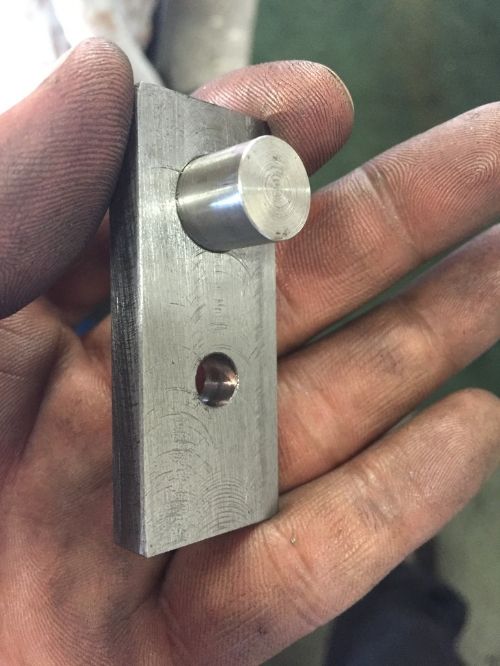 Jig for drilling the holes in the wheels. 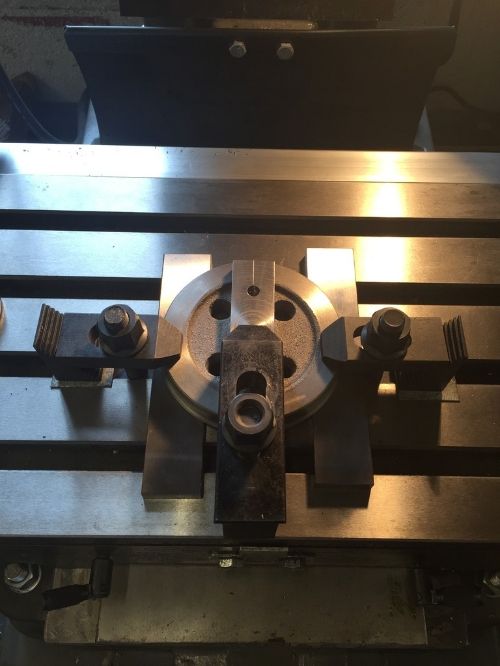 Setup for drilling the holes. 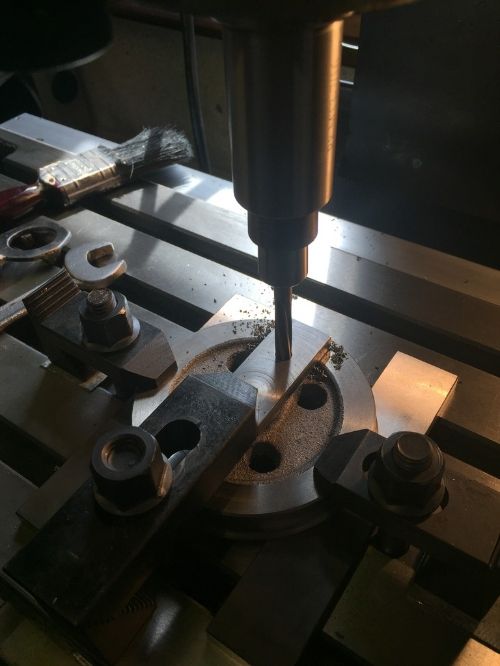 Reaming the holes 1/2" after drilling.  Showing the holes. Disappointingly just as Cro mentioned earlier in the thread, the web isn't in the right place in the casting which throws the holes off to one side. Never mind - I don't suppose you'll see them when they are wizzing round!  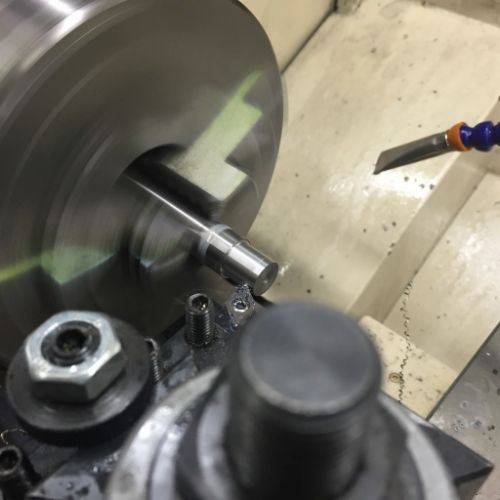 Machining the axle down to 1/2" to fit into the wheel. I've machined them to about .015mm up on size to give a nice fit into the wheel, which I'll grub screw half and half to fix them together. The axles have a 3/32 oilway through and crossdrilled. 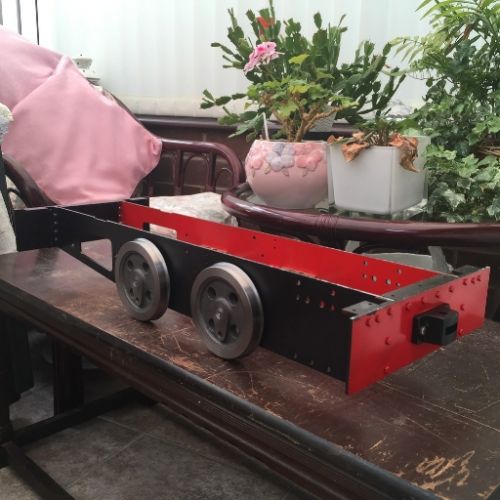 Dougal is finally on his (or is it her?) wheels! It moves up and down very freely with no rattling and banging, so I must be doing something right  Next step is to get the crankpins made and the connecting rods, then I can quarter the wheels up and move on to the cylinders (which I'm not looking forward to... expensive bits of cast iron!) Cheers for now, Dan |
|
dc309
Seasoned Member
Posts: 146
|
Post by dc309 on Jul 14, 2016 16:17:24 GMT
It's been a bit of a headache day today  I got all set up this morning at my mates workshop and machined all three eccentrics for the loco, along with the stop collars. The problem came when I had to bore the hole for the axle... I'd forgotten what ChrisB had told me and just ploughed ahead - With increasing my axle diameter, the hole for the axle breaks through onto the running surface of the eccentric  I'm not quite sure what to do now as I've made the axles and boxes etc. Would I be able to increase the diameter of the eccentric or change the hole offset in the eccentric? 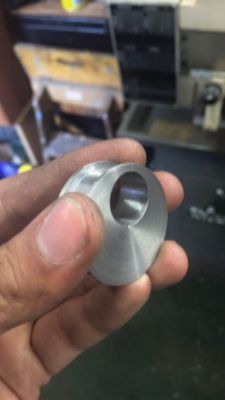 If anyone can help or advise, I'd be very much appreciative of it!! Regards, Dan |
|
uuu
Elder Statesman
 your message here...
Posts: 2,815
|
Post by uuu on Jul 14, 2016 18:20:41 GMT
You'll have to study the drawings to see if you can have bigger eccentics or if you'll hit something.
Could you reduce the axle just at the spot where the eccentrics are - a groove - and then have split eccentrics?
Changing the offset would have consequential changes.
Wilf
|
|
|
|
Post by Roger on Jul 14, 2016 18:28:45 GMT
It's been a bit of a headache day today I got all set up this morning at my mates workshop and machined all three eccentrics for the loco, along with the stop collars. The problem came when I had to bore the hole for the axle... I'd forgotten what ChrisB had told me and just ploughed ahead - With increasing my axle diameter, the hole for the axle breaks through onto the running surface of the eccentric I'm not quite sure what to do now as I've made the axles and boxes etc. Would I be able to increase the diameter of the eccentric or change the hole offset in the eccentric? If anyone can help or advise, I'd be very much appreciative of it!! Regards, Dan Hi Dan, Sometimes it's just easier to take it on the chin and make some new ones. It's not a lot of work really, and you'll probably waste as much time trying to work round the error. I don't worry about binning things, it's bound to happen from time to time if you go 'off piste'. (as I do all the time) You made a nice job of those, so you'll make just as good a job of any new ones and be happy with them. |
|
dc309
Seasoned Member
Posts: 146
|
Post by dc309 on Jul 14, 2016 18:32:41 GMT
Thanks for your replies Wilf and Roger.
If I made split eccentrics Wilf, I guess that would solve it! I may well look into that, as I don't really want to make the axleboxes again!
The problem is Roger, the axles are 5/8" instead of 1/2" which will have a problem all round. I'd have to make new axles and new boxes if I wanted to go back to drawing to make it work - I was wondering if I could do something with the eccentrics before I make the whole lot again?
Regards,
Dan
|
|
|
|
Post by Roger on Jul 14, 2016 19:01:10 GMT
You certainly could neck the axles in where the eccentrics are, but you'll have to make those again for that and they would have to be split as Wilf says. You haven't made the axles that much bigger, so I would be surprised if you couldn't make the OD of the groove bigger and accommodate the change in the straps. As Wilf says, you can check to see if you can make those slightly bigger too. Don't assume that you have to use castings for those, they can be made out of bar.
Personally, I'd keep the axleboxes and axles as they are, I don't see the need to change those.
|
|
dc309
Seasoned Member
Posts: 146
|
Post by dc309 on Jul 14, 2016 19:15:21 GMT
It wouldn't have to be much I think as it was only just breaking through - You could push the metal about with your fingernail but it was still intact! 0.040" - 0.060" in diameter would do it I should have thought?
|
|
|
|
Post by Roger on Jul 14, 2016 19:53:00 GMT
Well, you've only lost 1/16" by the change in the diameter of the shaft, so adding that back might be sensible. You know that amount was considered enough on the original design.
|
|
jma1009
Elder Statesman
Posts: 5,901
|
Post by jma1009 on Jul 14, 2016 22:13:52 GMT
Hopefully Mutley will come up with a solution as he has a very nice version.
Cheers,
Julian
|
|
dc309
Seasoned Member
Posts: 146
|
Post by dc309 on Nov 5, 2016 16:33:25 GMT
Hi all, Not touched Dougal for a good few months due to various reasons, but I got back into the workshop today for a few hours! I set about the driving and leading crankpins, which are now all finished barring the spacers and nuts. I took some photos but I managed to lose some of them uploading into Photobucket... 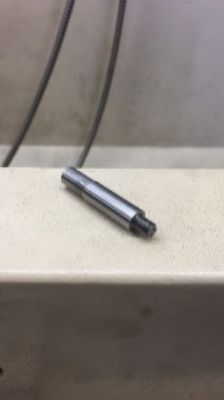 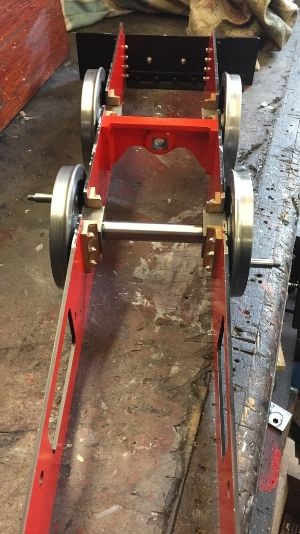 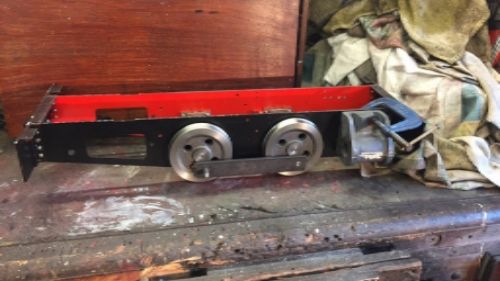 I made two dummy coupling rods up to check my centres were right and they slipped on perfectly (which I felt quite pleased with!). I will have to tackle the eccentrics first, but it will soon be time to quarter the wheelsets up - What is the best solution for doing so? Regards, Dan |
|
dc309
Seasoned Member
Posts: 146
|
Post by dc309 on Jan 5, 2017 12:38:53 GMT
A bit more done on Dougal over the Christmas break. I got bored with working on the chassis, so decided to machine the smokebox saddle/ port block. 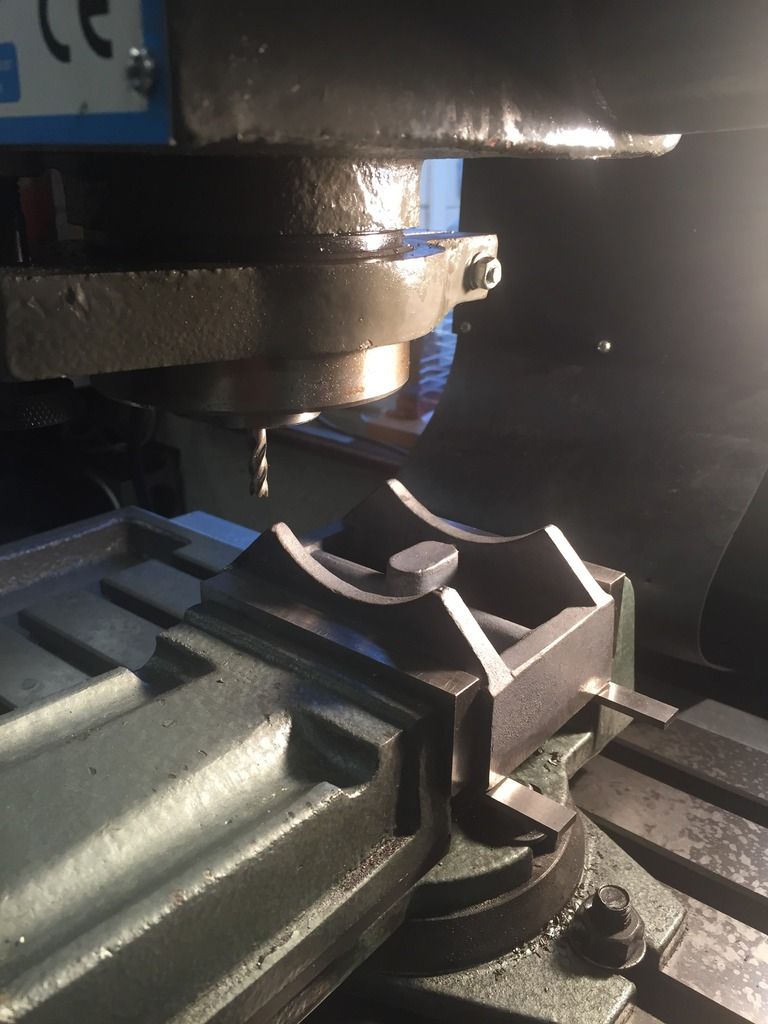 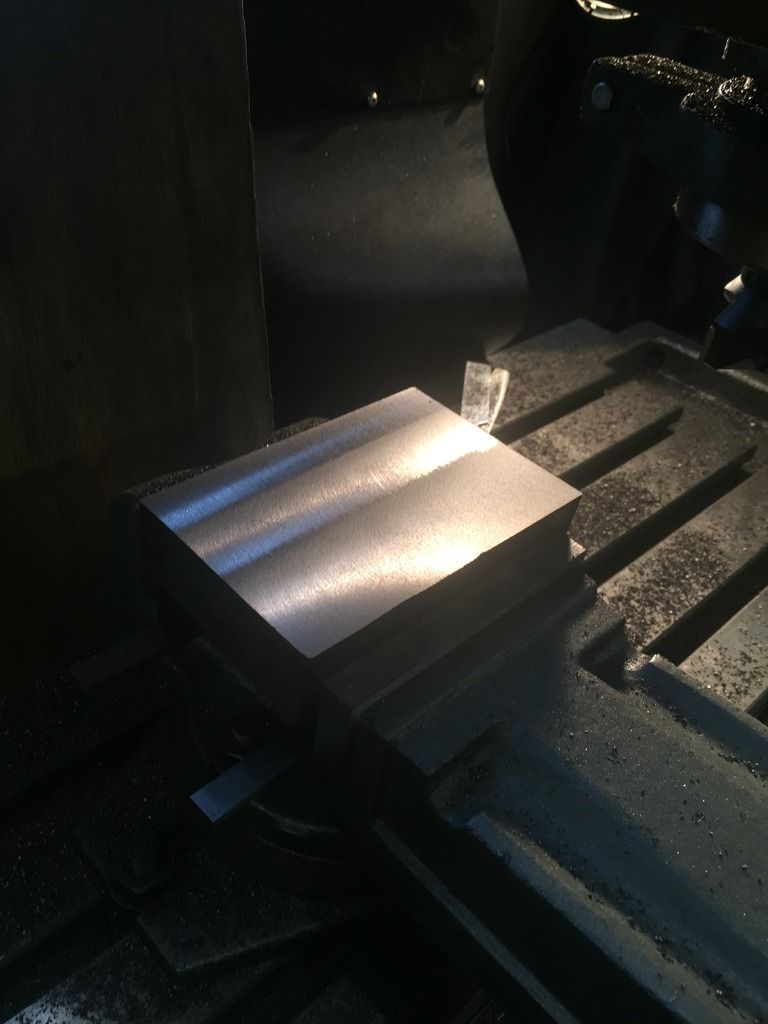 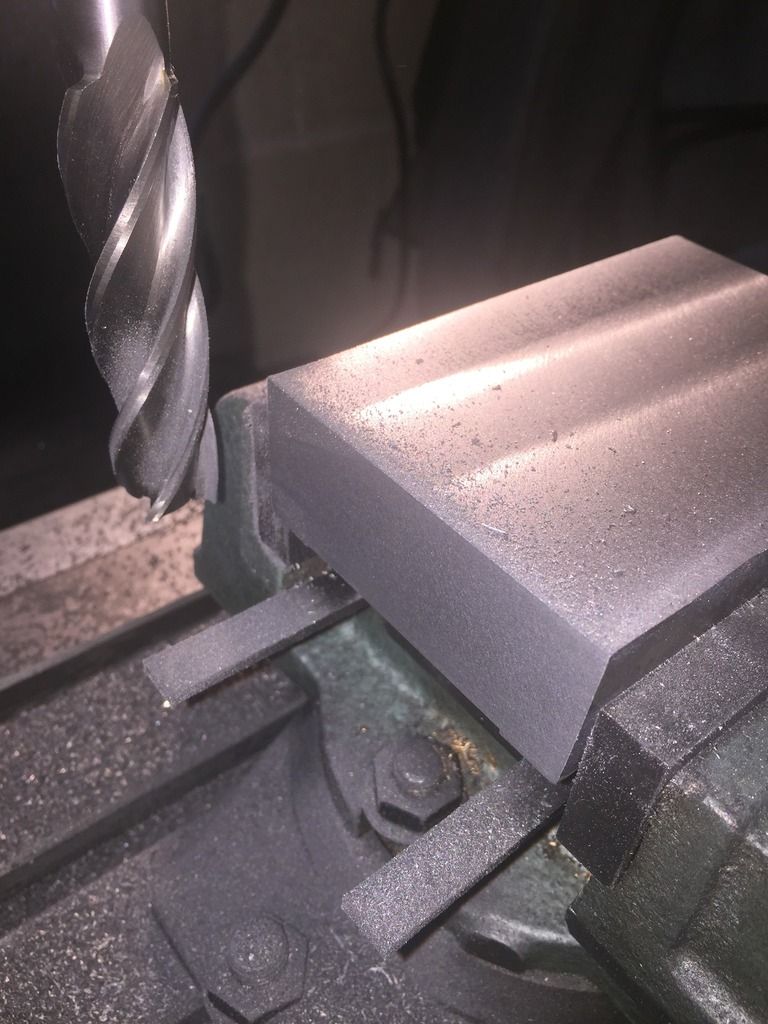 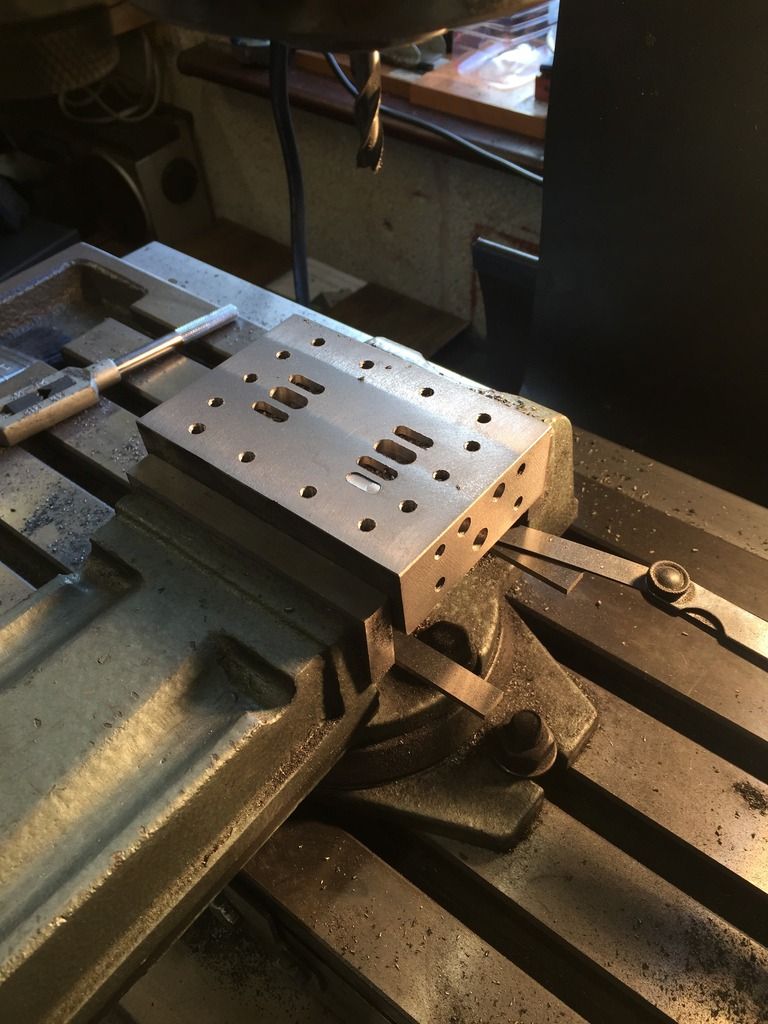 A near catastrophe but I noticed in time! 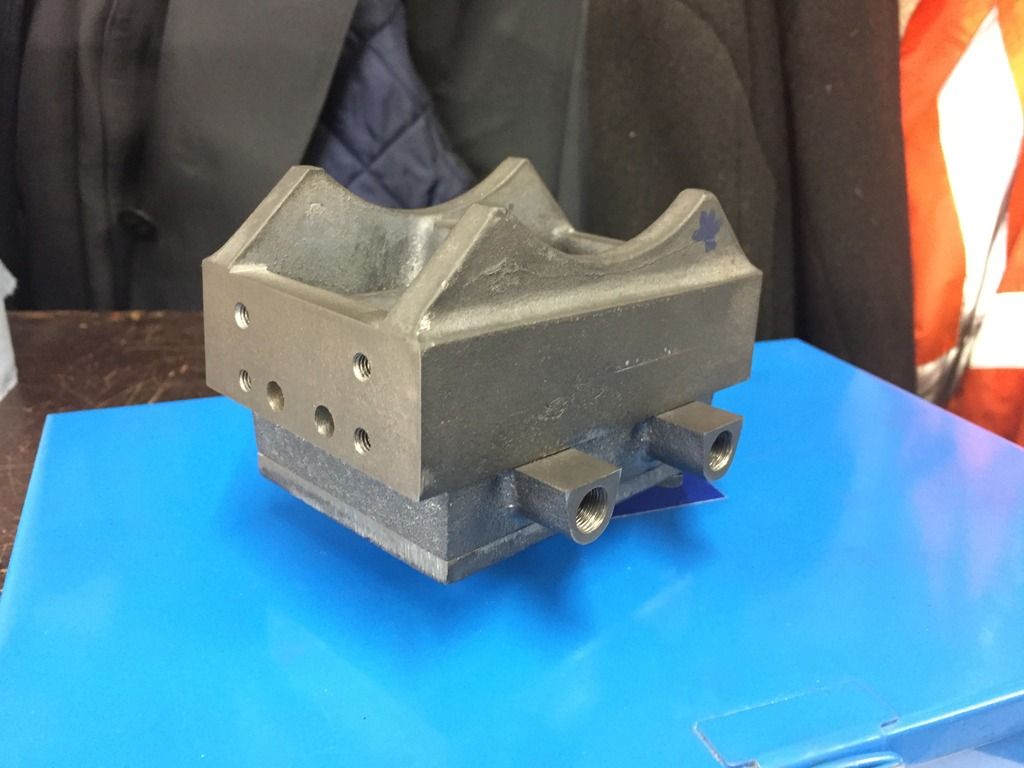 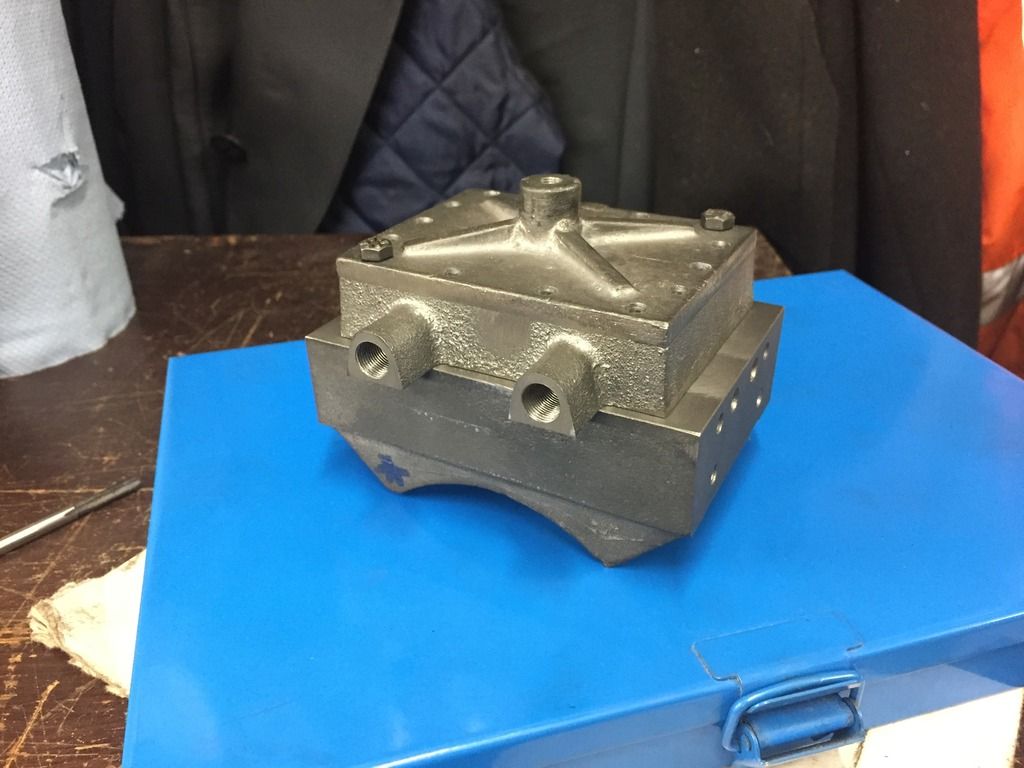 Getting there! Dan |
|
|
|
Post by Rob on Sept 29, 2018 9:36:48 GMT
Dan, how's recent progress? Honestly, I just can't understand certain members not updating build threads for years on end...  |
|
dc309
Seasoned Member
Posts: 146
|
Post by dc309 on Sept 30, 2018 10:13:02 GMT
Dan, how's recent progress? Honestly, I just can't understand certain members not updating build threads for years on end... Hi Rob! It hasn’t really progressed recently due to work commitments... although I’ve got the cylinder castings out and looking at machining them, but not quite sure how yet! How’s your loco coming on? |
|
|
|
Post by Rob on Oct 3, 2018 19:30:06 GMT
I've been out of the workshop for the past year or so with efforts focused on the house (it's never ending isn't it!) and elsewhere. You're well ahead of me if you're looking at your cylinders, mine are still wrapped up in the paper! I haven't got much further than the rolling chassis I had a few years ago. I decided to remake my axle sets for a third time as my wheel bosses reamed a thousandth over size which made made my fits far too sloppy. I've only recently broached and milled the key ways for quartering and drilled the holes for the crank pins. Hope to assemble it all permanently in the next few weeks. I'm making the eccentric straps at the moment, if only the 5BA die I ordered would turn up so I can finish the fitted bolt I have had sat in the lathe since Saturday when I discovered I didn't have one |
|
dc309
Seasoned Member
Posts: 146
|
Post by dc309 on Oct 19, 2018 21:55:27 GMT
Hi all, Slight lapse with the build, but it’s slowly underway again. Rob has given me the motivation to get going again I’ve remade the eccentrics today, with better results than last time. Starting off with some 1.5” bar, upended in the mill and drilled and reamed the holes to suit. 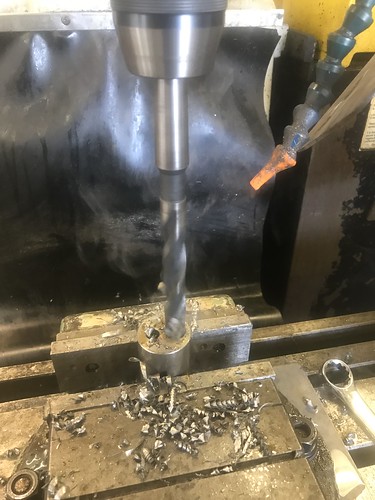 Untitled Untitled by Dan Collins, on Flickr  Untitled Untitled by Dan Collins, on Flickr Then over to the lathe where I turned the diameters and parted off to length. 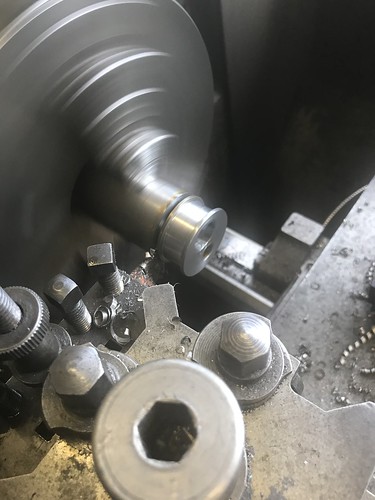 Untitled Untitled by Dan Collins, on Flickr 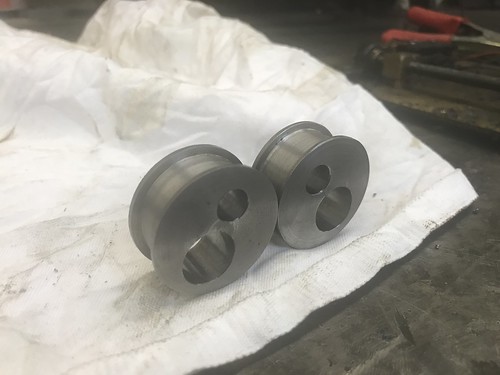 Untitled Untitled by Dan Collins, on Flickr 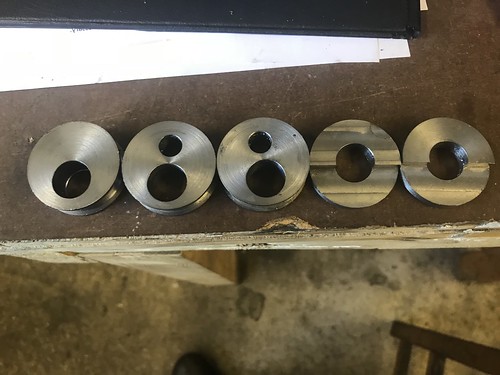 Untitled Untitled by Dan Collins, on Flickr Hopefully onto the cylinders next! (EDIT: I’m having extreme difficulty in getting photos to show. Not posted for a while... is it still the same technique?) |
|
|
|
Post by Rob on Oct 20, 2018 9:36:16 GMT
Dan, which image host are you using?
I switched from Photobucket to Flickr after Photobucket started playing silly buggers with their third party site rules - they prevent third party displaying without you paying a fee now I believe.
Flickr is as simple to use as Photobucket was, it'll generate the BBcode link for you to paste in. I believe they don't mind you displaying your images on third party sites provided you retain the link back to Flickr they generate for you.
Looking forward to seeing the pics, and how you tackle the cylinders. Every step worries me, but the cylinders especially so!
|
|
dc309
Seasoned Member
Posts: 146
|
Post by dc309 on Oct 20, 2018 10:47:57 GMT
Hi Rob, I’m using Flickr but on an app from my phone as I’m computer less at the moment. Can’t seem to get the link to work! I’ll post the photos of the setup etc once I’ve done it |
|
dc309
Seasoned Member
Posts: 146
|
Post by dc309 on Oct 21, 2018 20:15:44 GMT
Finally worked out how to get photos on... Bit of a faff though!
|
|
dc309
Seasoned Member
Posts: 146
|
Post by dc309 on Oct 26, 2018 17:03:27 GMT
I've started work on the eccentric straps today, using the castings I bought from Reeves. First off, I milled up all the flat surfaces by getting the casting level by eye in the vice. I then marked up where the holes should be for the fixing bolts, then scribed a centreline across the bore. Holes drilled 1/8", near enough tapping size for M4. 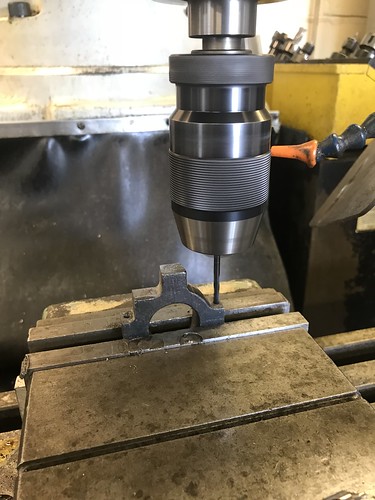 The strap was then cut in half, faces milled, the bottom half holes tapped to M4 and top half drilled 4mm. Then the two halves were bolted together with M4 cap screws. Over to the lathe, I put the strap in the 4 jaw and then bored out to 1.3125". After this I skimmed each side to give 3/8" overall size. 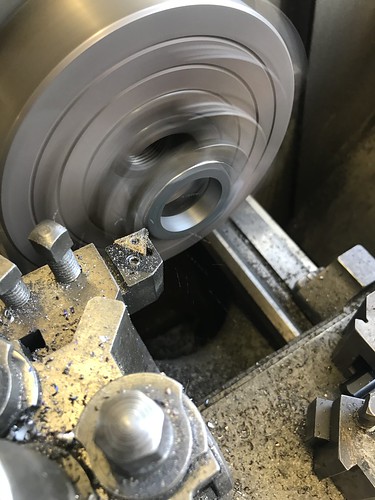 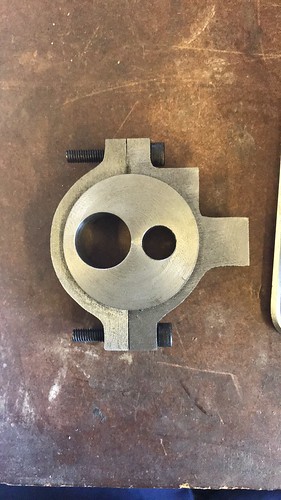
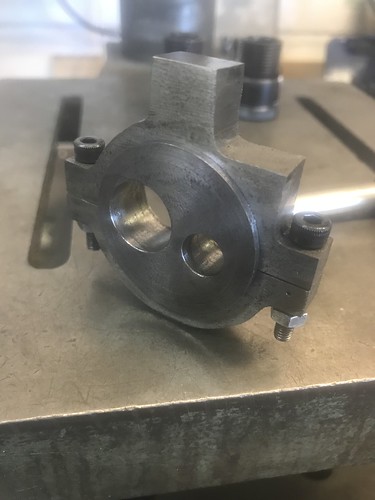
After a bit of fettling, I got the eccentric to run smoothly in the strap. 2 more to do, including mill the slot for the rod and clean up the castings ready for paint
|
|


 I got all set up this morning at my mates workshop and machined all three eccentrics for the loco, along with the stop collars. The problem came when I had to bore the hole for the axle... I'd forgotten what ChrisB had told me and just ploughed ahead - With increasing my axle diameter, the hole for the axle breaks through onto the running surface of the eccentric


