kipford
Statesman
  Building a Don Young 5" Gauge Aspinall Class 27
Posts: 575 
|
Post by kipford on Nov 21, 2020 18:34:39 GMT
Refitted the valve gear and ran it on the drilll, seems to work ok. Joy gear is quite mesmerising to watch. Time to take it all apart again and get ready for the air test. Dave Video |
|
kipford
Statesman
  Building a Don Young 5" Gauge Aspinall Class 27
Posts: 575 
|
Post by kipford on Nov 25, 2020 12:30:18 GMT
Trial fitted the brake gear, most of this was made earlier in the summer. Going to take it all apart again know to get it ready for air testing. I have correctly sized washers to fit in place of the ones shown. Dave  IMG_2450 IMG_2450 by Dave Smith, on Flickr 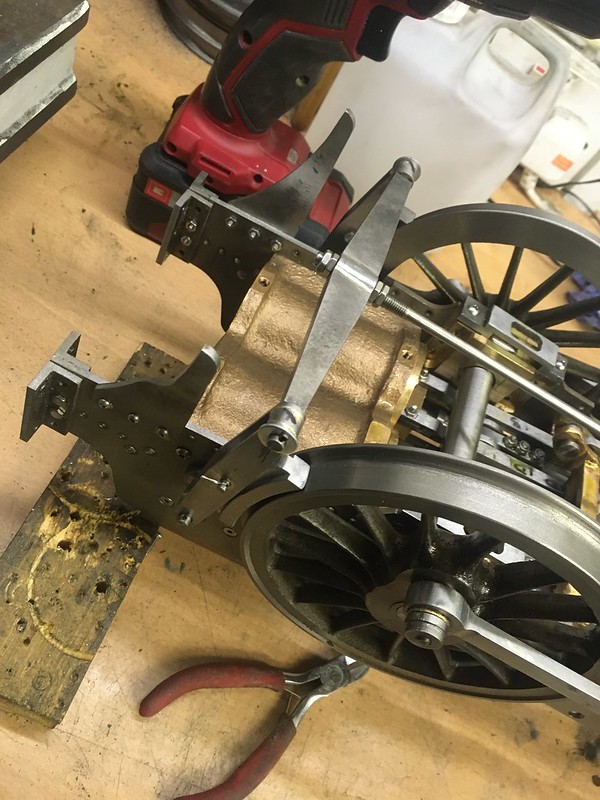 IMG_2449 IMG_2449 by Dave Smith, on Flickr 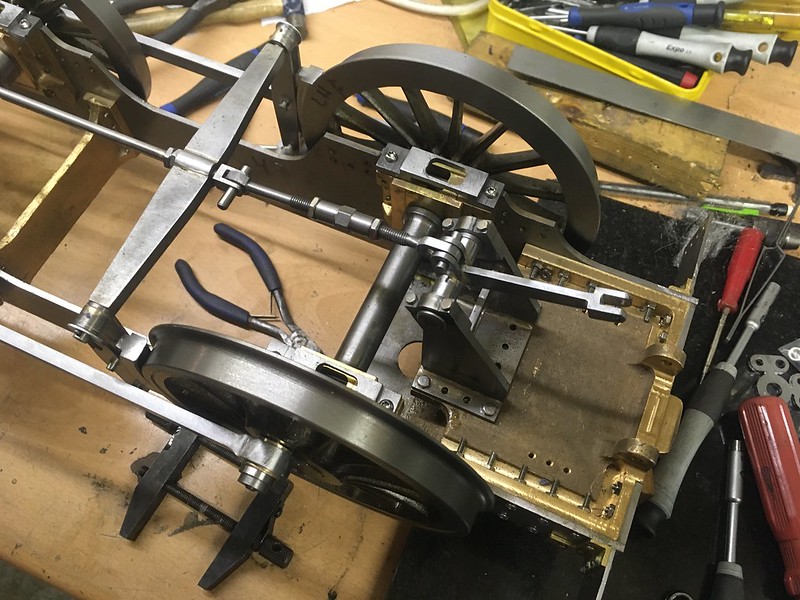 IMG_2448 IMG_2448 by Dave Smith, on Flickr |
|
|
|
Post by coniston on Nov 25, 2020 22:34:13 GMT
It's a great feeling when you can put lots of bits you've already made together and realise just how much has been achieved, well done Dave, look forward to the day it steams.
Chris D
|
|
kipford
Statesman
  Building a Don Young 5" Gauge Aspinall Class 27
Posts: 575 
|
Post by kipford on Dec 14, 2020 12:30:34 GMT
Had a delivery from Shapeways today. The front sandbox valve bodies and the pedestal that holds the handle for the damper door are quite complex and not easy to make. In the past I have had the odd lost wax brass casting done by Shapeways, but there are limitations with this and you need to build in shrinkage. So I thought I would try there binder printed steel. In actual fact it is a 60/40 stainless steel/bronze matrix. The steel is printed from powder using a binder resin, then later the resin is removed and infused with bronze. They say it is ok for bottle openers but not suitable for load bearing, so it is fine for this application. It is so easy to do, upload stl file, pay money wait 2 weeks for the bits arrive. For small parts this is reasonably cost effective, but as parts get larger the cost gets a bit heavier. Anyway these 3 parts were £58 delivered to my door. I am very pleased with quality if the prints and will certainly consider doing some more. By the way apart reaming a couple of holes they are ready to fit. Dave 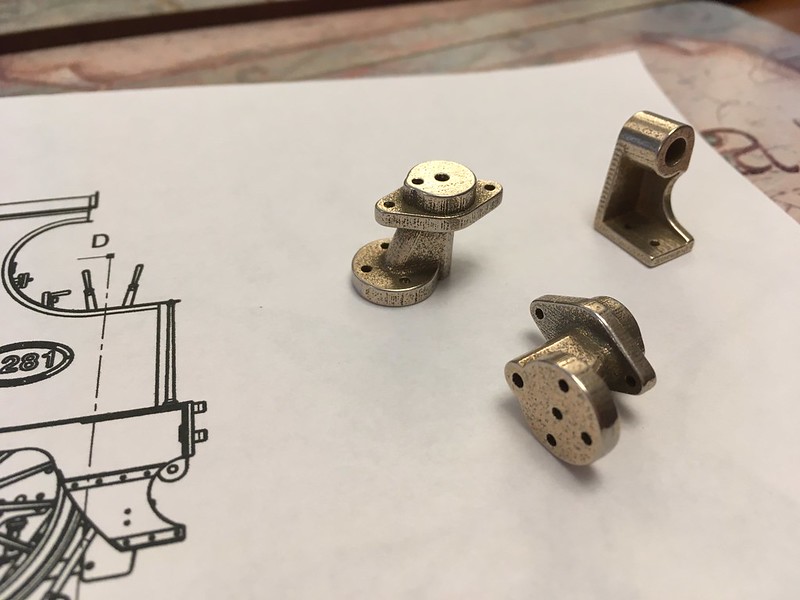 IMG_2485 IMG_2485 by Dave Smith, on Flickr |
|
kipford
Statesman
  Building a Don Young 5" Gauge Aspinall Class 27
Posts: 575 
|
Post by kipford on Dec 15, 2020 22:50:29 GMT
Question for the membership. As I move towards running on air I have a question on the axle boxes. The design includes a cavity in the brass lower half to accept I believe a felt pad to act as a form of oil reservoir. Don's drawings do not mention this. I am correct, if so is it fabric felt, can it be layered and what sort of compression is used? The screen grab show the axle box with top reservoir shown and the lower cavity marked. Thanks in advance. 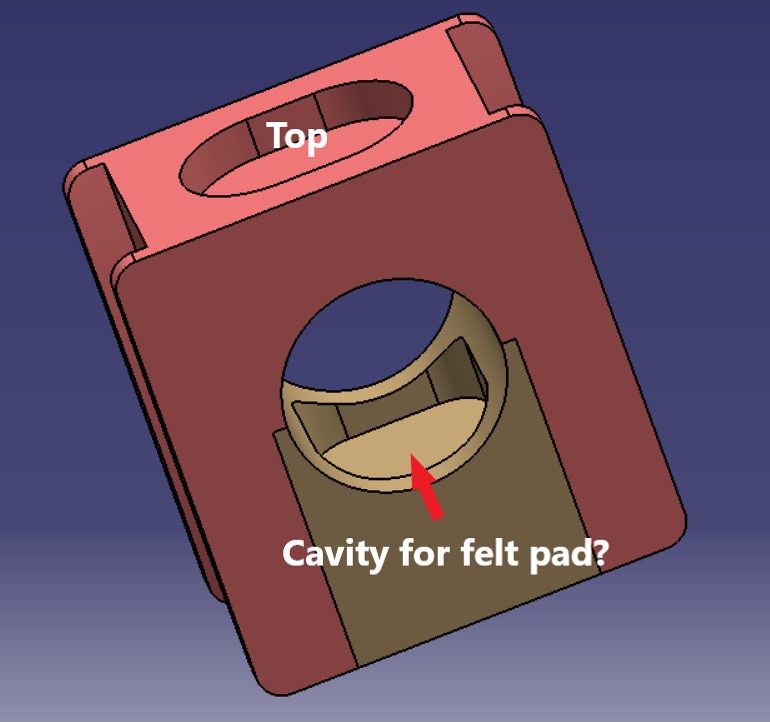 Axle Boxe Axle Boxe by Dave Smith, on Flickr |
|
don9f
Statesman
  Les Warnett 9F, Martin Evans “Jinty”, a part built “Austin 7” and now a part built Springbok B1.
Posts: 961 
|
Post by don9f on Dec 15, 2020 23:16:10 GMT
Yes the cavity is for “bearing felt”....I use the same stuff that’s used full size, e.g. for the pads in the ends of the underkeeps, that lubricate the thrust faces of the axleboxes / backs of wheels. I would suggest not much compression is needed, as long as the felt actually contacts the journal it will do the job.
Just thinking about it, the felt “wipers” on the carriage of my lathe are probably made of the same stuff?
Cheers Don
|
|
|
|
Post by Deleted on Dec 15, 2020 23:52:53 GMT
Hi Dave
Yes that's the same as 'Doncaster', felt pad in keep cavity. I assume that DY also shows the 3 oilways, two horizontals, one to each horn and a vertical rear of centre down to the axle.
Regards
Pete
|
|
|
|
Post by simplyloco on Dec 16, 2020 9:12:00 GMT
SNIP Just thinking about it, the felt “wipers” on the carriage of my lathe are probably made of the same stuff? Cheers Don Have you seen the price of them? The ones for my Maximat V10P appear to be worth their weight -literally- in gold! John |
|
kipford
Statesman
  Building a Don Young 5" Gauge Aspinall Class 27
Posts: 575 
|
Post by kipford on Dec 16, 2020 10:19:54 GMT
Pete Yes the set up is the same as you describe. So next question what type of felt? None of the ME suppliers seem to stock it. I can get this on ebay Ebay link
Is this any good? Dave |
|
|
|
Post by Deleted on Dec 16, 2020 10:55:57 GMT
Pete Yes the set up is the same as you describe. So next question what type of felt? None of the ME suppliers seem to stock it. I can get this on ebay Ebay link
Is this any good? Dave So far I have fitted the felt pads that you can buy to stick under furniture. IIRC I bought a pack of different sizes online, perhaps from Amazon? I cut them to suit, so far I have them in the tender axle box trays, cartazzi axle box trays and in the main and bogie keeps. I can't say how well these will work yet but they seem ok, time will tell. Pete |
|
kipford
Statesman
  Building a Don Young 5" Gauge Aspinall Class 27
Posts: 575 
|
Post by kipford on Dec 16, 2020 13:32:17 GMT
Pete
Thanks, done what you say and found some that are suitable on Ebay. The Aspinall tender does not use them and any way I have needle rolled the tender axle boxes.
Dave
|
|
Midland
Elder Statesman
  
Posts: 1,875
|
Post by Midland on Jan 23, 2021 18:49:47 GMT
Hi Dave
Inspiring, my Aspinal is on on the bench!! Will need your advice.
Cheers David
|
|
Midland
Elder Statesman
  
Posts: 1,875
|
Post by Midland on Feb 2, 2021 10:49:05 GMT
Andy Agreed, that is a trip I want to do sometime. Dave Dave That is a me too as I would love to get photos of the detail to add a bit. Fancy sharing the driving etc David |
|
kipford
Statesman
  Building a Don Young 5" Gauge Aspinall Class 27
Posts: 575 
|
Post by kipford on Feb 4, 2021 7:47:49 GMT
David
When all this rubbish is finished yes sounds like a plan.
Dave
|
|
kipford
Statesman
  Building a Don Young 5" Gauge Aspinall Class 27
Posts: 575 
|
Post by kipford on Aug 16, 2021 12:23:21 GMT
It is a long long time since my last update (the whole of lockdown), but I have been busy apart from buying Conistons Super Simplex to play with while I finish the Aspinall. So where am I? Ignoring any painting: A complete tender A complete rolling chassis, that runs on air. All the platework except the boiler cladding finished. So the boiler is next. The boiler is deviating slightly from Don’s design. The following sumarises the changes which are in line with the AMBSC code and have been agreed with our club boiler inspectors A Reduction of the fire box by 3 mm to provide sufficient clear to the rear horn blocks. B Parts threaded into the boiler to be attached using threaded phosphor bronze bushes. C Move blow down valve from front to one each side of the firebox, D Change inner and outer wrapper material thickness from 2.0 mm to 2.5 mm (easier to get 2.5mm material. E Change from threaded side stays to copper rivets. F Replace the crown girder stays with rod stays. I have all the copper and bronze required to build the boiler and have made the formers need to make the flanged parts. I am also just finishing the form tools for the inner and outer wrappers. So to the photos: The first few are of the loco as it stands today.  IMG_2783 IMG_2783 by Dave Smith, on Flickr 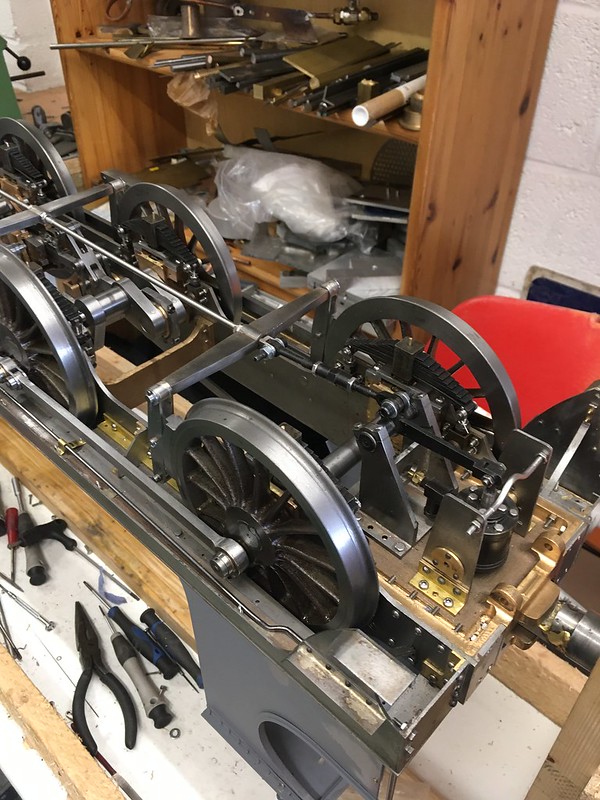 IMG_2784 IMG_2784 by Dave Smith, on Flickr  IMG_2785 IMG_2785 by Dave Smith, on Flickr  IMG_2787 IMG_2787 by Dave Smith, on Flickr  IMG_2788 IMG_2788 by Dave Smith, on Flickr  IMG_2799 IMG_2799 by Dave Smith, on Flickr 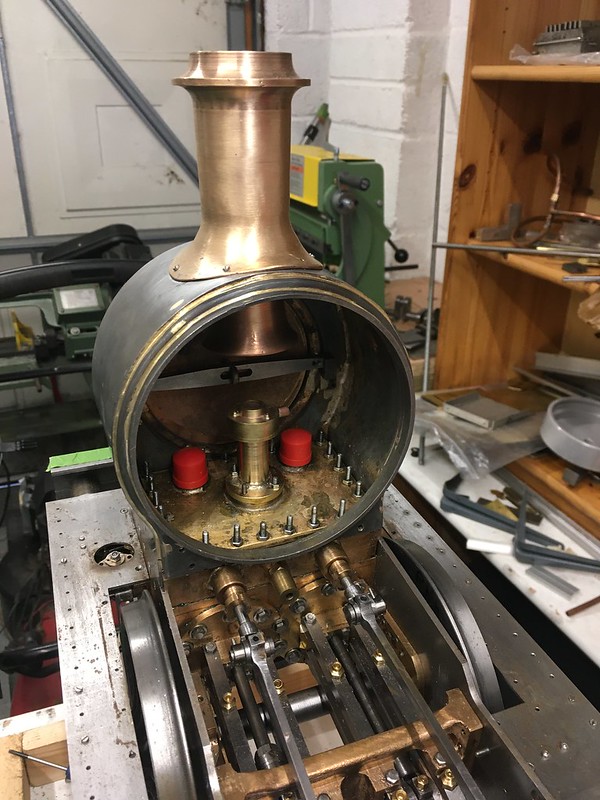 IMG_2945 IMG_2945 by Dave Smith, on Flickr  IMG_2972 IMG_2972 by Dave Smith, on Flickr  IMG_2947 IMG_2947 by Dave Smith, on Flickr Next where I am with the boiler. First some material  IMG_3027 IMG_3027 by Dave Smith, on Flickr Boiler Formers for flange parts in manufacture and finished  IMG_2957 IMG_2957 by Dave Smith, on Flickr  IMG_2960 IMG_2960 by Dave Smith, on Flickr 3D printed outer wrapper former, Inner wrapper is not quite finished.  IMG_3023 IMG_3023 by Dave Smith, on Flickr 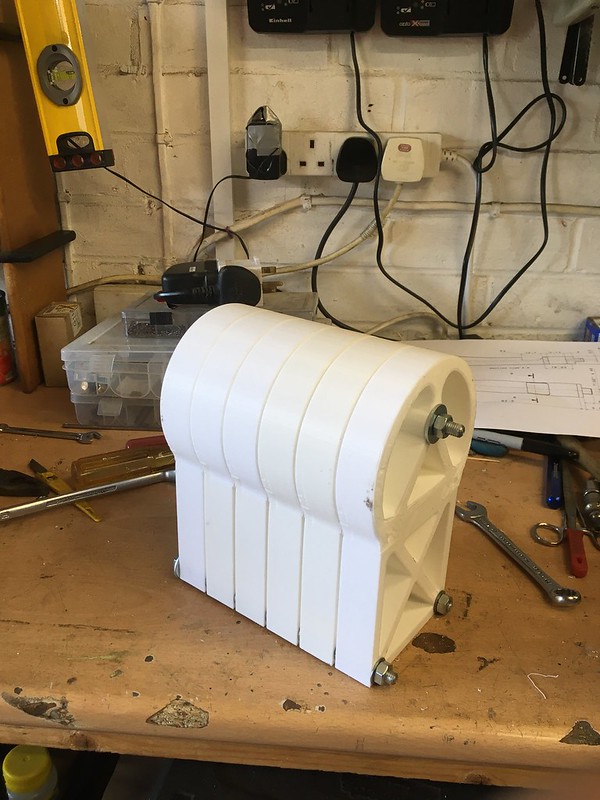 IMG_3024 IMG_3024 by Dave Smith, on Flickr Dave |
|
kipford
Statesman
  Building a Don Young 5" Gauge Aspinall Class 27
Posts: 575 
|
Post by kipford on Aug 18, 2021 9:18:05 GMT
All ready to start! These are 3mm thick parts and I will cut them out on the band saw at the model railway club tomorrow night. Rebuilt the brazing half yesterday with Thermalite blocks, so it looks like the weekend will see a first attempt at flanging.  IMG_3040 IMG_3040 by Dave Smith, on Flickr Also could not resist this, starting to look like a proper engine. 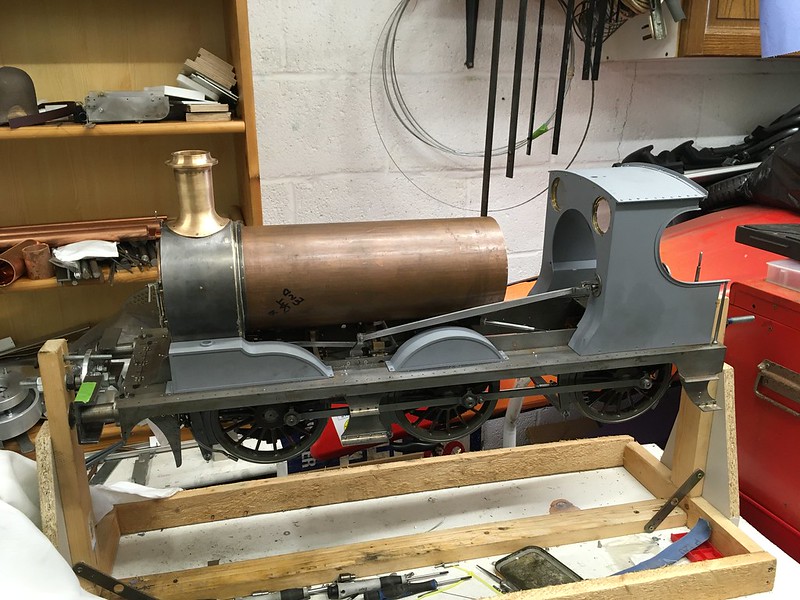 IMG_3039 IMG_3039 by Dave Smith, on Flickr Dave |
|
kipford
Statesman
  Building a Don Young 5" Gauge Aspinall Class 27
Posts: 575 
|
Post by kipford on Aug 21, 2021 17:58:24 GMT
And so the hard work begins: I cut out all the parts on the bandsaw at the model railway club last Thursday night. Today I flanged my first ever part on a boiler, the front tube plate. My big Sievert torch with a long extension made light work of annealing the part. It took about 6 anneals to fully form the plate. I was actually surprised taking it slowly how easy it was (famous last words). All the bits need to flange the plate.  IMG_3042 IMG_3042 by Dave Smith, on Flickr First anneal  IMG_3044 IMG_3044 by Dave Smith, on Flickr 6 anneals later, quite pleased with it. Now it needs the outer diameter skimmed to fit the boiler tube, milling to the correct flange height and the tube hole drilled. 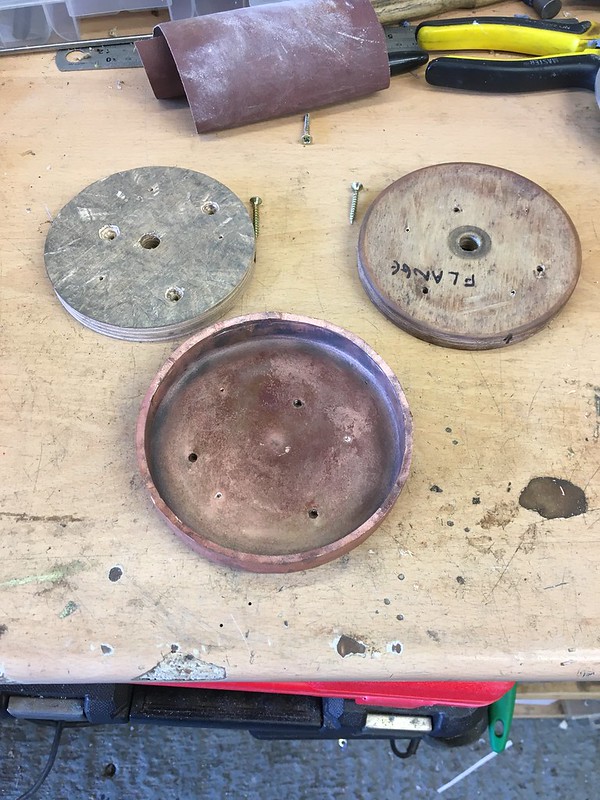 IMG_3045 IMG_3045 by Dave Smith, on Flickr |
|
|
|
Post by mugbuilder on Aug 25, 2021 1:21:08 GMT
Lovely job, Great to see such fine workmanship.
|
|
kipford
Statesman
  Building a Don Young 5" Gauge Aspinall Class 27
Posts: 575 
|
Post by kipford on Sept 10, 2021 18:06:05 GMT
The basic flanging and forming is now finished. Tomorrow it back to the mill to drill all the holes for the various bushes. I am in the middle of building an assembly jig to enable me to drill bolt/rivet holes for holding the assembly together when it is silver soldered. I will post some pictures of the jig when it is finished. Tube plate, back head, firebox ends and throat plate. The throat plate is not distorted by the way it is a quirk of the photo. 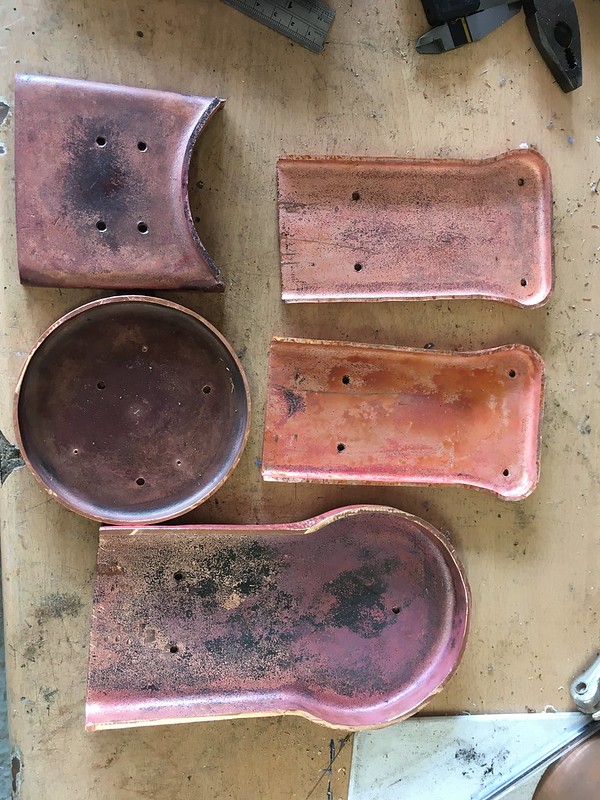 IMG_3082 IMG_3082 by Dave Smith, on Flickr Outer and inner wrappers and their 3D printed formers. These formers worked just as I wanted and were strong enough to allow the reverse bends in wrappers to be formed using a dead blow hammer. 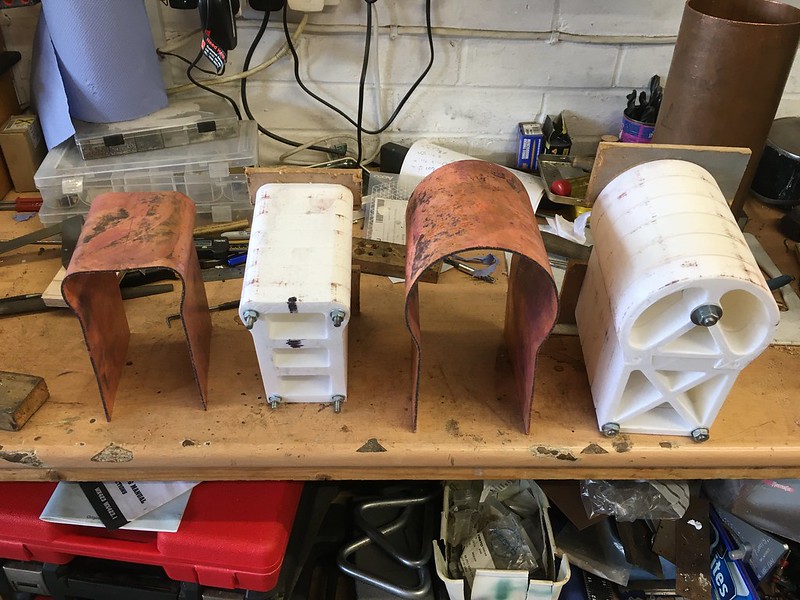 IMG_3091 IMG_3091 by Dave Smith, on Flickr. All the basic shell parts together.  IMG_3092 IMG_3092 by Dave Smith, on Flickr Dave |
|
|
|
Post by steamer5 on Sept 11, 2021 8:34:41 GMT
Hi Dave,
Nice work!
Your 3D printed formers looked to have worked a treat!
Cheers Kerrin
|
|