|
|
Post by runner42 on Oct 21, 2019 6:57:28 GMT
I have another issue with DY's drawings. It is not an error but an unusual method of sealing the smokebox door. From the drawing you see the two dimensions red ringed which are for the smokebox door diameter and the smokebox ring diameter. Usual practice is for the smokebox door diameter to be larger than the in this case effective diameter of the smokebox ring so one has a flat to flat contact faces and forms an effective seal. But because the converse is true ie the smokebox door diameter is smaller than the effective smokebox ring diameter, this means that the periphery of the smokebox door is mating with the ring on the inward slope, providing only a edge contact of the door to the ring. Before I machine the door to the specified diameter and therefore reducing it to a point of no return I would like the members that have already made similar sealing methods re-assure me that I am going to have an effective seal. Brian  door and ring door and ring by Brian Leach, on Flickr |
|
don9f
Statesman
  Les Warnett 9F, Martin Evans “Jinty”, a part built “Austin 7” and now a part built Springbok B1.
Posts: 961 
|
Post by don9f on Oct 21, 2019 8:21:51 GMT
Hi, that sort of arrangement “full size” would include a narrow matching 45 degree chamfer on the periphery of the door. This would mate with the ring and give the seal.
It requires careful setting of the hinges to align the door properly, then will work well in my opinion.
If you Google images of Black 5’s, you will see that they usually have an additional support for the door when it’s in it’s closed position....this is on the opposite side to the hinges (ie at “9 o’clock”). This helps take the weight of the full size door and keep it aligned, but these don’t appear on your drawing?
As an aside, looking at your drawing and the position of the lamp iron rivet holes, some engines had this lamp iron moved lower down and to the right (when looking at the door), due to the introduction of overhead electrification, safety etc. The corresponding one on the buffer beam was also moved to keep it vertically under the one on the door.
Photos show however that this change wasn’t fully implemented on all engines before the end of steam! It might influence your chosen loco identity, era etc. etc.
Cheers Don
|
|
44767
Statesman
 
Posts: 539
|
Post by 44767 on Oct 21, 2019 9:13:48 GMT
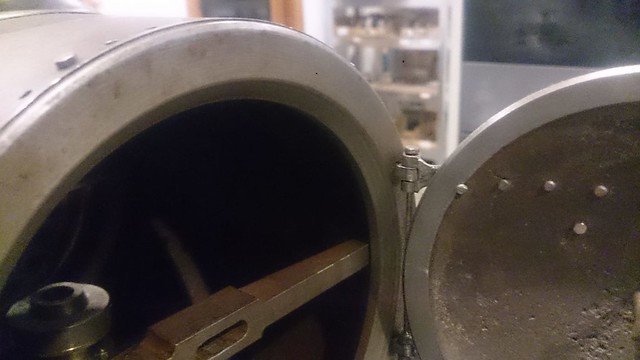
It looks like Don got in first with what I was about to say! Here are some pictures of my Black 5's smokebox door. I have done what Don describes. I worked on 44767 in 1990. One of the parts being replaced was the smokebox door and ring. I think I'm right in saying that both were spun but, whereas it was stipulated that the ring must be machined with the 45° chamfer, the door itself was not. This meant the boy had the job, using an angle grinder at first followed by files and bearing blue, to make the door fit with an airtight seal!    I hope this illustrates things OK. Mike |
|
rrmrd66
Part of the e-furniture

Posts: 339 
|
Post by rrmrd66 on Oct 21, 2019 9:14:42 GMT
Hello Brian
Although not a Don Young Black 5 I have today started machining the smoke box door for a DY 5" gauge NG Hunslet.
Here he has stuck to "normal" procedure and has a 4.625" dia door sealing against the flat surface of a 4" dia smoke box door ring.
The only challenge I face is that I hope there is sufficient casting tolerance to allow me to get everything flat and true during turning.
Good Luck with the door.
Malcolm
|
|
|
|
Post by Deleted on Oct 21, 2019 10:22:33 GMT
Hi Brian
From my experience with Don's designs, he does tend to follow full-size practice ( although he didn't with Doncaster) now confirmed by Mike. I wonder if he might suggest something along what Mike has described in his words? IE, filing/machining a small chamfer on the door's back outer edge to give a good seal.
My main reason for posting though is that the side drawing doesn't show any lip for the door ring to press against in the smokebox tube, if I am seeing this right I would be inclined to incorporate one to make inserting of said ring and getting it square and at the correct depth easier, perhaps make the ring just a tad larger dia and machine in a small step for it to push up against the tube?
Mike's pictures look like this has been done considering the tube is 1.6mm thick?
Just an idea
Pete
|
|
oldnorton
Statesman
  5" gauge LMS enthusiast
Posts: 728
|
Post by oldnorton on Oct 21, 2019 10:51:50 GMT
I agree that Don Young might be drawing the fit of the door to follow full size. Thinking about it, in full size this would have helped support the door by pulling it into the taper seat, thus taking all the load off the hinges. But it clearly didn't work, or once the hinges wore it became difficult to lift the door into the taper, because the additional bracket was subsequently fitted to all Black 5s as Don9F mentions.
I think Brian, you might have a much easier job if you ignore the 45 deg taper and have the door fitting square to the smokebox ring, as many other models do. I have not cut mine yet, but this is what I will do to get a more reliable seal.
Norm
|
|
|
|
Post by ettingtonliam on Oct 21, 2019 18:27:01 GMT
I'm following this out of curiousity, because I'm not building Doncaster and am never likely to.
What no one has answered is why the door is 4 25/32" dia, and the chamfer ring is 4 7/8" dia. The full size photo would suggest that the door isn't recessed into the ring, which it certainly will be on the model if the door is 3/32" smaller than the chamfer in the ring.
|
|
44767
Statesman
 
Posts: 539
|
Post by 44767 on Oct 21, 2019 18:56:23 GMT
I'm following this out of curiousity, because I'm not building Doncaster and am never likely to. What no one has answered is why the door is 4 25/32" dia, and the chamfer ring is 4 7/8" dia. The full size photo would suggest that the door isn't recessed into the ring, which it certainly will be on the model if the door is 3/32" smaller than the chamfer in the ring. This is from the GA of the Black 5. I think it shows just what it is like in full size. I modelled mine having seen this and having seen the full size. As Peter says, I recessed the ring to accommodate a heavier wall tube but make it look like it was wrapped around the door ring. You can see that in full size the chamfer on the door is across the whole mating face.  |
|
don9f
Statesman
  Les Warnett 9F, Martin Evans “Jinty”, a part built “Austin 7” and now a part built Springbok B1.
Posts: 961 
|
Post by don9f on Oct 21, 2019 20:51:10 GMT
I found this photo of a Black 5 smokebox door that shows the details referred to and into the bargain, how someone has been “adjusting” the hinges! Smokebox door
Cheers Don |
|
|
|
Post by runner42 on Oct 21, 2019 22:51:05 GMT
Thanks for the replies, I will make a 45 deg chamfer on the door to mate with the smokebox ring. I hope that this will work because it means machining the door down to size so there is no plan B, only the use of some sealing compound.
Brian
|
|
|
|
Post by David on Oct 22, 2019 4:28:35 GMT
One benefit of the chamfer on the door ring is that it should automatically centre the door. I have just faffed around quite a bit worrying about that.
|
|
oldnorton
Statesman
  5" gauge LMS enthusiast
Posts: 728
|
Post by oldnorton on Oct 22, 2019 19:59:04 GMT
If the door is to be centred by the taper it will perhaps be more critical to drill accurately the hinge bracket mounts.
|
|
|
|
Post by runner42 on Oct 22, 2019 21:51:37 GMT
If the door is to be centred by the taper it will perhaps be more critical to drill accurately the hinge bracket mounts. Yes I agree, I intend to utilise the dart to centre the door and clamp it in position and then locate the hinge bracket mounts on the smokebox ring. I also intend to utilise the additional fixing located on the LHS to further support the door as per fullsize. Brian |
|
|
|
Post by Cro on Oct 22, 2019 22:17:04 GMT
Thanks for the replies, I will make a 45 deg chamfer on the door to mate with the smokebox ring. I hope that this will work because it means machining the door down to size so there is no plan B, only the use of some sealing compound. Brian As Important as seals are you'd be amazed at how unimportant they are..... my Maid of Kents door is thin and bent and steams like mad and for the year I ran the 9f the smokebox had loads of tiny holes in here I hadn't fitted smoke deflectors and didn't bother it. Once machined a bit of careful lapping in and there ill be no issue, my 9f has similar arrangement and it's fine. Adam |
|
oldnorton
Statesman
  5" gauge LMS enthusiast
Posts: 728
|
Post by oldnorton on Oct 23, 2019 8:37:18 GMT
Hi Brian I am glad you raised this subject of the smokebox door sealing. I like what you are wanting to do and I have changed my mind about how I tackle it. I might put the taper in the ring, so that it looks prototypical, but have that taper become a flat seat for the door when it is still about 0.050" larger in diameter. Looking at works plate detail for my Britannia today, I have just realised that their smokebox doors seem to fit in the same way. Norm  |
|
44767
Statesman
 
Posts: 539
|
Post by 44767 on Oct 25, 2019 0:47:30 GMT
If the door is to be centred by the taper it will perhaps be more critical to drill accurately the hinge bracket mounts. I think, rather than drilling the hinge mounts very accurately, it is easier and better to have compliance in the hinge which allows the door to self-align, generally aligned by feel as the door is closed. Mine has compliance side to side and up/down. In full size this happens with the use of the bracket on the lh side of the door to align it somewhat before fastening. |
|
|
|
Post by runner42 on Nov 2, 2019 5:27:11 GMT
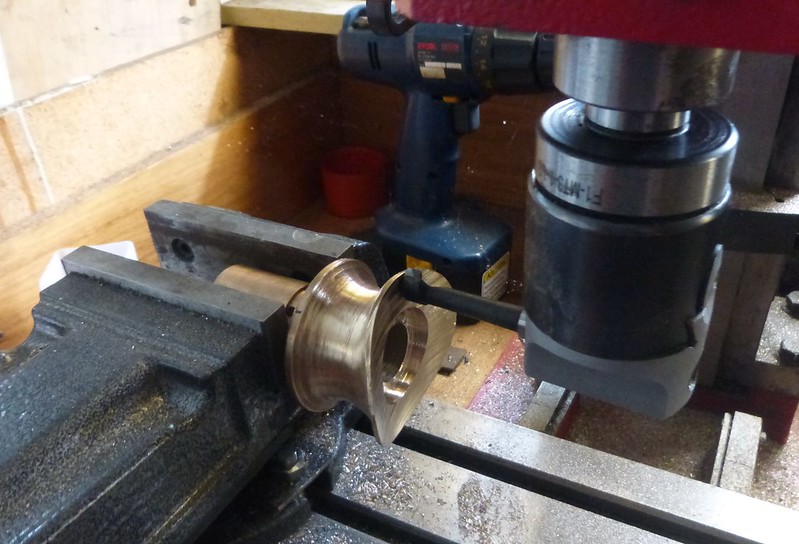
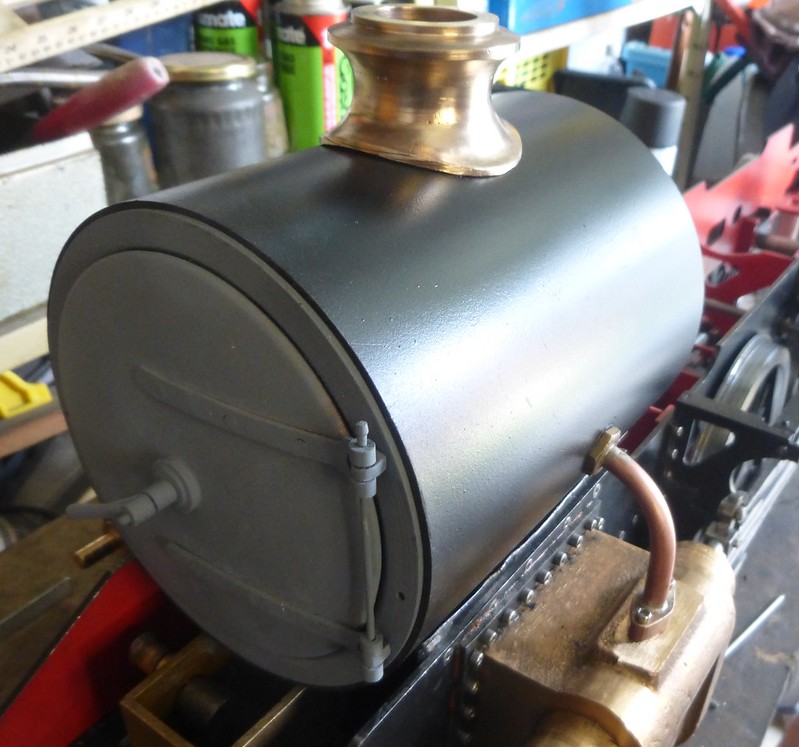
I machined the chimney casting, it is not an exact Black 5 one but in general it will do, the only shortfall was not enough metal to machine the top lip to size, it is slightly undersize. As a preliminary I reviewed Steve's (Springcrocus) website to see how he managed it. Most of the procedure I followed but deviated when machining the base where it mate's to the smokebox. My difficulty was having a cutting tool that would extend to 2.875" half the smokebox diameter. So I use my boring bar for the mill to achieve this. It looks a shaky method and somewhat risky in that the cutting tool swings around 360 degrees and is looking for that careless right hand to take a bite out of. But small cuts and and a clear head I managed it.  machining the chimney machining the chimney by Brian Leach, on Flickr I opted for Steve's very good suggestion to use my Dremel for undertaking the machining of the lower compound curve. I have a number of small sanding tubes that are ideal for this job. What I have not done yet is the 2 degree taper in the chimney. DY probably introduced it because the prototype used it, but will it make a lot of difference to a 5" gauge model, Some thoughts on the matter would be appreciated.  chimney chimney by Brian Leach, on Flickr The smokebox door was not straightforward, it took me three attempts to make the hinges, The first attempt was to use a 7/32" x 1/16" piece of mild steel and a 13/32" long x 7/32" diameter steel rod silver soldered in a simple butt joint. However when the cut outs for the hinge hangers were machined it only left a 1/32" section each side of the hanger, which was inadequate to hold the relatively heavy door. The second attempt I produced a T piece that was 13/32" at the top of the T and 7/32" at the vertical, this I feathered at the top and put a saw cut length ways in the steel rod. Inserting the feathered end into the saw cut produced a better joint for silver soldering. But alas having finished and riveting them to the door I dropped the whole assembly and sods law it landed on the hinges and bent them. I couldn't straightened them to obtain the correct alignment, so another pair where made.  smokebox door smokebox door by Brian Leach, on Flickr The next photo shows the progress so far on the smokebox but what is hidden is the snifter valve inside the smokebox at the bottom and forward of the smokebox saddle.  smokebox progress smokebox progress by Brian Leach, on Flickr |
|
|
|
Post by runner42 on Nov 5, 2019 22:17:26 GMT
I may have been mistaken in stating that a learned member said that Don Young never built a Black 5 locomotive. If this is true then I can understand that why he chose the method of affixing the drain cocks operating lever to the cab sides and the method appeared to be rather flimsy given the force required to operate the drain cocks through a 1/8" copper tube carrying an 18 swg stainless steel wire. Firstly, requiring the cab to be constructed, which generally occurs late in the build leaves the operation of the drain cocks untested until that time. Having, completed the system up to the connection to the operating lever and tried to operate using a pair of pliers on the stainless steel wire the drain cocks required considerable force to move them. Pulling the wire was just possible but pushing it caused the wire to kink in the unsupported area although I greased the wire as best I could. Let me say that greasing is easily stated but little gets placed the the area where it is required. Given all these factors, I have decided to adopt a different approach, which affixes the the operating lever to the chassis. The first thoughts were to follow LBSC's solution he used on Doris and simply affix the lever to the inside of the frames but this would interfere with the ash pan operating lever. So I decided to make a rather complex assembly to position the operating lever in approximately the same position, ie near the cab side but affixed to the chassis. I have nearly completed this but decided to post this issue in advance to show DY's drain cock lever operation and ask if any builder has successfully implemented it. Brian  drain cocks lever drain cocks lever by Brian Leach, on Flickr |
|
|
|
Post by Deleted on Nov 5, 2019 22:34:57 GMT
Hi Brian
If all else fails I wonder if you could use the design for Doncaster? From what I can see Don has basically followed the full size design which operates via bowden cable on a 'push pull' system.. If you think it would help I'm happy to post the relative drawings here, or via PM if preferred...
Pete
|
|
|
|
Post by springcrocus on Nov 5, 2019 22:48:57 GMT
I'm not familiar with the whole of the drain cock system on your loco but would assume that the far end of the bowden cable connects to a lever of some sort. Is it possible to connect a strong spring to the far side of the lever to assist the "push" operation of the cable, effectively turning it to a "pull" operation? If so, a ratchet could hold the cab lever in the "pull" position.
Apologies if I've misunderstood the problem and this is not what you may be looking for.
Regards, Steve
|
|