|
|
Post by GWRdriver on Mar 30, 2010 14:48:52 GMT
I have to say that Ken Swan's drawings are a model of clarity- I don't think I've come across any as good. Nigel, I have a couple of drawers full of ME/MAP/Etc plans and I agree, but if you read Ken's potted history of Bridget he went through a number of revisions and adjustments over a long period of time before arriving at the final version, which is no doubt why I've never heard of a "bug" in the drawings. That is apart from the excellent draughtsmanship. I'm presently using the Bridget cylinder, motion, and boiler as guidelines for a revised big (7+ga) Tich. |
|
chiptim
Part of the e-furniture

Posts: 270
|
Post by chiptim on May 8, 2010 16:18:13 GMT
I finally managed to get some more soldering done amongst decorating for SWMBO and running Dads Taxi Service... I fitted the doundation ring and decided to hold it in place with copper rivets. These can be ground off later if they foul the grate. I didn't want anything to move! 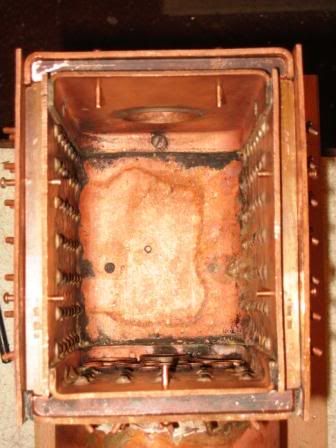 When I soldered the stays on the outside beneath the barrel, I did it in free air and struggled to get enough heat even with a 50mm burner. So I approached this task differently aiming to contain the heat where I wanted it and solder both the back section of foundation ring and re-flow the stays. 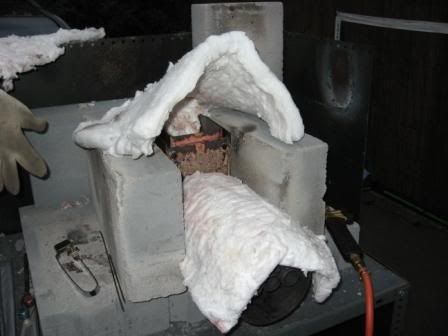 The 50mm burner was sufficient with this set-up reaching temperature in under 10 minutes. The foundation ring looks OK to me but the stays are still not great - can't see from the photo. 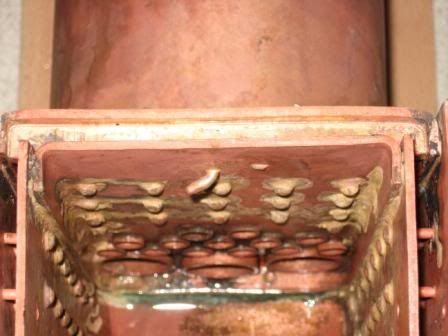 This morning I soldered the rivet stays in the firebox that will protrude through the backhead having first sharpened their points. I wanted to keep the heat off the rest of the joints and used the Kaowool blankets to block the gaps by placing it on the Celcon blocks 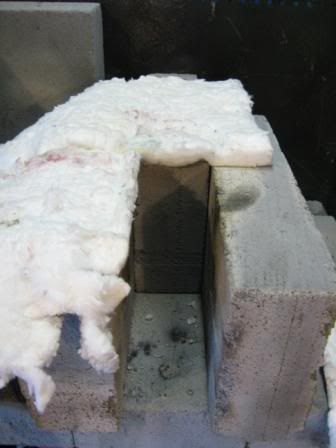 then pushing the excess up into the cavity to block it. 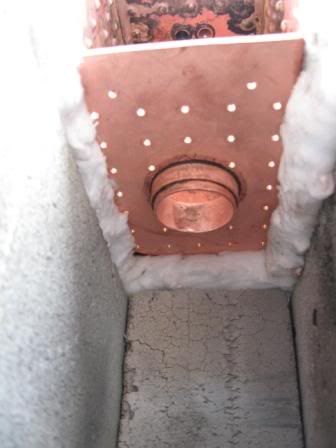 You need some through draft though so the firehole ring was left open. This allowed some heat through to the firebox. Even so I struggled with just the 50mm burner and applied a Cyclone inside the firebox. This worked but as they say there's always one - Yep I forgot to solder one of them so will have to have another go! 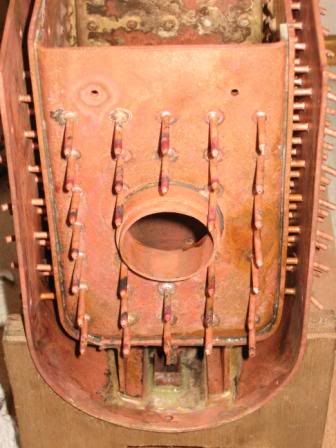 At least the solder's come through though. I wish I could get the photos better but when I use macro mode it won't focus and the flash just causes glare. Regards Tim |
|
chiptim
Part of the e-furniture

Posts: 270
|
Post by chiptim on Dec 8, 2010 13:07:35 GMT
I've decided to scrap the boiler! The problem all along has been the barrel to throat plate joint. I came very close to a successful boiler and hydraulically tested it to 200 psi. There were a number of pin-prick leaks that I attempted to seal with comsol and this is where it all started to go wrong. There's not much info on using Comsol and I hadn't anticipated how hard it would be to seal the minute leaks...plus the stay ends that weren't soldered but the screwed type as per the design. To cut a long story short I ended up re-flowing some of the silver solder joints successfully but also made a near fatal mistake. I left the longitudinal stays in place on one occasion. This deformed the front tube plate causing leaks at that end. By the time I'd sealed all the leaks I'm no longer confident that the internal joints (that I can't inspect) haven't become dry so for safety reasons I'm going to scrap it. My biggest problem all along has been the barrel to throat plate joint. It caused me problems from the outset and later on the solder ran out of the joint causing it to leak. Re-flowing this joint is not easy once the boiler is complete and this joint suffered two pin-prick leaks that I struggled to seal even with Comsol. I'm not going to try any more because I've re-heated it too many times. Never mind. I've enjoyed making it and not to be put off have ordered the materials for boiler No. 2! I've checked with my boiler inspector and will modify the barrel to throat plate joint thus overcomming the previous biggest problem. With an improved joint design I'm confident I can make No 2 a success. Wish me luck  Tim |
|
|
|
Post by Deleted on Dec 8, 2010 13:15:01 GMT
I've decided to scrap the boiler! The problem all along has been the barrel to throat plate joint. Tim JB |
|
|
|
Post by baggo on Dec 8, 2010 14:28:14 GMT
Never mind. I've enjoyed making it and not to be put off have ordered the materials for boiler No. 2! I've checked with my boiler inspector and will modify the barrel to throat plate joint thus overcomming the previous biggest problem. With an improved joint design I'm confident I can make No 2 a success. That's the spirit  It's a real shame though. You were going so well. Definitely good luck for number 2 John |
|
|
|
Post by gardener69 on Dec 18, 2010 15:23:32 GMT
 Just found this forum today. I intent to start the build of a 7.25" Jessie myself in the new year, having purchased plans recently. Did you make your own patterns or did you buy the castings? gardener
|
|
chiptim
Part of the e-furniture

Posts: 270
|
Post by chiptim on Dec 20, 2010 10:36:10 GMT
Hi Gardner,
I bought the castings, however there's some castings I wish I hadn't bought and made from the solid e.g. axle boxes and retaining brasses.
Good luck.
Tim.
|
|
chiptim
Part of the e-furniture

Posts: 270
|
Post by chiptim on Jan 20, 2011 21:58:40 GMT
Started soldering boiler No 2 today having completed the fabrication. So far so good. Will try to post some photos soon.
Much easier second time around.
Revised barrel to throat plate joint !!!
Tim
|
|
chiptim
Part of the e-furniture

Posts: 270
|
Post by chiptim on Jan 25, 2011 22:00:44 GMT
I've made good progress on Boiler No 2. Here's a shot of the modified barrel/wrapper/throat plate joint. You'll see I've continued the strap all the way round. This forms a stepped joint for the barrel to throat plate and also overcomes the awkward bits that you have to fill with solder due to the radius of the throat plate flange. 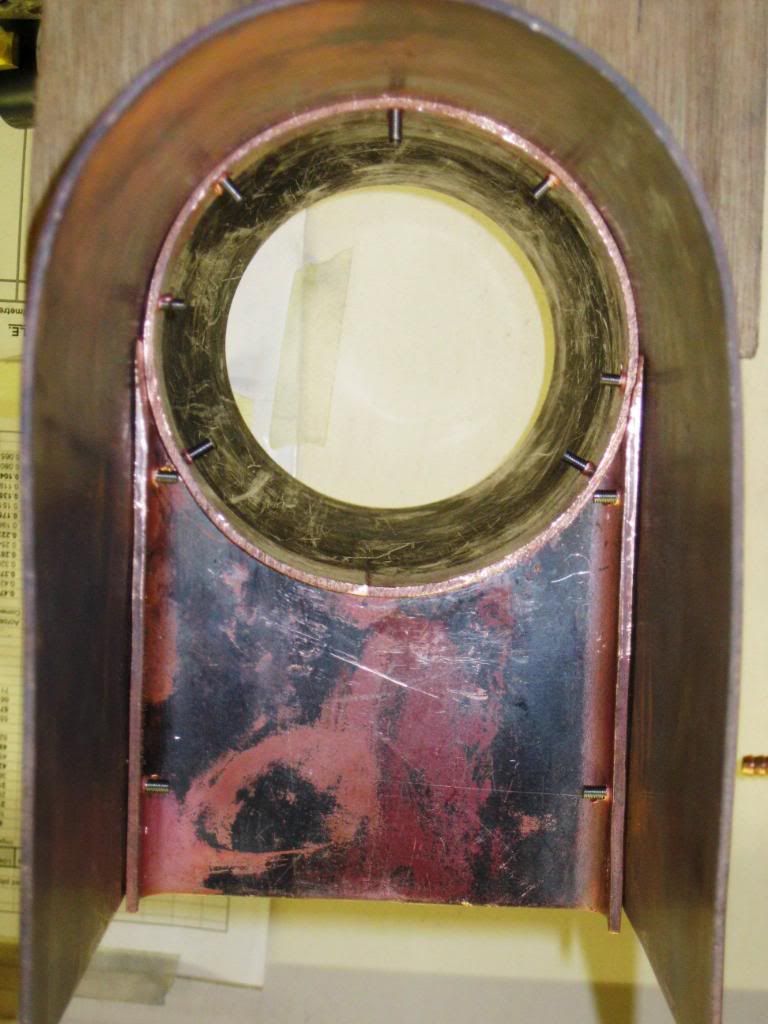 I soldered the ring into the barrel using a medium temp cadmium free. Flowed beautifully. Even the join in the ring filled with solder.  I've soldered the other half tonight. Looks good so far. More photos to come. Tim |
|
chiptim
Part of the e-furniture

Posts: 270
|
Post by chiptim on Jan 26, 2011 20:17:18 GMT
Here's a couple of photos of the joint fully soldered.   So far so good  Tim |
|
steam4ian
Elder Statesman
   One good turn deserves another
Posts: 2,069
|
Post by steam4ian on Jan 27, 2011 20:43:26 GMT
G'day Tim
That's looking really good.
Are you able to salvage any of the old bolier?
Regards
Ian
|
|
chiptim
Part of the e-furniture

Posts: 270
|
Post by chiptim on Jan 28, 2011 9:36:22 GMT
Thanks Ian. About the only bit of the old boiler I'll salvage is the dome. Definitely the top half and I might unsolder and re-use the bottom half.
Regards Tim
|
|
chiptim
Part of the e-furniture

Posts: 270
|
Post by chiptim on Feb 3, 2011 21:48:51 GMT
Managed to get some more soldering done this morning - half day off work  Started on the dreaded stays- 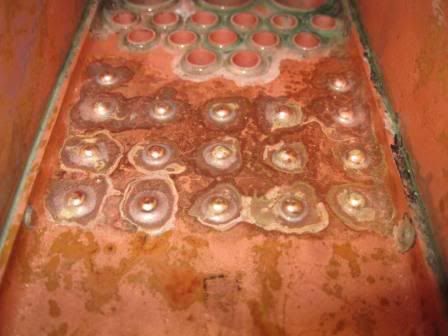 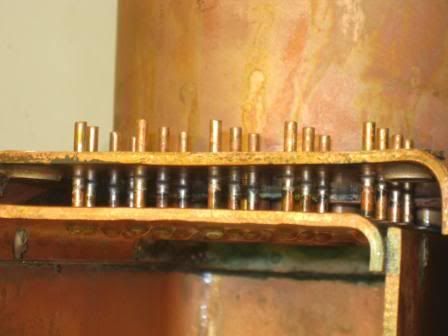 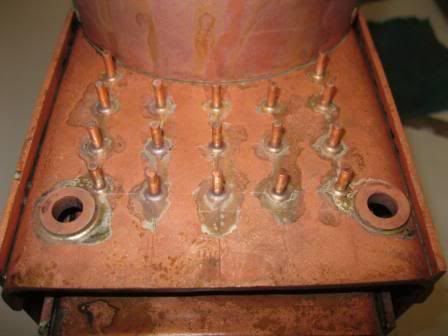 Very pleased with these. Tim. |
|
redmog
Part of the e-furniture
 Not Morgan weather
Posts: 461 
|
Post by redmog on Feb 4, 2011 7:16:49 GMT
Managed to get some more soldering done this morning - half day off work  Started on the dreaded stays- Very pleased with these. Tim. And so would I be. It's looking very good Tim. Slowly, slowly, one step at a time. Chris |
|
chiptim
Part of the e-furniture

Posts: 270
|
Post by chiptim on Feb 14, 2011 21:25:27 GMT
Well I managed to reuse the dome from the scrapped boiler. I'll leave the copper strap on until the front tubeplate is done as there's a risk of it comming off when you solder that.  and solder the two sides worth of stays at the weekend. 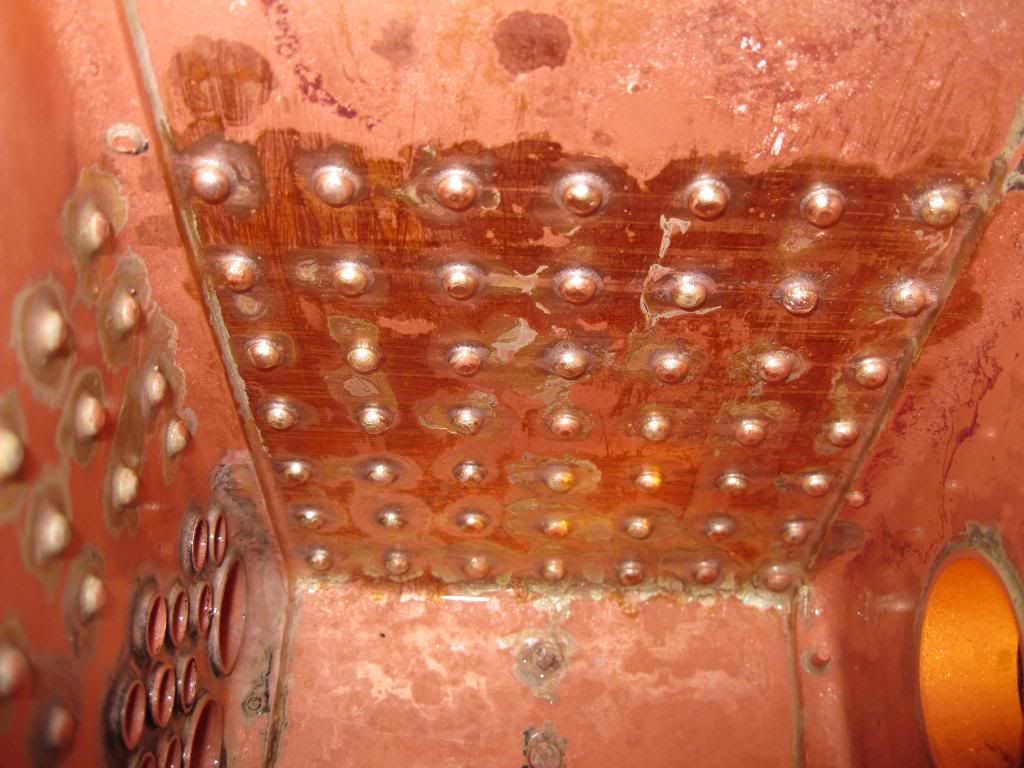 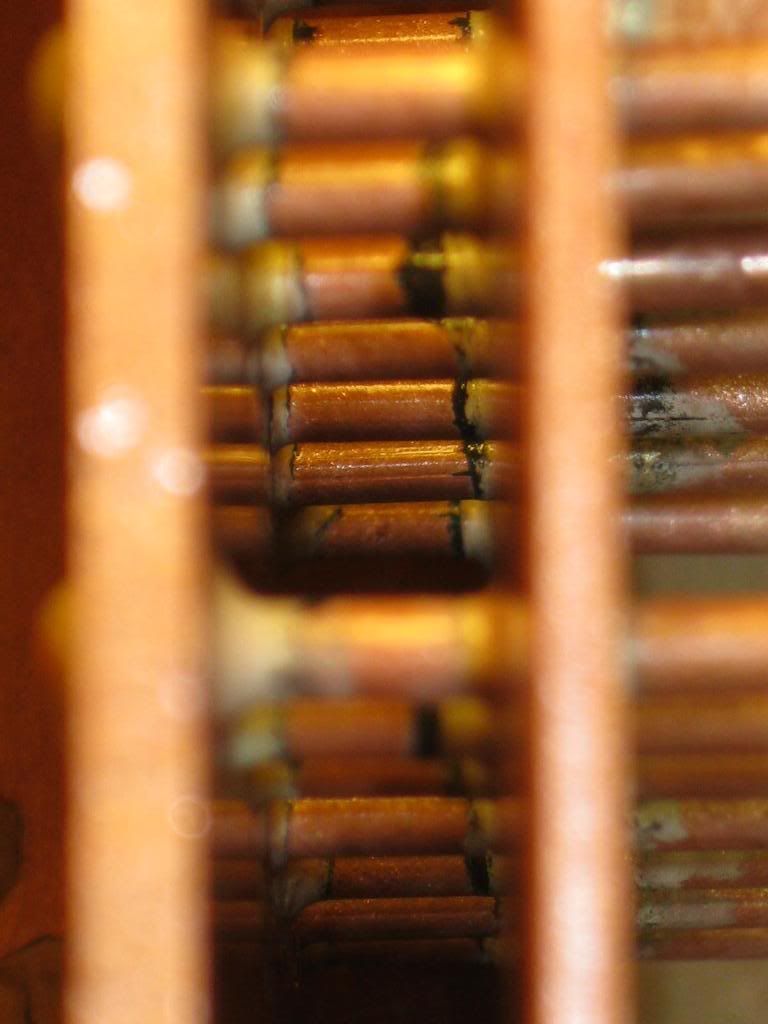  There's always one! (Top row) I'll get him when I do the foundation ring as all the others are fine. With the old boiler I soldered the stays from the outside having to bend them to prevent them from dropping through. On the new boiler they're soldered from the INSIDE so as long as there's solder on the outside I know it's come right through. Crown stays, manifold fitting and steam pipe next. Got to dash, Tim |
|
chiptim
Part of the e-furniture

Posts: 270
|
Post by chiptim on Feb 1, 2012 20:24:07 GMT
Finally I've got my boiler back from inspection AND had a free day when I felt well enough to do some soldering. (Not been well lately). Whilst the boiler was with the inspector I've finished the valve gear, made the smokebox and painted the chassis. Hopefully I'll have a running on air chassis in a couple of months or so and will post some pictures then, In the meantime here's the backhead - soldered in one go inside and out. Not fully pickled and cleaned but good enough to inspect. The set-up 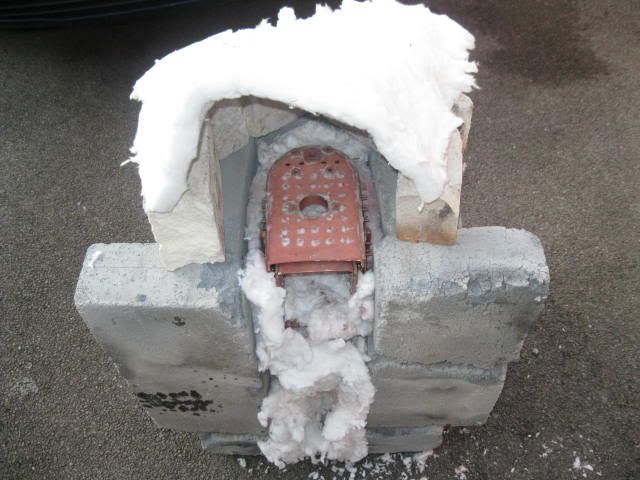 I had the cyclone held in a clamp burning inside the firebox and worked the outside with the 50mm burner. When the top was finished I inspected the inside to ensure all the solder-rings had melted through before removing the heat. Inside just after removing the heat. 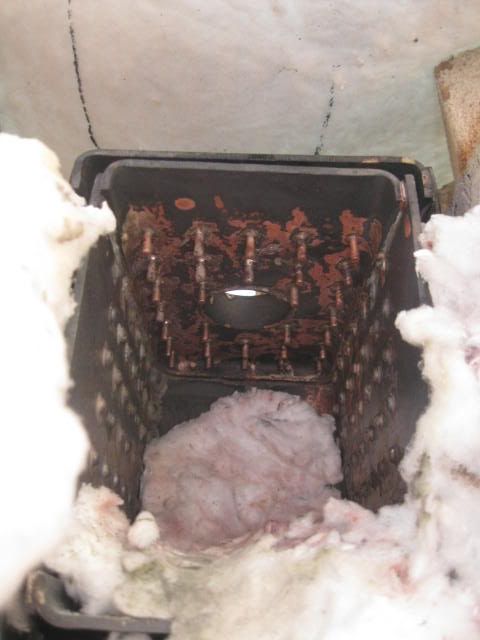 Then into the citric acid for a hour or so - it's slow whith the cold weather so will need a further pickle at some point. The Backhead 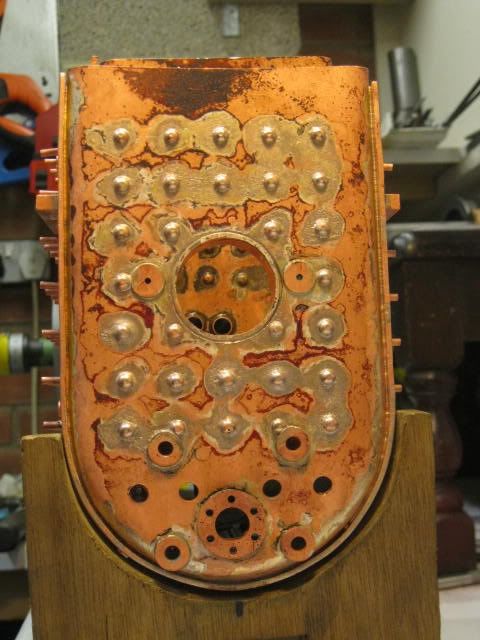 Close-up 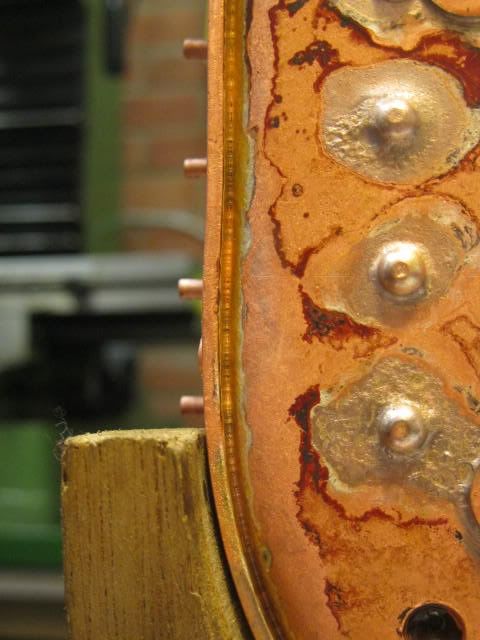 ...and the firebox side  Checking the stays. You can see it needs a good pickle but the solder has come through. 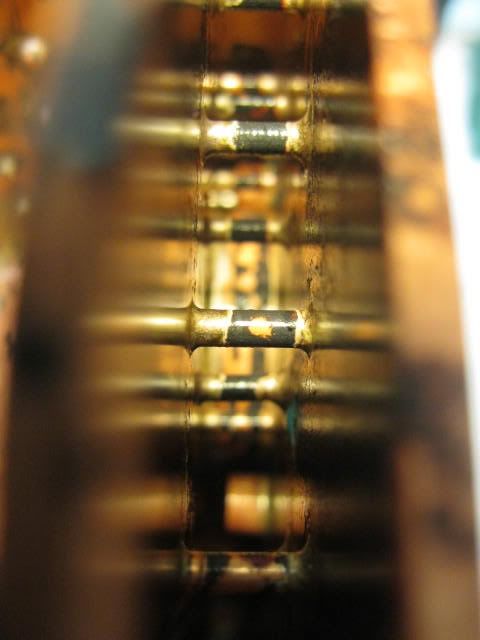 . HAPPY AGAIN  . |
|
chiptim
Part of the e-furniture

Posts: 270
|
Post by chiptim on Feb 1, 2012 20:28:32 GMT
Just noticed that the backhead doesn't look like its soldered to the wrapper on the lower part but trust me - it is!
|
|
|
|
Post by davebreeze on Feb 1, 2012 23:56:25 GMT
It all looks good, and gives me inspiration to start on my own boiler! Just need some time as usual.
|
|
chiptim
Part of the e-furniture

Posts: 270
|
Post by chiptim on May 9, 2012 18:32:26 GMT
I've finally completed the boiler - well almost. There was a few weeps. The stay I missed and soldered from the outside at the same time as the foundation ring weeped. It was the only stay to weep and I've successfully re-flowed it whilst also plugging a leak in the foundation ring. This was because I had been somewhat over-ambitious in the gaps that I expected the solder to fill. I'd fabicated some offcuts to fit those awkward corners but obviously not well enough! Problem solved now. The biggest problem as recorded in my other thread was trying to make a clack that didn't weep. Even with some new steel balls it weeped slowly casuing the pressure to drop. However I was able to disconnect the pump and inspect inside the firebox. I couldn't see any weeps with the pressure dropping from 200 to 150 PSI over the course of approx 45 minutes. So I guess its off to the boiler inspector now or wait until the loco's completed enough to steam?? 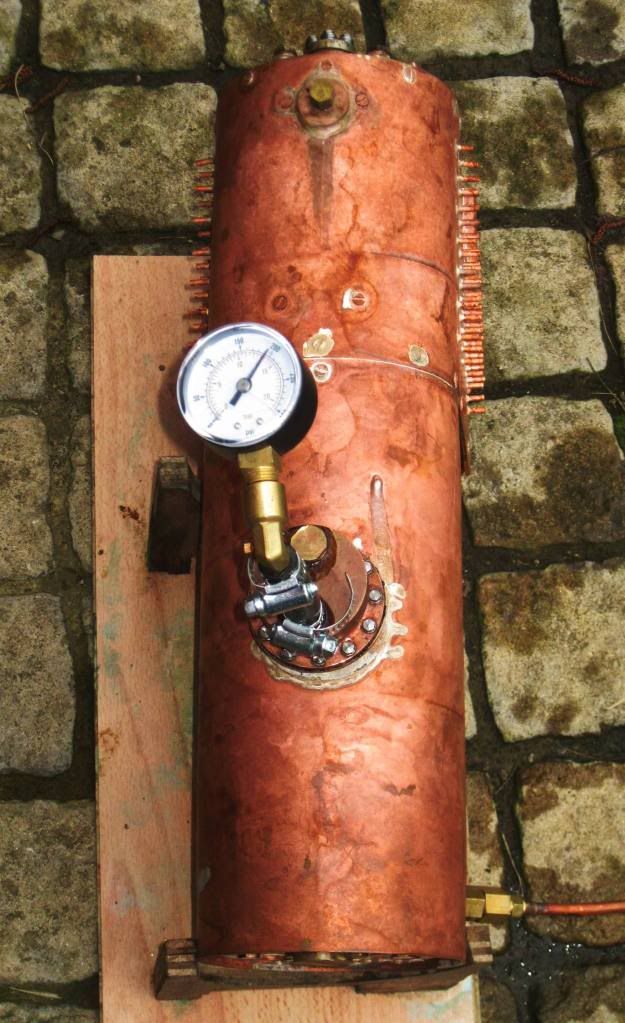 Regards Tim |
|
|
|
Post by dinmoremanor on May 11, 2012 6:53:26 GMT
Good work Tim, a real sense of achievement there!
|
|