chiptim
Part of the e-furniture

Posts: 270
|
Post by chiptim on May 11, 2012 16:57:38 GMT
Thanks Dinmore
It certainly is especially being my first boiler/loco. Last night I got the chassis running on air for the first time; only a few revs 'cause my compressor is too small but hoping to borrow a larger one this weekend and run it in.
Regards Tim
|
|
|
|
Post by Shawki Shlemon on May 13, 2012 9:34:27 GMT
It looks a well built boiler , hope all goes well and we see the fine finished loco soon and congratulation is in order for the achievement . Good luck.
|
|
chiptim
Part of the e-furniture

Posts: 270
|
Post by chiptim on May 13, 2012 18:08:39 GMT
Thanks Shawki. I went to take a photo of the loco and the camera was broken  (Must have been one of the children...) Anyway new camera and photo of the chassis at last. Need to finish off various items, esp. all the bolts through the valve gear joints. Anyone got any spare 5BA castle nuts?? 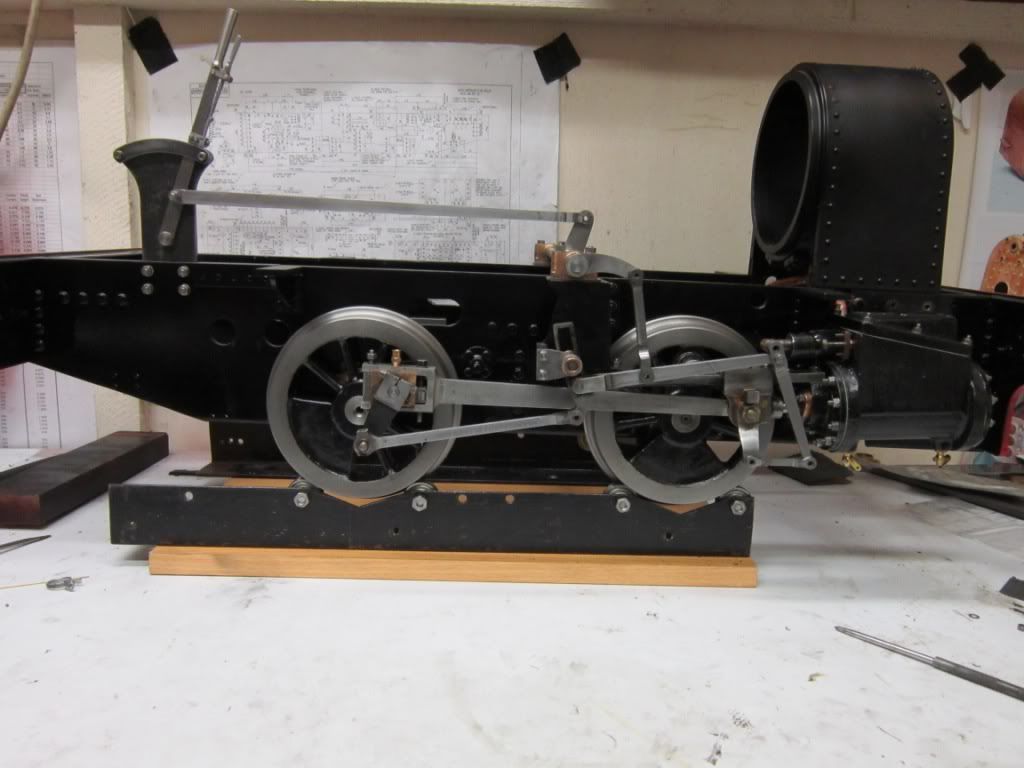 Regards Tim. |
|
|
|
Post by digger on Nov 3, 2012 23:14:18 GMT
I've finally completed the boiler - well almost. There was a few weeps. The stay I missed and soldered from the outside at the same time as the foundation ring weeped. It was the only stay to weep and I've successfully re-flowed it whilst also plugging a leak in the foundation ring. This was because I had been somewhat over-ambitious in the gaps that I expected the solder to fill. I'd fabicated some offcuts to fit those awkward corners but obviously not well enough! Problem solved now. The biggest problem as recorded in my other thread was trying to make a clack that didn't weep. Even with some new steel balls it weeped slowly casuing the pressure to drop. However I was able to disconnect the pump and inspect inside the firebox. I couldn't see any weeps with the pressure dropping from 200 to 150 PSI over the course of approx 45 minutes. So I guess its off to the boiler inspector now or wait until the loco's completed enough to steam?? 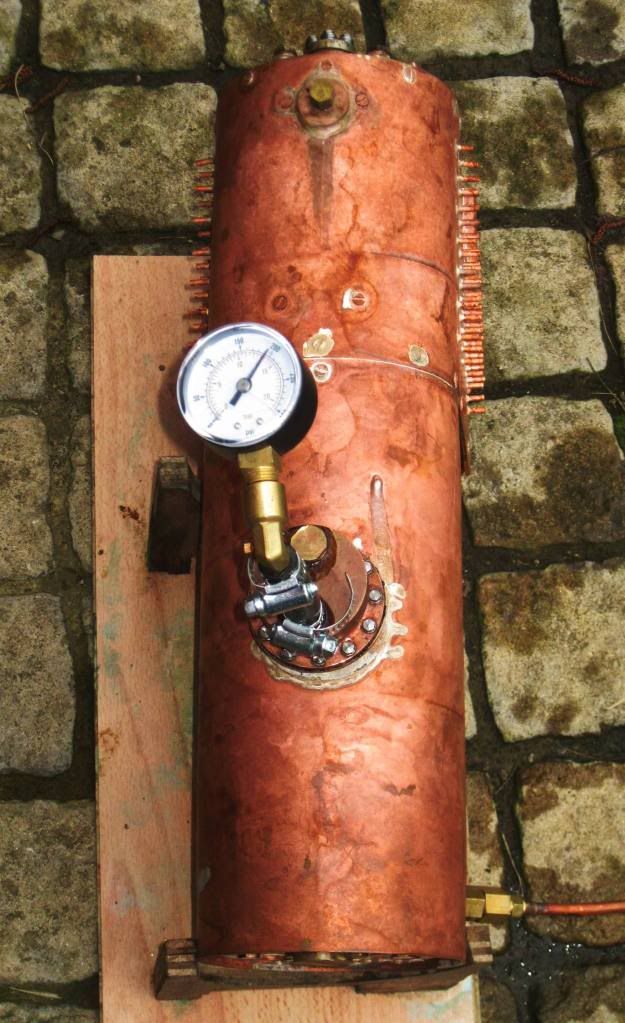 Regards Tim If there are no leaks visable then it could be that pressure drop over that period of time is just the soft copper expanding slightly under the sustained pressure, when it work hardens it will stand the pressure consistantely. Digger |
|
chiptim
Part of the e-furniture

Posts: 270
|
Post by chiptim on Dec 8, 2012 22:10:26 GMT
I've finally made some progress on the chassis. The brakes are complete. The brake stand was taken from the solid: 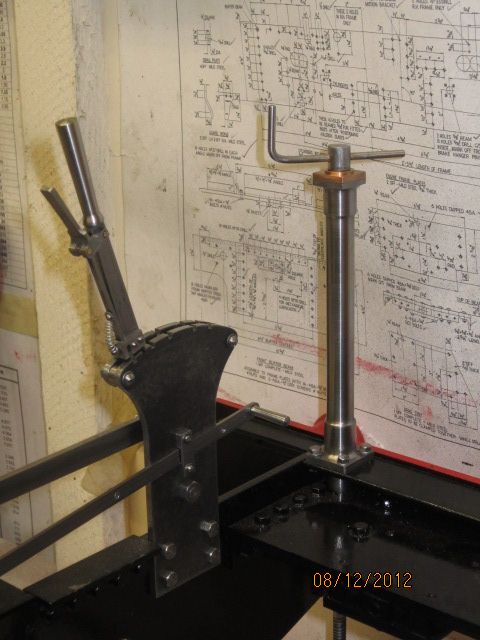 I've finished the blast nozzle and blower and connected it to the elbow in the smokebox.  I fitted an in-line non-return valve to a bracket held in place with one of the cylinder fixings. I would have used a Schraeder valve as suggested (and even had one knocking around) but I'd already bought the valve. Still there's always next time... 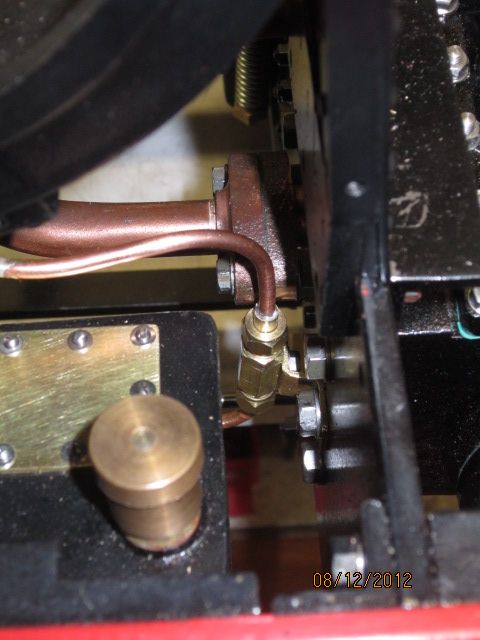 So now I'm turning my attention to the smokebox door. I bought a piece of cast billet to turn it from. Talk about pushing an ML10 to its limit! There was no more than a cigarette paper between the bed and the jaws. 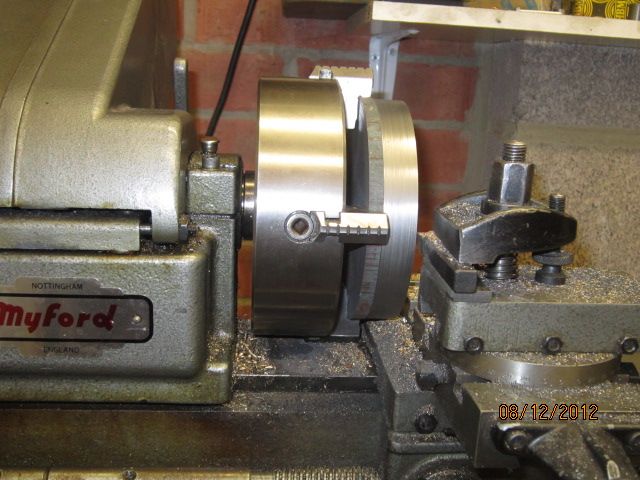 But it just fits. I turned the inside by slackening off the screws allowing the tool post to swivel and then turned it round by hand. Not sure how I'm going to manage the outside radius though  (photos when it's finished) 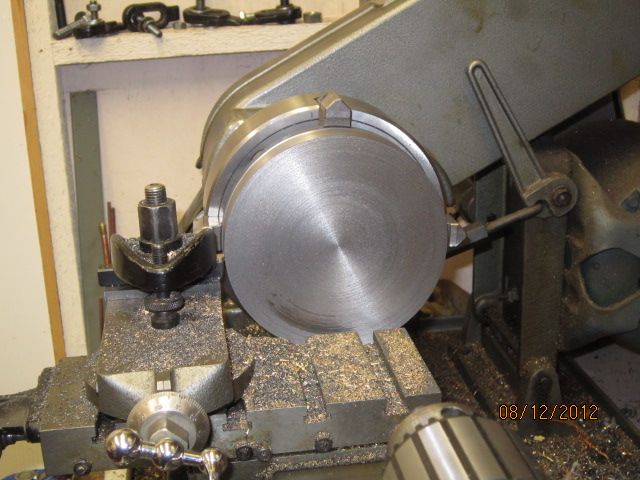 Anyway. I'm please with the way the chassis's progressing. Can't wait to connect up the boiler. 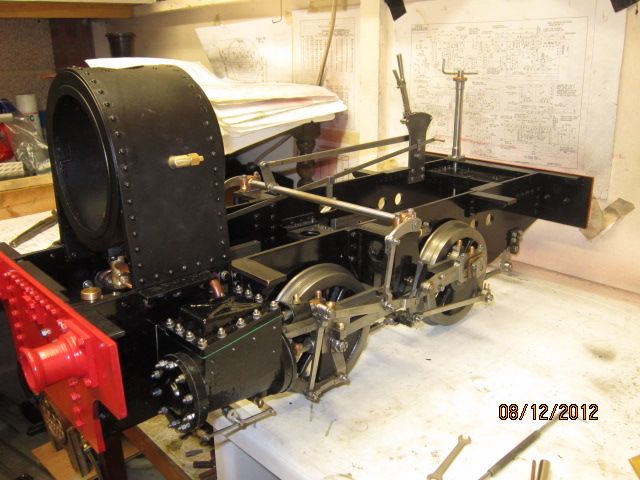 Regards Tim |
|
|
|
Post by Shawki Shlemon on Dec 9, 2012 6:19:35 GMT
Tim , just an idea , may be you already aware of it , I fit a tee in the blower system with a blanking cap . to start the engine I connect compressed air to it and close the blower valve , when boiler has enough pressure ( say 50 psi ) , I remove the compressor connection , fit blank and open blower valve . No need for extra equipment . By the way very nice work .
|
|
uuu
Elder Statesman
   your message here...
Posts: 2,856
|
Post by uuu on Dec 9, 2012 9:02:14 GMT
This is going to be a classy little engine. Lovely pictures.
|
|
chiptim
Part of the e-furniture

Posts: 270
|
Post by chiptim on Dec 11, 2012 18:26:50 GMT
Thanks Guys. Here's the smoke box door that I've finished roughing out using the "Etch-a-Sketch" method to get the outside curve. Roughly 2 thou in for 10 thou out to produce a diagonal line then finished off to a curve by eye! Just needs a spin against some wet and dry before painting. I might reduce the diameter of the inside bit. I left it oversize on purpose so I had something decent to grip whilst turning the outside. 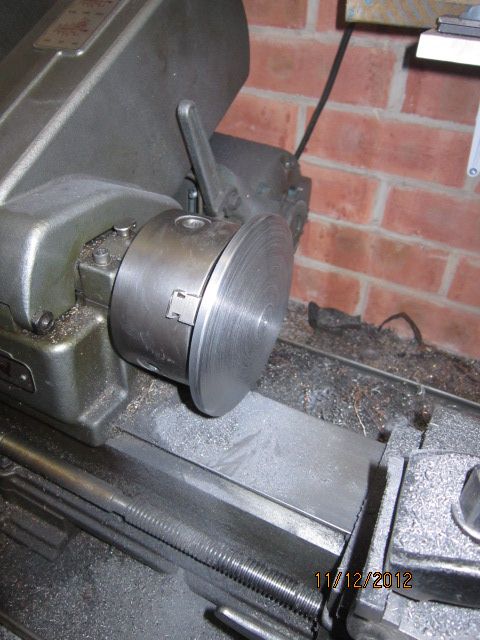 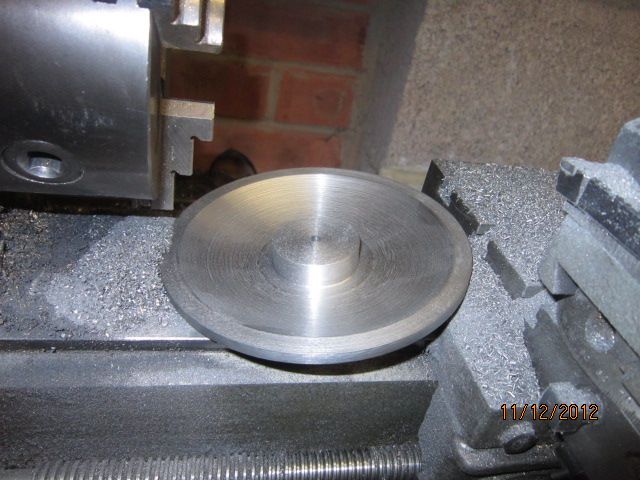 Regards Tim |
|
chiptim
Part of the e-furniture

Posts: 270
|
Post by chiptim on Jan 12, 2013 17:34:40 GMT
Well I've finally had a bit of time in my workshop making more of this stuff.... 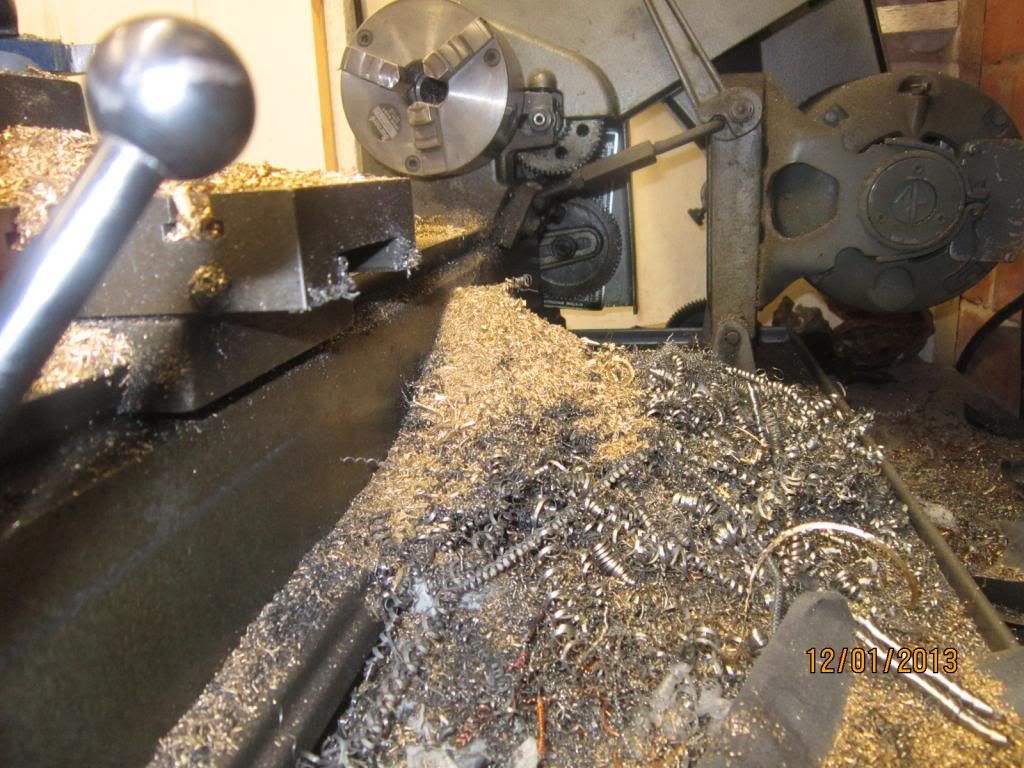 That was from the chimney that I've fabricated from the solid in three pieces... 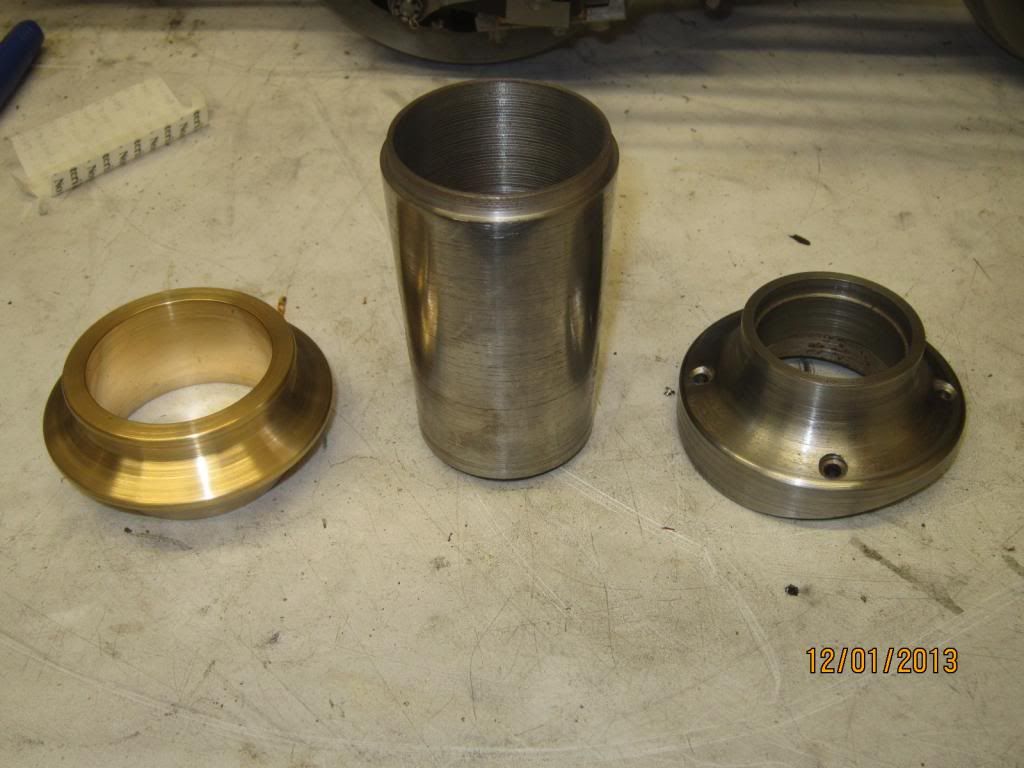 Question is, how do I get the base to the correct profile before I solder the 3 pieces together? I could turn it down further but not to the correct profile and I can't see any way of achieveing this with the tools I have. Also what do people think of the brass finniel? (if that's the correct term). It doesn't look quite right to me. Maybe just too large or a squatter profile perhaps? I did fit the boiler for the first time... 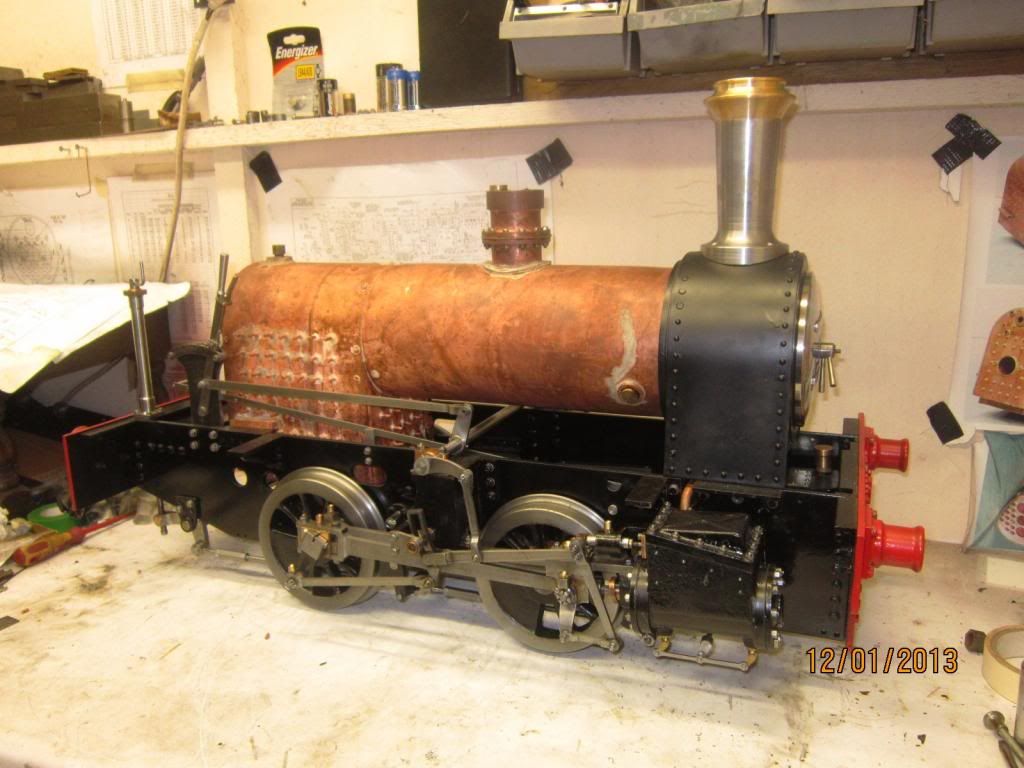 Regards Tim |
|
RLWP
Part of the e-furniture

Posts: 319
|
Post by RLWP on Jan 12, 2013 18:27:45 GMT
I turned my chimney base as you have, then turned it around in the chuck and thinned the flange down to about 1/32". I could then bend the flange to follow the profile of the smokebox
Richard
|
|
|
|
Post by Callum Darraugh on Jan 12, 2013 21:04:56 GMT
|
|
|
|
Post by ejparrott on Jan 13, 2013 9:31:26 GMT
Your chimney cap is very like the Kerr Stuart example fitted to TR No. 4. As we used a Stirling Single casting to provide the top and bottom castings (being the right size it turned out-no pun intended!) then I can only assume Stirling used similar.
|
|
uuu
Elder Statesman
   your message here...
Posts: 2,856
|
Post by uuu on Jan 13, 2013 10:11:40 GMT
You may have to file the base to the saddle shape. I can't think of a machine set-up that would develop the shape easily.
|
|
kingsteam9
Hi-poster
  Enter your message here...
Posts: 160
|
Post by kingsteam9 on Jan 13, 2013 10:49:22 GMT
Tim,
The late Colin Binnie described a setup for profiling chimney base flanges etc for 16mm NG locos which worked by setting the chimney on a mandrel held in the chuck, and a 'follower' fitted to the cross slide bearing on the flange underside profile. He used a rotary burr/drill carried on the cross slide to do the cutting and as the chimney rotated the follower moved the cross slide L-R/R-L to form the profile. Sounds complicated but Colin's sketches made it reasonably clear. Possibly that could be scaled up to suit. I'll dig out the sketch if that would help.
Robin
|
|
chiptim
Part of the e-furniture

Posts: 270
|
Post by chiptim on Jan 15, 2013 19:37:11 GMT
OK decision made. I'm going to leave the base as it is because I just want to finish and run ASAP. Maybe after a seasons running its a job I can tackle in the winter...
I'm going to change the profile of the cap slightly then solder the three together.
Tim
|
|
RLWP
Part of the e-furniture

Posts: 319
|
Post by RLWP on Jan 15, 2013 20:03:06 GMT
Right, you have said it twice now.
Solder the parts together?
Richard
|
|
|
|
Post by davebreeze on Jan 15, 2013 21:45:40 GMT
OK decision made. I'm going to leave the base as it is because I just want to finish and run ASAP. Maybe after a seasons running its a job I can tackle in the winter... I'm going to change the profile of the cap slightly then solder the three together. Tim It doesn't look -too- bad the way it is... there's bound to have been a prototype for it somewhere! |
|
chiptim
Part of the e-furniture

Posts: 270
|
Post by chiptim on Jan 18, 2013 12:45:46 GMT
Yes Silver Solder.
I think I'll turn a slight cut-out on the inside of the join, flux and assemble with a ring of solder in the cut-out/flux then heat from the outside to draw the solder through.
Regards Tim
|
|
RLWP
Part of the e-furniture

Posts: 319
|
Post by RLWP on Jan 18, 2013 12:50:35 GMT
That's OK then - carry on that man!
;D
Richard
|
|
chiptim
Part of the e-furniture

Posts: 270
|
Post by chiptim on Sept 3, 2013 21:24:41 GMT
Not much progress to report I'm afraid. I lost my workshop by getting divorced so all I've made this year is the superheater. Still I've settled into somewhere new, and started building a new workshop. I laid the concrete last week with the help of my labradore... Needless to say he had to swim in the river to get the concrete off his paws!
Anyway some photos coming soon and I hope to exhibit Jesse at the East Somerset Railway's 'Models and Miniatures' weekend (this weekend 7th&8th Sep) hopefully on the Sunday weather permitting. If anyone's down that way do come over and introduce yourself (ask for Tim). Hopefully we'll have a 7 1/4" guage loco in steam.
Tim
|
|