|
|
Post by trainman on Apr 6, 2014 12:17:03 GMT
Hi Jim, I secured my tender tank to the top stretchers by sweating some 2BA brass bolts from the inside of the tank. Using a spinner you can then do up the nuts without too much bother. The real thing had brackets on the side of the tender that held it down, as well as those at the front and rear. If you haven't seen it already, Nigel Fraser Ker has an excellent website where there are loads of pictures of a stripped down Britannia fraserker.com/britannia/Regards Paul 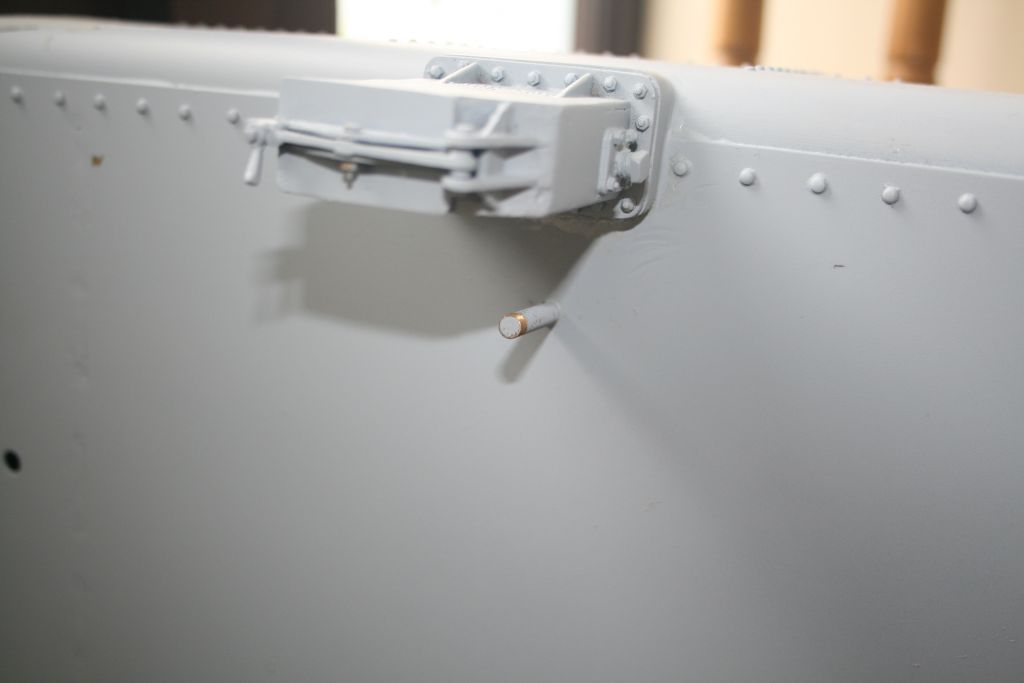 |
|
|
|
Post by trainman on Apr 6, 2014 12:35:44 GMT
Hi Jim, Just found the photos. The first one shows the bracket on the frames, the second shows the corresponding bracket on the tender, and the third shows the brackets at the front. Regards, Paul 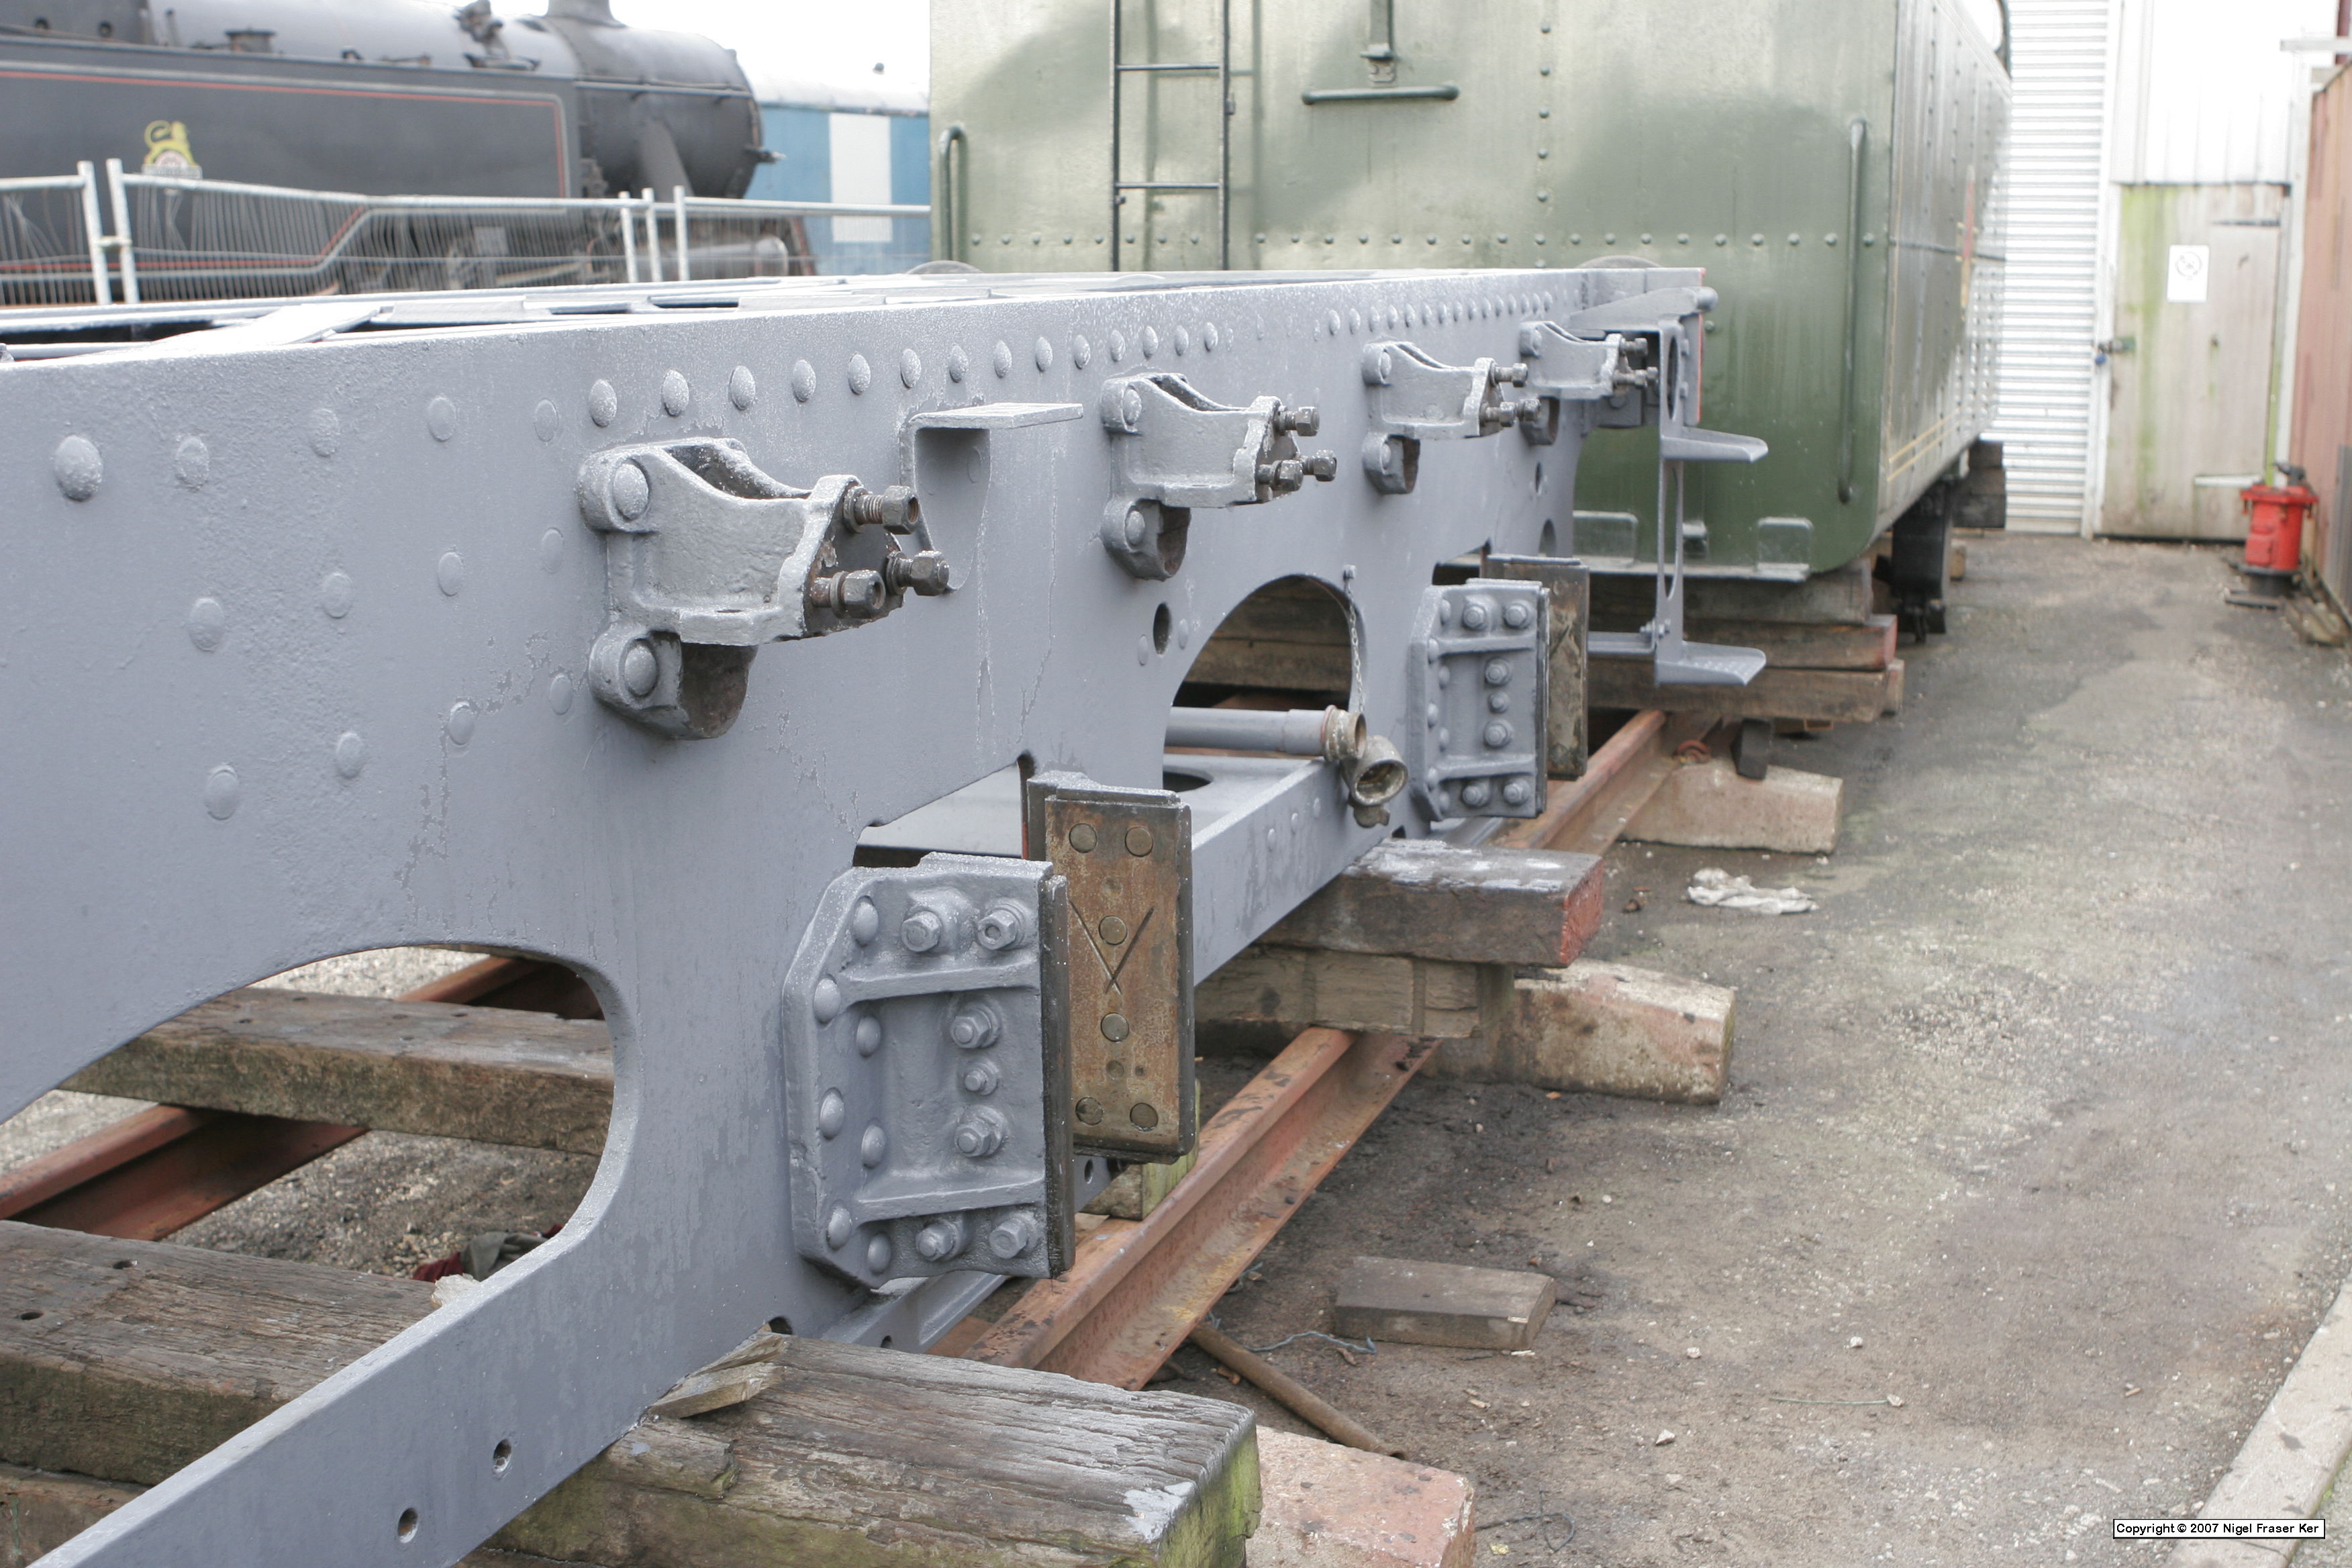 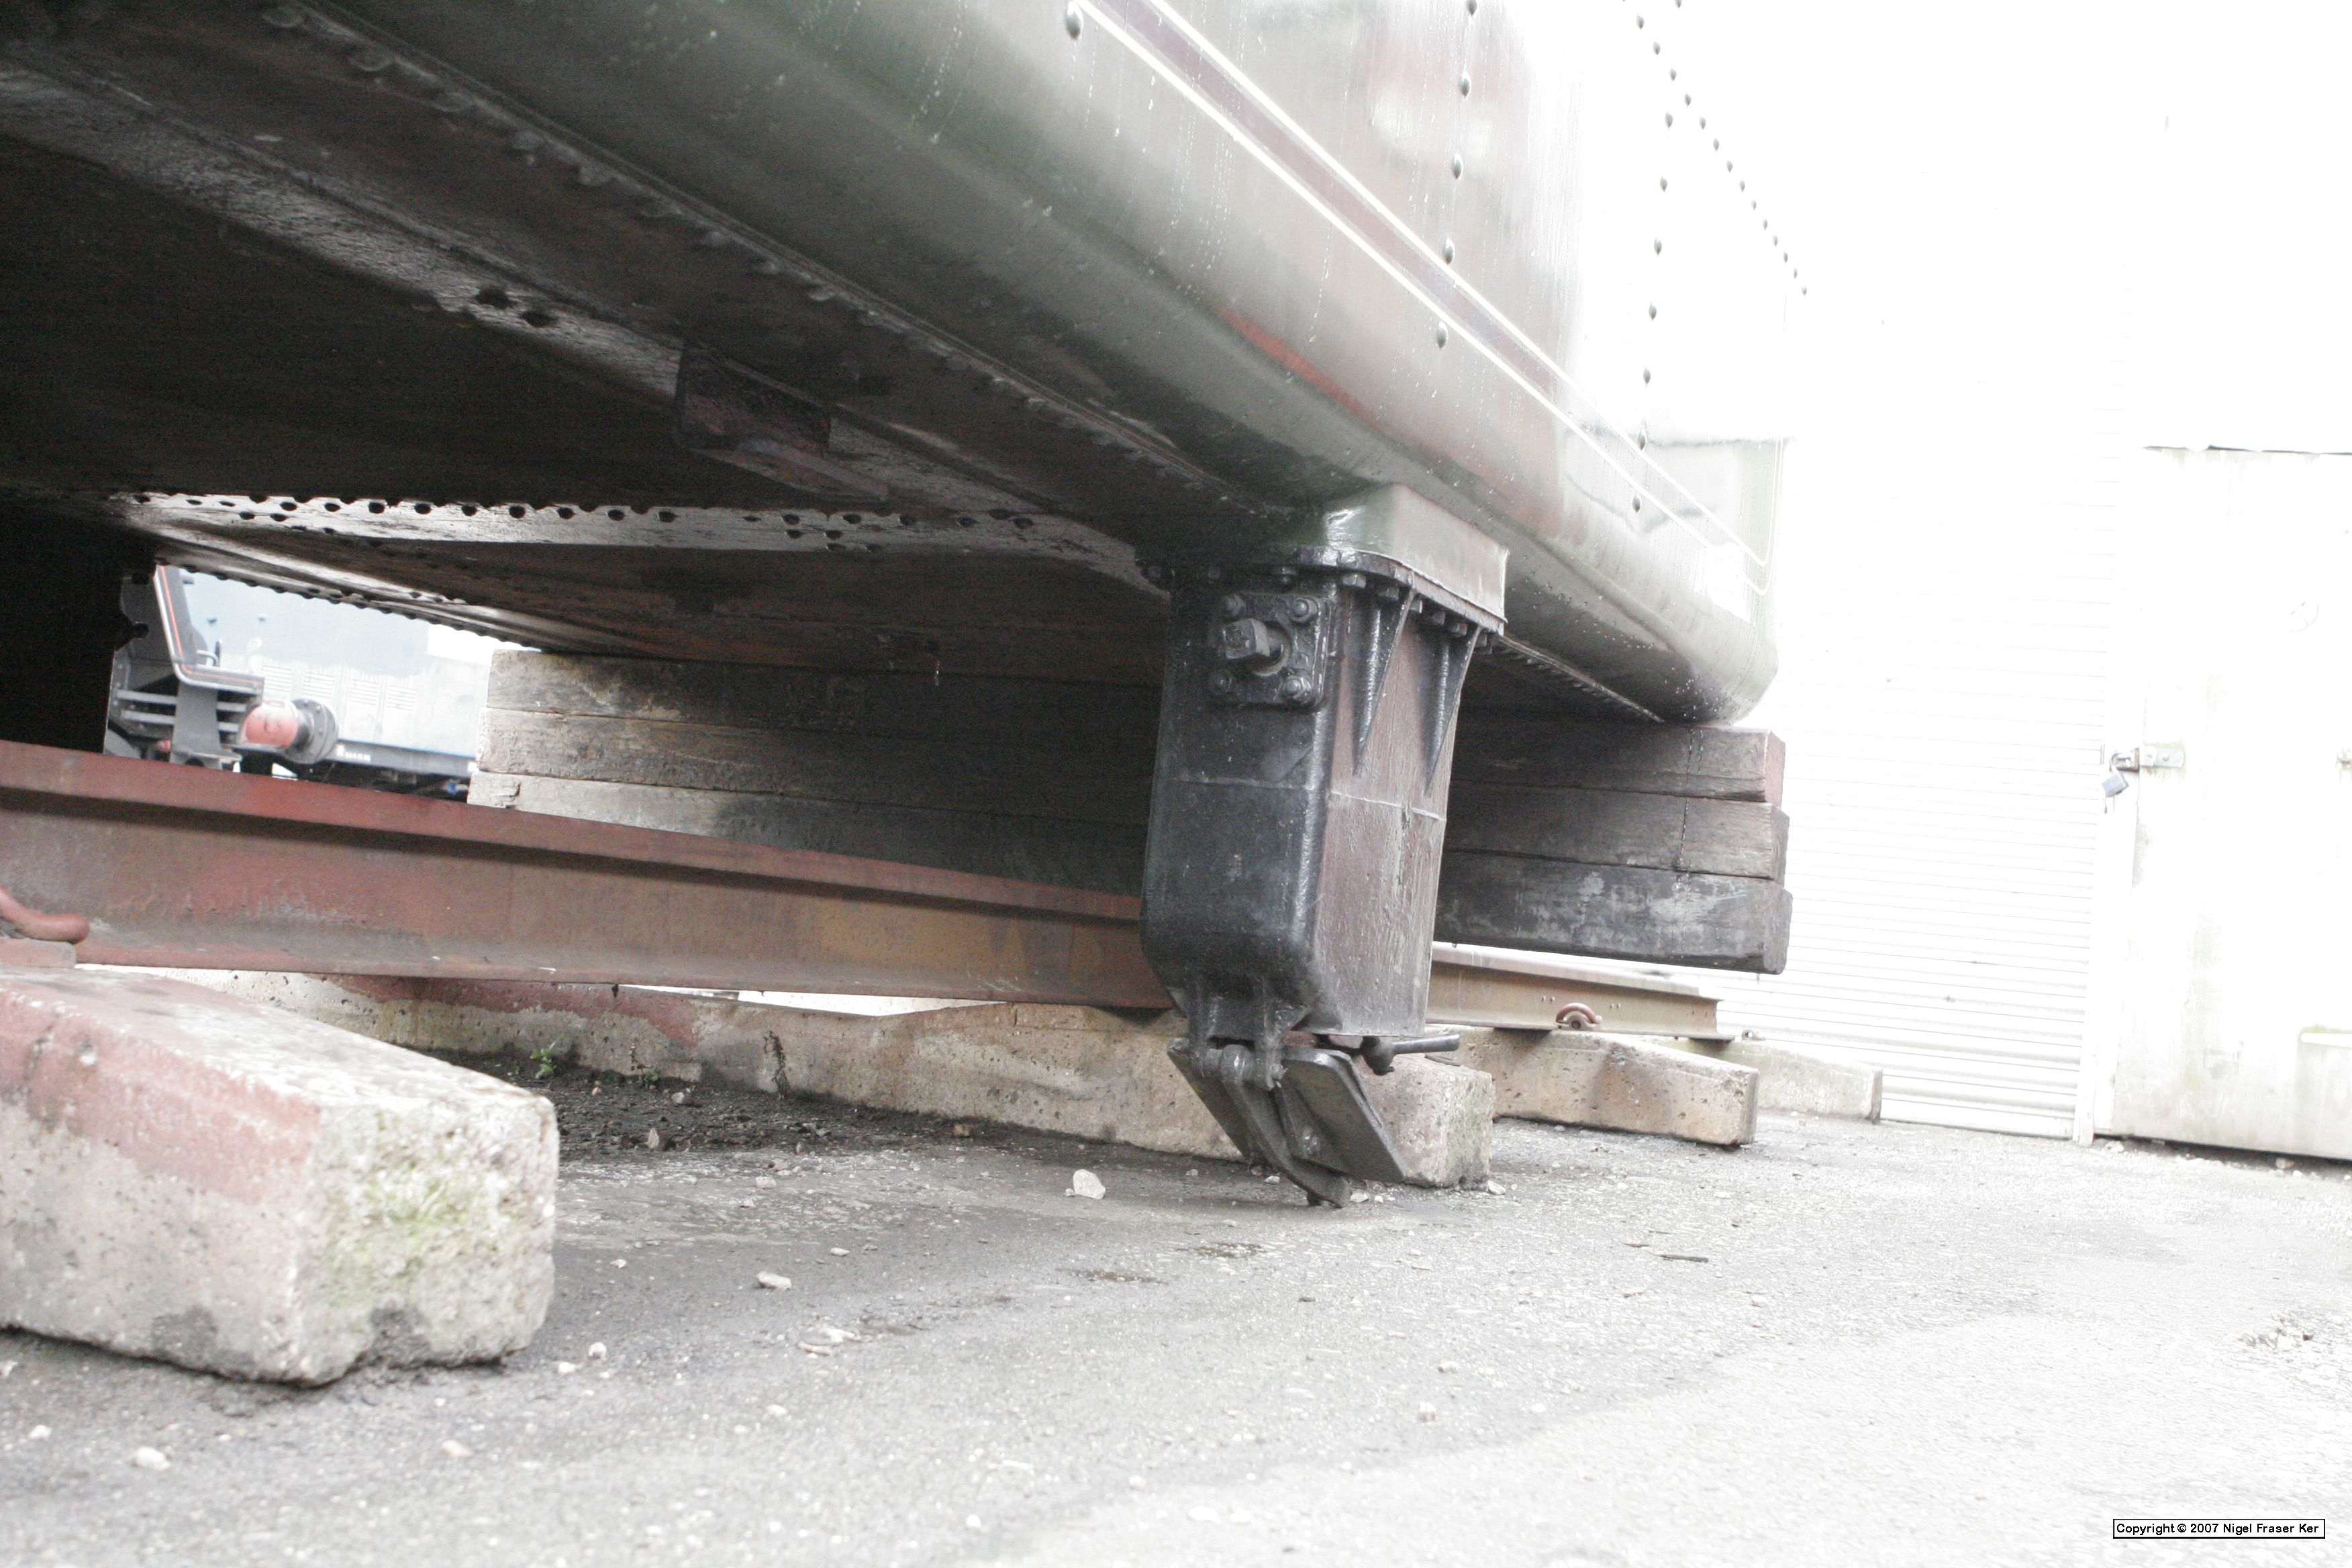 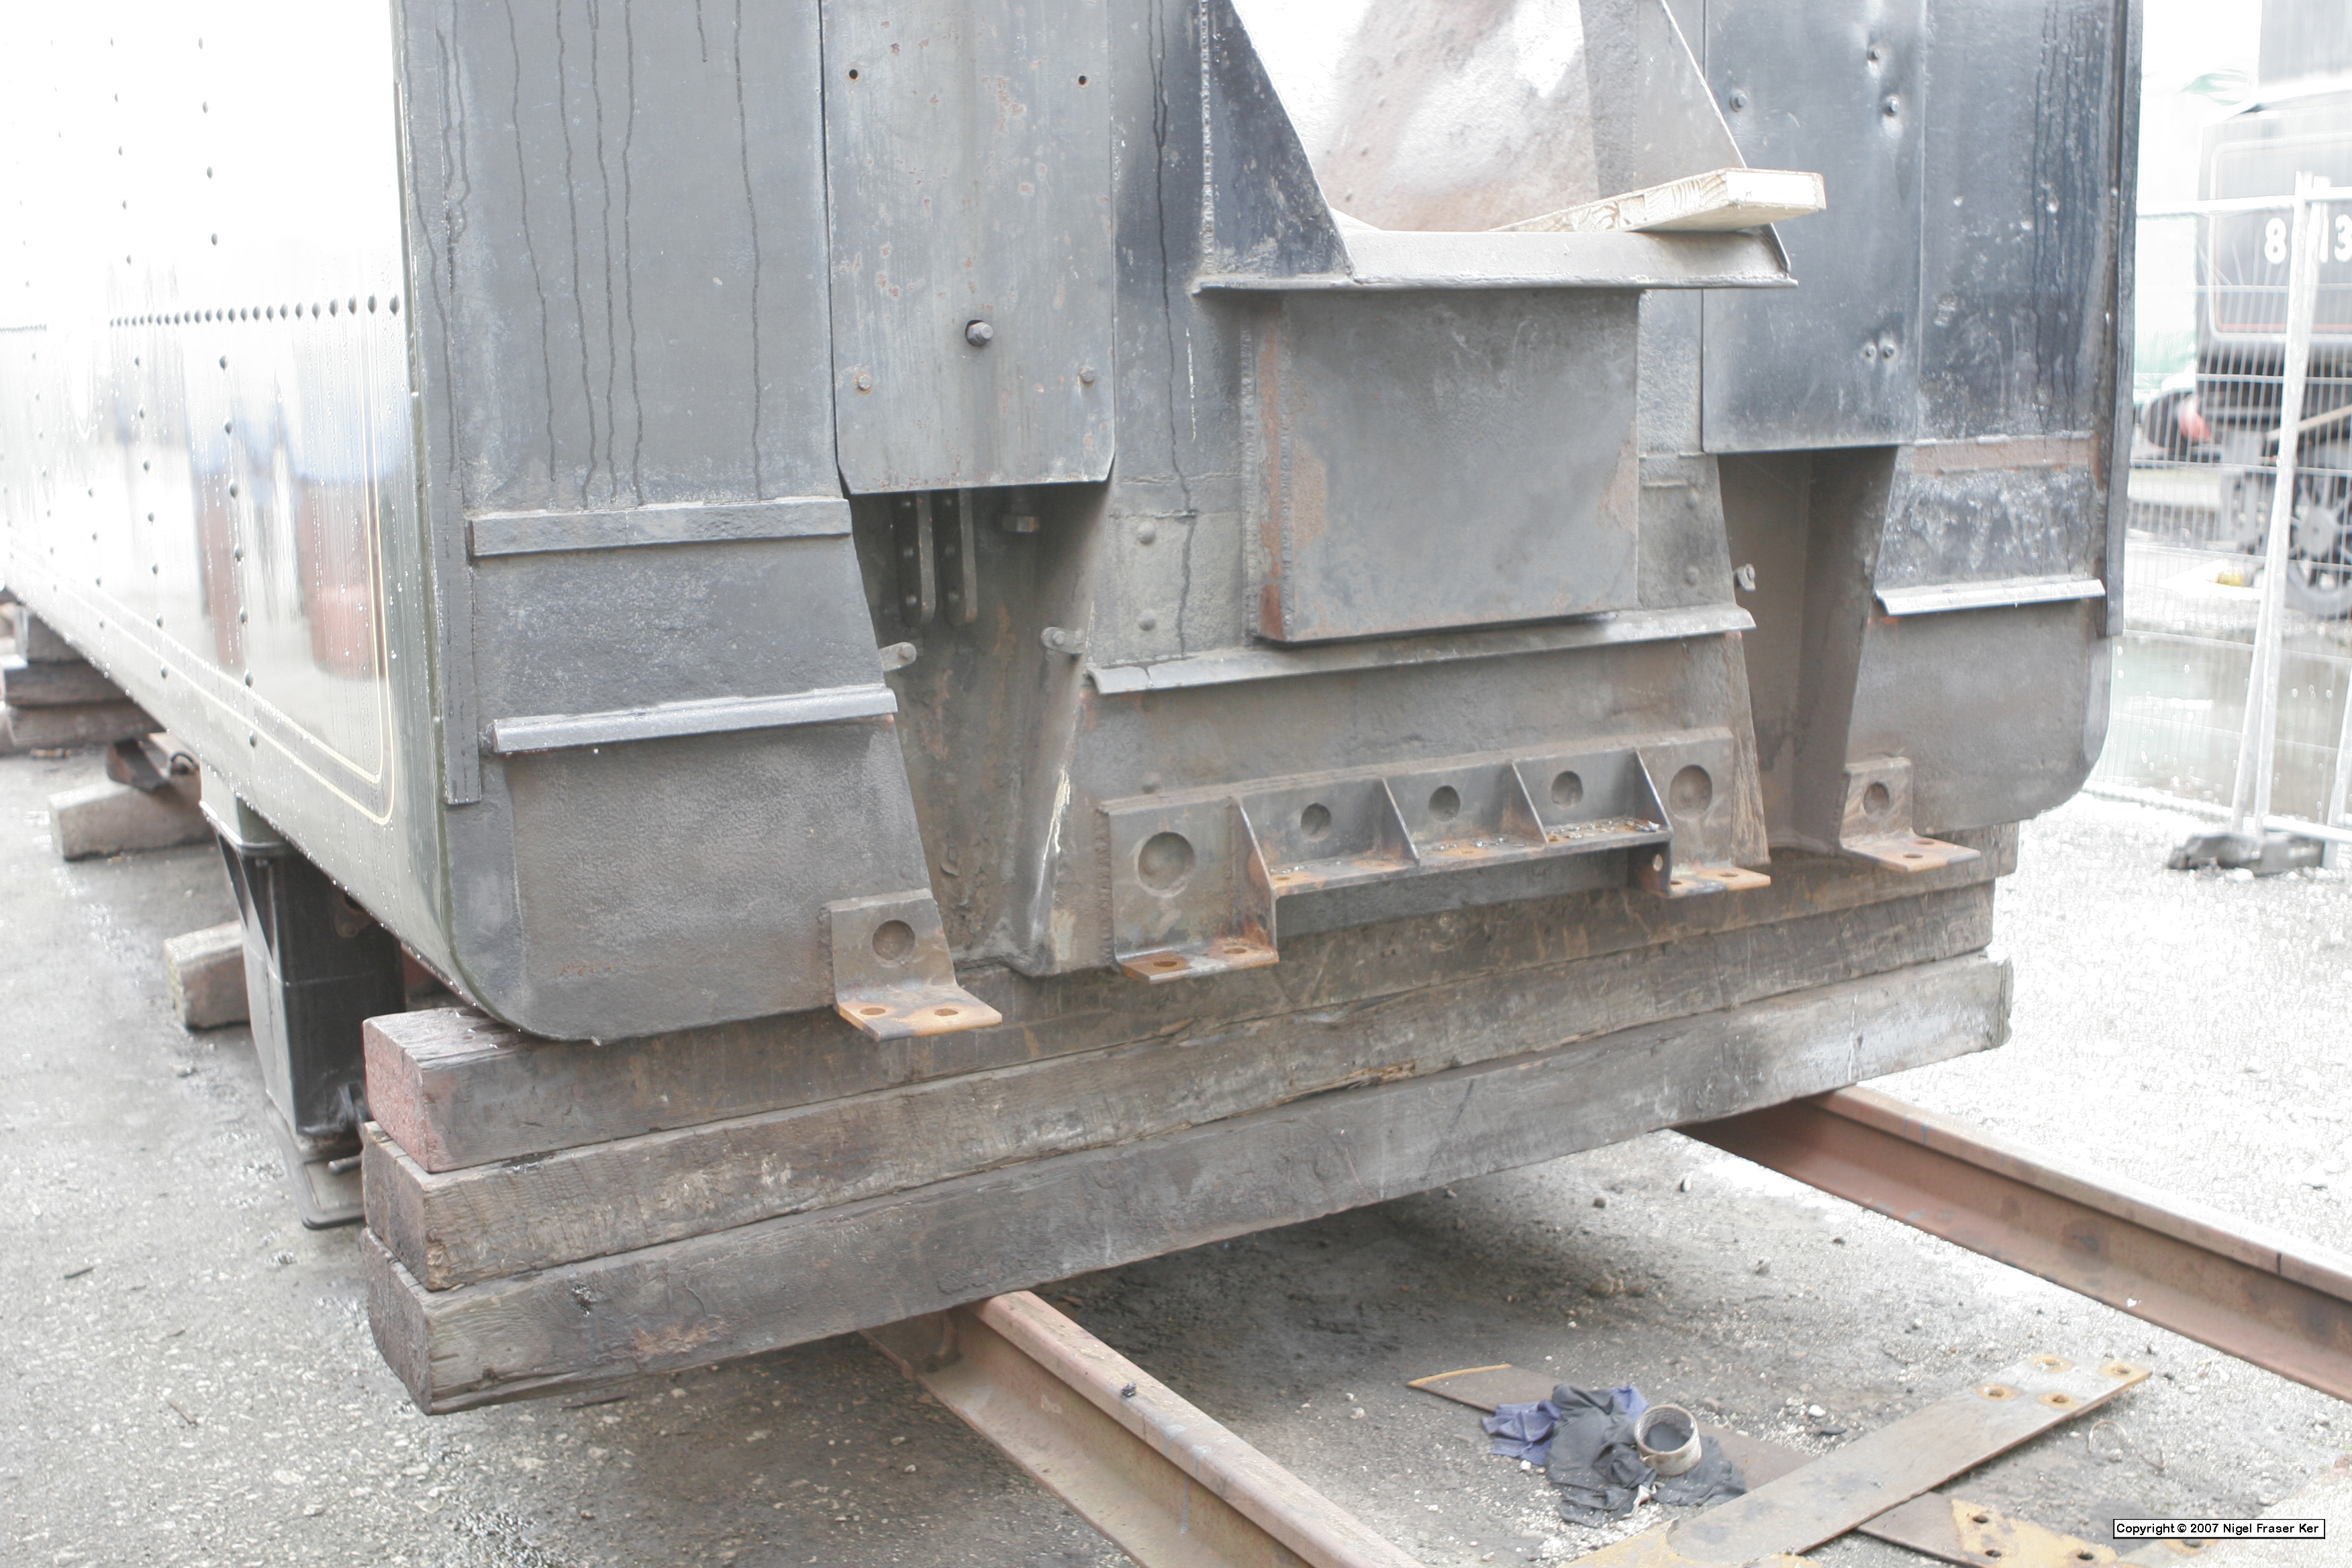 |
|
|
|
Post by Deleted on Apr 6, 2014 17:20:24 GMT
Coming along nicely Jim, tender chassis looks great, it won't be long before it's full of coal...  Pete |
|
|
|
Post by Jim on Apr 6, 2014 21:25:23 GMT
Many thanks Paul for taking the trouble to post those photos and to remind me of the fraserker photo collection the detail in them is pure gold and stuff you never get to see in the usual photos. It had completely slipped my memory.  The 2BA brass bolts sweated inside the tank to pass through the stretchers is the answer Paul and as you say with a spinner they are 'easy' to fit when securing the tender to the frames. Thanks Pete too, I love your optimism but 'Yes' things are moving along and really I think with these projects it is the journey...well that's what I tell myself. It's a funny thing I've just noticed in my photo two whole rows of rivets missing on the front tender buffer beam. I kept thinking the beam looked very 'clean and uncluttered'. While for me they will be cosmetic I'll take the beam off and add the rivets as they add to the detail and if I don't that inner voice will keep nagging away telling me 'They should be there you know they should.' Inner voices are like my former workshop gnomes, do nothing but complain.  Once again, thanks John, Paul and Pete for the input. Jim |
|
|
|
Post by Shawki Shlemon on Apr 7, 2014 9:25:13 GMT
Jim you are doing well , let me tell you I am very lucky I don't have inner voice therefore I can get away with whatever pleases me .  |
|
|
|
Post by Jim on Apr 7, 2014 12:55:16 GMT
|
|
|
|
Post by Deleted on Apr 7, 2014 15:35:51 GMT
Hello all--------- Just a vote of thanks from me as well for that Britannia link........My research for The Bear' boiler down the years has shown just how inter-related it is to later locos such as the Gresley, Stanier, Bullied and BR Standard Pacifics.... By looking at these photos I can almost see The Bear's "tail" as it were ie}-- the rear of the frames and the fire grate/ashpan /pony truck assy.....
|
|
|
|
Post by Jim on Apr 21, 2014 8:12:05 GMT
Over the last couple of weeks I've been working on Boadicea's tender brakes. Perrier's drawings are not the easiest to follow with components scattered over 2 or 3 sheets making it a 'Where's Wally?' type game. As my dad would say, 'Why make it difficult when with a bit more effort you can make it impossible?' With out going into too much detail I decided leave Perrier and make my own sub floor from 1/8" aluminum and the bearing support brackets from an off cut of rectangular tube. The details can be seen in the first photo. 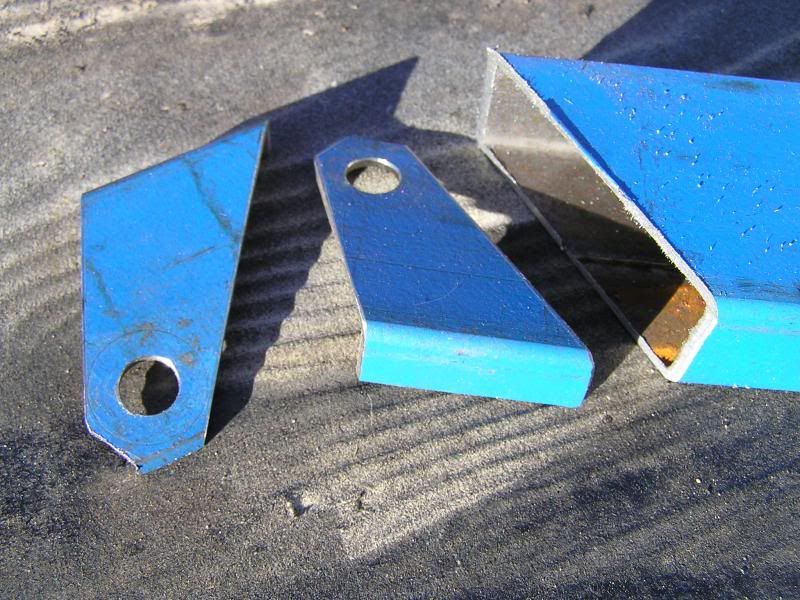 After drilling and shaping with a file the brackets were attached to the sub floor. 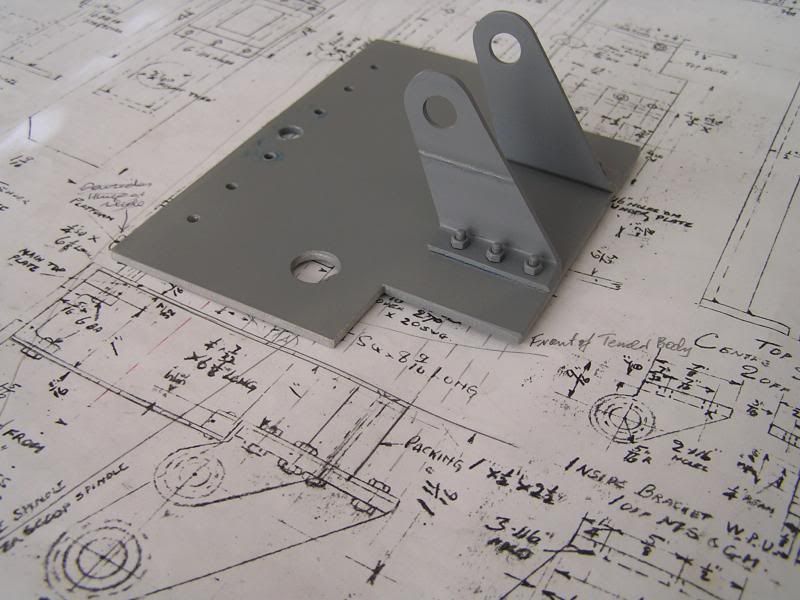 The brake actuating cranks were assembled and fitted on the shaft to check the alignment before taking the brackets to the rotary table for shaping the big ends, the small ends were again done with a file and the sides were done in the mill. With a coat of grey primer to make everything neat and tidy and hide the rough stuff all was assembled for a trial fit. Amazingly it all came together as planned.  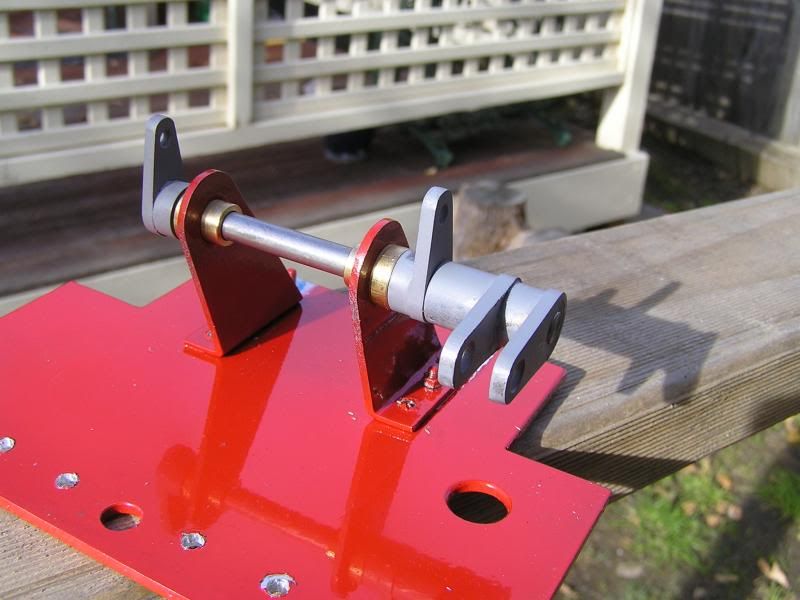 The next job will be to complete and adjust the brake rods. I must say that in the hidden world that lurks under the tender I've opted for simplicity rather than closely following the original works drawings. That's my excuse m'lord and I'm sticking to it.  Jim |
|
44767
Statesman
 
Posts: 539
|
Post by 44767 on Apr 21, 2014 8:28:46 GMT
Well, I can understand going for simplicity, Jim. The only time it will be seen is when it's being built or if it falls off the track (and we don't want that do we)!
|
|
|
|
Post by Jim on Apr 22, 2014 12:27:29 GMT
You are quite right Mike I certainly don't want Boadicea showing her nether regions to the gawping public let alone the critical eyes of other modellers by falling off the track..heaven forbid.  I thought to make up for not doing much I'd post a photo of Boadicea and her tender in their bare frames! If you look you can just make out the sub floor in place with the brake actuating cranks fitted. Of course Boadicea's boiler had to poke its nose in to remind me it was waiting for me to get all enthusiastic and complete it. It's probably about 3 days work if that to do the stays and the the two sides of the foundation ring. Then of course there's the two Mk1 coaches sitting out of sight just behind the tender waiting for the interiors to be fitted.  I think I need a soothing ale. Jim 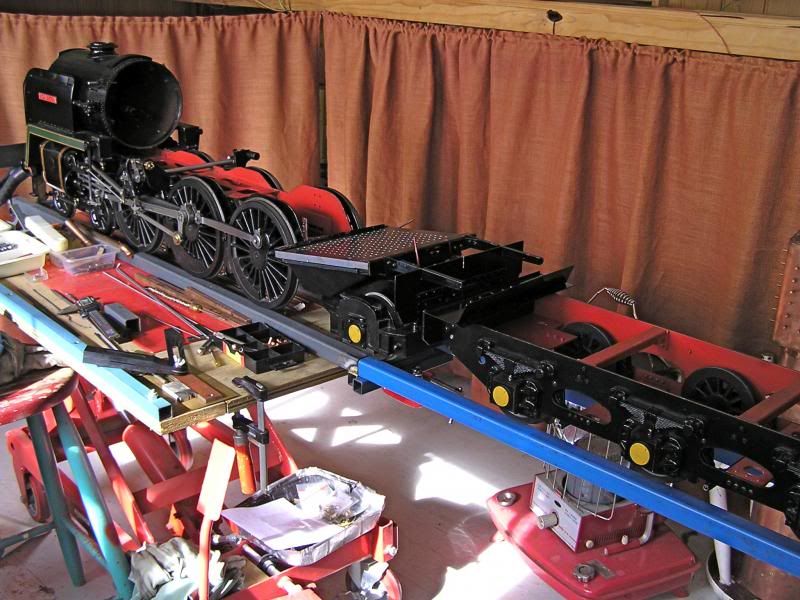 |
|
|
|
Post by Deleted on Apr 22, 2014 13:12:13 GMT
wow.. she looks great Jim.. I'm looking forward to seeing her completed boiler sitting on her frames too...  Pete |
|
|
|
Post by Jim on May 13, 2014 8:33:04 GMT
Thanks Pete and after today the sight of Boadicea's boiler completed may not be too far away. Feeling rather pleased as I silvered the crown stays into the fire box today using my new (for me) oxy-propane set up. The Sievert torch was used to preheat the job then the oxy-propane torch used to work along the rows of stay heads. I found some adjustment of the gasses was needed to get the temperature right but once that was sorted all went well. Once everything had cooled down and the boiler had been through the pickle barrel it was cleaned up for checking and all looked great until I discovered I'd missed a stay while two others could do with some attention too  . A job for tomorrow. Over the last couple of days it's struck me that the boiler is getting pretty heavy so I popped it on the scales to discover it now weighs 20kgs or 44lb in the old money. No wonder my back aches. All in all though I'm happy with the result. Time for a soothing ale I think.   Jim |
|
|
|
Post by ejparrott on May 13, 2014 9:02:19 GMT
you southeners....a soothing ale??? I've only just got up...don't tease me!! Work in 4 hours!
|
|
uuu
Elder Statesman
   your message here...
Posts: 2,864
|
Post by uuu on May 13, 2014 18:39:11 GMT
My wife has just left her wine glass unguarded. The bottle is empty. Do you think she'll notice if I take quick swig?
|
|
uuu
Elder Statesman
   your message here...
Posts: 2,864
|
Post by uuu on May 13, 2014 18:46:01 GMT
"We got through that a bit quickly"
I may just have got away with it.
|
|
|
|
Post by Jim on May 13, 2014 23:47:04 GMT
My wife has just left her wine glass unguarded. The bottle is empty. Do you think she'll notice if I take quick swig? Go for it uuu, wine is a useful item of workshop equipment. It smooths out score marks, improves painting efforts, frees up binding connecting rods and solves difficult problems without even having to think about them.  Sadly though neither it nor soothing ales will fix the stay I missed.  |
|
Geoff
Hi-poster
 
Posts: 171 
|
Post by Geoff on May 14, 2014 6:07:14 GMT
My wife has just left her wine glass unguarded. The bottle is empty. Do you think she'll notice if I take quick swig? De-cant half of it back into the bottle and pour yourself the dregs once she gets back. Forget this "swig" b------t. |
|
|
|
Post by Jim on May 16, 2014 7:28:10 GMT
More progress with the boiler today when I rebrazed the missed stay and attended to two other stays that I felt the silver had not flowed through as it should have. After everything had cooled down and the firebox end had been through the pickle bath I rechecked all the stays with a dental mirror and a very bright light to be sure that all stay joints were sound.
Tomorrow I'll re work the stay hole countersinks on the sides of fire box before brazing the next lot of side stays in.
For some reason the oxy propane didn't work as it had the day before so I reverted to the more familiar oxy actylene with no problems.
Jim
|
|
|
|
Post by Jim on May 18, 2014 6:52:13 GMT
Just a quick progress report to say I silver brazed the stays into the inside of one side of the fire box which marks the halfway point.
I'm still finding my way with the oxy propane in terms gas settings and determining the "hot point" in the flame. Today it went very well. I did the pre heating with the standard propane torch then the used the oxy propane torch with a higher oxygen flow and the inner cone about 1/2" to 3/4" from the head of the stay. The silver didn't spread out from the stay but clearly went through the joint as could be seen by shining a torch into the water cavity. I must say I now prefer the oxy propane to oxy acetylene. It produces the heat required for the job without the pin point intensity of acetylene.
For a test I bronze brazed an off cut of copper tube into an off cut of 2.5mm copper. The oxy propane created a nice fillet round the tube without any damage. I'm fairly sure the same test with acetylene would have damaged the tube or even burnt a hole in it.
I'd be interested to hear what other oxy propane users have found.
Jim
|
|
uuu
Elder Statesman
   your message here...
Posts: 2,864
|
Post by uuu on May 18, 2014 9:23:45 GMT
I've not had my hands on the torch myself - but we seem to be doing a lot of old boiler repairs at the Pump House at the moment. So we're silver-soldering individual joints, or caulking up small leaks with soft solder, trying not to disturb any other parts. In John's hands the oxy-propane seems to be just the right thing.
Wilf
|
|