jma1009
Elder Statesman
  
Posts: 5,922
|
Post by jma1009 on May 25, 2014 22:22:40 GMT
dont worry, jim, family time is far more important! we look forward to further excellent progress in 10 days time!
one of my earliest memories is my late Grandpa taking my brother and i to the old clapham museum - we ate our packed lunches my Grandma had made for us alongside BOXHILL... my Grandpa has a lot to answer for!
cheers,
julian
|
|
|
|
Post by Jim on Jul 14, 2014 5:28:09 GMT
It's taken longer than I expected to get back to the boiler but today was lovely and sunny, if cold so I decided to start on the tails of the crown stays. With everything cleaned up a brick shield was made up to contain the heat and work started on getting things warmed and hot with the big Sievert. When things looked right the oxy-propane was lit and with the Sievert in one hand keeping the heat up the oxy-propane was used to work along each stay tail at a time. I find the first tail seems to take forever for the silver to flow but from then on each neighbouring stay flows almost as the flame hits it. Once cool the boiler will go back in the citric acid for a clean up and check. 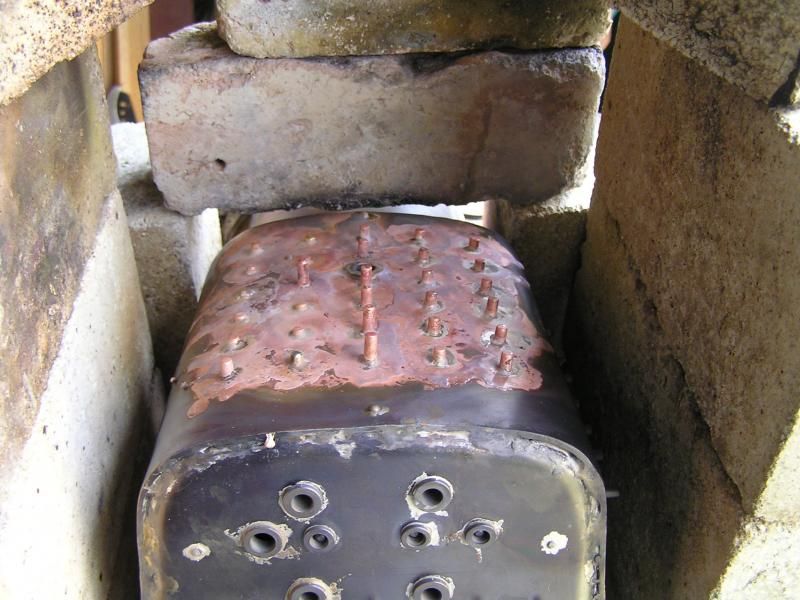 There's not a lot more to go now, with just the stay tails on the fire box sides and backhead along with the remaining two sides of the foundation ring, then it will be checking for leaks.  Jim |
|
|
|
Post by Roger on Jul 14, 2014 6:54:30 GMT
Lovely job Jim, that looks very sound indeed.
|
|
|
|
Post by Jim on Jul 14, 2014 8:10:43 GMT
Thanks Roger. I've now had the boiler through the citric acid to clean it up and the joints are all good which is great relief as I don't like having to go back and redo things. The boiler now tips the scales as 21 kgs and soaks up a huge amount of heat which is why I use the oxy-propane which I'm finding ideal for the task. I still prefer lathe work to boiler making though.  Jim |
|
|
|
Post by Roger on Jul 14, 2014 8:34:37 GMT
I have to say that I'm looking towards the boiler making with some trepidation, it's not something I'm that comfortable with. That's a massive boiler, no wonder it takes a lot of heating up.
|
|
|
|
Post by Deleted on Jul 14, 2014 10:19:27 GMT
I have to say that I'm looking towards the boiler making with some trepidation, it's not something I'm that comfortable with. That's a massive boiler, no wonder it takes a lot of heating up. You and me both Roger.......lovely work Jim...not long before the hydraulic test....exciting times....  Pete |
|
|
|
Post by Jim on Jul 14, 2014 10:20:10 GMT
Hi Roger and Pete,
I can fully understand your sense of trepidation but have no fear, if I can do it..well nearly do it, I've still got a bit more to do, then you should have no worries.
You're not wrong either about the Britannia's boiler being big. My back is feeling the strain as I get it out of the pickle barrel with it half full of citric acid.
But after a nervous and anxious start things are working well especially now I have an affordable and adequate heat source.
Jim
|
|
|
|
Post by Jim on Jul 21, 2014 4:09:26 GMT
Well today was an ideal boiler making winter's day, clear sky, bright sunshine and no wind so I had no excuse, not that I really wanted one as the last two heat ups have gone without any problems and as I imagined they should. The first photo shows the side of the fire box, stays all fluxed, silver solder rings in place and in a heat containing 'cave', an idea I borrowed from Julian having carefully noted his excellent photos of his boiler build. 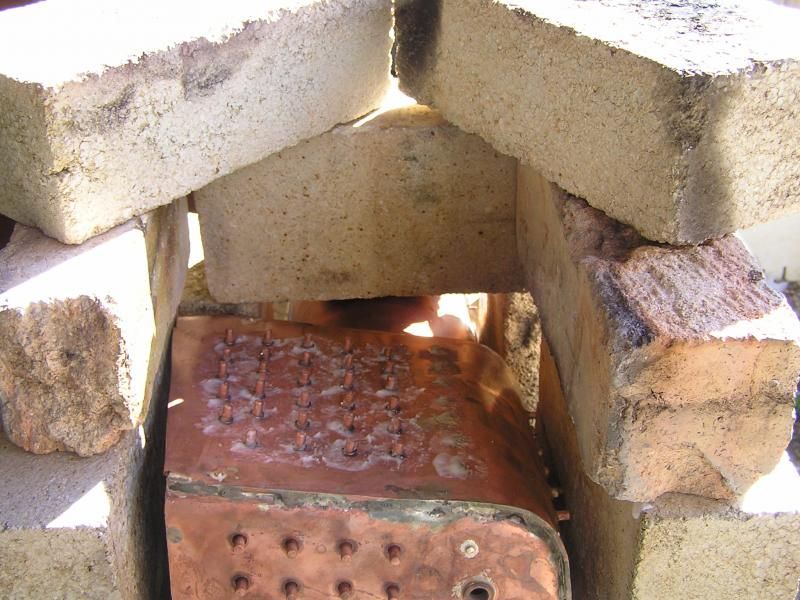 The next photo shows the big Sievert torch used for getting everything as hot as possible and the oxy-propane torch concentrating heat to bring the first of the stays up to the point where the silver ring melts and flows. 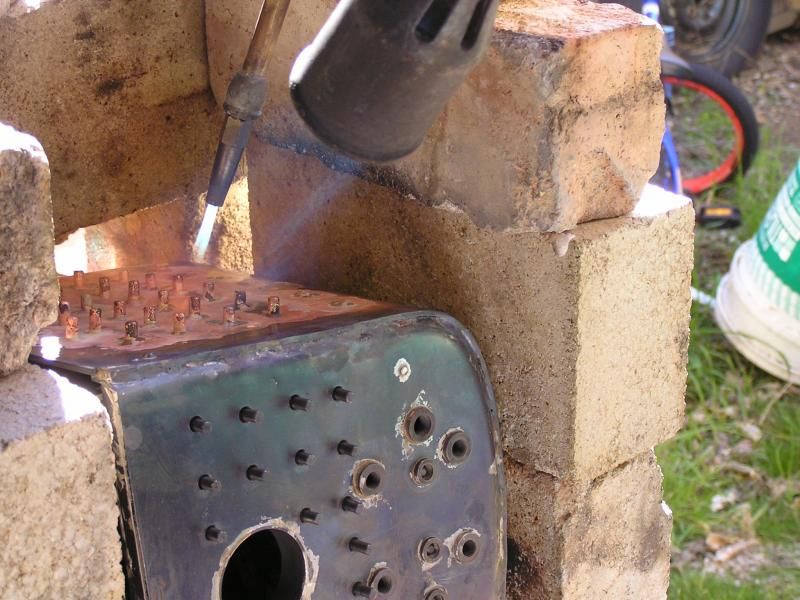 The oxy-propane has now got things well and truly hot and all that's required is to move from stay to stay with the oxy-propane as the heat flows on to the adjacent stay. 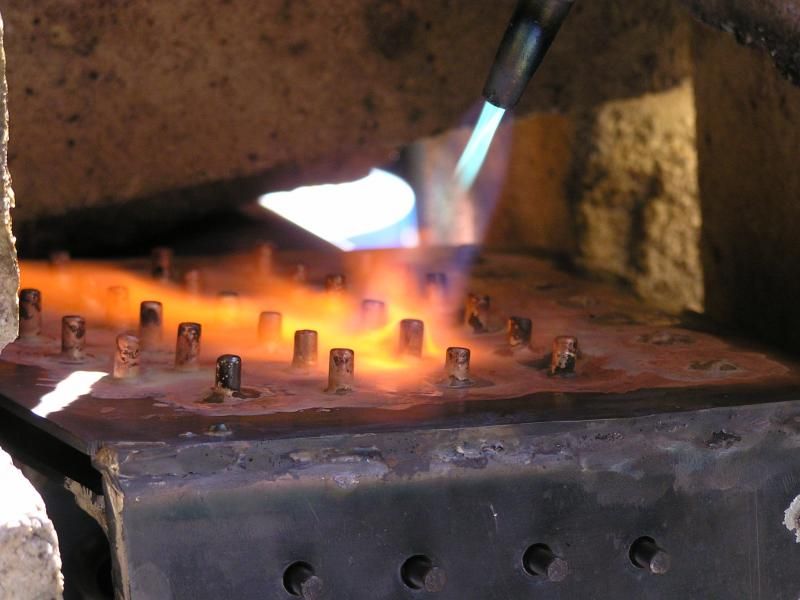 The final photo shows the fire bricks removed and the job getting a check to ensure no stays have been missed, something that's easy to do in the heat of the moment (groan) 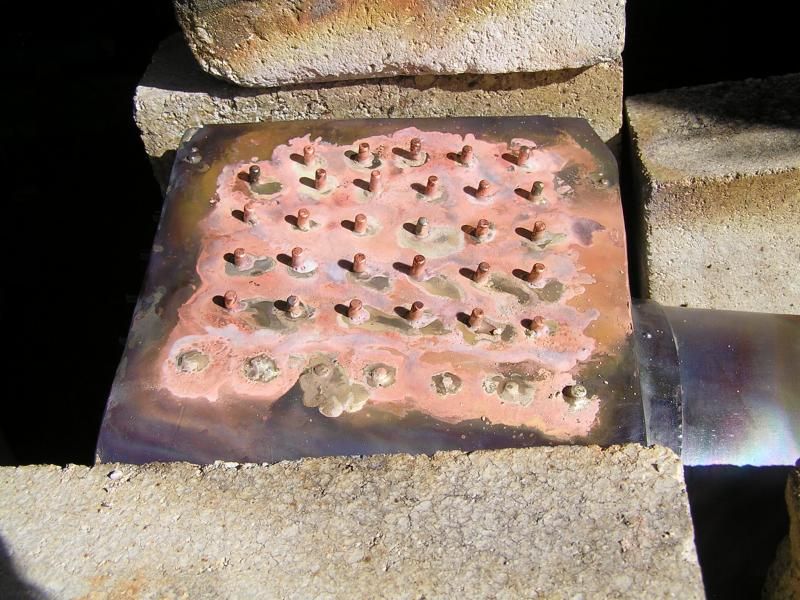 After the job had cooled I returned it to the pickle for a clean up, inspection and to get ready to do the other side. Happily all was good with full penetration round the stays. I find one of those led lamps you strap on your head for hands free work brilliant for looking into the dark innards of the boiler. It's been a good morning's work and another step closer to completing become a weight lifting exercise. Jim |
|
|
|
Post by runner42 on Jul 21, 2014 4:53:07 GMT
Hi Jim,
good job, well done. You are nearly there. That's a good demonstration on the performance of the oxy-propane set up you recently acquired.
Brian.
|
|
|
|
Post by Deleted on Jul 21, 2014 6:23:11 GMT
Very nice Jim, I love all these boiler building threads, the more I read the less I worry about trying it!
Keep it up!
Cheers
Ben
|
|
|
|
Post by Roger on Jul 21, 2014 7:17:53 GMT
I'll second that, it really helps to see it step by step and how it should look, especially the setup and how to keep the heat where you need it.
|
|
|
|
Post by Jim on Jul 21, 2014 7:47:11 GMT
Thanks Pete, Ben and Roger, I must say I'm happy that at last I'm coming to the end of the project and as is always the case things start to fall into place just as you turn into the home run.
I have said a couple of times the oxy-propane apart from the attractive operating costs has much more the feel of the standard air propane torch we all know, except that it really pumps out the heat to a fairly small area so that as you work on one stay the neighbouring stay is almost there ready for you to move the torch over it.
Jim
|
|
jma1009
Elder Statesman
  
Posts: 5,922
|
Post by jma1009 on Jul 21, 2014 8:58:56 GMT
excellent Jim!
as you say not much left to do! just the exterior of the backhead stays and foundation ring left?
as you know i do both ends of the stays at the same time.
ive never used citric acid having still a supply of sulphuric acid - and shifting the boiler into the pickle when at black heat is sometimes very awkward.
cheers,
julian
|
|
|
|
Post by Jim on Jul 21, 2014 10:23:33 GMT
Thanks Julian and as you say not much more to do now. One of the interesting things that comes from these various boiler builds is the different ways there are of tackling any given task. You do both ends of the stays at the same time. My boiler inspector does all the inner firebox stays in one hit then after cleaning, up does all the outside stays ends in one go. Always imagining the worst that can happen I tend to do thing in small steps. In the end the job is done though in my case a bit slower than most.  I can imagine the awkward time you'd have getting a black heat boiler into the sulphuric acid. Jim. |
|
|
|
Post by Doug on Jul 21, 2014 14:12:26 GMT
nice work Jim i like the setup and glad to see it works ok i was thinking something along the same lines myself (big burner for background heat and welding torch for local quick warmups to finish it off)  |
|
|
|
Post by Jim on Jul 29, 2014 1:46:31 GMT
At present I'm waiting for some silver brazing rods to come so I can complete brazing in the remaining two sides of the foundation ring to hopefully complete the boiler. To keep me out of out of harms way while waiting, I've set to work on the driving trolley so at least it's ready for the big day in the future when Boadicea moves under her own steam, which is another reason why I can't fall off the perch just yet.  I'm working to a set of plans by Ross Bishop and published in Nos 38,39,40 of AME some years back. The art work I've come up with is based on a photo of an Eastern Region CCT, (bogies hidden from prying eyes under the safety skirts) which should fit in with my 2 BR Mk 1 coaches. My son says I need a set of at least 6, to which I've said, "go for it son!"  The first shows the proposed GA of the planned trolley.  The second photo is of the wheel sets and two cross tie rods with the full sized schematic for the side frames. As it turned out for the first time in history the 8 wheels I bought on spec 4 years ago turned out to be exactly right for the trolley. Murphy must have been sleeping that day.  Jim |
|
|
|
Post by Shawki Shlemon on Jul 30, 2014 10:28:24 GMT
Jim , I understand that you bought these wheels , just for information I am not criticising , my question is are the flanges machined to or close to AALS standards ? To me they look wright angle flanges , may be is the photo .
|
|
|
|
Post by Jim on Jul 30, 2014 10:44:05 GMT
Nice to hear from you Shawki. Looking at the photos they do look to be right angled flanges but in fact they are correctly profiled. I got them from DNC Systems at the Melbourne Model Engineering Exhibition from memory, three years back and while they were the wrong diameter for the carriage I wanted to build they were just right for this project...you can be lucky.  Jim. Edit: I've just been out to the workshop to check the wheels against the latest AALS set of standards Shawki and they certainly conform in fact I'd say they are 'spot on' |
|
|
|
Post by Shawki Shlemon on Jul 31, 2014 10:33:50 GMT
Thanks Jim , sorry for the the question , the picture looked like that , DNC ( IAN ) would only supply the correct parts as far as I know , he is a member of our club and to me he seem to be a genuine person . I am happy with my dealings with him in the past .
|
|
|
|
Post by Jim on Aug 4, 2014 8:56:46 GMT
It was a lovely still and sunny winter's day today and ideal for redoing two stays I wasn't happy with along with a pinhole that had appeared in the silver brazing round the fire hole ring. With some new silver solder rings fitted to the 2 stays and with the areas to be worked carefully fluxed work started on the heat up with the big Sievert. Once things were really hot a switch was made to the oxy-propane and as the silver started to flow the torch was moved to each stay in turn before moving to the fire hole ring. A very careful check and with all looking good the job was left to cool till it could be handled for putting in the pickle barrel. The 'pickle' is made from Citric acid bought in 125g containers at the local super market. I mix it in a water filled plastic bin until the water tastes 'lemony' very scientific I know but it works  At 21kgs getting the boiler in and out of the bin is a strain. 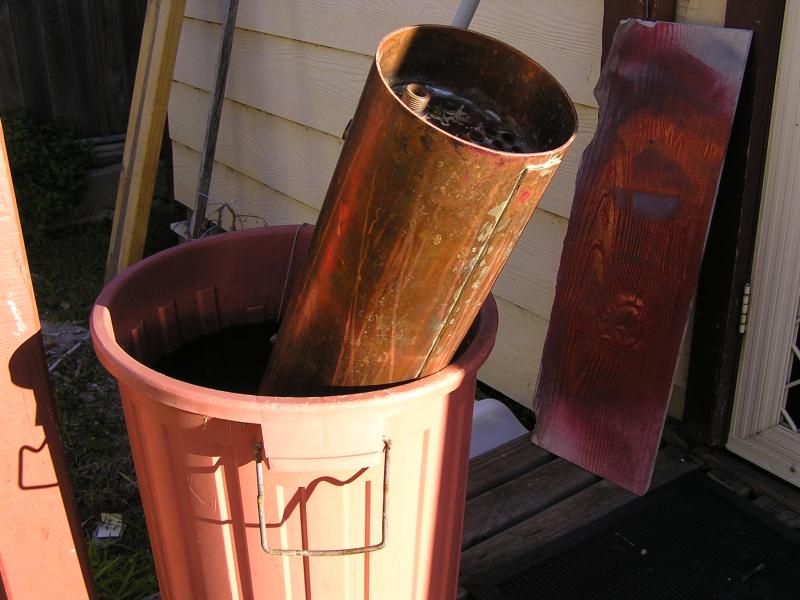 While I had the torches out I also brazed the bolsters to the tie bars for the driving trolley's bogies. Once they were clean and dry a coat of Kill Rust made them look a bit brighter. The 2 small holes were used to check that everything was centered and will be opened out later for the pivot pin. 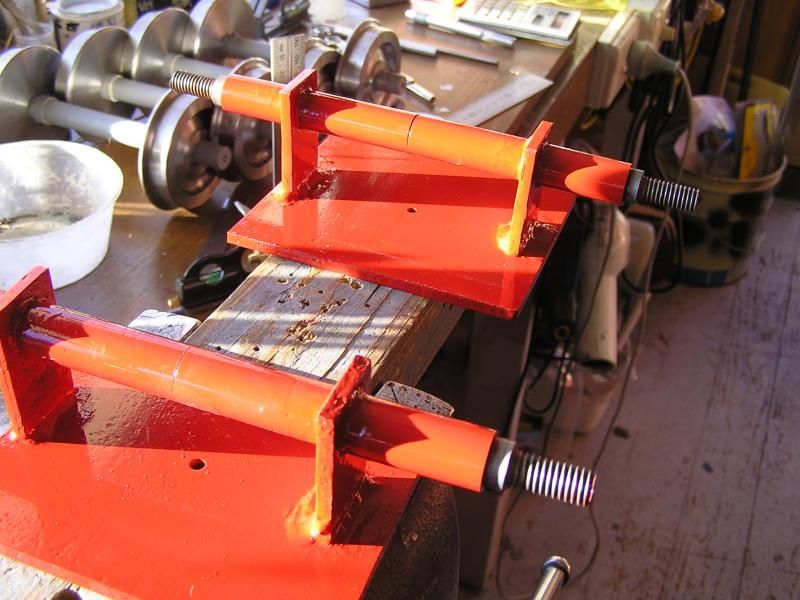 Now I reckon it's time for a soothing ale and some crisps by the fire.  Jim |
|