44767
Statesman
 
Posts: 538
|
Post by 44767 on Feb 2, 2014 12:03:44 GMT
Do both! That's the answer. I shall, however, concentrate on the tank version as four have already been accounted for. It should be a relatively easy thing to do later on. The tenders have been done by others and other than that the tanks go and a different cab without the bunker. Sure, some of the stretchers are different and the reverser operating mechanism is like the class 4 mogul, the class 5,6,7 and 9. Anyway, watch this space but in the mean time I ought to get back to describing the build. Actually, little has happened since Christmas as I have been in China with work. The last of the blastpipes arrived the day before I was due to go to China. Two parcels were sent at the same time; one arrived on Christmas Eve but the other not until the first week in January! I still managed to get them machined though. I did take some works drawings with me but only managed to get the top feed clackbox model done. These are available elsewhere already but I wanted to have it drawn up anyway. Perhaps I'll look at a different way of machining them later. At the moment I am working on a press tool to "roll" the smokebox saddle. One was done as a sample by the sheetmetal engineers but it had kinks where the square cutout had influenced the curve and as usual when rolling, the ends suffered from underbend. By experiment with a narrow strip of the material, I found a diameter suitable for forming the correct radius allowing for spring back. I am making the tool with a stripper which will tightly hold the centre along its length with heavy springs. This will slightly overlap the square hole so the subsequent forming should not be affected by the hole. Also, to deal with the ends the outer 20mm or so of the tool's sides is at a smaller radius which I have just guessed at when comparing the true radius with the test piece. Now, I guess, the curve required is probably and ellipse or parabola but I chose the old tech drawing way of approximating an elipse to make the [manual] programming of the CNC easier. This is the sort of tool but it will fit in a very small old die set.  I'm waiting for some material so if I get it I may be able to get it all machined before I go back to China on Thursday. |
|
|
|
Post by Deleted on Feb 3, 2014 0:12:19 GMT
I really don't know why you would want to go to so much trouble! I rolled the saddle plate for my 4MT with no difficulty. Just two things to be aware of: allow an extra couple of inches of material at each end before rolling, and don't cut any holes in the plate until you've rolled it (rivet holes are fine, but no large apertures).
|
|
44767
Statesman
 
Posts: 538
|
Post by 44767 on Feb 3, 2014 2:02:55 GMT
I really don't know why you would want to go to so much trouble! I rolled the saddle plate for my 4MT with no difficulty. Just two things to be aware of: allow an extra couple of inches of material at each end before rolling, and don't cut any holes in the plate until you've rolled it (rivet holes are fine, but no large apertures). That would be because the plates have all been laser cut to size and include the large hole in the middle for the blastpipe and that I have at least ten of them to do. Also I like to try something which I haven't done before so making up a press tool will get another thing ticked off the list-of-things-to-do. |
|
|
|
Post by Donald G on Feb 4, 2014 10:23:53 GMT
I am currently building a Class 2 Tank in 5". It is mentioned above about the extra mass of the tender. Please remember that the tank loco is quite a lot longer than the chassis of a tender loco and also much more to the point is the length and weight. My loco is around 43 1/2 " long and getting rather heavy already and that is with cab/bunker , boiler and smokebox. I have not yet got round to building sidetanks and making all the fittings and pipework..
Donald
|
|
44767
Statesman
 
Posts: 538
|
Post by 44767 on Apr 15, 2014 13:31:42 GMT
I'm home for a short while so I spent time making the form tool I mentioned earlier. It was an interesting exercise and it works very well. 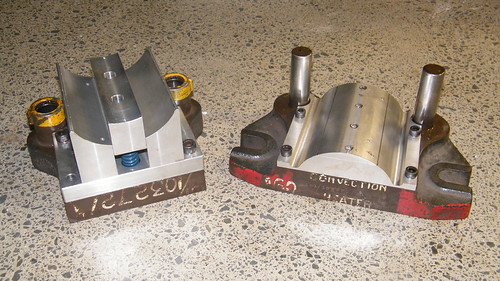 The main reason for going this way was to avoid the kinks that would be put in when rolled as the plates were already laser cut to size. As you can see here it gives a very smooth curve. 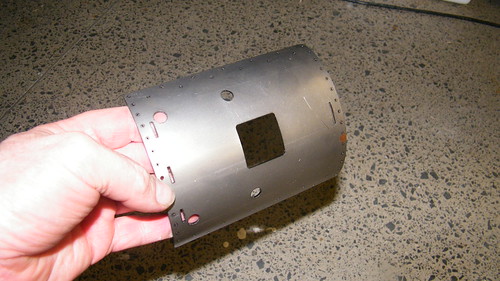 And the fit is close enough: 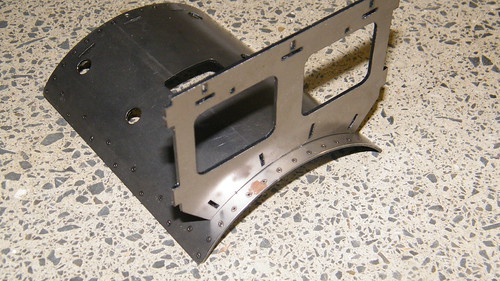 Now these are ready I'll be able to solder the saddle fabrications and get them on the mill for machining. Unfortunately, I'm off to China again shortly so more computer work is on the horizon. Mike |
|
|
|
Post by Deleted on Apr 15, 2014 14:39:54 GMT
very nice Mike...love the jig and it certainly does the job it's designed for.....clever stuff sir..
Pete
|
|
|
|
Post by Deleted on Apr 15, 2014 17:45:06 GMT
|
|
|
|
Post by Roger on Apr 15, 2014 19:24:27 GMT
I take my hat off you you Mike, that's a great tool and superb result. I take it that you're a tool designer, that's not something you just dream up and make on the off chance it might work. How did you make the bottom piece?
|
|
bhk
Part of the e-furniture

Posts: 458 
|
Post by bhk on Apr 15, 2014 20:48:10 GMT
Looks great Mike
|
|
jma1009
Elder Statesman
  
Posts: 5,917
|
Post by jma1009 on Apr 15, 2014 20:58:16 GMT
i am a bit bemused - did you say you were building 10 of these locos? is this a commercial venture?
cant myself understand why you would want one BR std loco when compared with a GWR loco let alone 10!!
very nice work though and very impressive!
cheers,
julian
|
|
jwkb23
Active Member
 
Posts: 18
|
Post by jwkb23 on Apr 15, 2014 21:05:08 GMT
Looks amazing so far !
|
|
|
|
Post by Jim on Apr 15, 2014 22:23:46 GMT
Superb work Mike. Way beyond me but inspirational stuff and a joy to look at.  Jim |
|
44767
Statesman
 
Posts: 538
|
Post by 44767 on Apr 16, 2014 6:05:43 GMT
I take my hat off you you Mike, that's a great tool and superb result. I take it that you're a tool designer, that's not something you just dream up and make on the off chance it might work. How did you make the bottom piece? Cheers, Roger. No I am not a designer; currently I am a machine builder working for a company which makes production lines for whiteware (appliances). I started there nearly nineteen years ago as a manual miller then soon after was trained on the CNC machines (ending up on a machine which had a machine envelope of 5002mm x 3002mm x ~2000mm and could take 35 tonnes on the table. Also it could do 5-face machining. Then I went to the buildshop, the design office doing checking and detail drawings and small design jobs and now am in the buildshop again where we build, commission export and reinstal our machinery. I actually didn't do an apprenticeship and got my job on the strength of a certificate in engineering, previous work experience and the passion I had for model engineering as a hobby. I concider my locomotive as my apprenticeship as I started it before I knew anything about engineering so any job like this press tool I do it for interest's sake. The bottom form tool was a simple 2D contour using a ballnose endmill but working in the Y-Z plane (G18). This means G2's and G3's create an arc using Y and Z movements and means that cutter compensation can be used to take the size of the tool into account. This simple tool path was then repeated with an incremental movement in X until the whole surface is done. There are only about 15 lines of code for the whole surface. Sorry for boring the rest of you but I know Roger has a little CNC and does brilliant work himself so if I can help I'd be happy to lend a hand. Mike |
|
44767
Statesman
 
Posts: 538
|
Post by 44767 on Apr 16, 2014 6:17:56 GMT
i am a bit bemused - did you say you were building 10 of these locos? is this a commercial venture? cant myself understand why you would want one BR std loco when compared with a GWR loco let alone 10!! very nice work though and very impressive! cheers, julian Julian, This all started when I set out to make one for myself. Then I found out that there was a trust building a full size example and I joined them as a life member. Since I can't help them at Bridgnorth every Monday, I said I would make a second model along side mine and donate it to the trust so they could auction or raffle it to earn funds. Then I thought that if I were making two I may as well make three more to sell to help fund the project. Two of those are already accounted for so I thought I'd make a few more. So yes, sort of commercial but I wouldn't want to be trying to make a living out of it! Making a batch of them means it is worthwhile making proper tooling and fixtures and spending time getting the drawings correct so anyone else can build it with confidence. If it makes you feel better this loco did use the GWR No 2 boiler with small modifications! Mike |
|
|
|
Post by Roger on Apr 16, 2014 6:19:58 GMT
Hi Mike,
In my opinion, self teaching is the best apprenticeship there is, and a never ending one at that. That's a beast of a machine you describe, a million miles away from what I have. I like the simple way you've generated that surface, that's one to remember. I could draw any complex profile on the Y-Z plane and then get the CAM to generate the increments as new depths. My control isn't smart enough to run loops, it relies on CAM to produce one big stream of G01s only. Still, it's an interesting method and cunning too.
My CNC backgound is from the Printed Circuit Board industry where you need to drill holes as quickly as possible. The CNC control I designed could drill three x 0.7mm holes per second through a 5mm stack of circuit boards on a 0.1" pitch all day long. The first time I saw a machine like that, I thought it was a punch, I'd never seen anything like it. They're much faster these days, with linear motors on all axes. Some machines double up as routers too, but it's all 2D and they use a motly selection of G-code based languages. I had to write interpreters for the 6 most common ones so anyone could use out machines.
Anyway, enough of that. It's interesting to hear what different worlds we've come from.
Roger
|
|
|
|
Post by Laurie_B on Apr 16, 2014 9:28:01 GMT
Excellent work Mike,and you make as many locos as you like!The 82045 project does seem to making very good progress.
|
|
44767
Statesman
 
Posts: 538
|
Post by 44767 on May 6, 2014 11:36:14 GMT
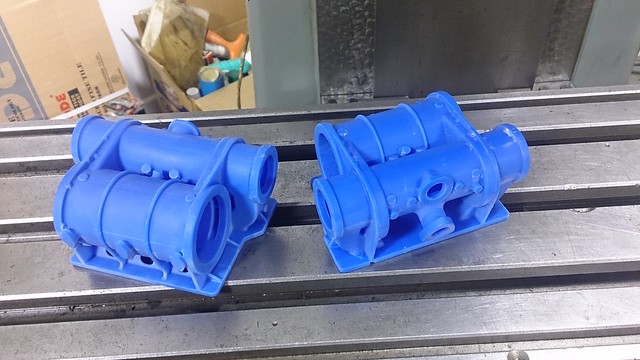
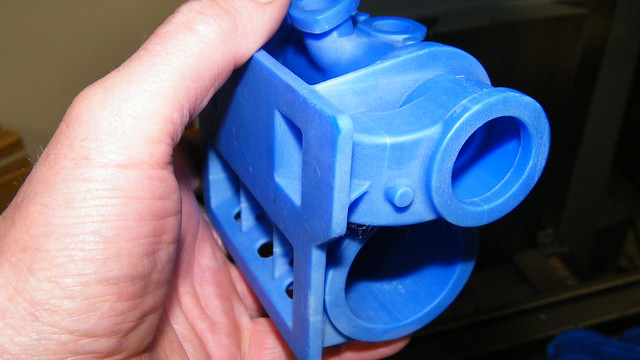
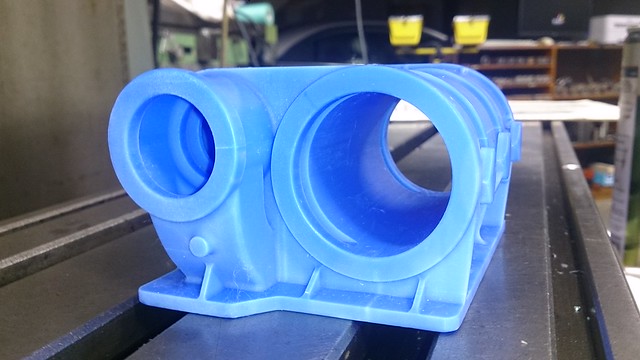
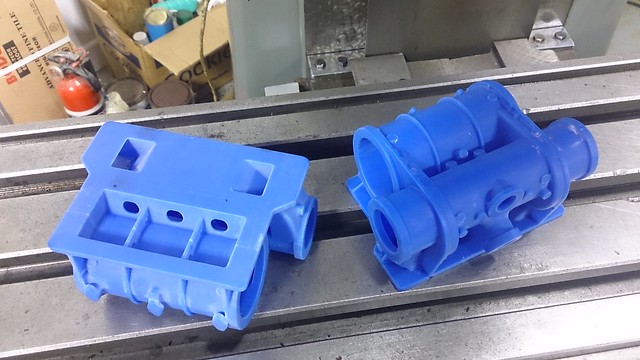
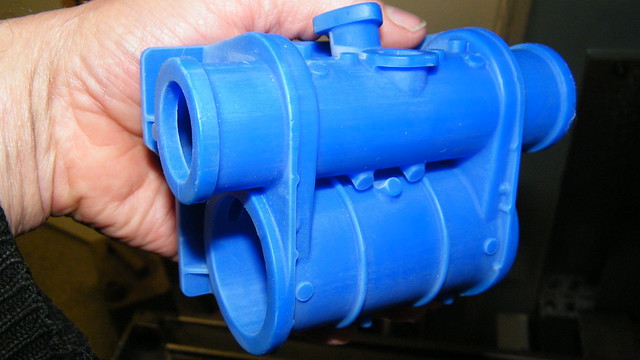
Well, here I am in China again and so I have a roll of drawings for the class 3 with me. I decided to do the cylinder clothing. While I have done it to the drawings I probably won't go to the degree of detail included here. For a start, there are over 100 fastenings on each side of the locomotive! They are all modelled in for the sake of the image. 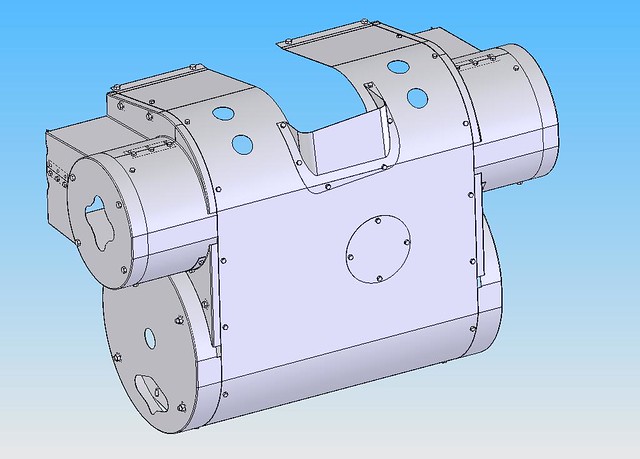 One reason I have done this now is as a means of checking the casting for the loco. By drawing the clothing and "assembling" it to the cylinder, end caps, valve guides etc. it is easy to see any error. In fact sometimes it can be a way of reverse engineering details on a part which has illegible dimensions on its drawing. The thickness of material will have to be changed as in full size the material is 1.6mm (16 gauge on the drawing) which works out at 0.14mm. This I feel will be too thin to withstand any bumps in service so I'll probably go with 0.25mm material or maybe 0.2mm. I am waiting on some waxes for my cylinders which are being printed as a sample. They should be done by the time I get home. Mike |
|
44767
Statesman
 
Posts: 538
|
Post by 44767 on Jun 2, 2014 13:11:51 GMT
Well, it seems I'm back home for a while this time so I have made a start on assembling all the smokebox saddles. There was a bit of clean up required to the laser-cut slots but it was actually less than I expected. The side plates though needed a bit more as the 1.6mm wide slots through 3mm material is not easy to do without a bit of slag left in the holes. Here's the batch with all the main components assembled now waiting for the gussets and the blastpipe flange bfore being welded/soldered together prior to machining. 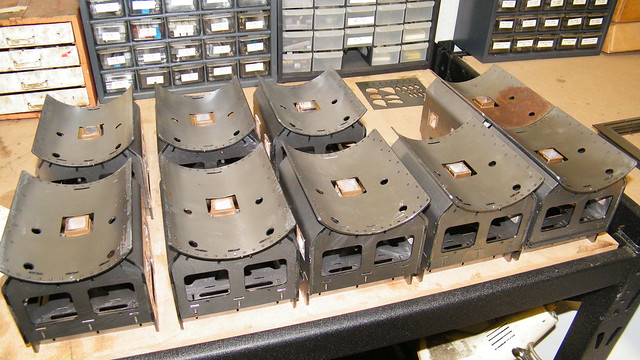 The rusty one is the original trial one which is good enough to use. I have ordered some dummy bolts which will be rivetted into the 52 holes around the saddle. They would normally hold the smokebox itself onto the saddle but there will be 4 hidden bolts holding it in place on the model. It's good to be back home! Mike |
|
44767
Statesman
 
Posts: 538
|
Post by 44767 on Jul 10, 2014 12:57:23 GMT
|
|
|
|
Post by ejparrott on Jul 10, 2014 15:21:03 GMT
Just check the expansion rates, you don't want the iron liners coming loose at heat
|
|


