Post by rrmrd66 on May 27, 2017 7:30:32 GMT
Good morning everyone.
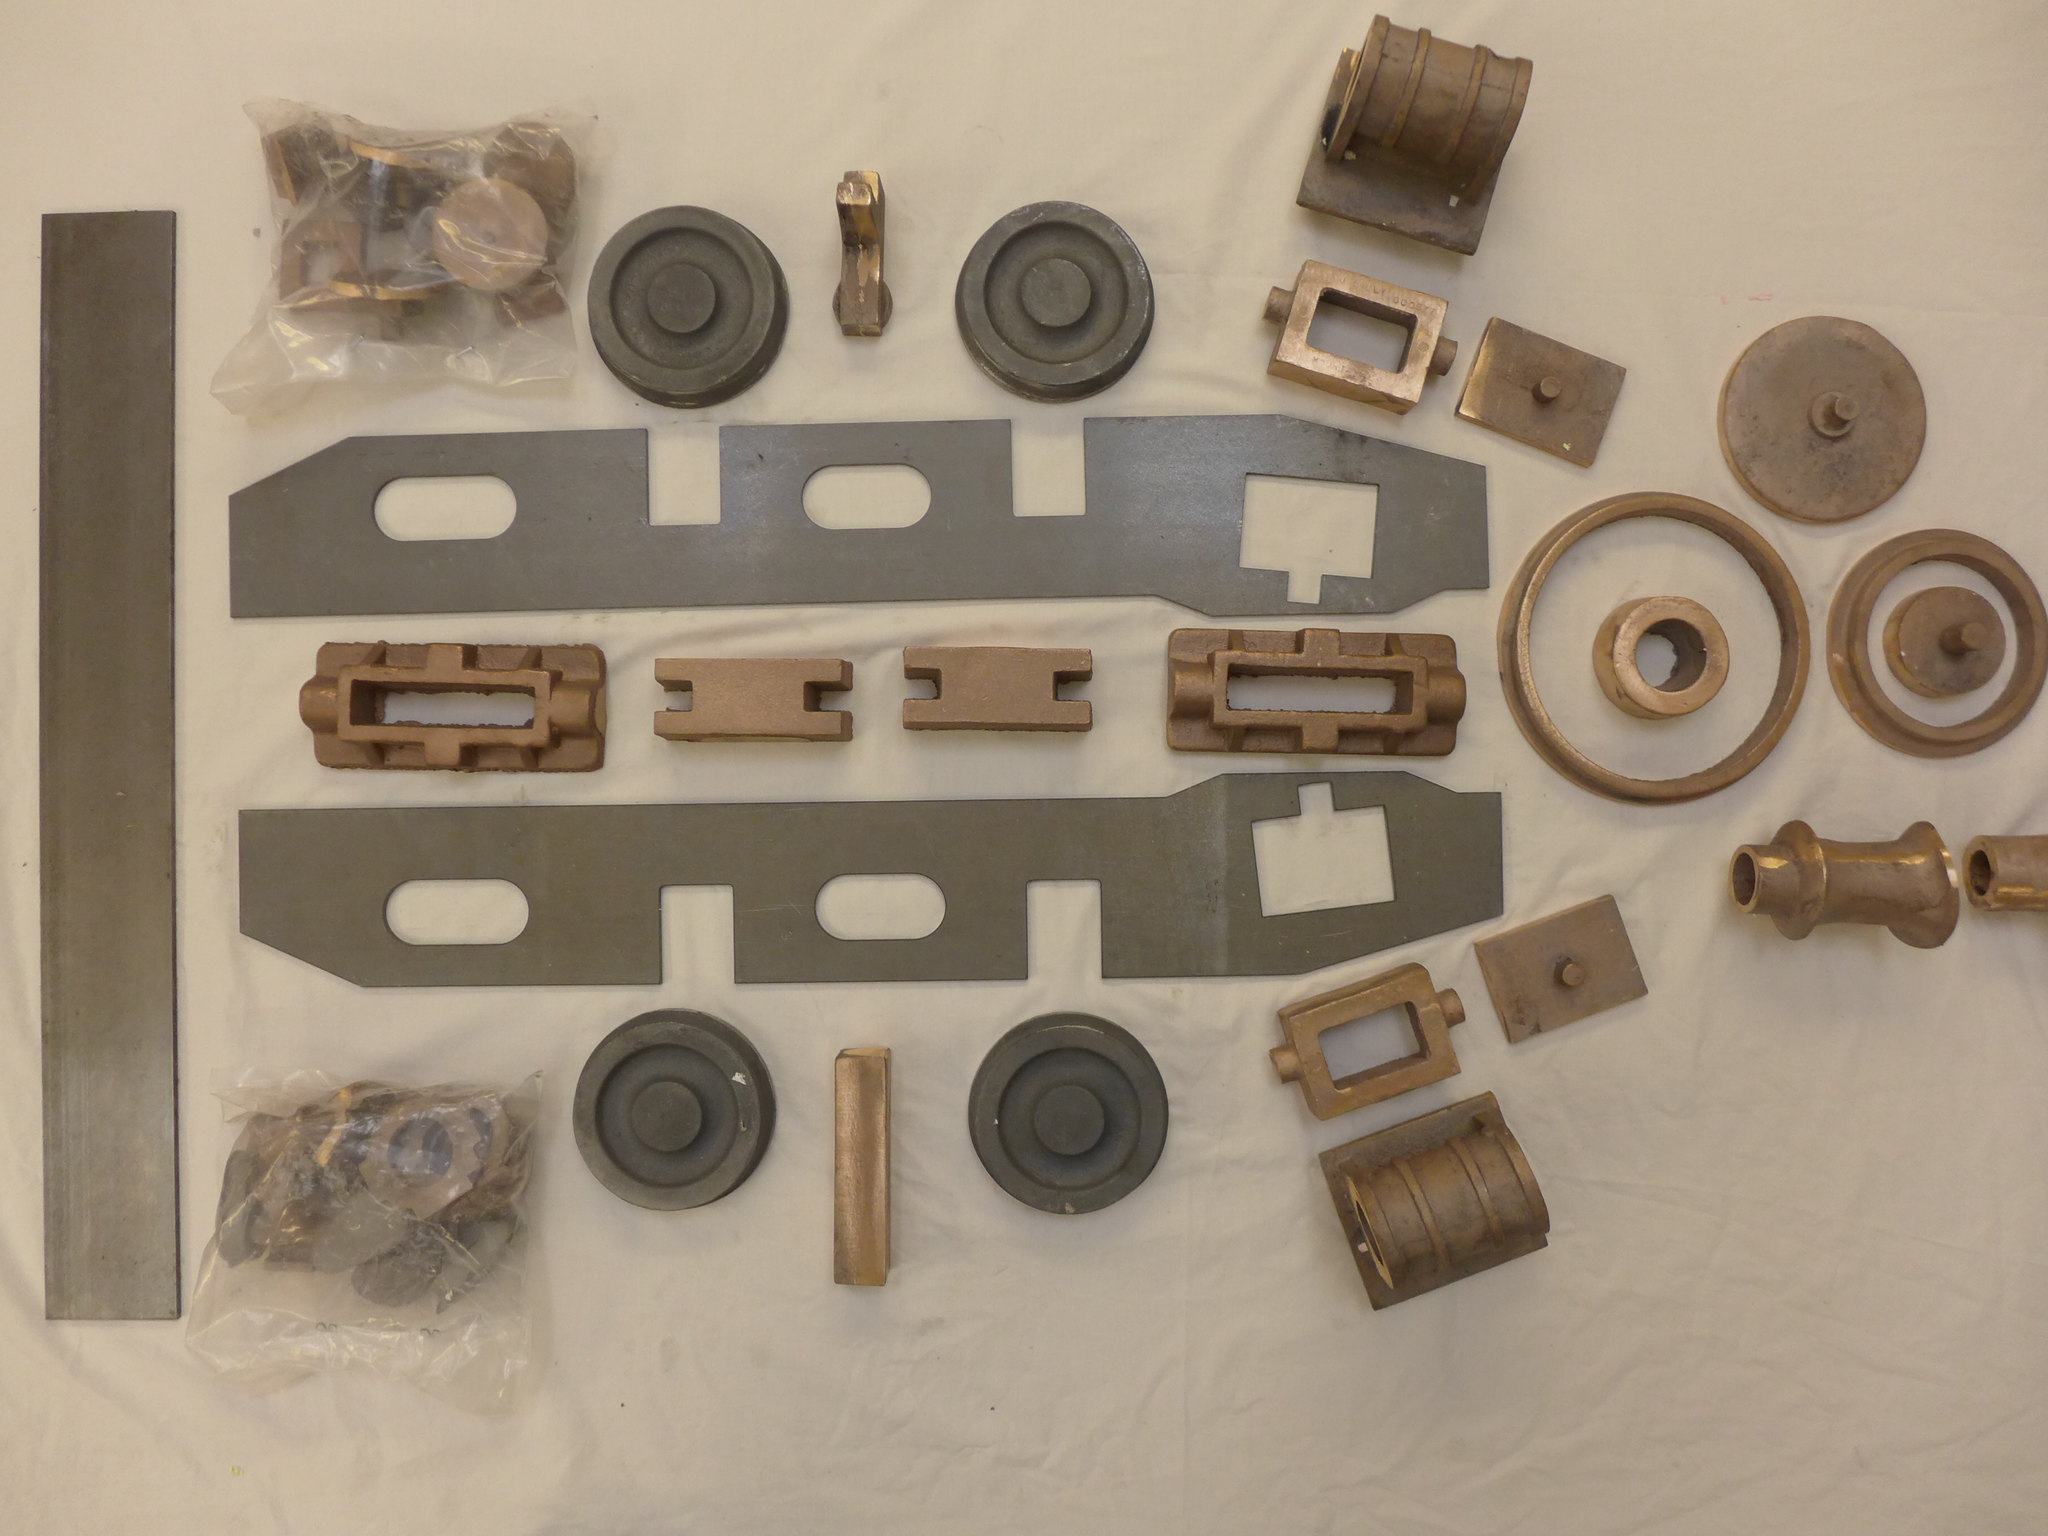
The Hunslet build continues at pace slower than I would have wished.
However there is progress to report.
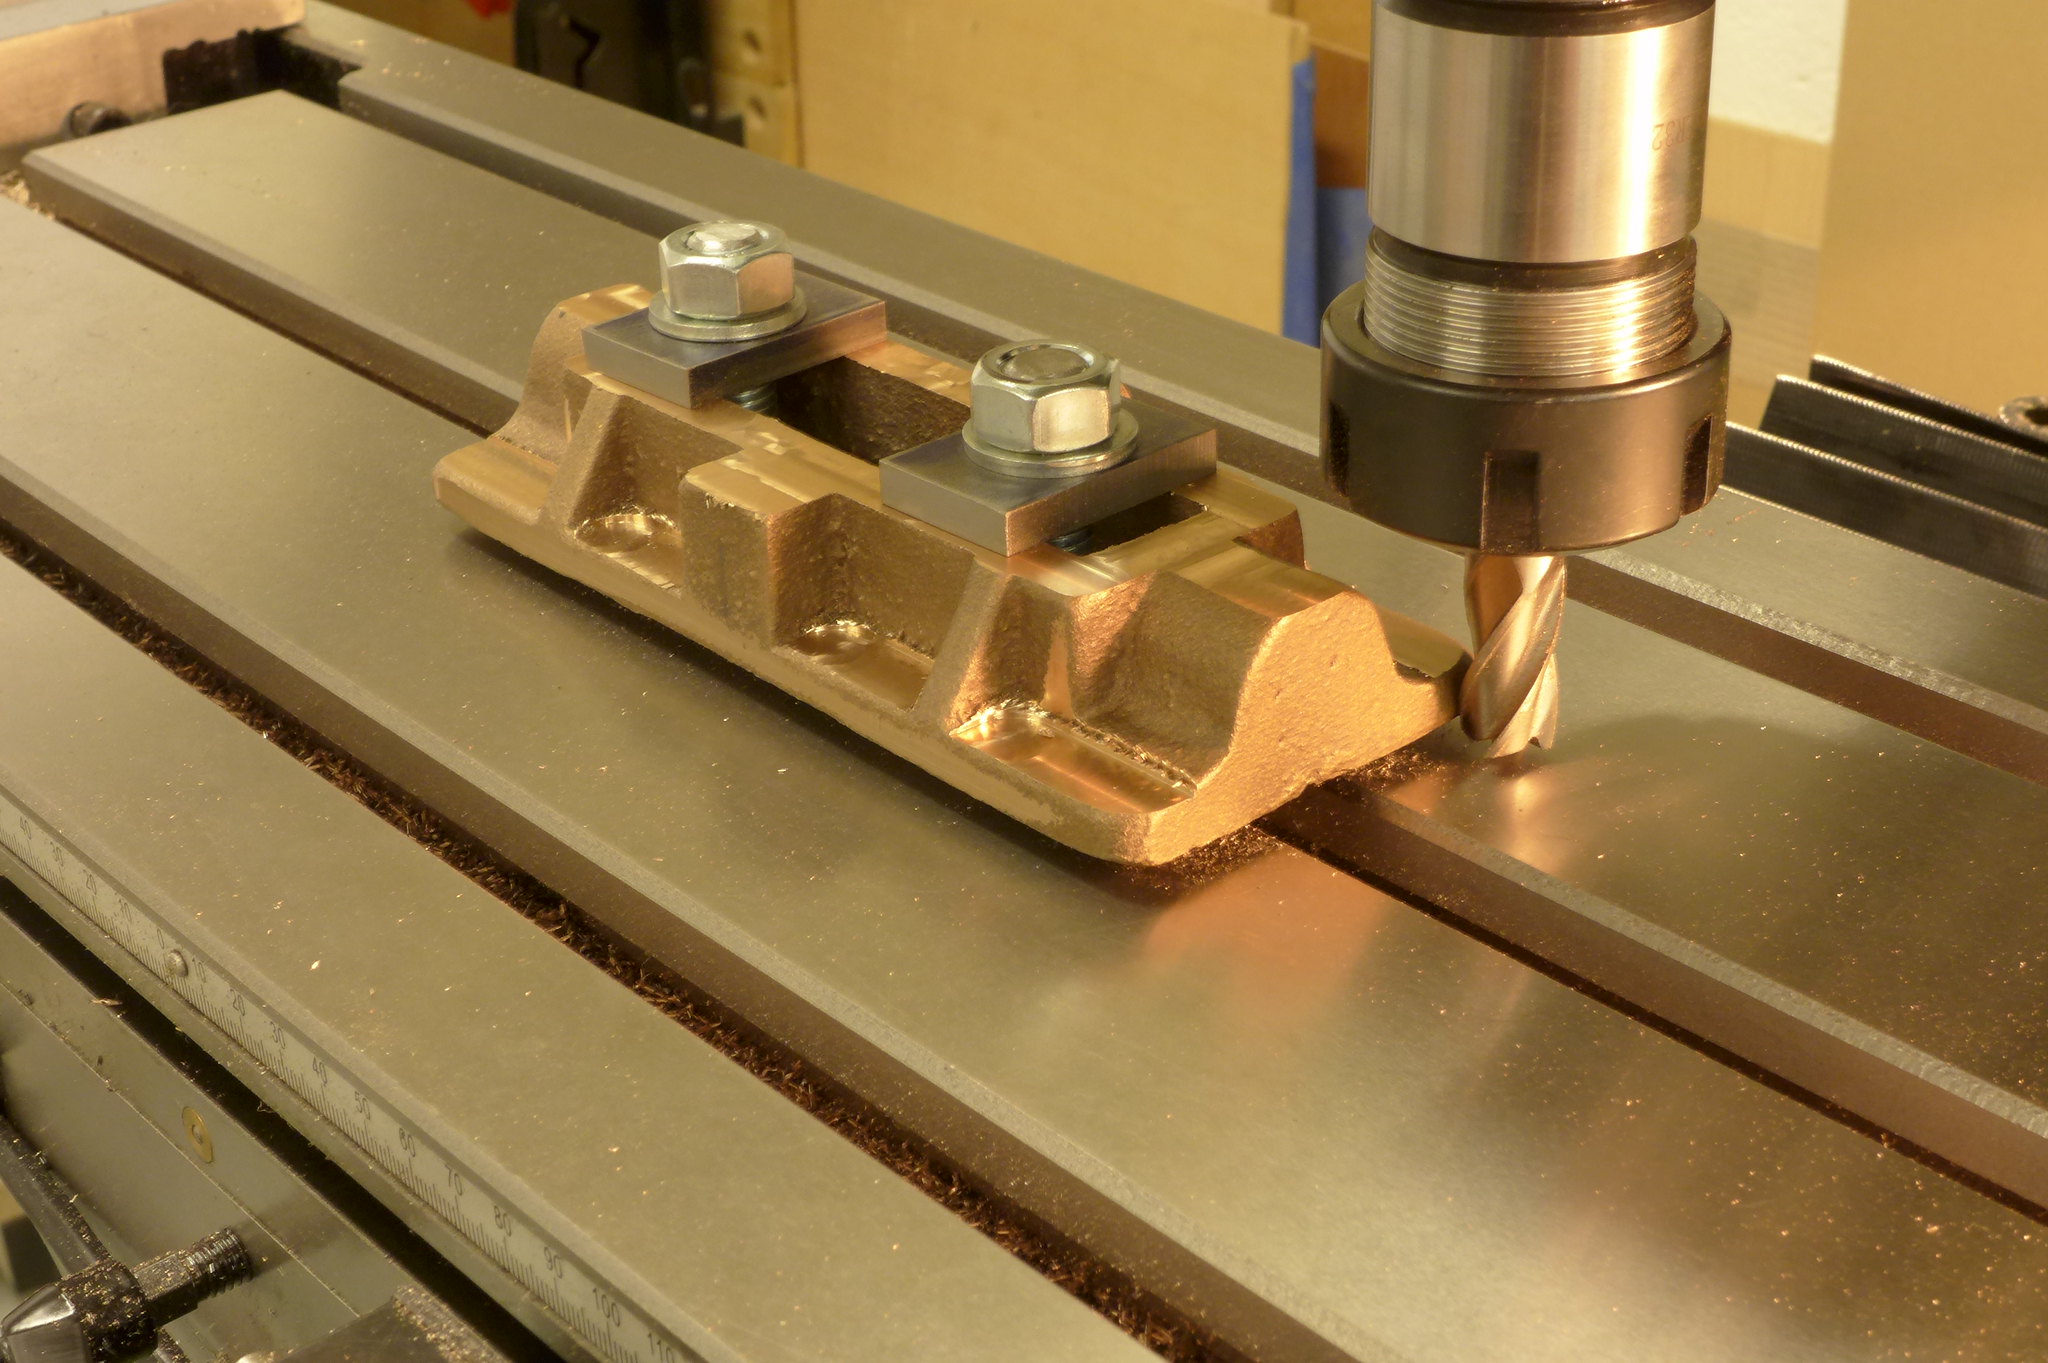
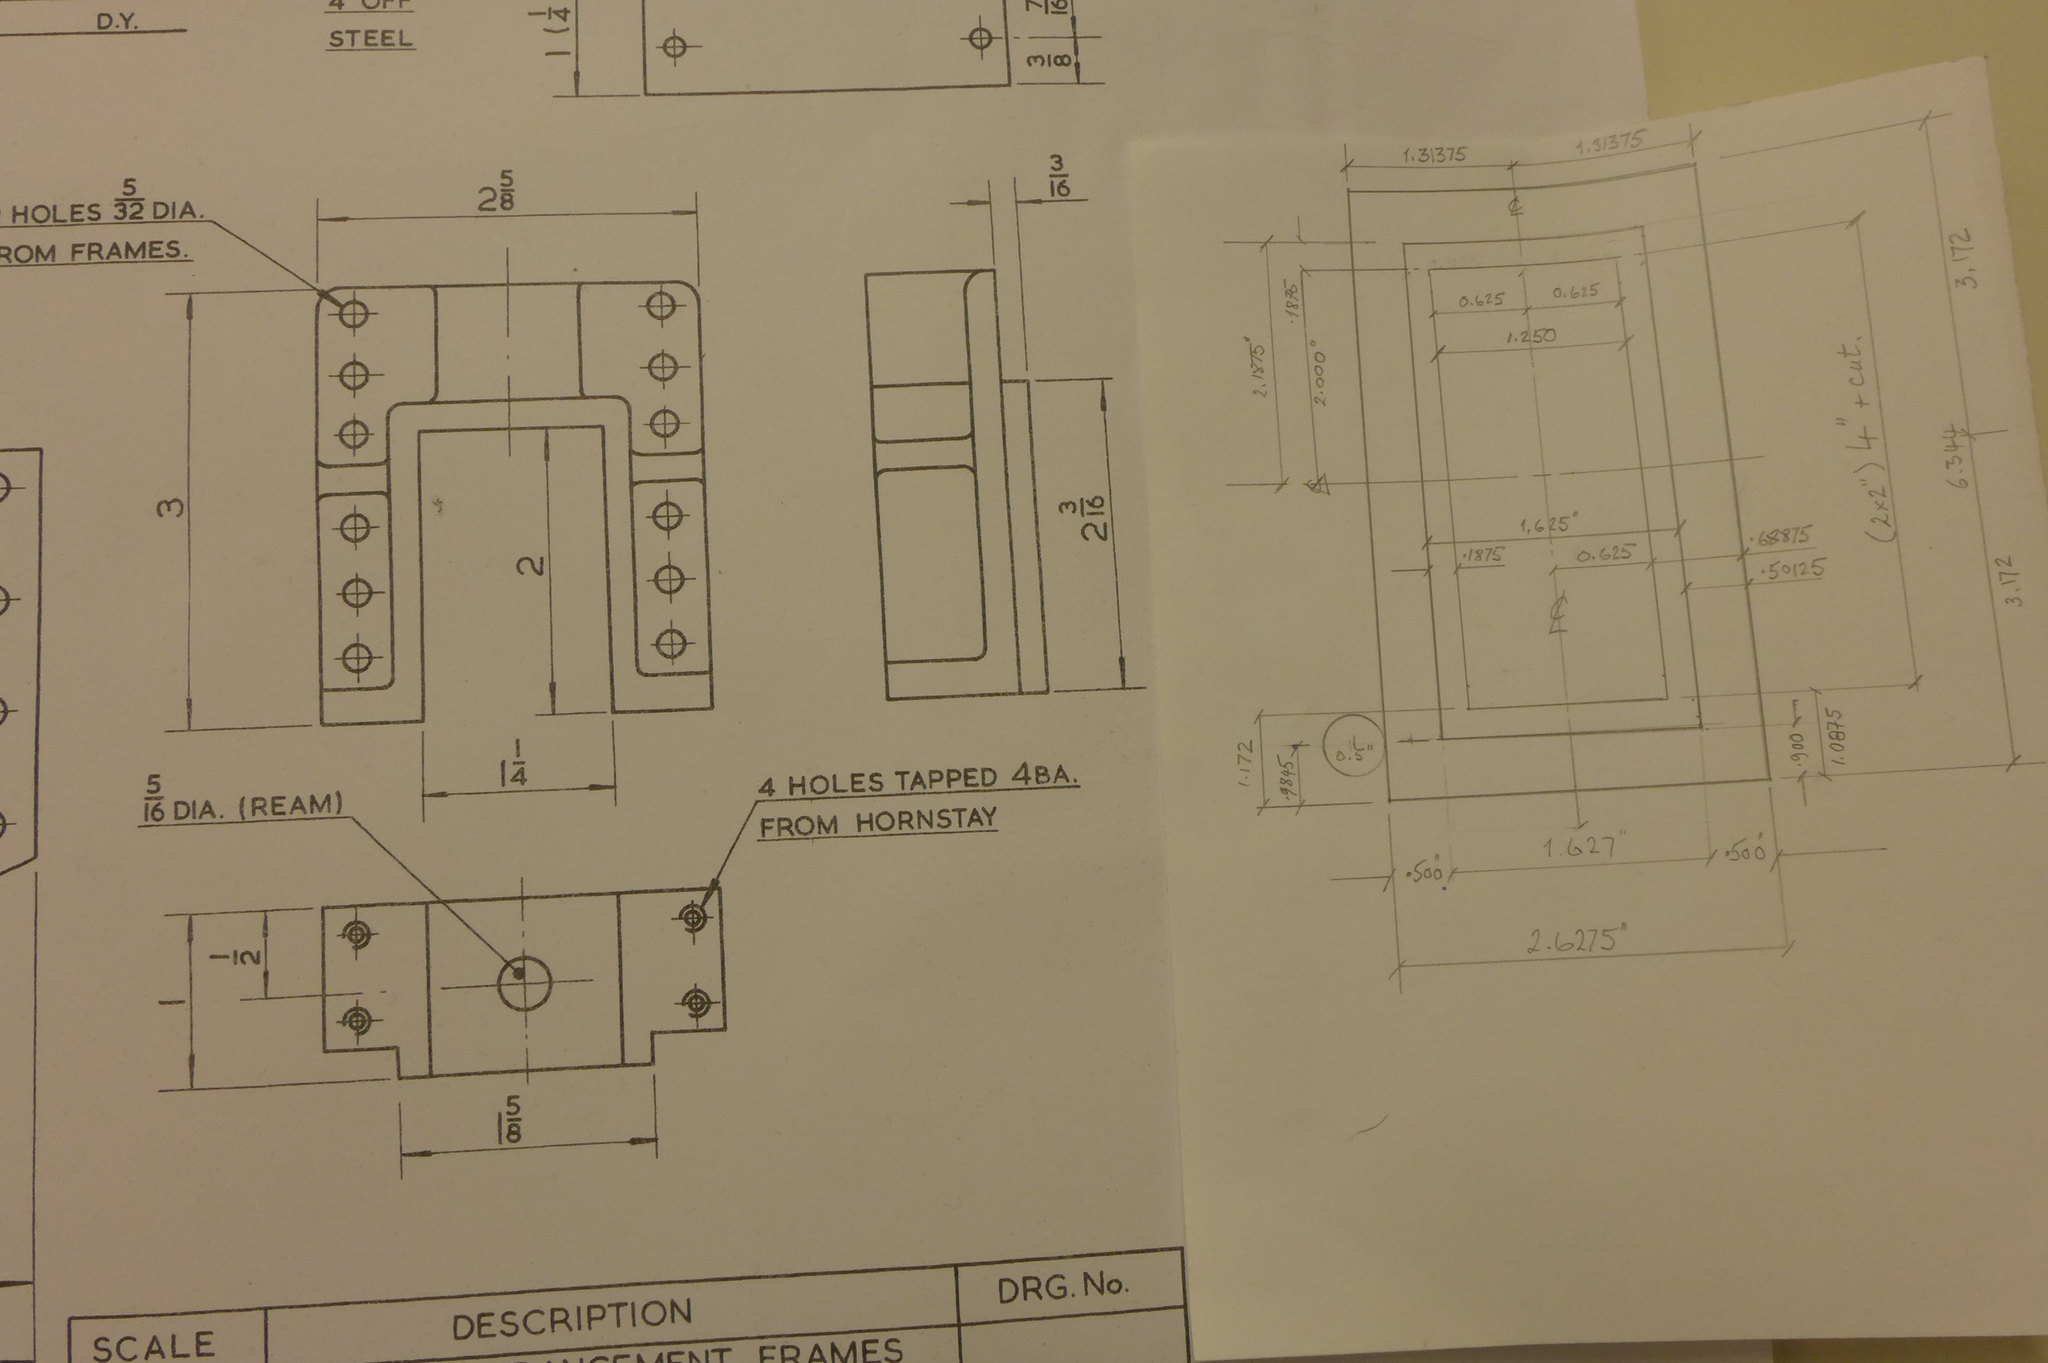
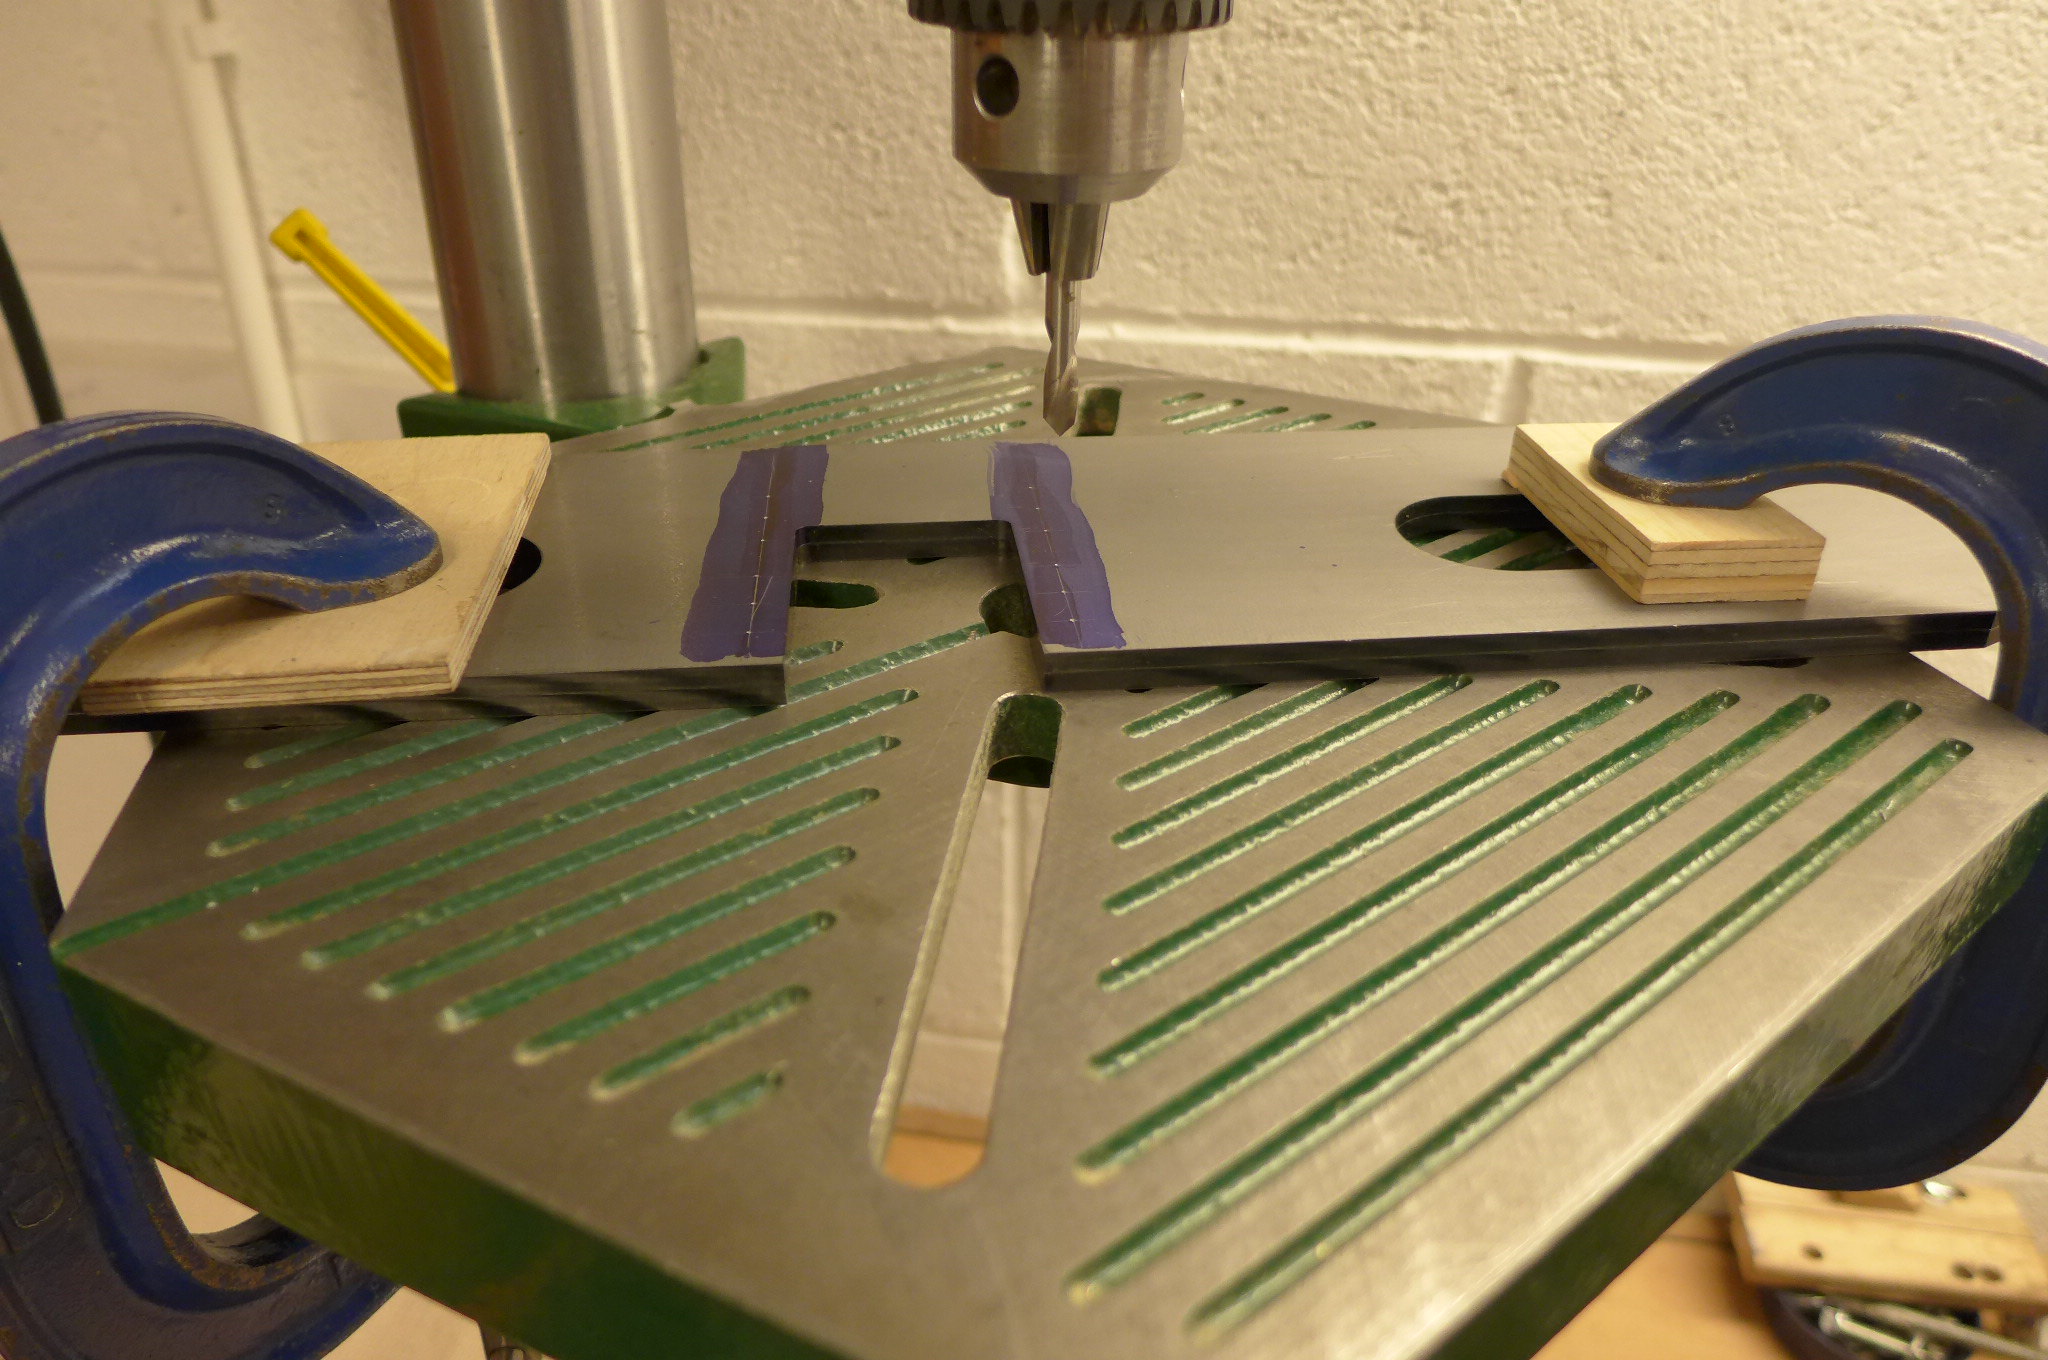
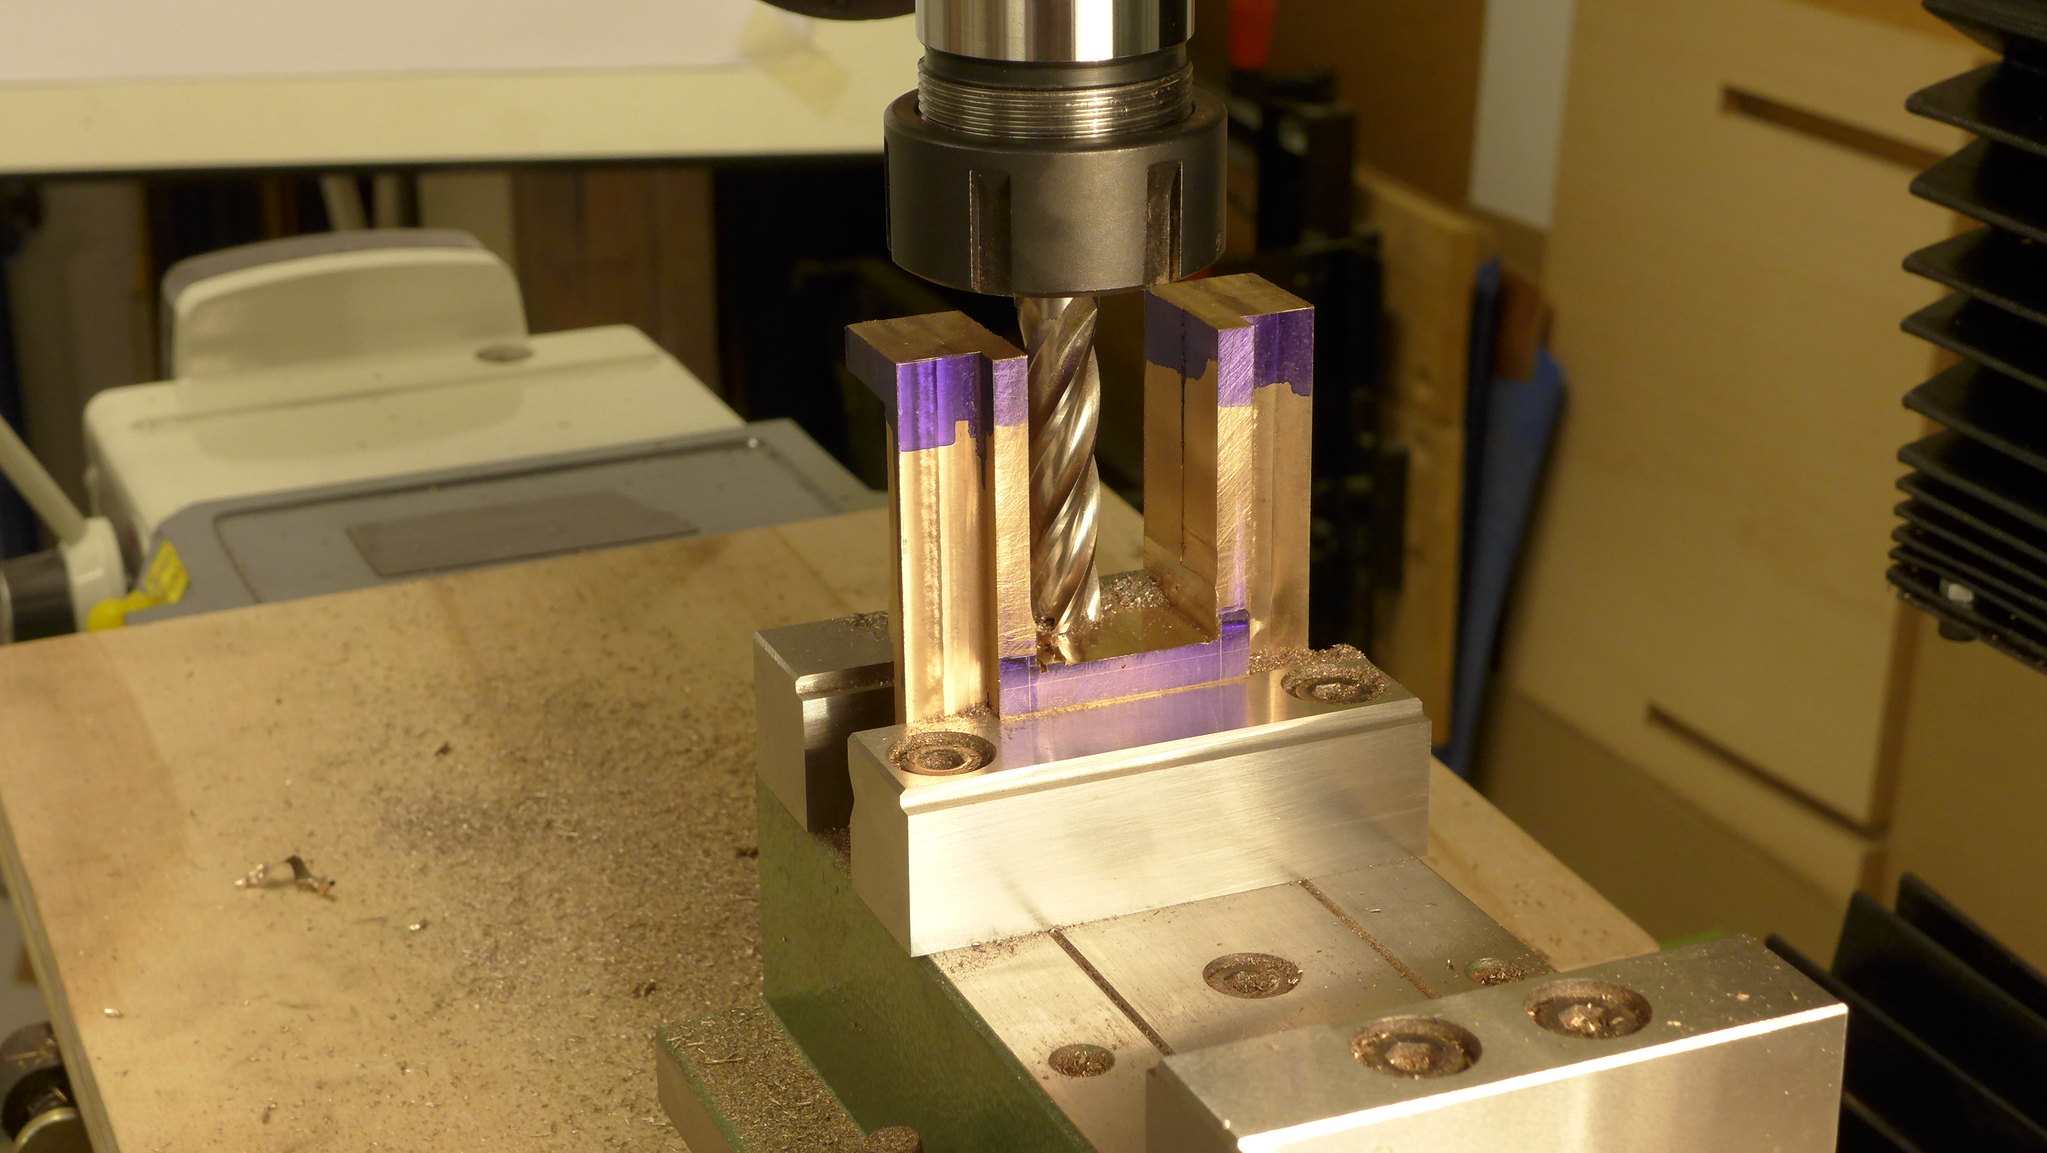
The last action was to mark out the "boundary lines on the casting so that I had sufficient metal left in the right places to achieve the drawing dimensions.
The casting was then machined internally to about approx half its depth, then turned over and repeated . This way I could see what was happening at all times. The bottom corners I would tidy up later as will be shown below.
 P1010084 by Malcolm HARWOOD, on Flickr
The casting was then carefully hand sawn in half.
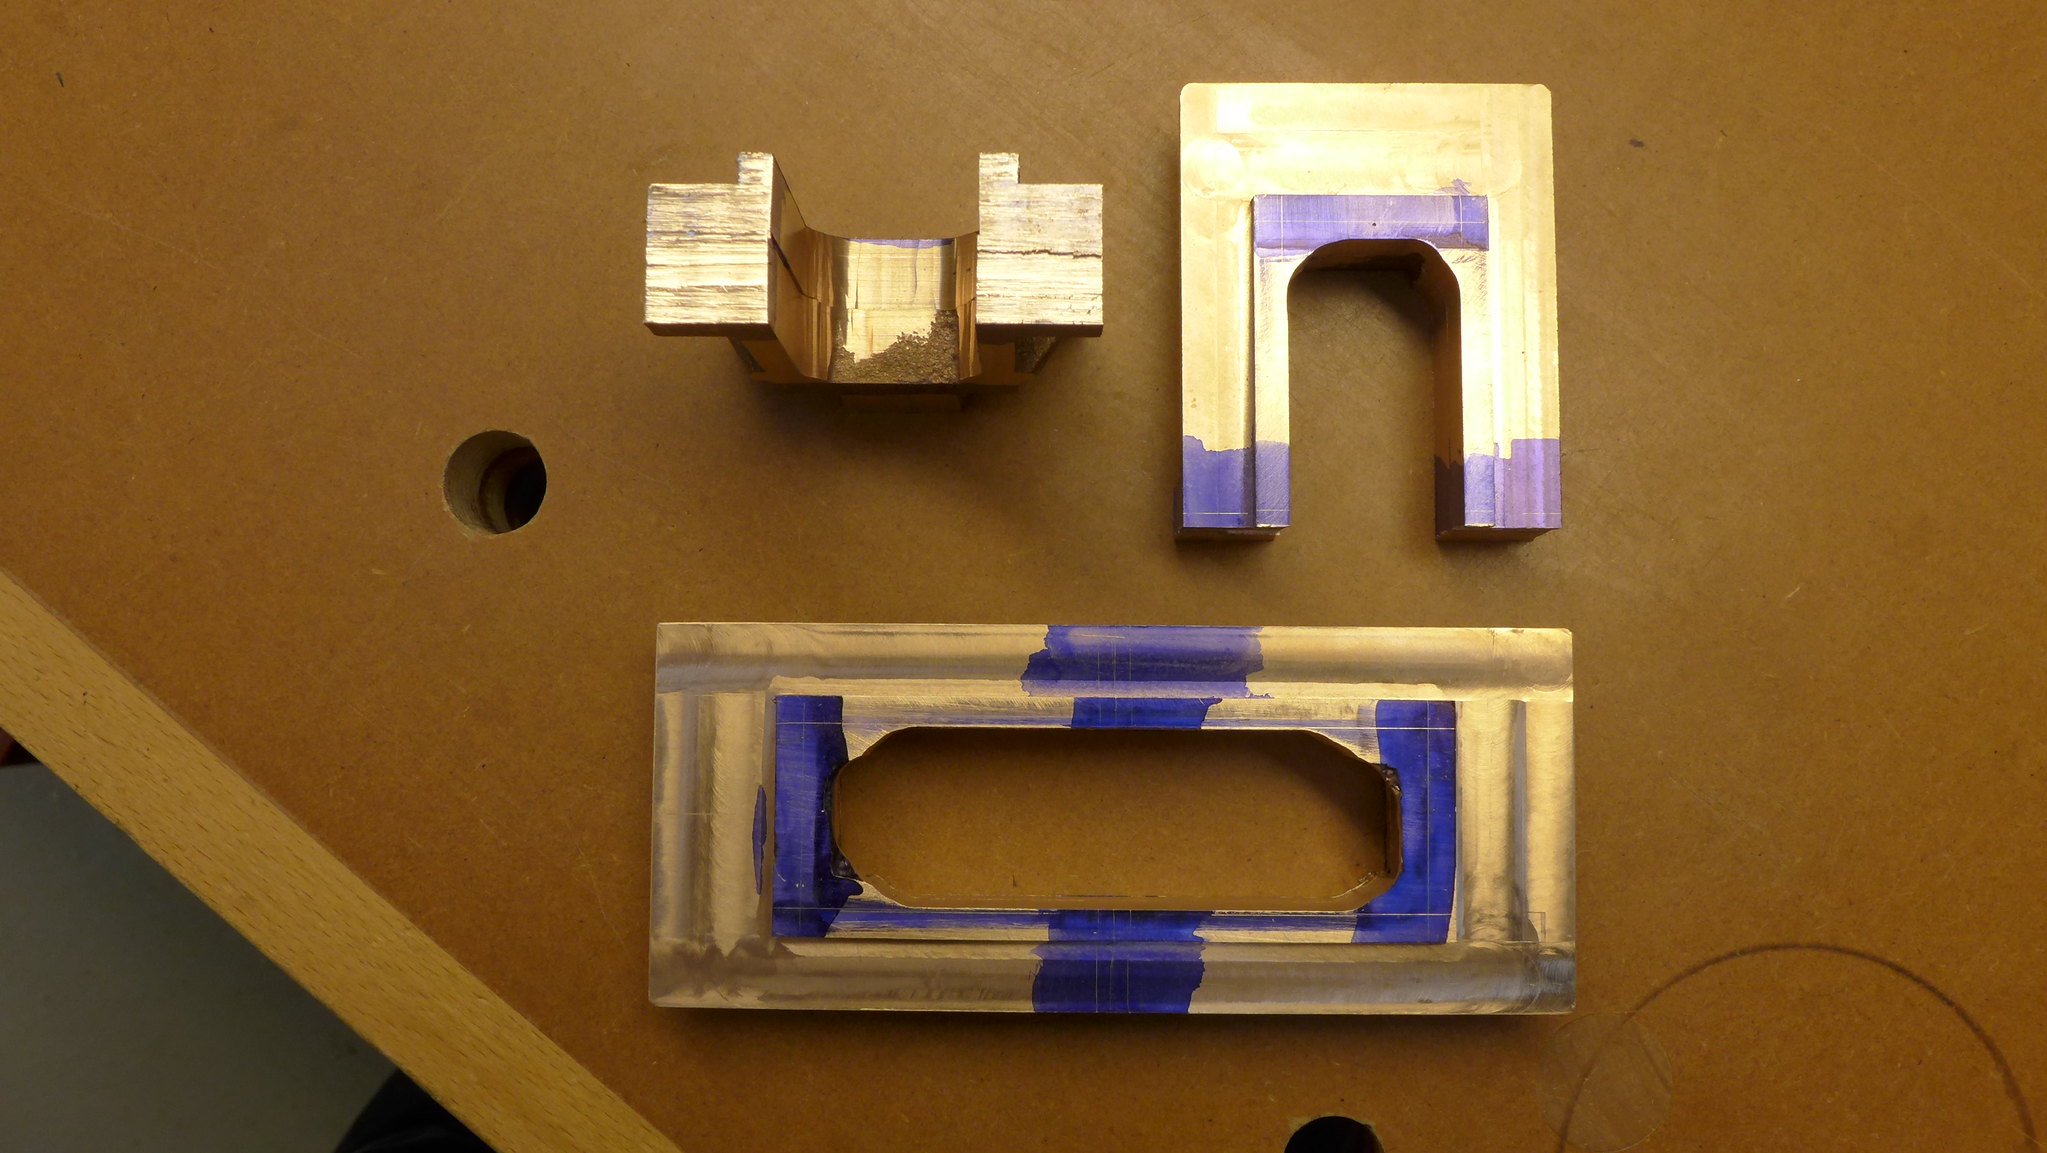 P1010085 by Malcolm HARWOOD, on Flickr
The "feet" of the horn blocks were then tidied
up.
 P1010096 by Malcolm HARWOOD, on Flickr
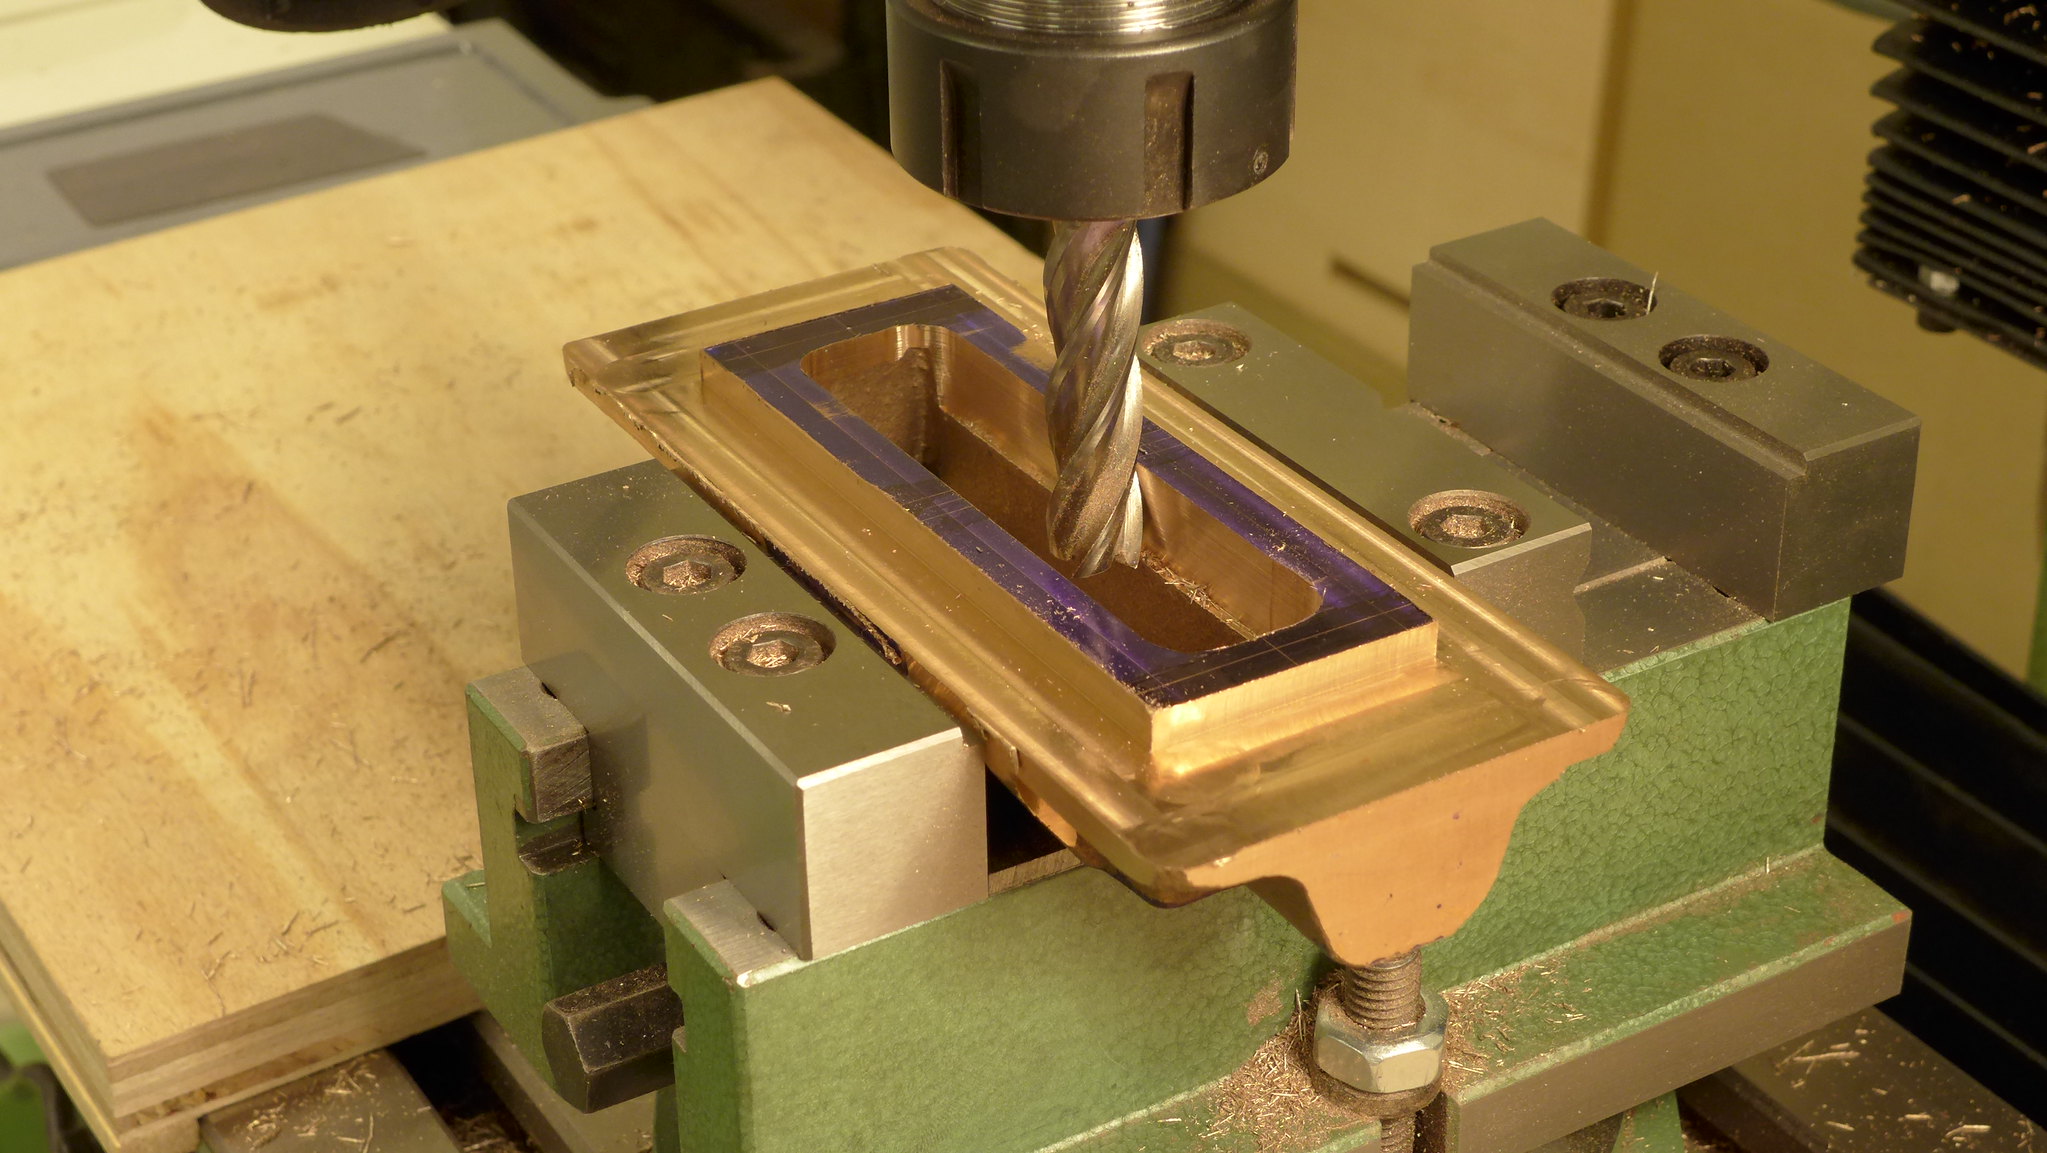
To achieve the 2" depth dimension and square corners at the bottom of the horn I changed to a long series 5/8" end mill which has an effective depth of cut greater that 2", something like 2.75" (a half inch diameter long series end mill should do it, but doesn't...believe me!).
 P1010088 by Malcolm HARWOOD, on Flickr
I have left something like .010"-.020" on each leg so that I can finish machine to size and at the same time ensure that the axle blocks run in parallel faces when they (the horns) are fixed to the side frames.
I had intended to fix the horn blocks with nuts and bolts as per DY's suggestion but have been seduced by Roger (of Speedy valve gear fame) and his excellent WIKI on clamping them face to face and milling to the final dimension . This necessitates riveting them with 5/32" round head soft iron rivets and obtain a flush surface to clamp together by heading the rivet into a countersink.
See "http://building-lbscs-speedy.wikia.com/wiki/Horn_blocks" for full details.
That's it for now. I am off tho practice hand riveting!
Thanks for reading
Cheers
Malcolm
The Hunslet build continues at pace slower than I would have wished.
However there is progress to report.
The last action was to mark out the "boundary lines on the casting so that I had sufficient metal left in the right places to achieve the drawing dimensions.
The casting was then machined internally to about approx half its depth, then turned over and repeated . This way I could see what was happening at all times. The bottom corners I would tidy up later as will be shown below.
P1010084 by Malcolm HARWOOD, on FlickrThe casting was then carefully hand sawn in half.
P1010085 by Malcolm HARWOOD, on FlickrThe "feet" of the horn blocks were then tidied
up.
P1010096 by Malcolm HARWOOD, on FlickrTo achieve the 2" depth dimension and square corners at the bottom of the horn I changed to a long series 5/8" end mill which has an effective depth of cut greater that 2", something like 2.75" (a half inch diameter long series end mill should do it, but doesn't...believe me!).
P1010088 by Malcolm HARWOOD, on Flickr I have left something like .010"-.020" on each leg so that I can finish machine to size and at the same time ensure that the axle blocks run in parallel faces when they (the horns) are fixed to the side frames.
I had intended to fix the horn blocks with nuts and bolts as per DY's suggestion but have been seduced by Roger (of Speedy valve gear fame) and his excellent WIKI on clamping them face to face and milling to the final dimension . This necessitates riveting them with 5/32" round head soft iron rivets and obtain a flush surface to clamp together by heading the rivet into a countersink.
See "http://building-lbscs-speedy.wikia.com/wiki/Horn_blocks" for full details.
That's it for now. I am off tho practice hand riveting!
Thanks for reading
Cheers
Malcolm