|
|
Post by Roger on May 23, 2016 17:59:06 GMT
That's a very tidy workshop, I hope it stays that way! Mine is also a single garage, but mine is even more full of machines and tools. I'm afraid you'll probably never stop buying things for it, if my experience is anything to go by.
Looking at the CAD and tools available to you, I think it's a great idea to use those and your creativity to make what you want rather than copy someone else's design. I think it's much more satisfying, and you get what you want. It will also give you the confidence to question whether some aspects of the locomotive design are more easily made using different techniques. Don't feel bound to slavishly follow something that doesn't make sense to you. You might want to add more scale details, so again, don't just follow someone else's interpretation of the locomotive if you fancy doing something different. Remember that most of these designs were created when more sophisticated methods weren't available, and they meant to be made on traditional machines without the benefits of DROs or CNC.
I've basically binned the plans I bought for SPEEDY and did my own thing because I didn't like the way it looked and much of the detail was simply wrong. It takes a while to build confidence to go 'off piste' but there's a lot of pleasure in producing something that's unique to you.
I'm looking forward to seeing your progress.
|
|
Midland
Elder Statesman
  
Posts: 1,875
|
Post by Midland on May 23, 2016 20:52:05 GMT
A PS thanks to Midland and his wife for the hospitality at the Southampton club back in September. Dave Hi Just thought I would say thanks for your kind remarks. We talked again in Fareham did we not. You are welcome to join us in Southampton, especially if you can help me build my Aspinal!!!Also got one of those DCC gismos and trying to understand it. Come and see us, Wed am or allday Sunday. Cheers David |
|
kipford
Statesman
  Building a Don Young 5" Gauge Aspinall Class 27
Posts: 575 
|
Post by kipford on May 23, 2016 22:29:20 GMT
|
|
Midland
Elder Statesman
  
Posts: 1,875
|
Post by Midland on May 28, 2016 15:03:51 GMT
Hi Dave
Very smart. What are those peg like things for?
Cheers David
|
|
uuu
Elder Statesman
   your message here...
Posts: 2,856
|
Post by uuu on May 28, 2016 15:28:38 GMT
I think they're Cleco pins. For holding aircraft skins to the frame during assembly.
Wilf
|
|
kipford
Statesman
  Building a Don Young 5" Gauge Aspinall Class 27
Posts: 575 
|
Post by kipford on May 28, 2016 16:57:44 GMT
Wilf quite correct they are Cleco pins, available in a range of sizes predominantly 3/32, 1/8, 5/32 and 3/16 to suit the range of rivet diameters most common in aircraft. They are a sprung pin operated using a special set of pliars, They hold the skins reasonably tight while you rivet up the assembly. Normally you would pin every other hole while riveting. If you want to pull the skins tighter then you need to use Avdel pins which are yellow bodied ones you can see in the photos, they use a screw action but are a lot slower to use. I work in Aerospace so they very useful devices tend to fall into my pocket every so often!
Dave
|
|
Midland
Elder Statesman
  
Posts: 1,875
|
Post by Midland on May 31, 2016 18:57:24 GMT
Wilf quite correct they are Cleco pins, available in a range of sizes predominantly 3/32, 1/8, 5/32 and 3/16 to suit the range of rivet diameters most common in aircraft. They are a sprung pin operated using a special set of pliars, They hold the skins reasonably tight while you rivet up the assembly. Normally you would pin every other hole while riveting. If you want to pull the skins tighter then you need to use Avdel pins which are yellow bodied ones you can see in the photos, they use a screw action but are a lot slower to use. I work in Aerospace so they very useful devices tend to fall into my pocket every so often! Dave They look very useful, particularly when trying to use the third hand. This concept, ‘falling into one's pocket’, does this require s special kind of suit and do you have to be somewhere special? Not nosey, just curious. Reminds of the friend that that mentioned, spare wine makes interesting ice cubes. Had to tell him spare wine was a confusing concept! Cheers David PS Back working on the Aspinal today, thinning down the spring hangers!! |
|
kipford
Statesman
  Building a Don Young 5" Gauge Aspinall Class 27
Posts: 575 
|
Post by kipford on Jun 17, 2016 10:32:06 GMT
|
|
kipford
Statesman
  Building a Don Young 5" Gauge Aspinall Class 27
Posts: 575 
|
Post by kipford on Jul 25, 2017 20:32:14 GMT
I have not posted anything on here since May last year. Partly due to 4mm scale exhibition commitments, partially work and my wife banned me from starting the Loco before I take early retirement in October. However I have not been idle. First I have 97% finished a complete 3D model of the loco and tender. Out of this has come over 150 laser cut parts which is my retirement present to myself from work (they sort of know)! Second and the subject of this post is the continued build of the driving truck. One of the reasons for doing this was to try and get some more experience with the machines, try out various techniques and get as many major cock ups out of the way as possible before attacking expensive castings. So here are some pictures of the build so far. Wheel before final machining 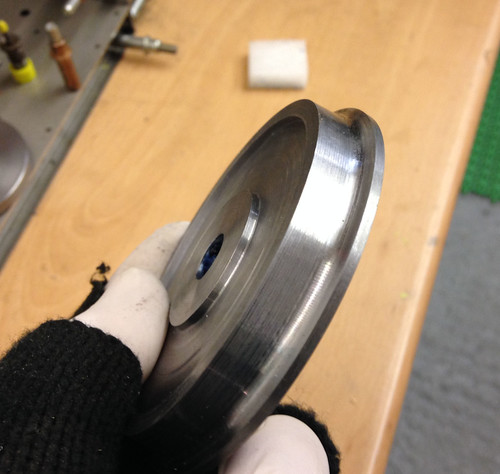 IMG_1178 IMG_1178 by Dave Smith, on Flickr Buffer and Spring Retainers 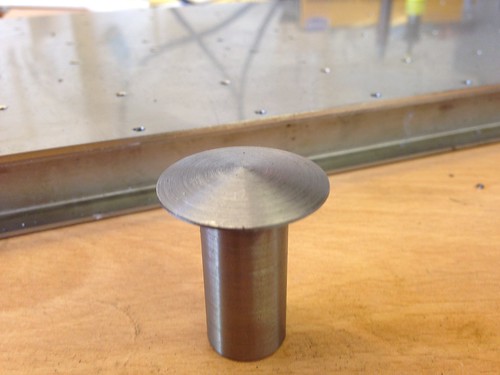 IMG_0876 IMG_0876 by Dave Smith, on Flickr 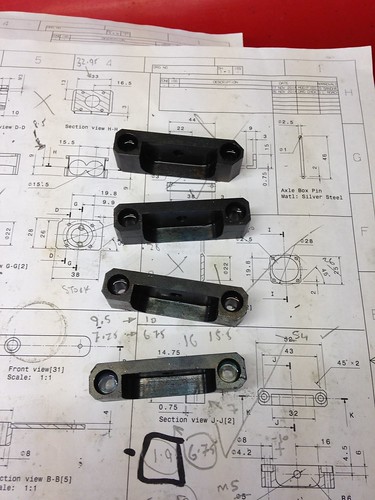 IMG_1263 IMG_1263 by Dave Smith, on Flickr Final check assembly before I take it apart to finish painting. 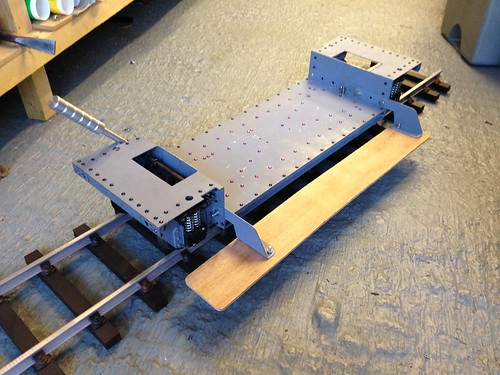 IMG_1367 IMG_1367 by Dave Smith, on Flickr 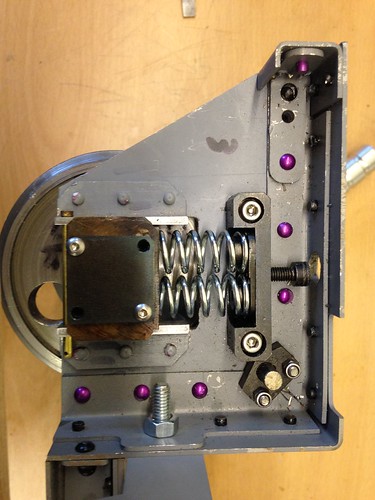 IMG_1372 IMG_1372 by Dave Smith, on Flickr 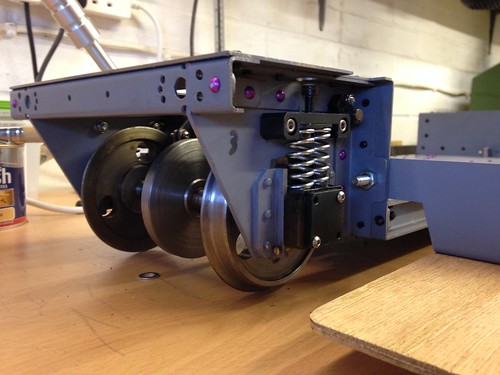 IMG_1368 IMG_1368 by Dave Smith, on Flickr 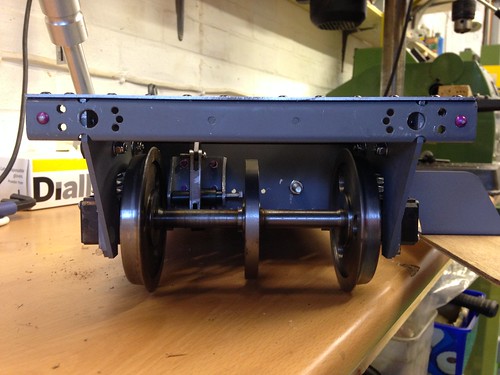 IMG_1369 IMG_1369 by Dave Smith, on Flickr 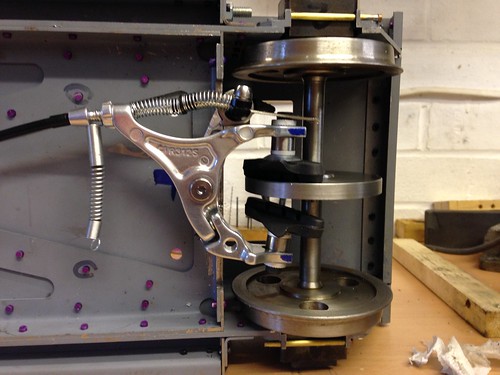 IMG_1370 IMG_1370 by Dave Smith, on Flickr 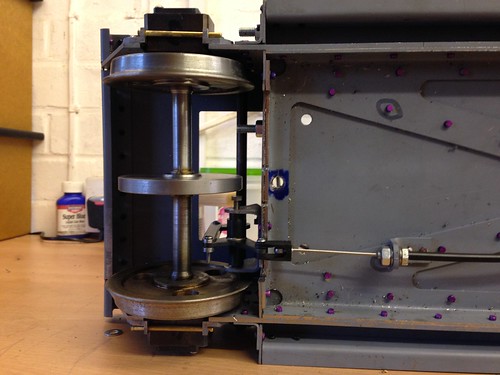 IMG_1371 IMG_1371 by Dave Smith, on Flickr Will post some more pictures when finished. Regards Dave |
|
|
|
Post by simplyloco on Jul 25, 2017 20:43:30 GMT
Now that's what I call forward planning!
Very good.
JB
|
|
kipford
Statesman
  Building a Don Young 5" Gauge Aspinall Class 27
Posts: 575 
|
Post by kipford on Jul 25, 2017 20:50:57 GMT
Sorry accidentally reposted.
Dave
|
|
kipford
Statesman
  Building a Don Young 5" Gauge Aspinall Class 27
Posts: 575 
|
Post by kipford on Jan 6, 2018 17:56:58 GMT
Quick couple of pictures to show what the driving truck looks like painted and with transfers. The tranfers are home brews using crafty computers transfer paper, which I have used a lot in my 4mm scale modelling. 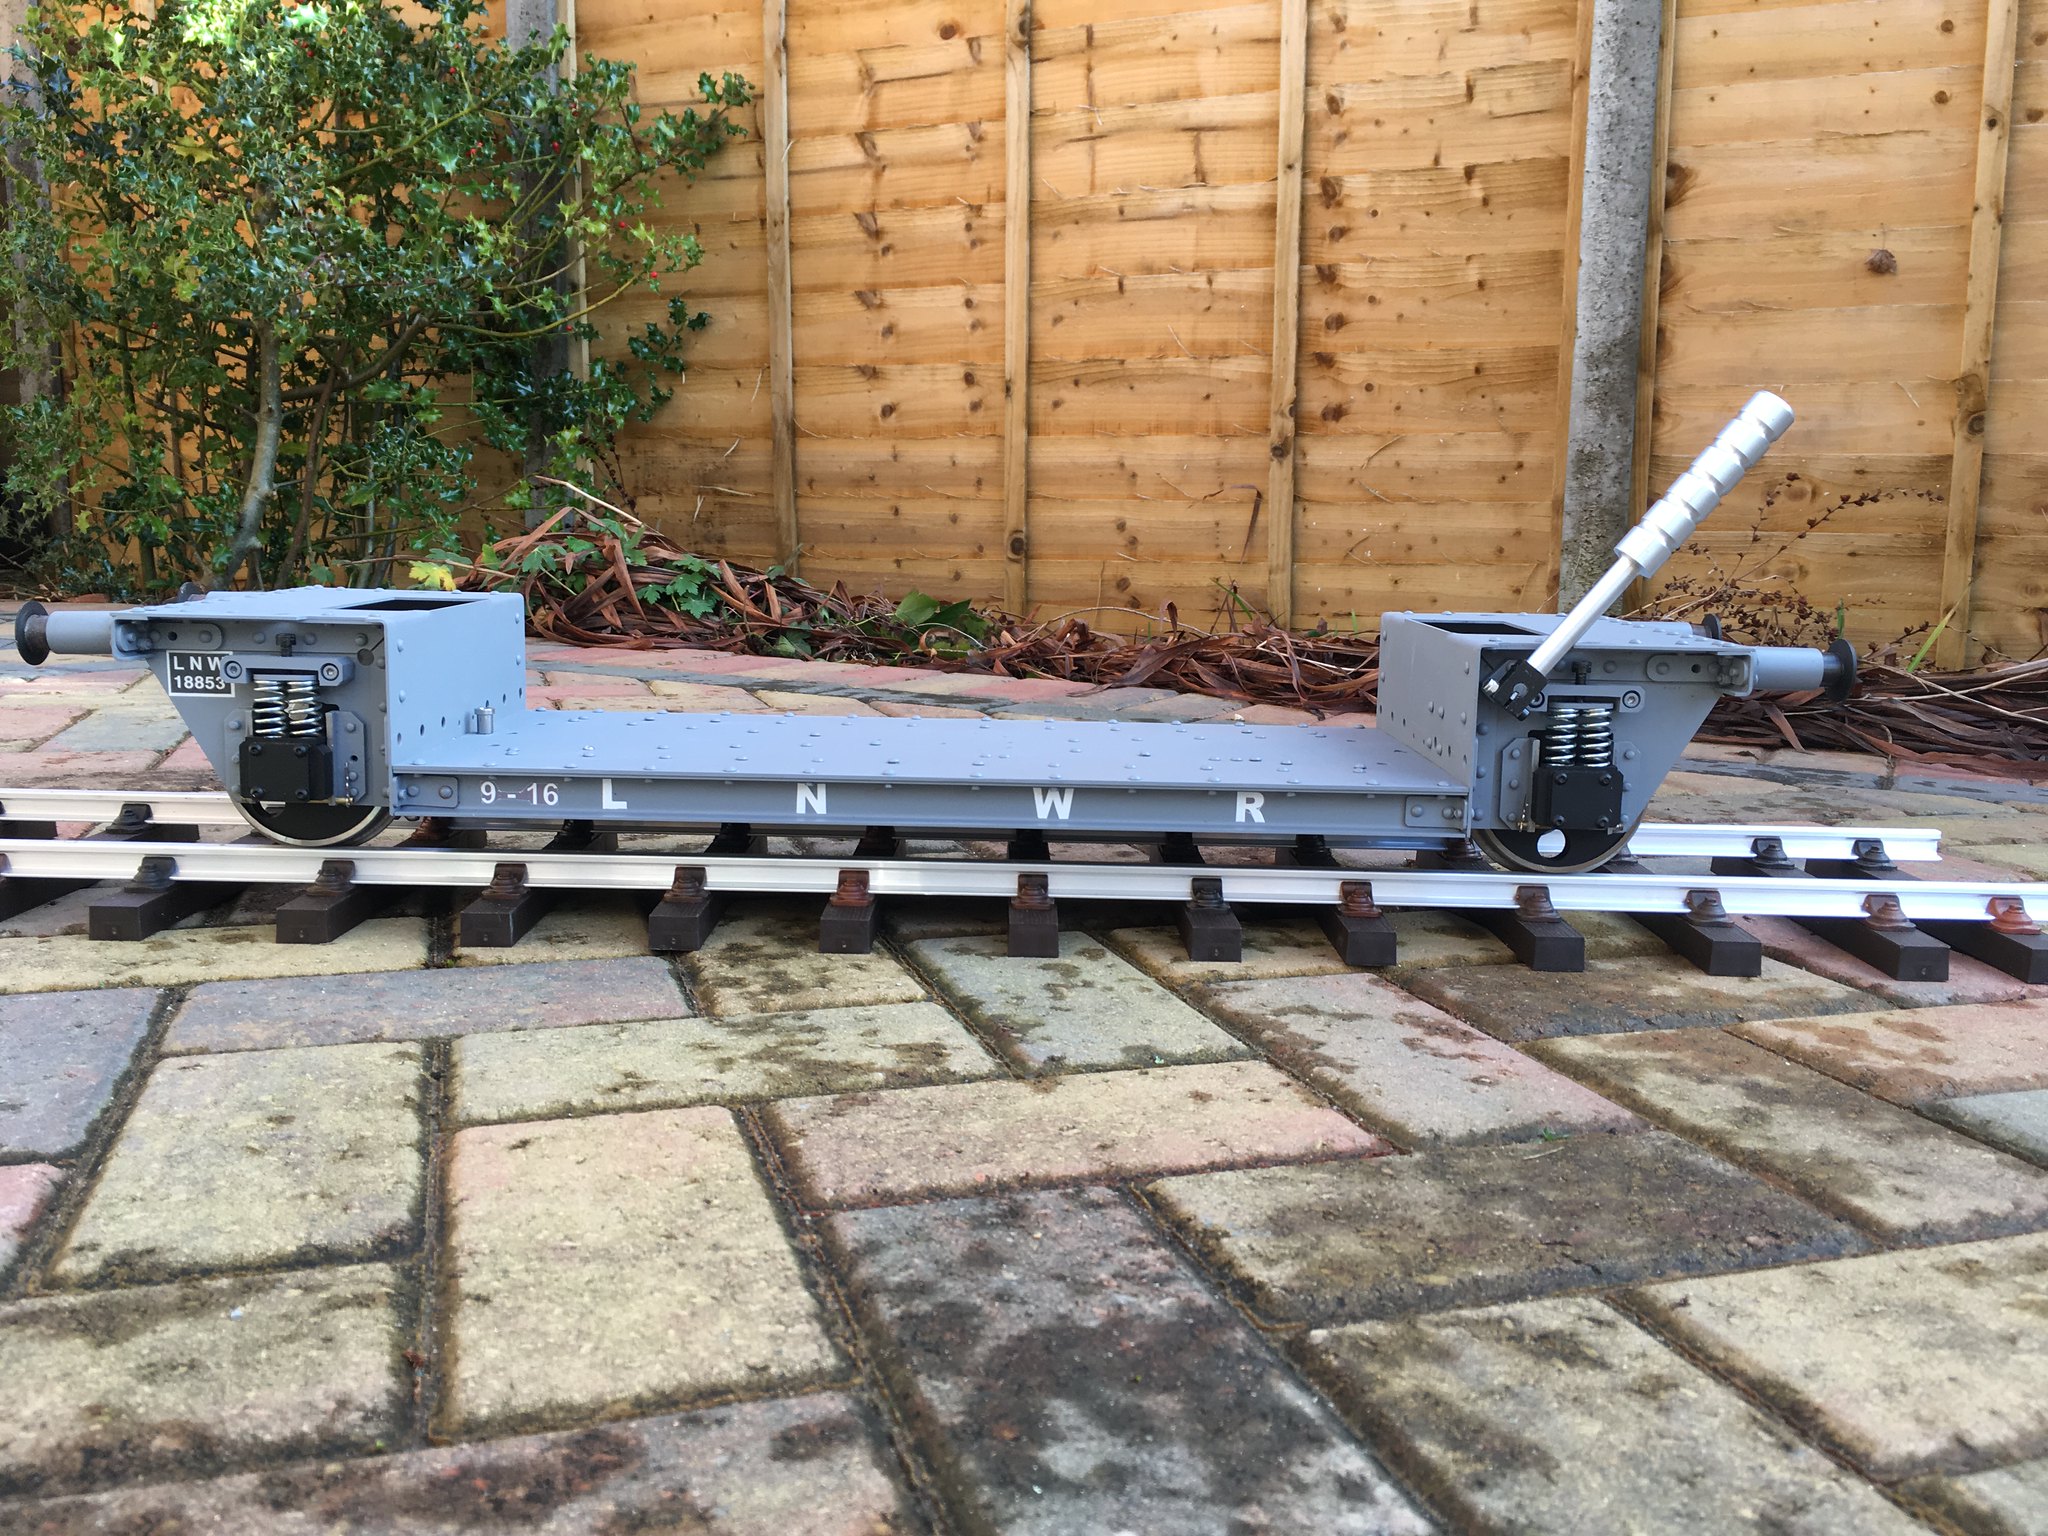 IMG_0003 IMG_0003 by Dave Smith, on Flickr 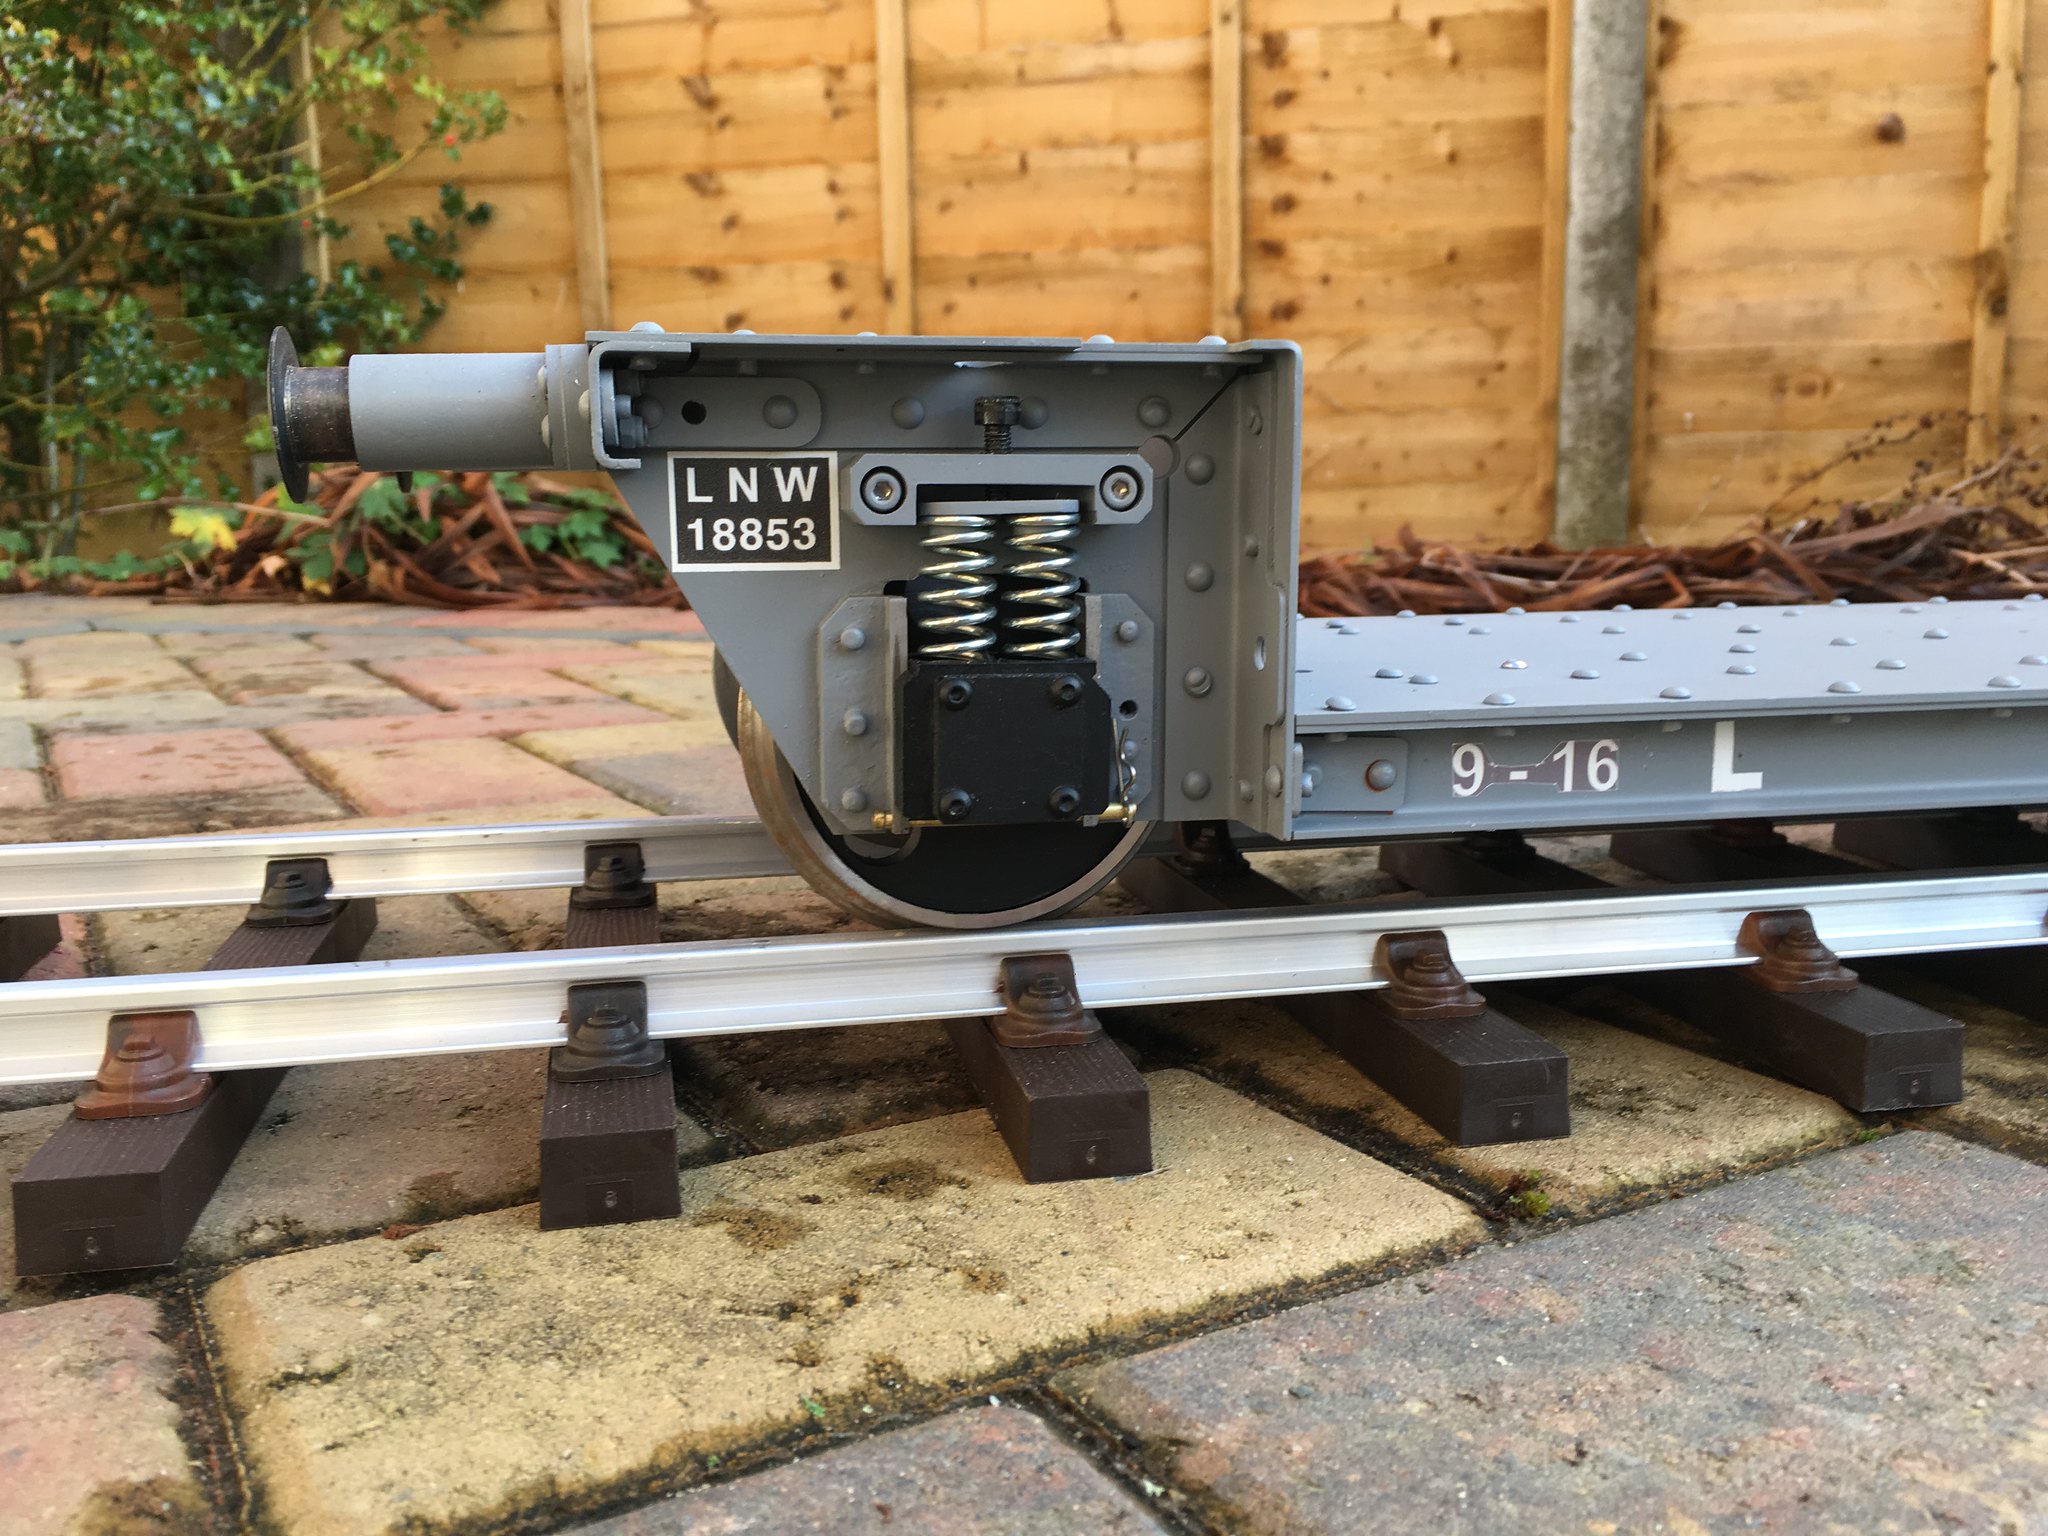 IMG_0004 IMG_0004 by Dave Smith, on Flickr 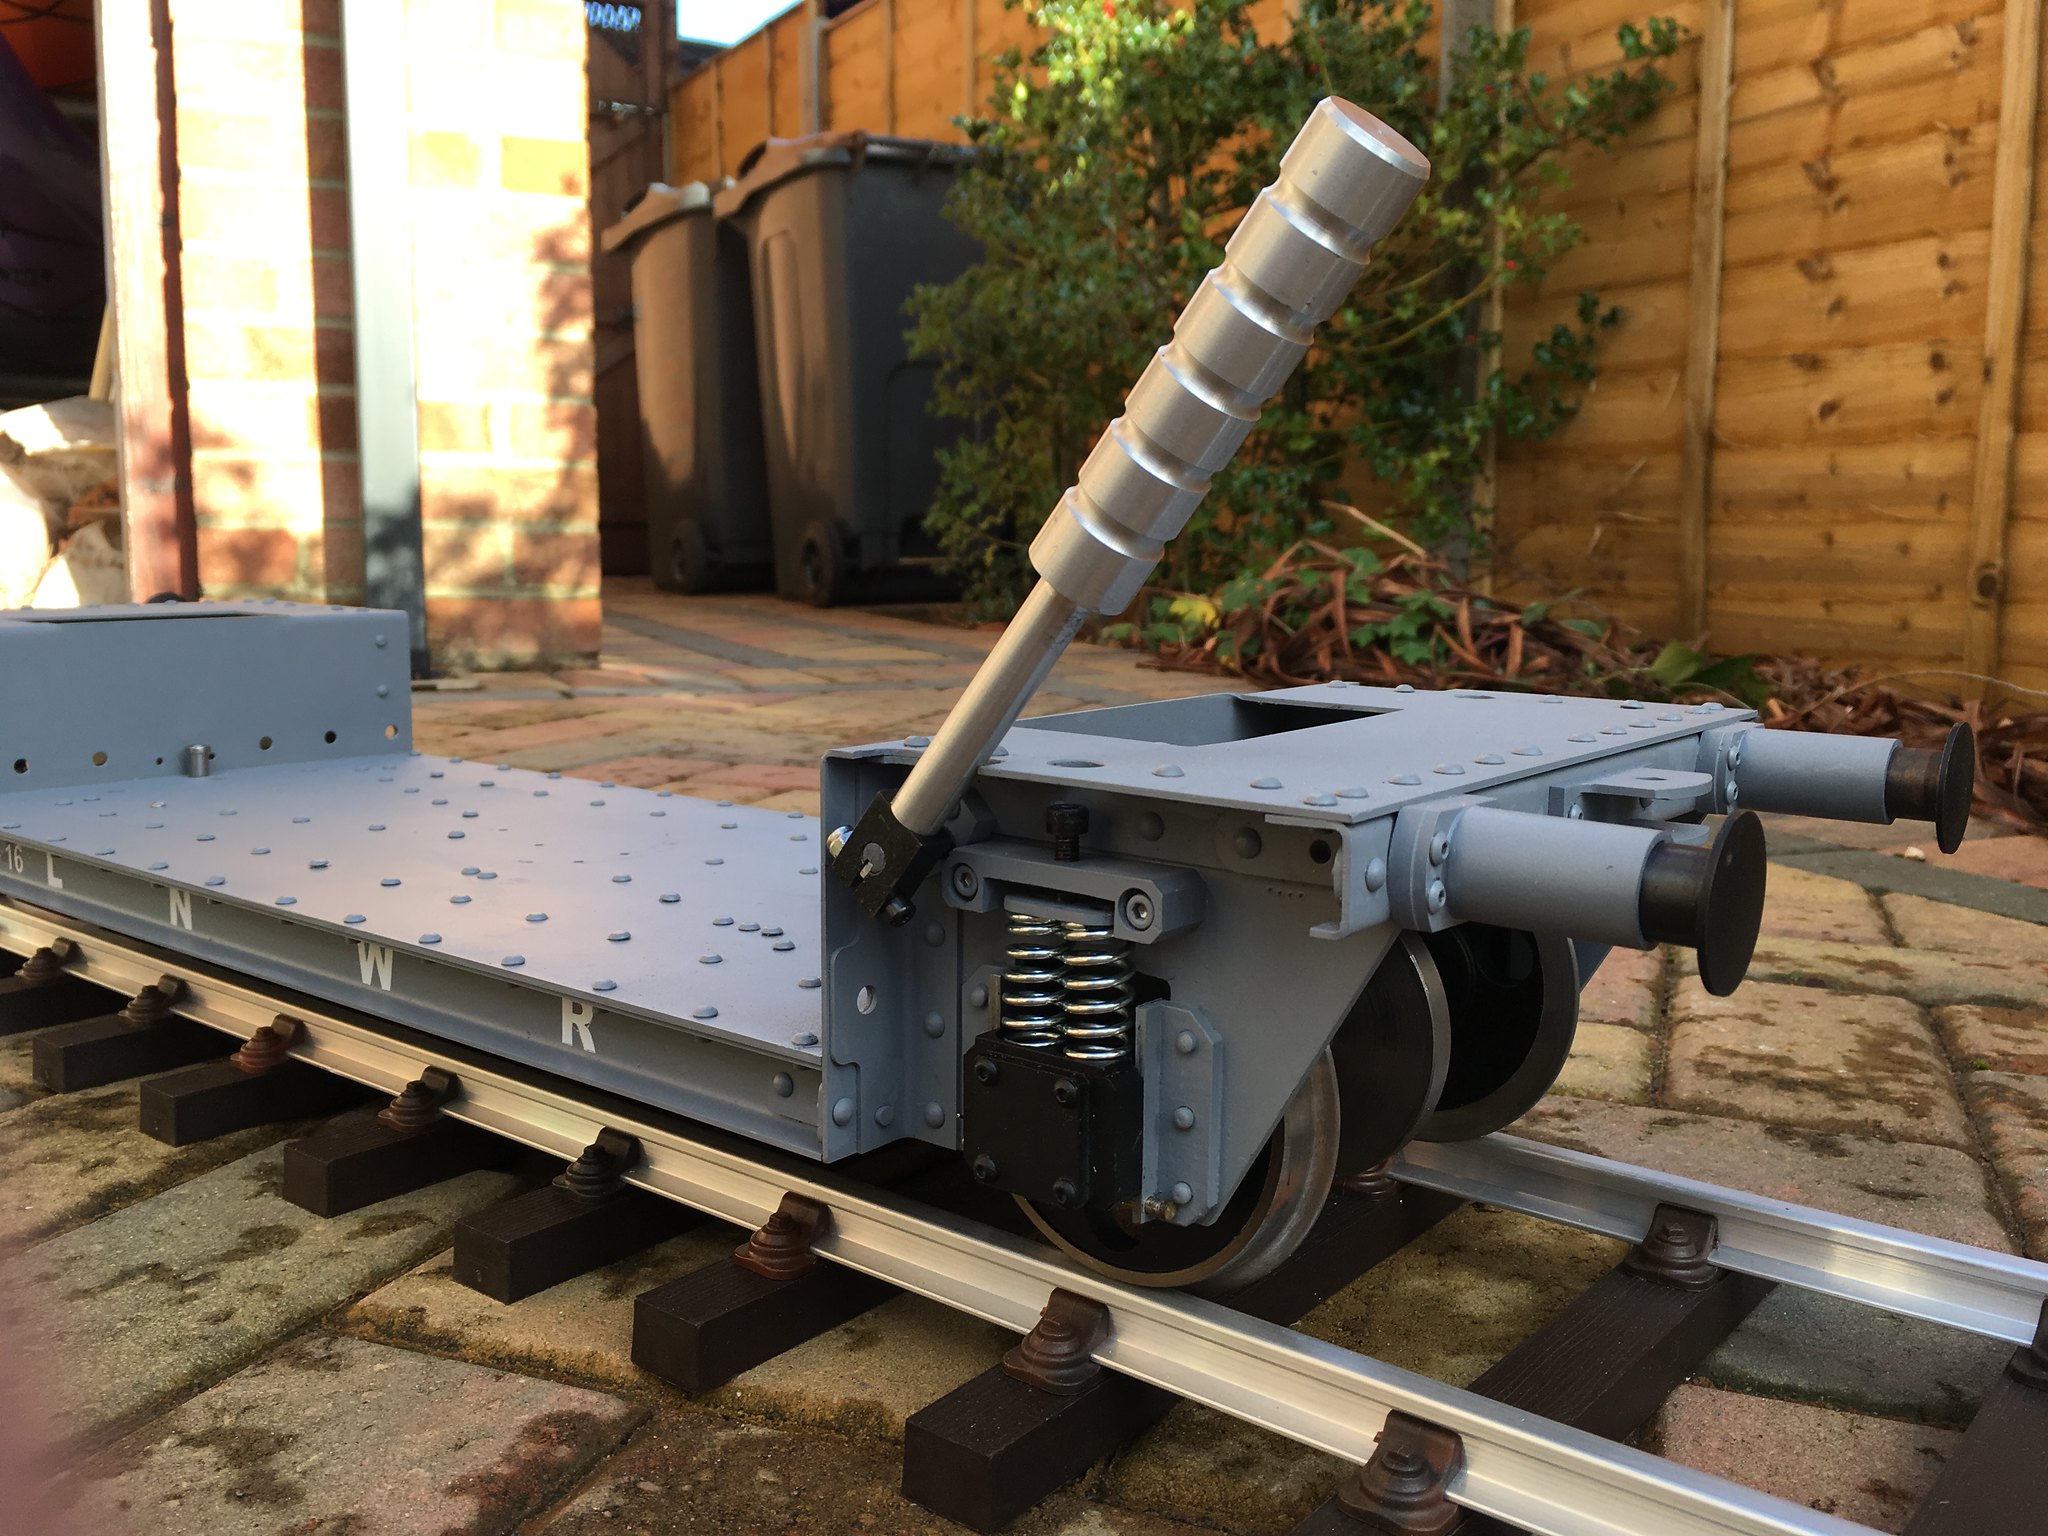 IMG_0006 IMG_0006 by Dave Smith, on Flickr 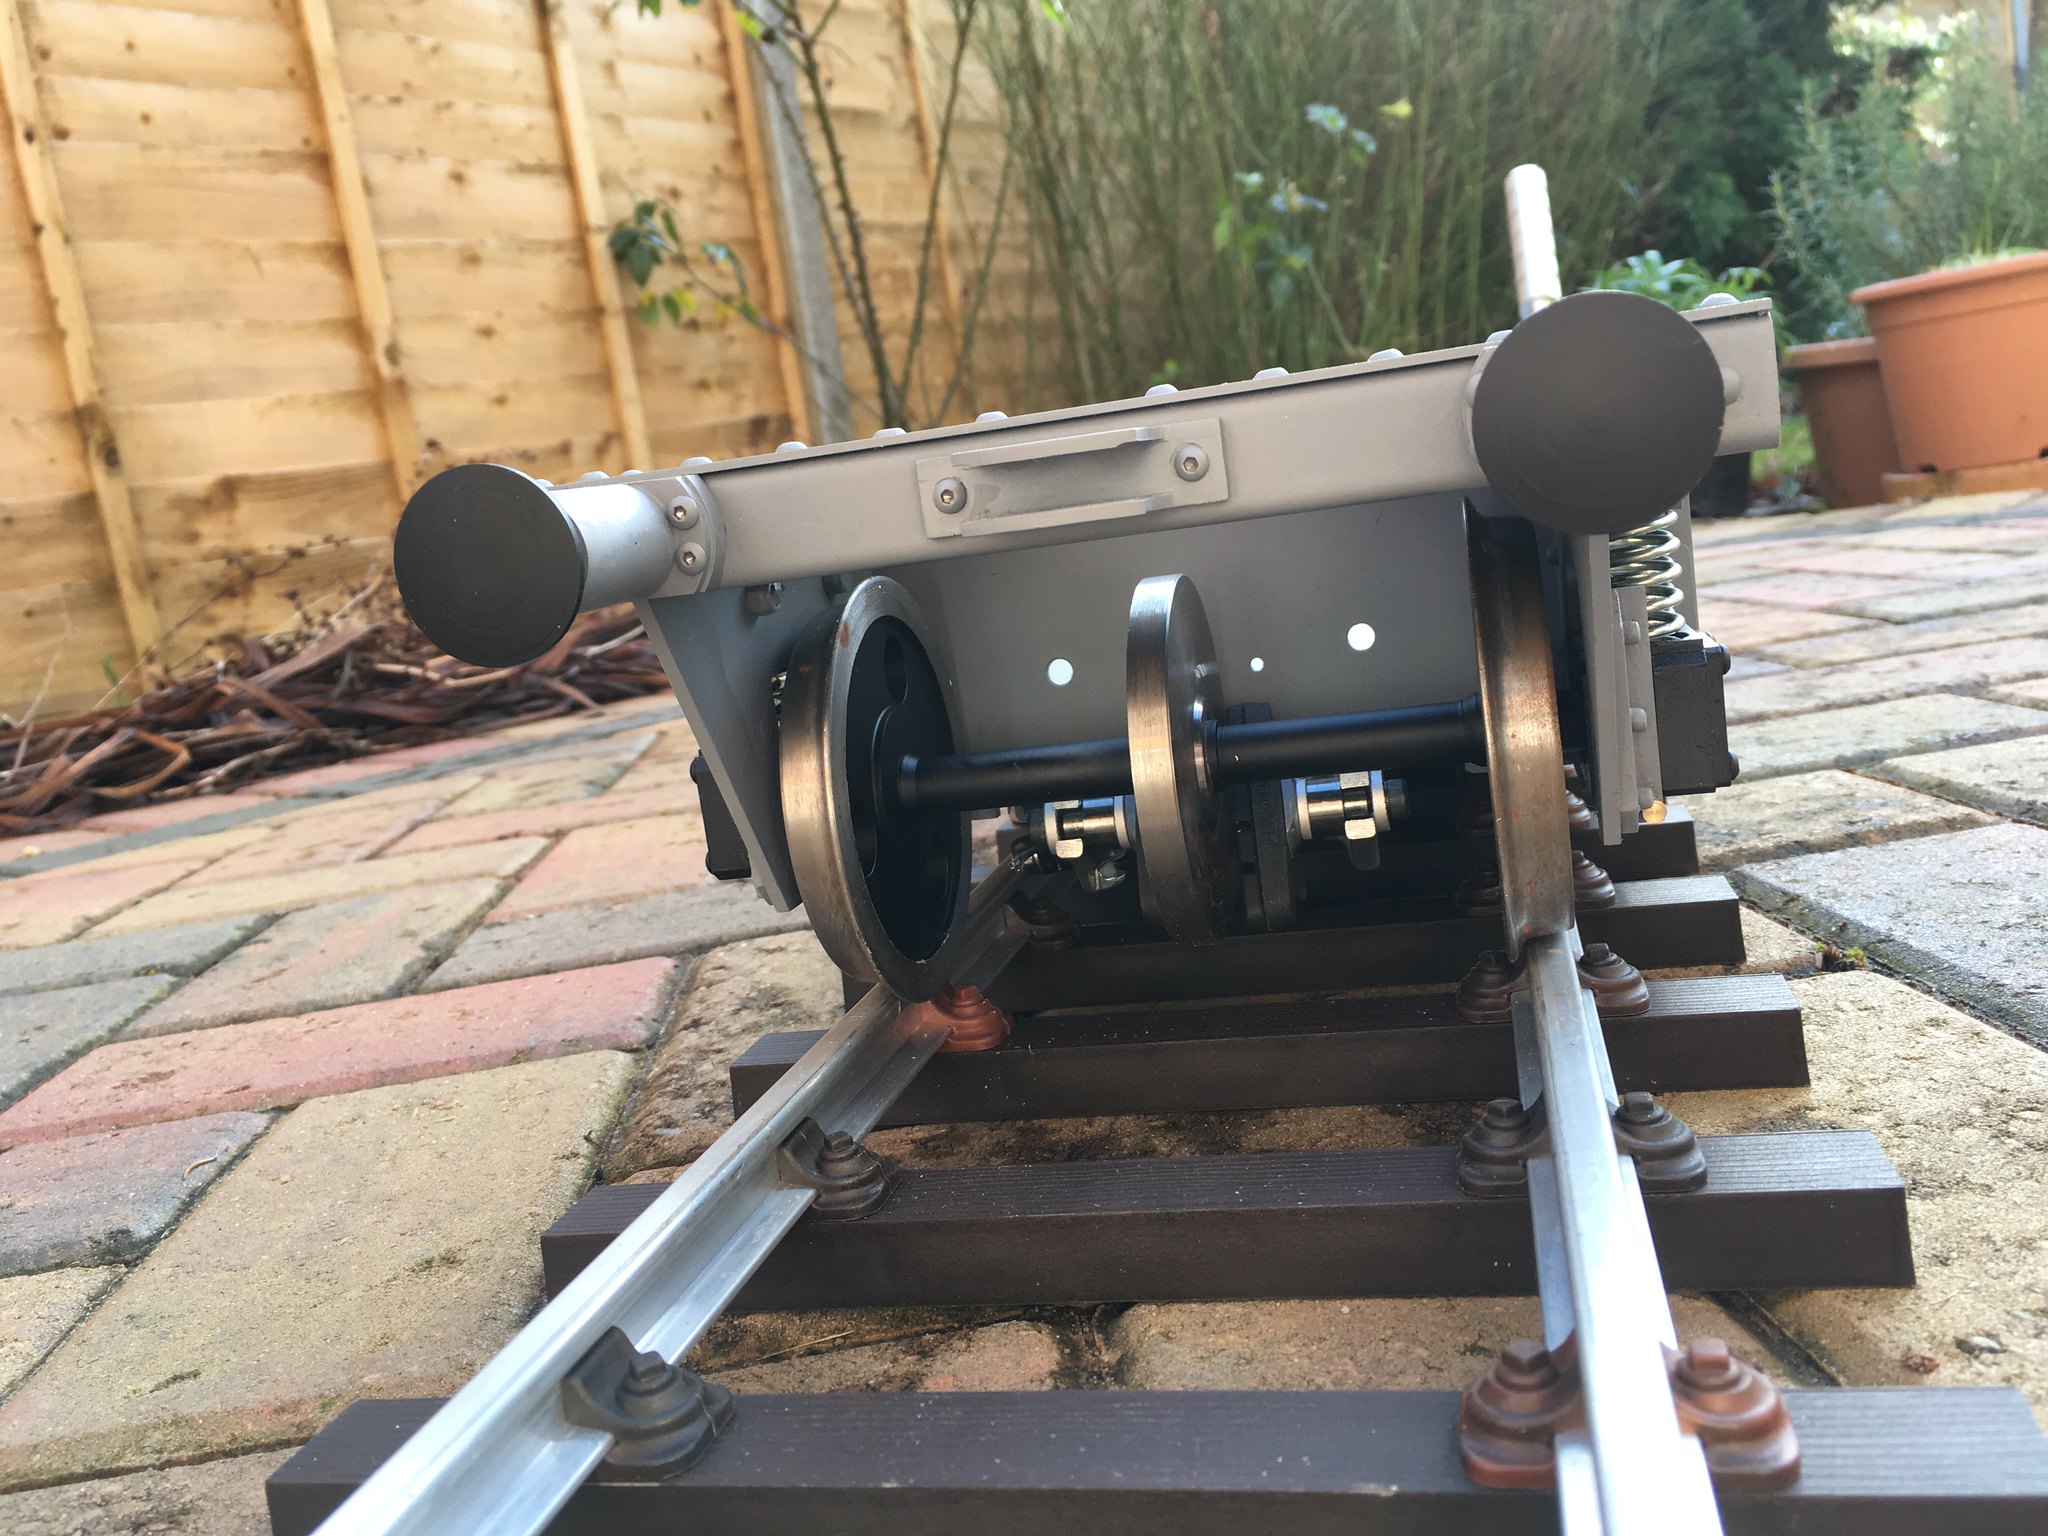 IMG_0005 IMG_0005 by Dave Smith, on Flickr I hope to report on progress on the Aspinall shortly. |
|
|
|
Post by steamer5 on Jan 6, 2018 20:45:01 GMT
Hi Dave,
Nice looking trolley! is it based on the Dave Hudson design?
Cheers Kerrin
|
|
kipford
Statesman
  Building a Don Young 5" Gauge Aspinall Class 27
Posts: 575 
|
Post by kipford on Jan 7, 2018 9:09:18 GMT
Kerrin
The design is all mine. It is loosely based on an LNWR Boiler Trolley. If you wanted a shorter wheelbase, the LNWR Well Wagon is very similar. The prototype uses leaf springs, but for ease of construction I used coil springs, it is also much easier to calculate the spring size required. I just need to finish the raised and ground level seats and foot rests.
Dave
|
|
|
|
Post by steamer5 on Jan 7, 2018 20:03:32 GMT
Hi Dave,
Thanks for the reply.
It looked like Dave’s Lowmac design which was described in the Model Engineer but with springs. I’ve built 2 of Dave Hudson’s passenger trolleys, 8 wheels as I’ve had a couple of heart stopping experience’s on 4 wheels ones!
Dave’s design is for a swing link, pivot less, self steering wheel set using shaped rubber as the “spring” system. They work very very well! He also profiles the tires to the correct profile, ie curved from the radius & the tapered to the out side edge. I tried a single axel on our track which has a downgrade, the the axel a push & it was interesting to watch the axel as it oscillated side to side & twisted for & arft for several meters, all the time self correcting until it aligned with the track & then it really took off!
Cheers Kerrin
|
|
kipford
Statesman
  Building a Don Young 5" Gauge Aspinall Class 27
Posts: 575 
|
Post by kipford on Jan 8, 2018 8:59:59 GMT
Kerrin
Interesting, by the way the wheels were machined to the GL5 profile as the loco and tender will also be.
Dave
|
|
|
|
Post by jordanleeds on Jan 8, 2018 10:14:02 GMT
Kipford I have sent you a private message
|
|
kipford
Statesman
  Building a Don Young 5" Gauge Aspinall Class 27
Posts: 575 
|
Post by kipford on Jan 13, 2018 19:07:24 GMT
I retired just before Christmas so I can finally start looking at the Loco. In a previous post I mentioned my retirement present to myself from work (not the official one) was around 200 laser cut parts for the Loco. Earlier in the year I finished the 3D CAD model in sufficient detail to think about what could be laser cut. There are a lot of laser cut parts available from Model Engineers Laser but not on the level I was thinking, plus I they would be gratius. I spent about a month going through every part on the loco including profiles for forming the boiler throat plate, back head etc, to see what could be laser cut to give a finished part or at least give a good start. Some small modifications to the way parts are assembled provided some very useful returns. While I was at it I also redesigned the ash pan. As Don drew it the ash pan is fixed which makes dropping the fire and cleaning the grate more difficult. Putting a simple drop grate system in was a no no as it would have meant dispensing with the prototypical centre pull brake rods. The ability to laser cut parts has made the execution of a solution quite simple and I will post the solution when I make it up. These parts arrived on trolley in two big boxes in my office on 21st December the day before I left, to all sorts of knowing looks from collegues. I am still sorting them all out but have included some photos below to show the sorts of things I have done. I will have to buy some laser parts from Model Engineers Laser as we did not use brass and were out of 6mm thick material. So to the photos: First typical 20 swg parts, these include frames to form the beading on the splashers, trying to fret these out of sheet would have been a horrifying thought. The edge finish is very good because the laser used uses Argon rather then CO2 as the shielding gas which eliminates the hard surface often found on laser cut edge. 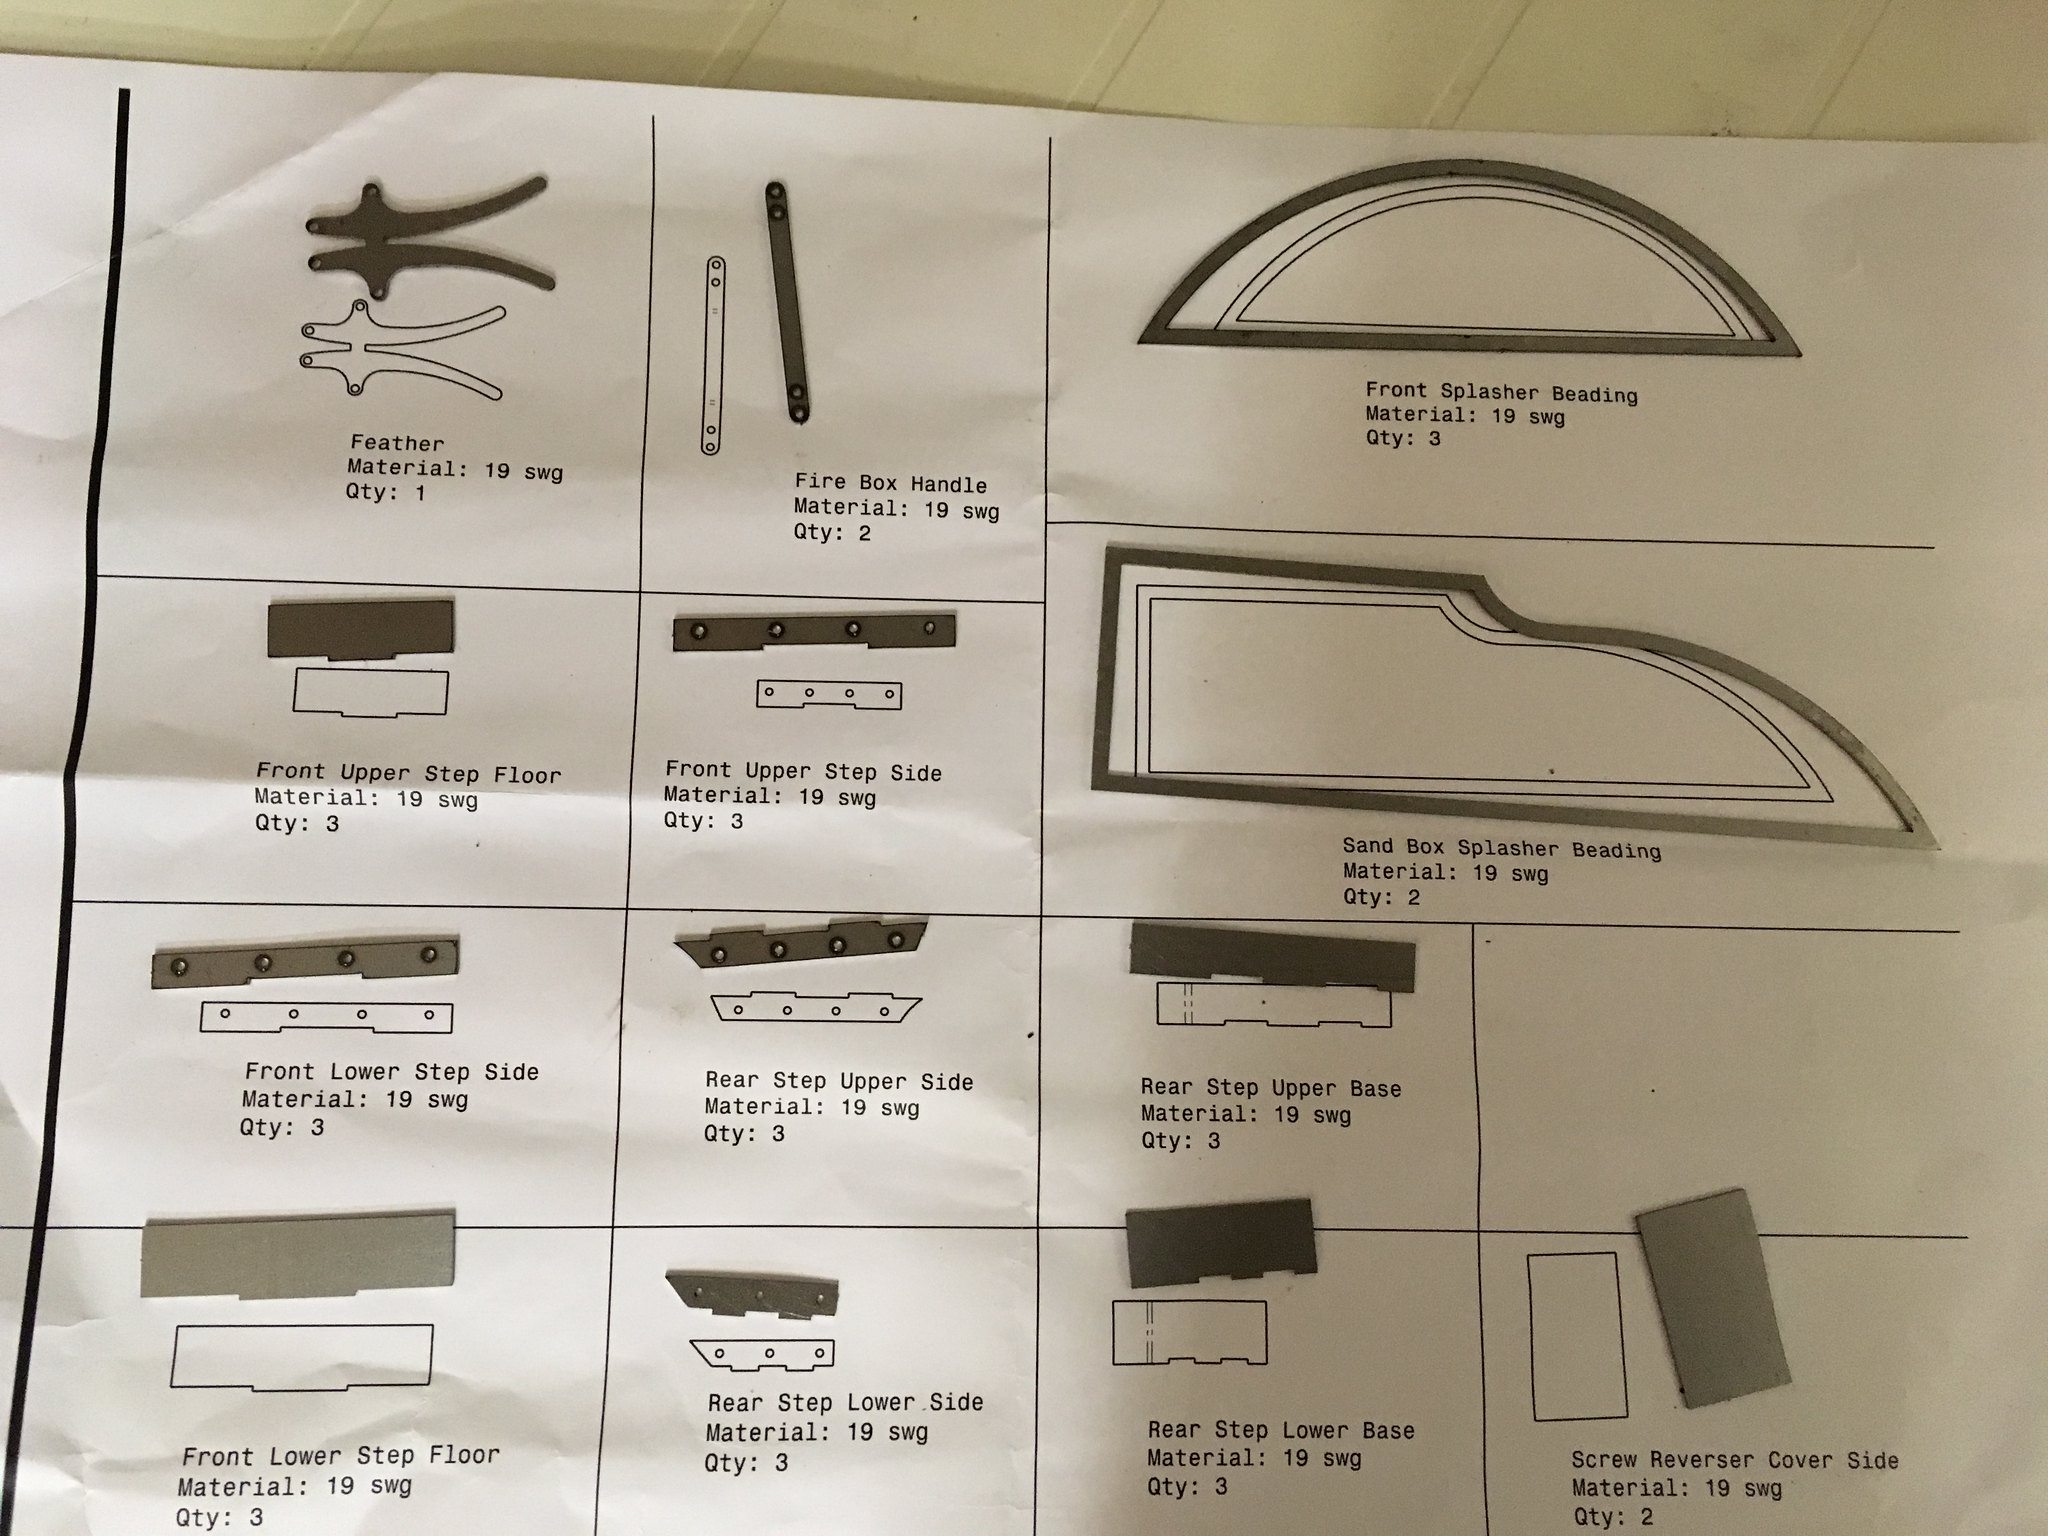 IMG_0016 IMG_0016 by Dave Smith, on Flickr Close up of the splasher beading. 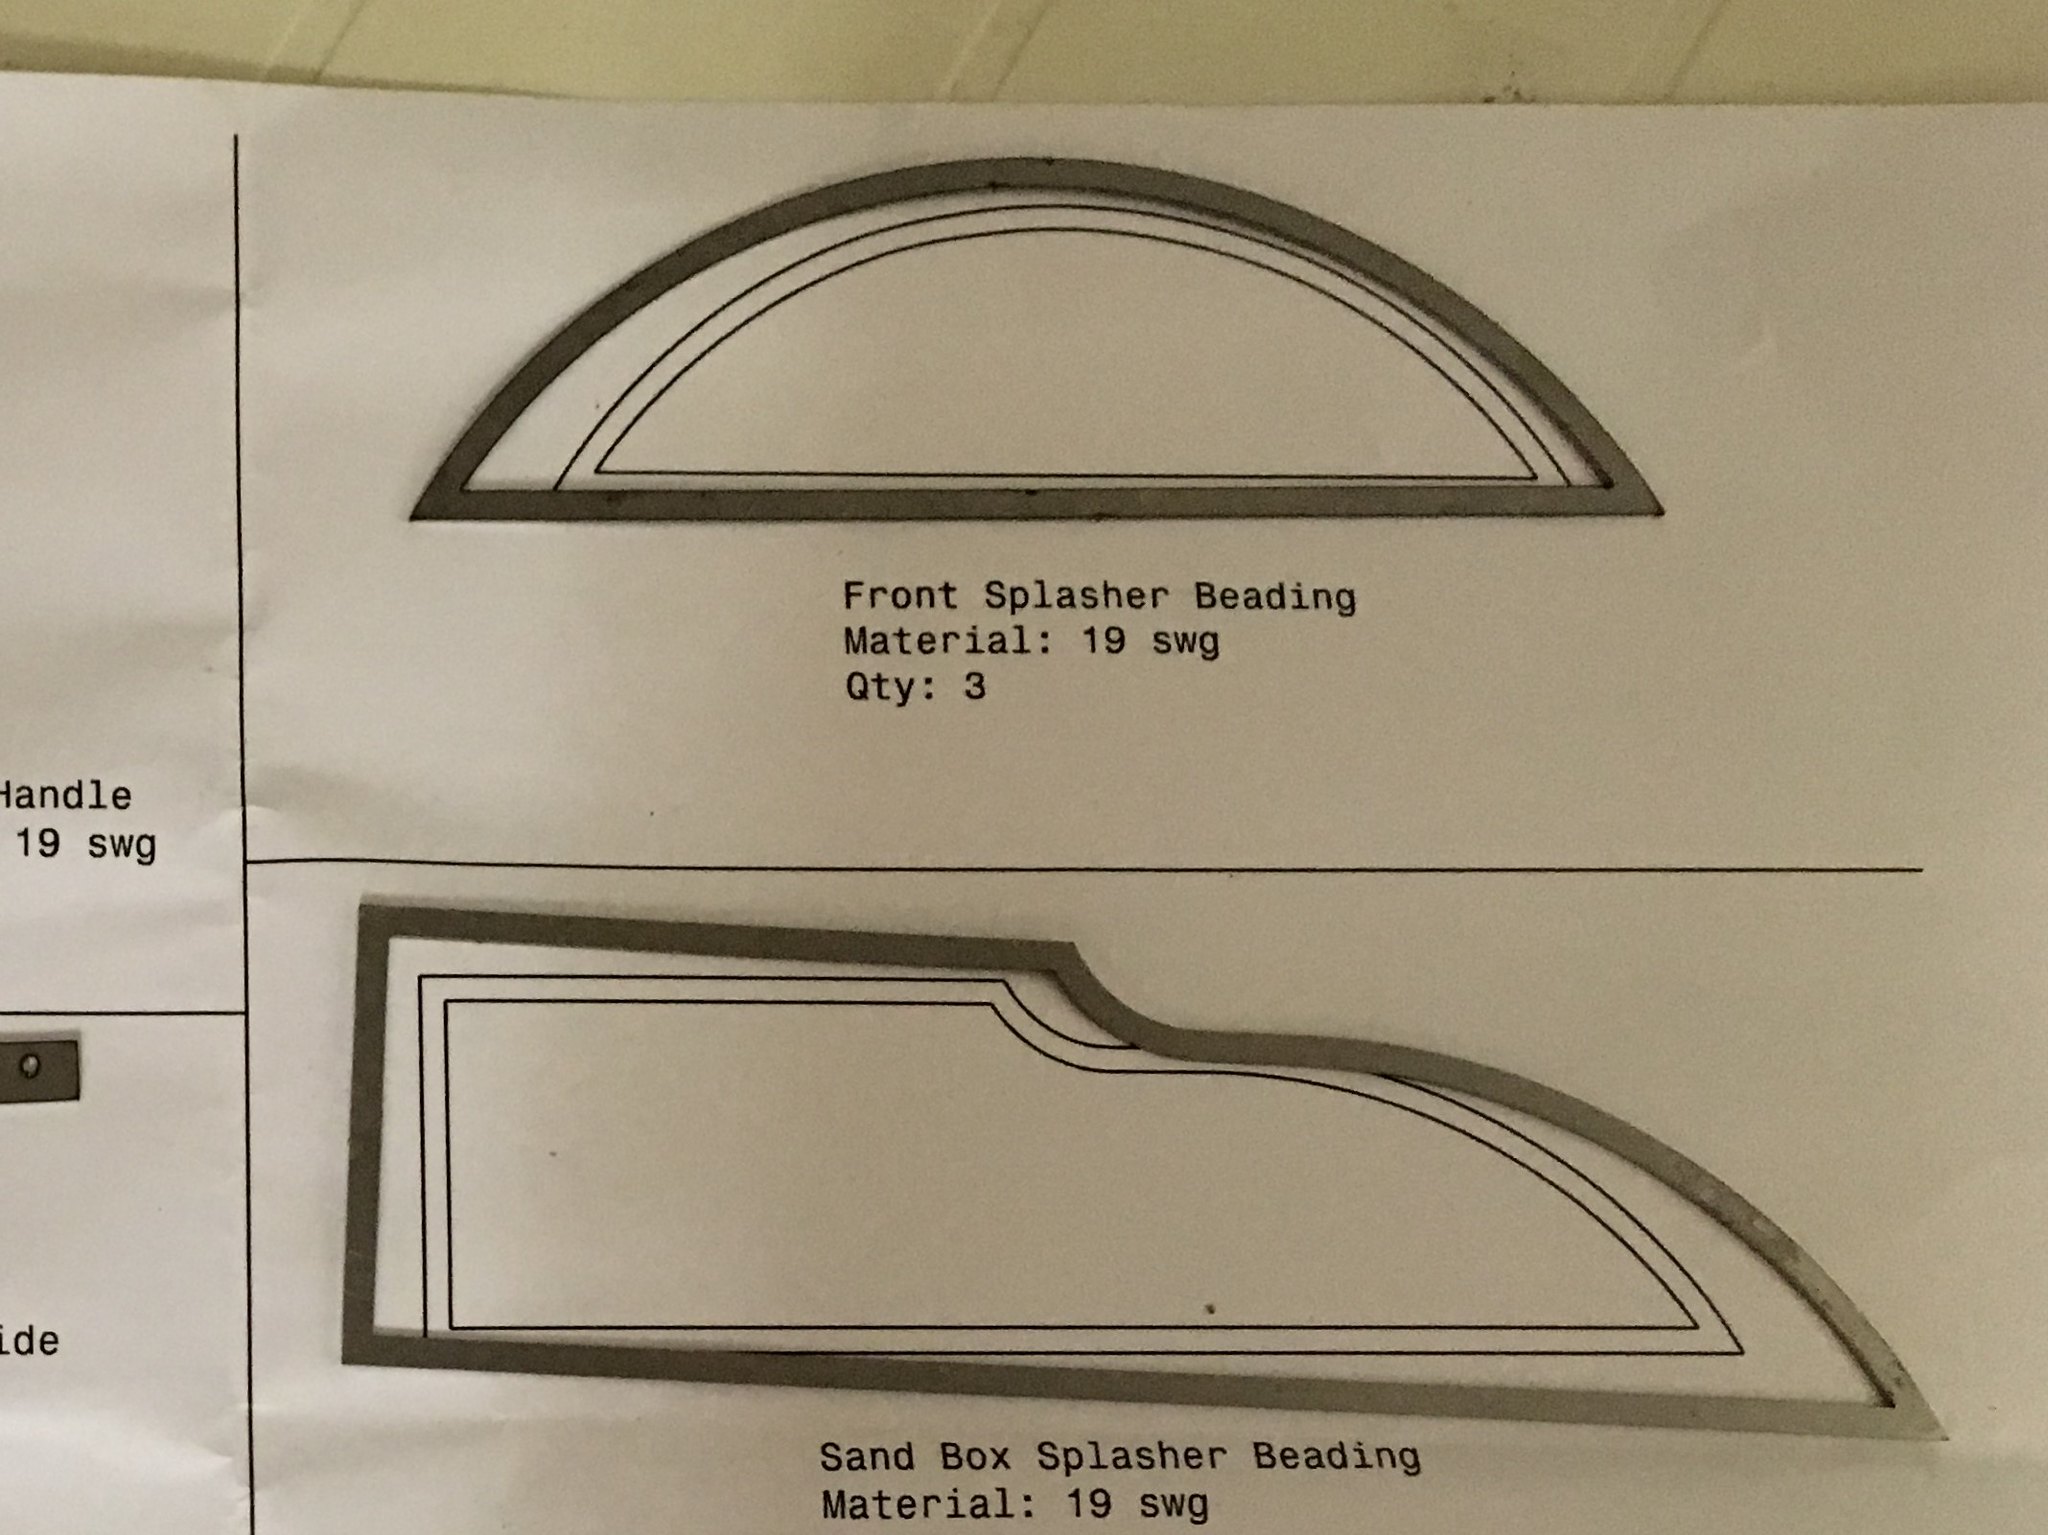 IMG_0016a IMG_0016a by Dave Smith, on Flickr A selection of 3mm thick parts including parts for the smoke box and buffer beams etc. 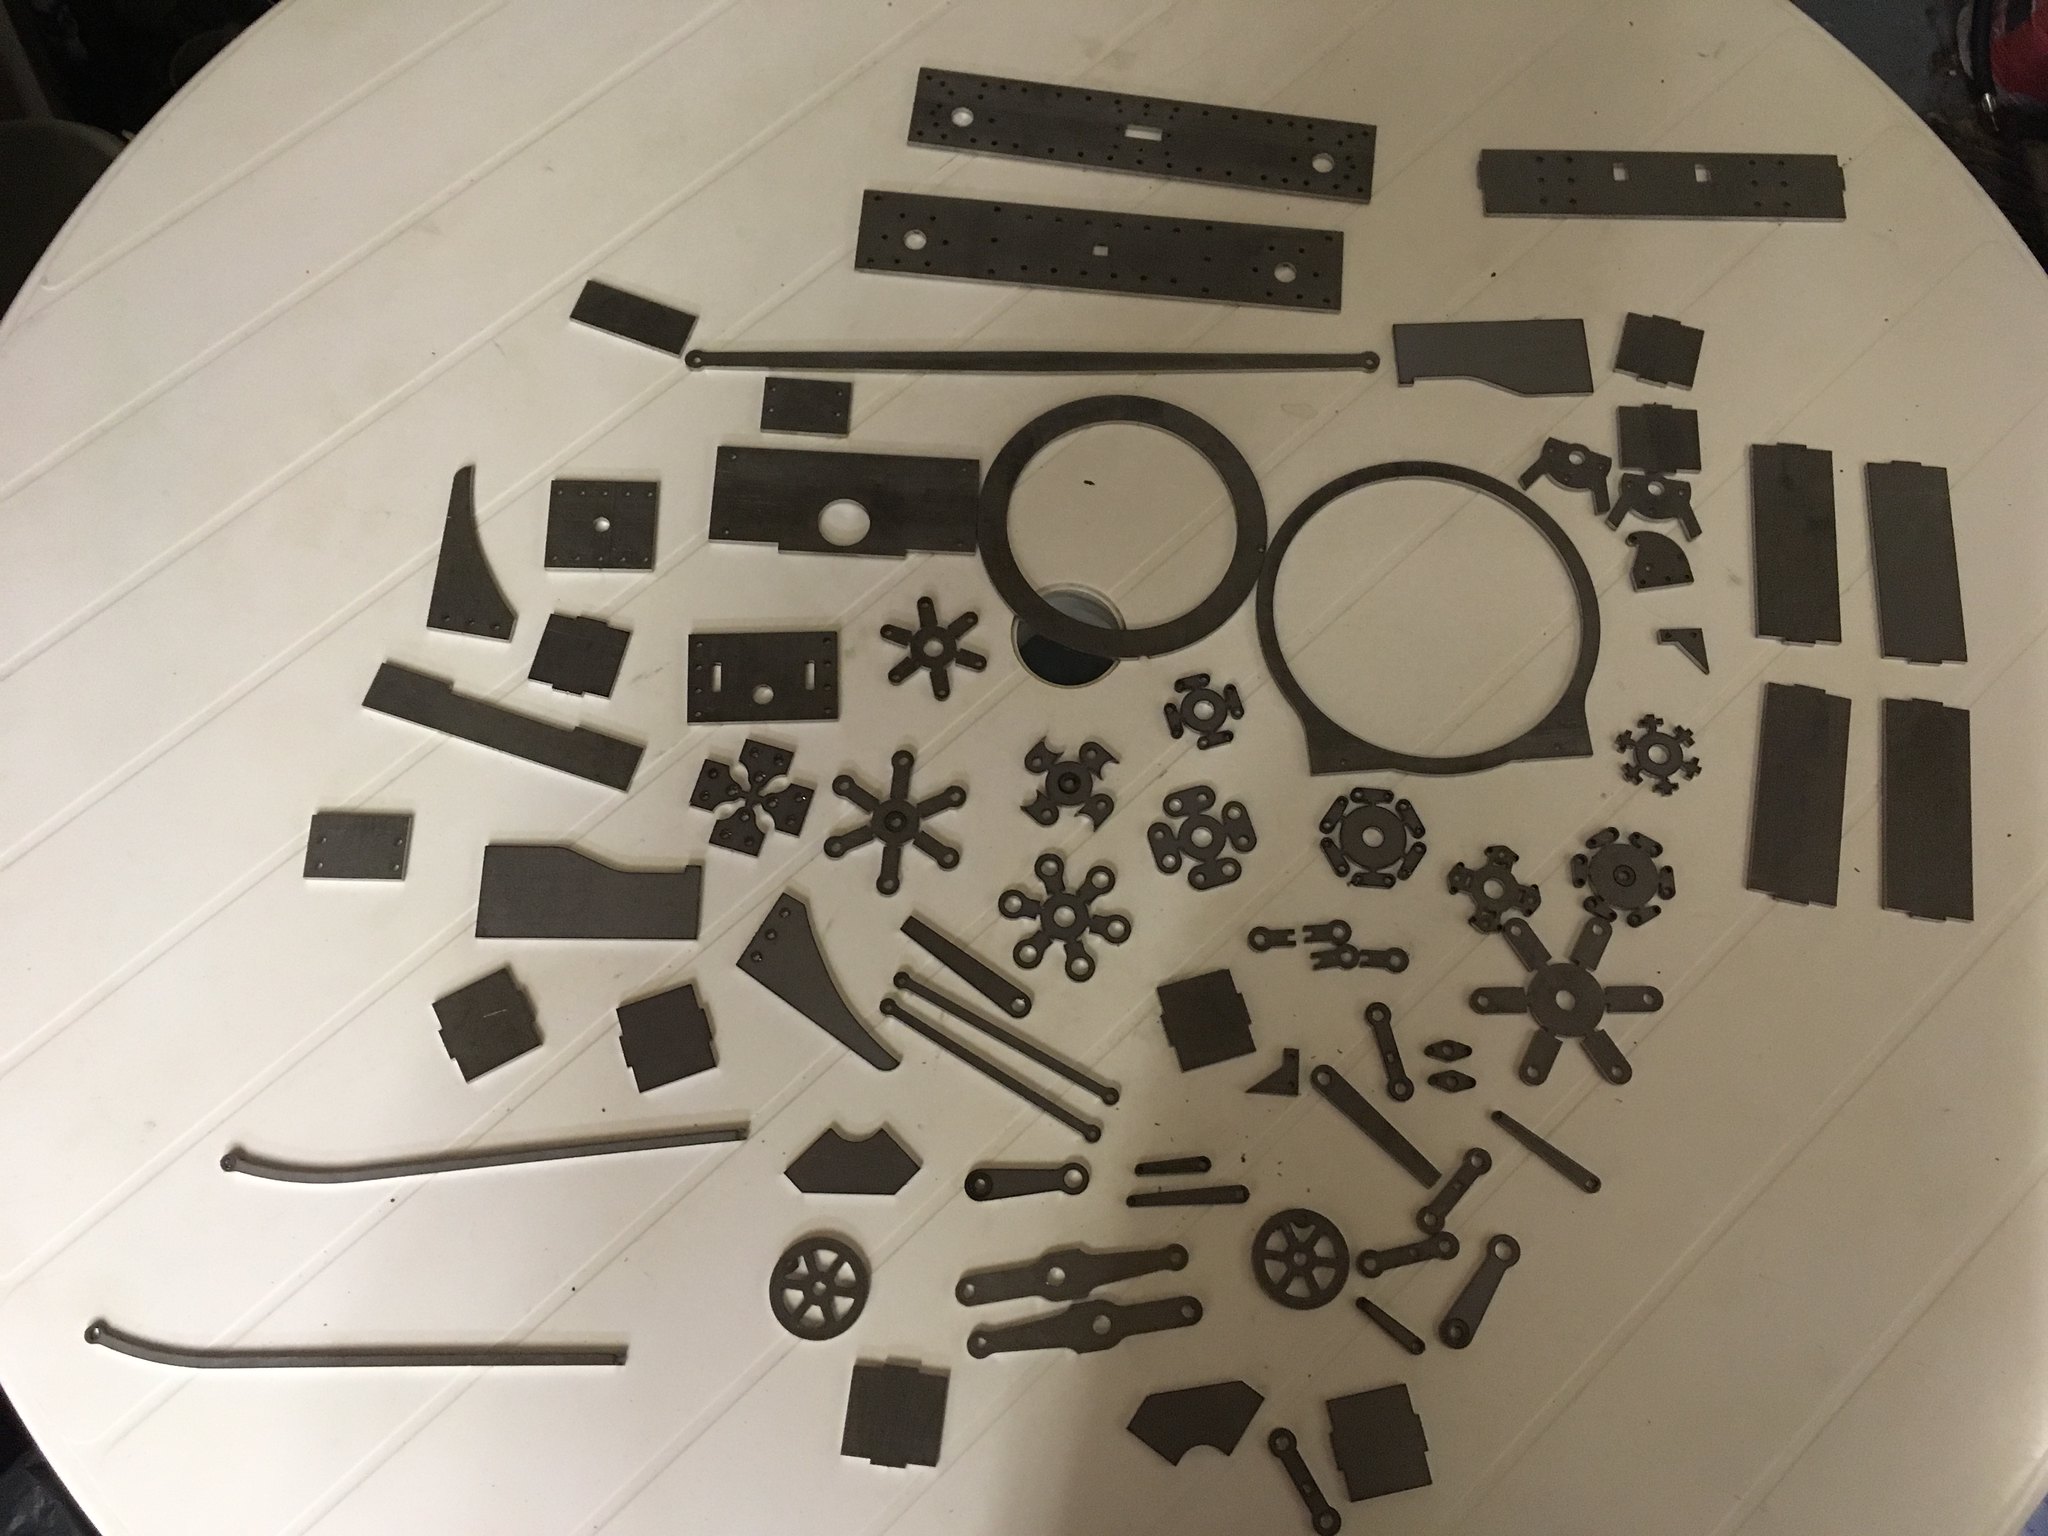 IMG_0017 IMG_0017 by Dave Smith, on Flickr The very small parts are nested so I do not loose them and also make additional operations easier. 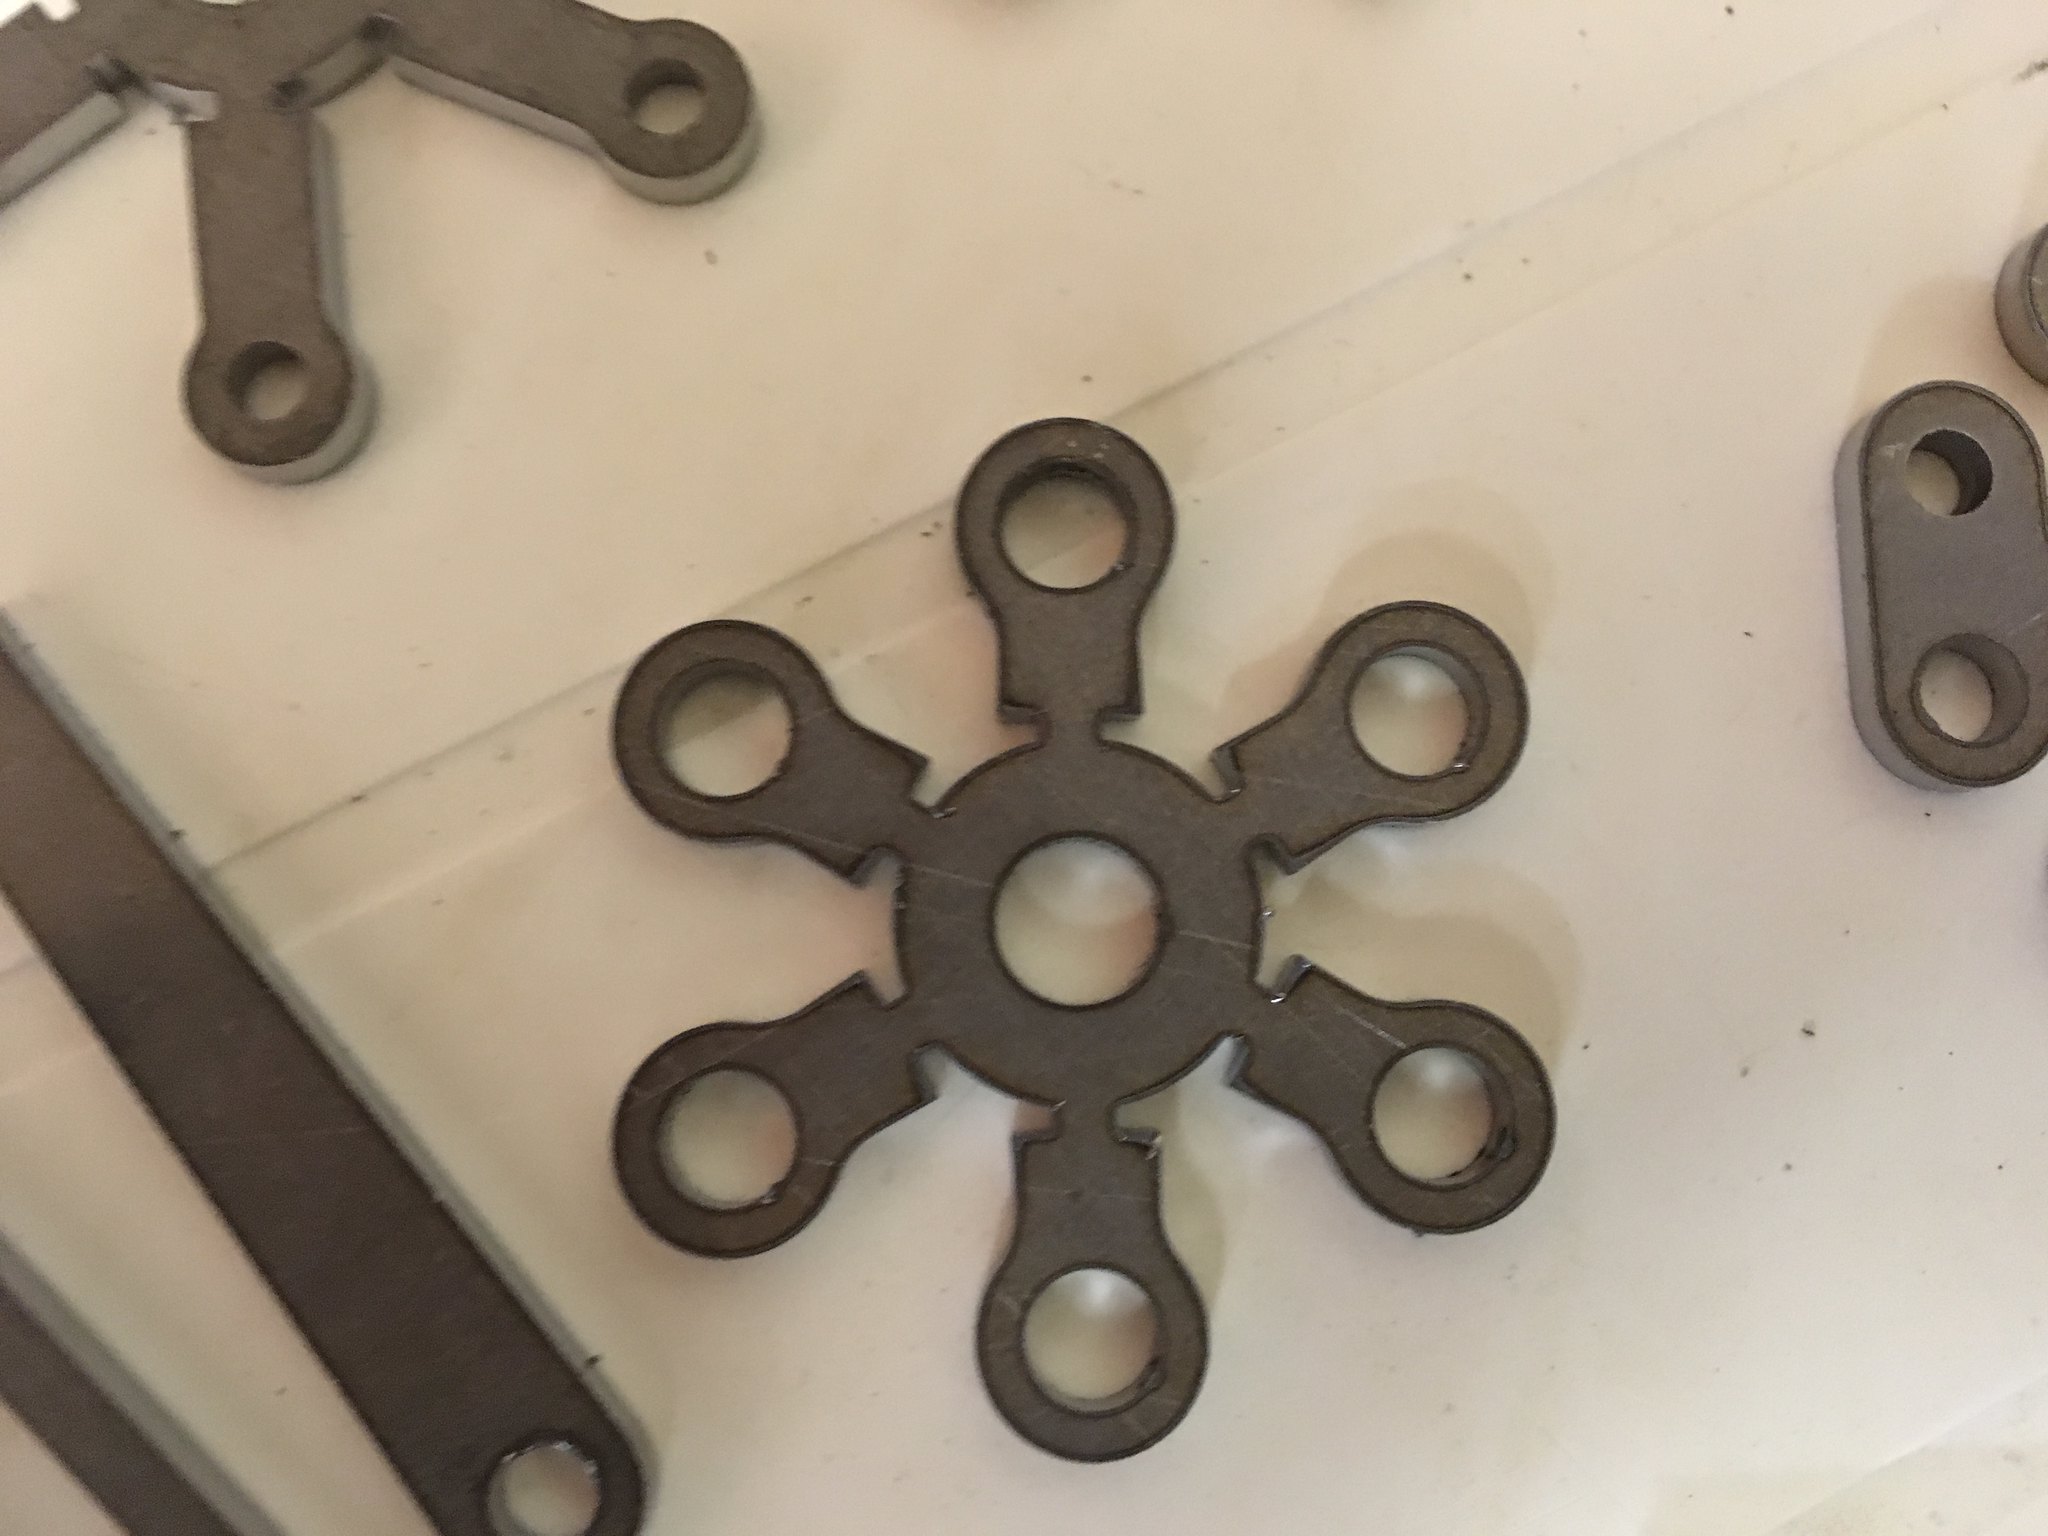 IMG_0018 IMG_0018 by Dave Smith, on Flickr Cab Front and side, plus smoke box wrapper. 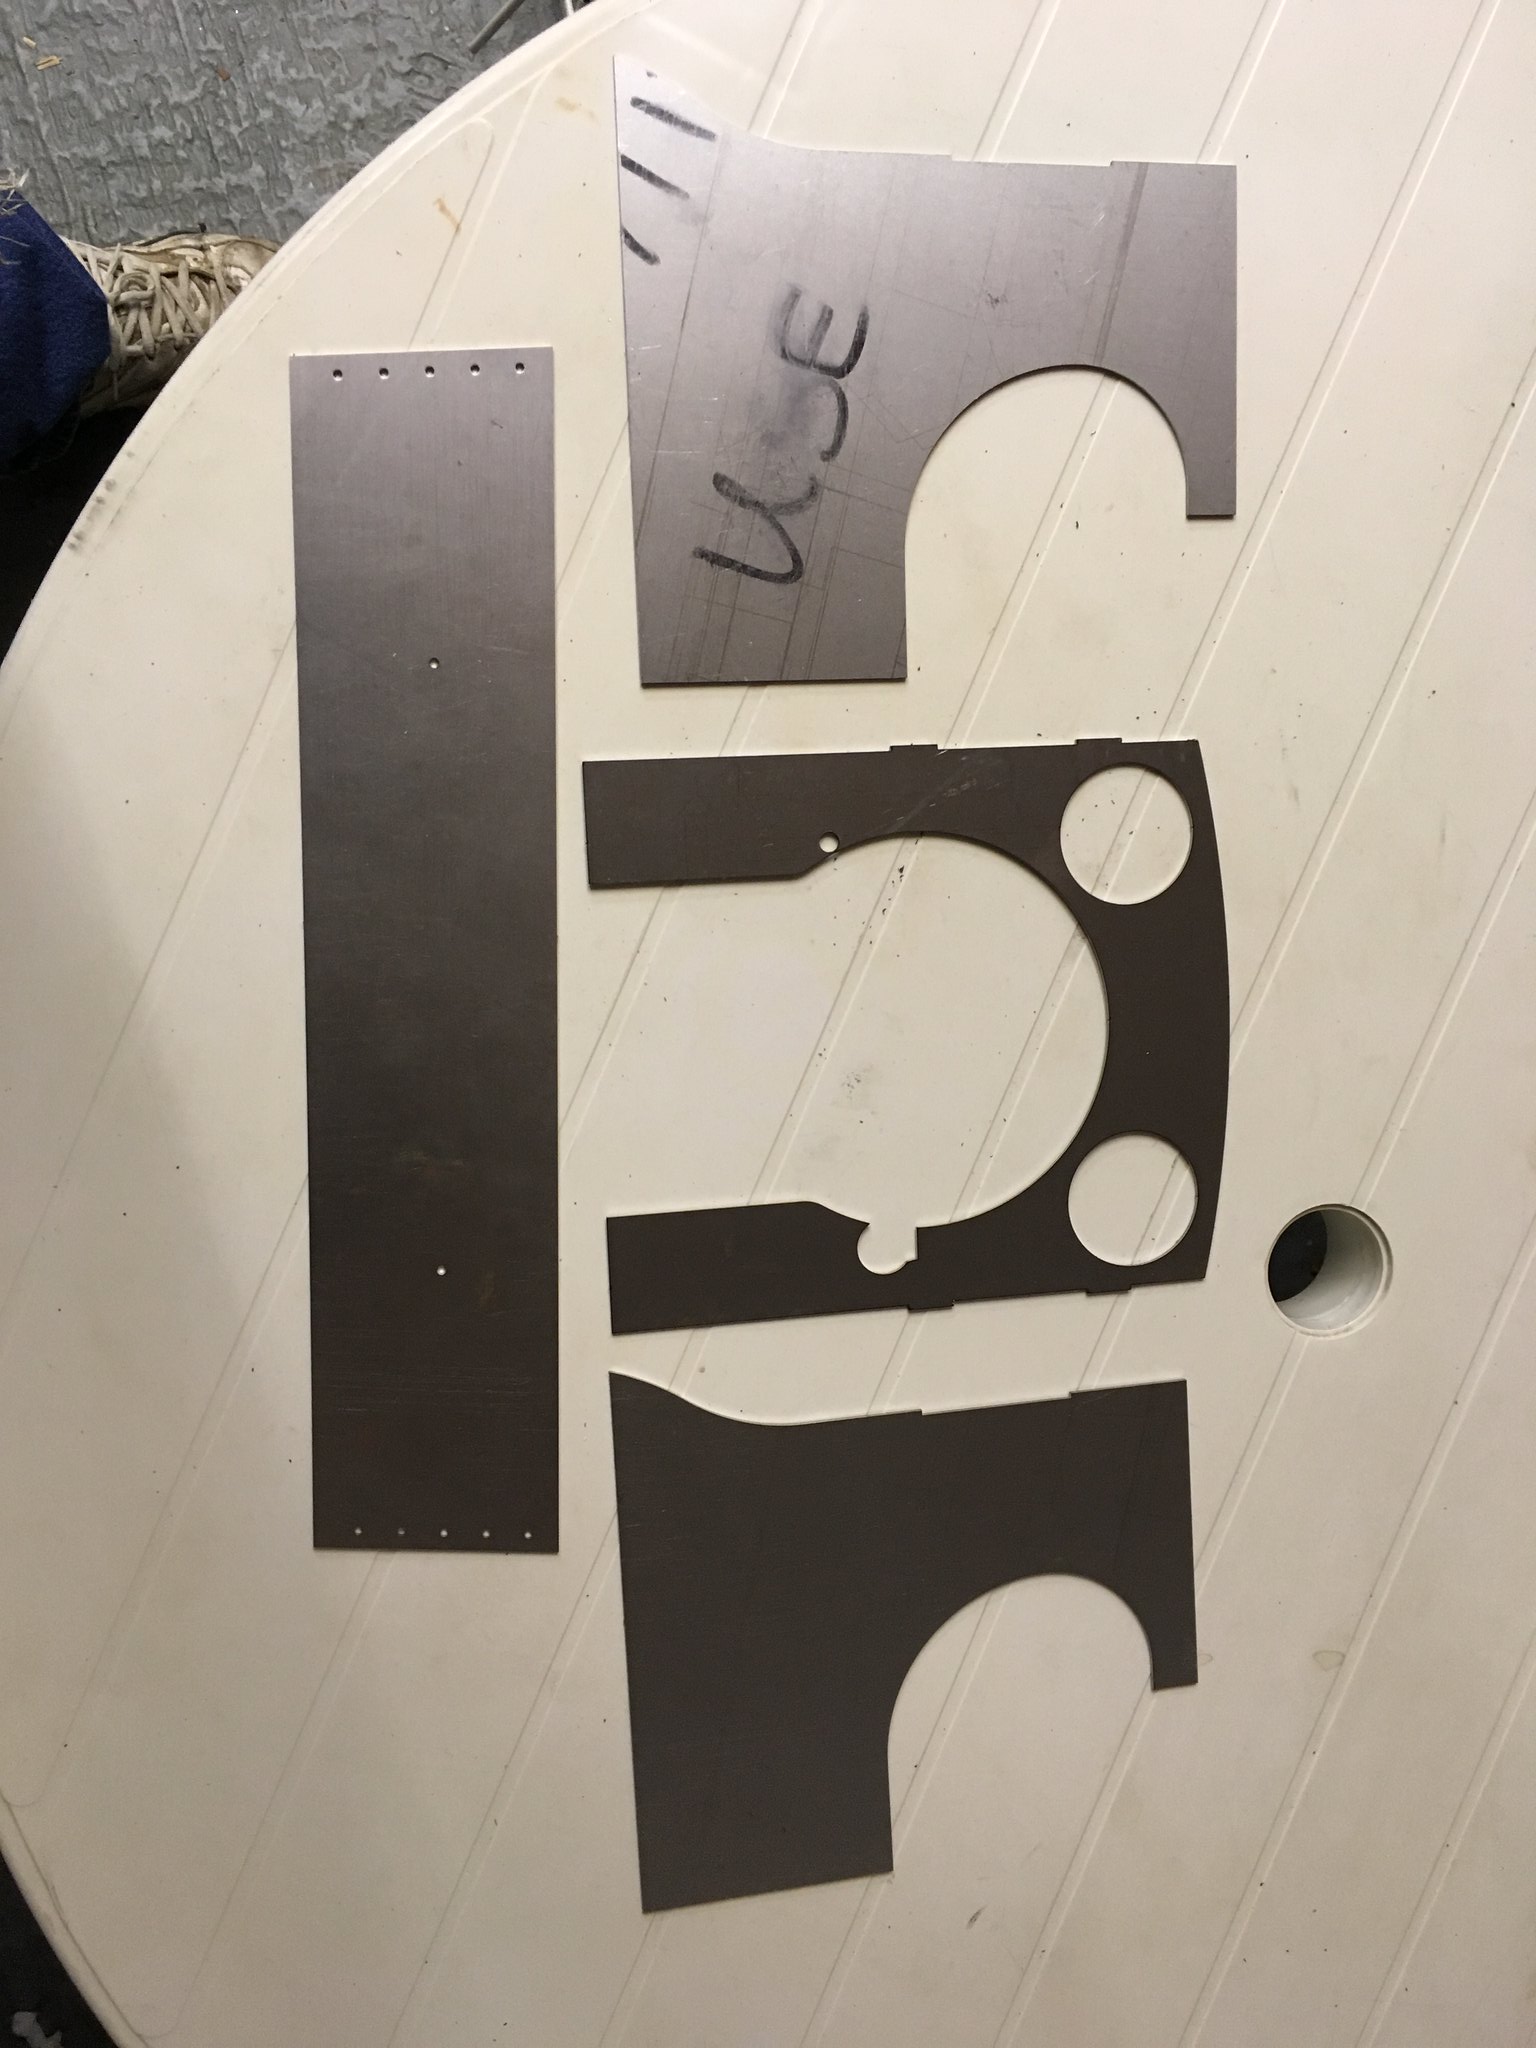 IMG_0024 IMG_0024 by Dave Smith, on Flickr Stainless steel parts for the grate. 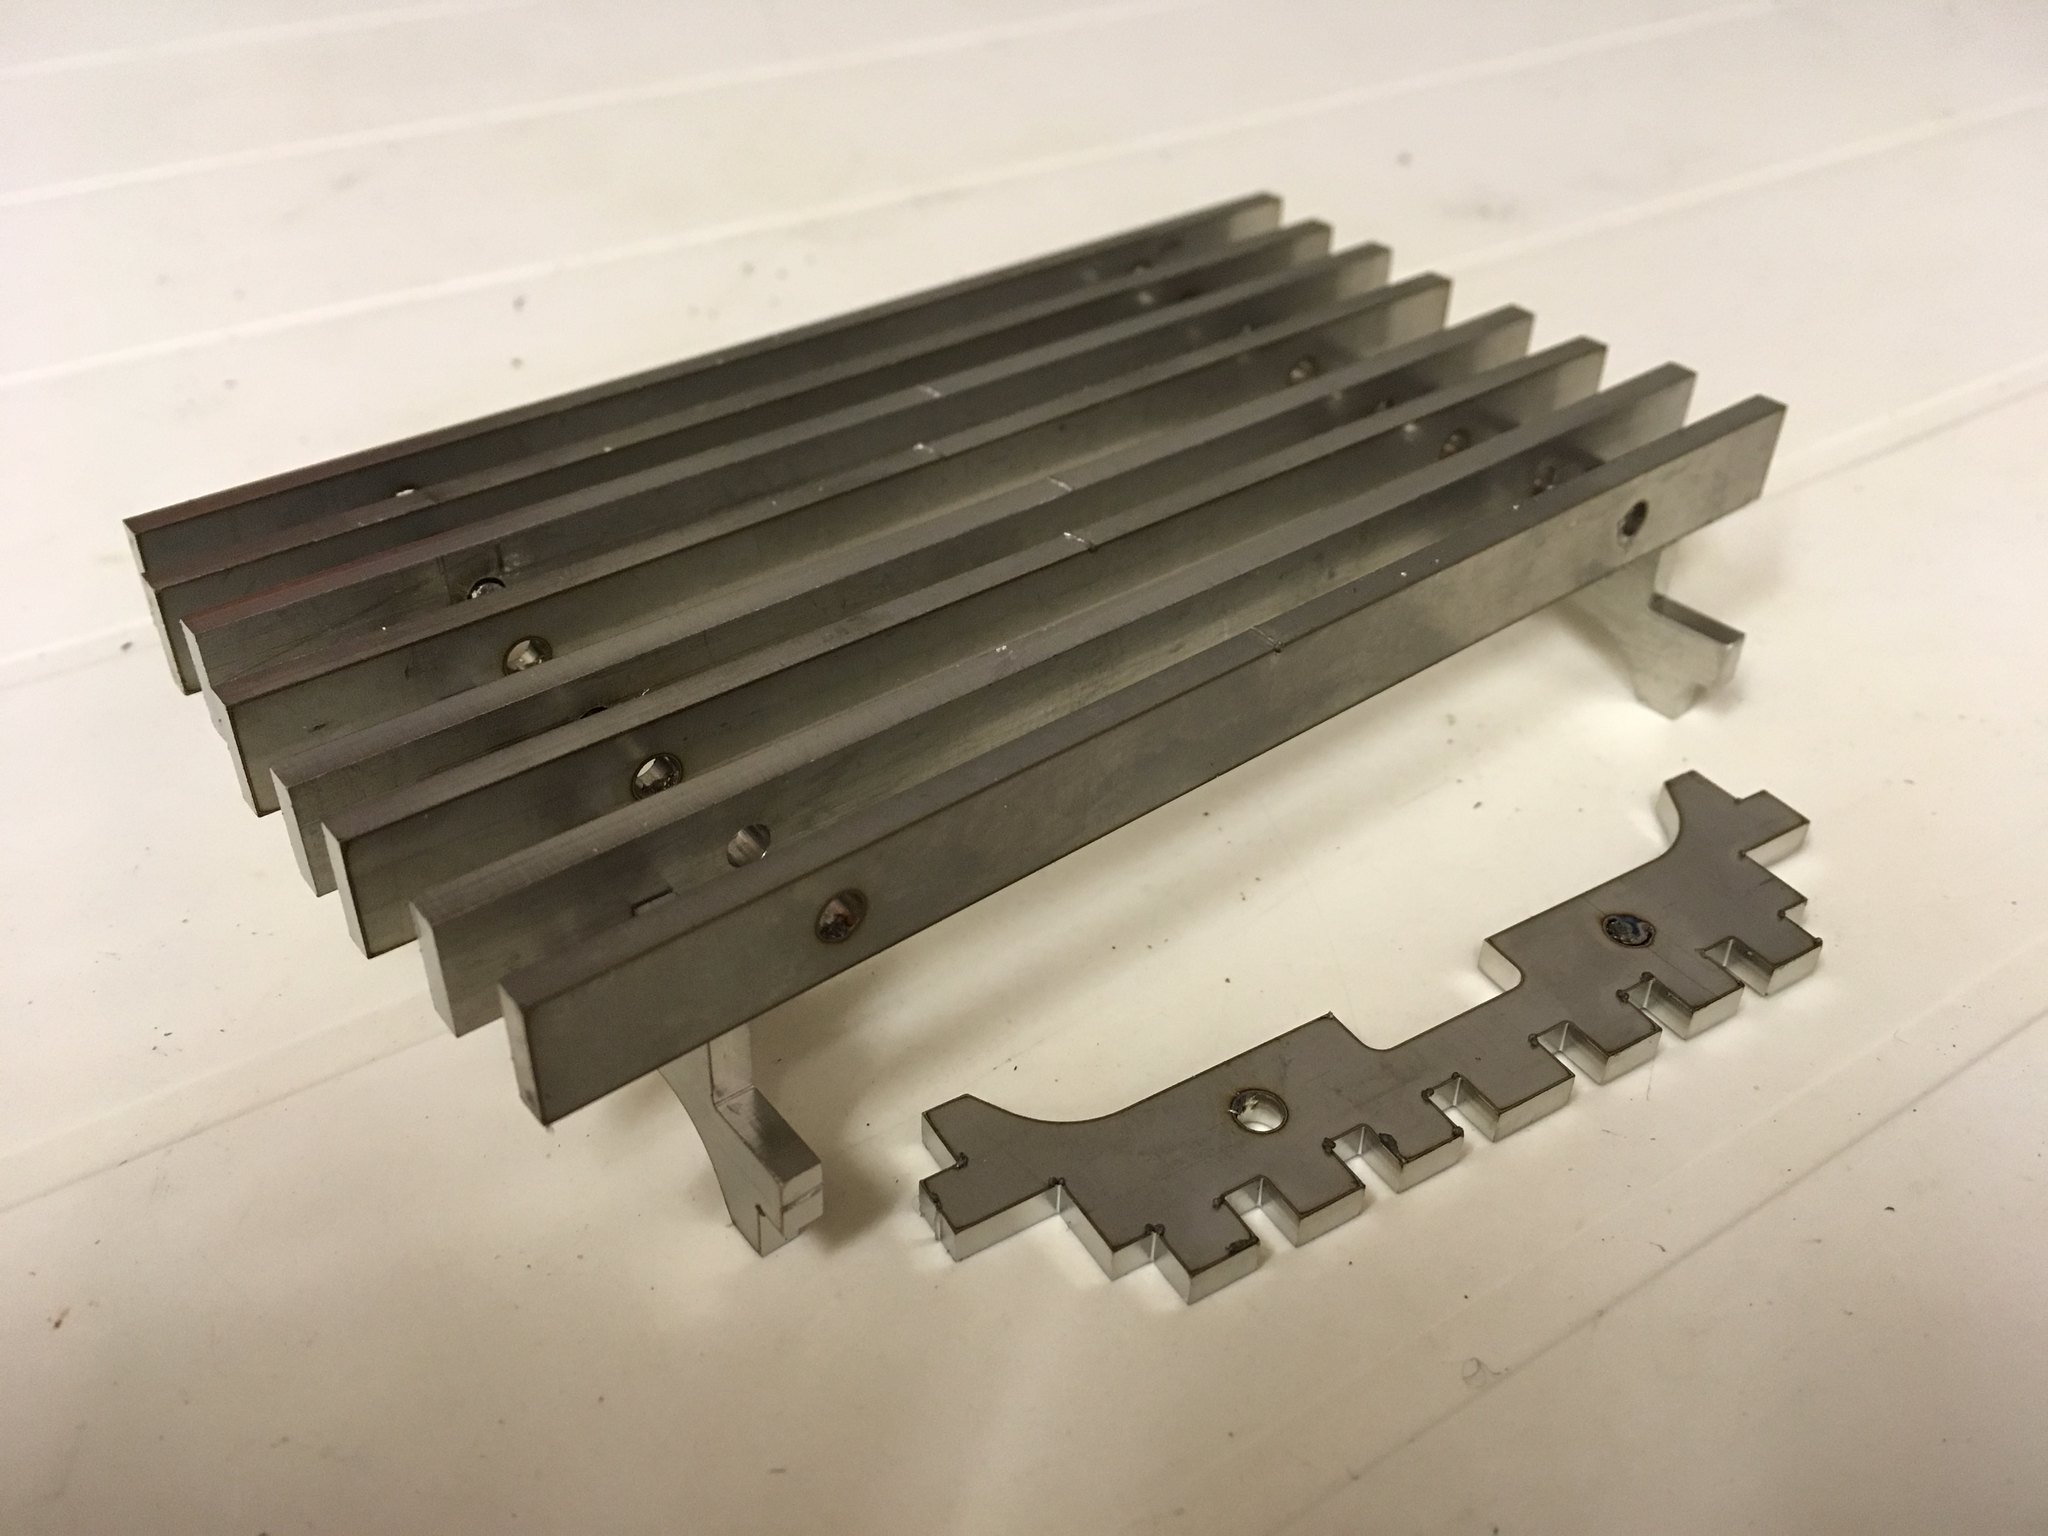 IMG_0020 IMG_0020 by Dave Smith, on Flickr Reversing rod etc 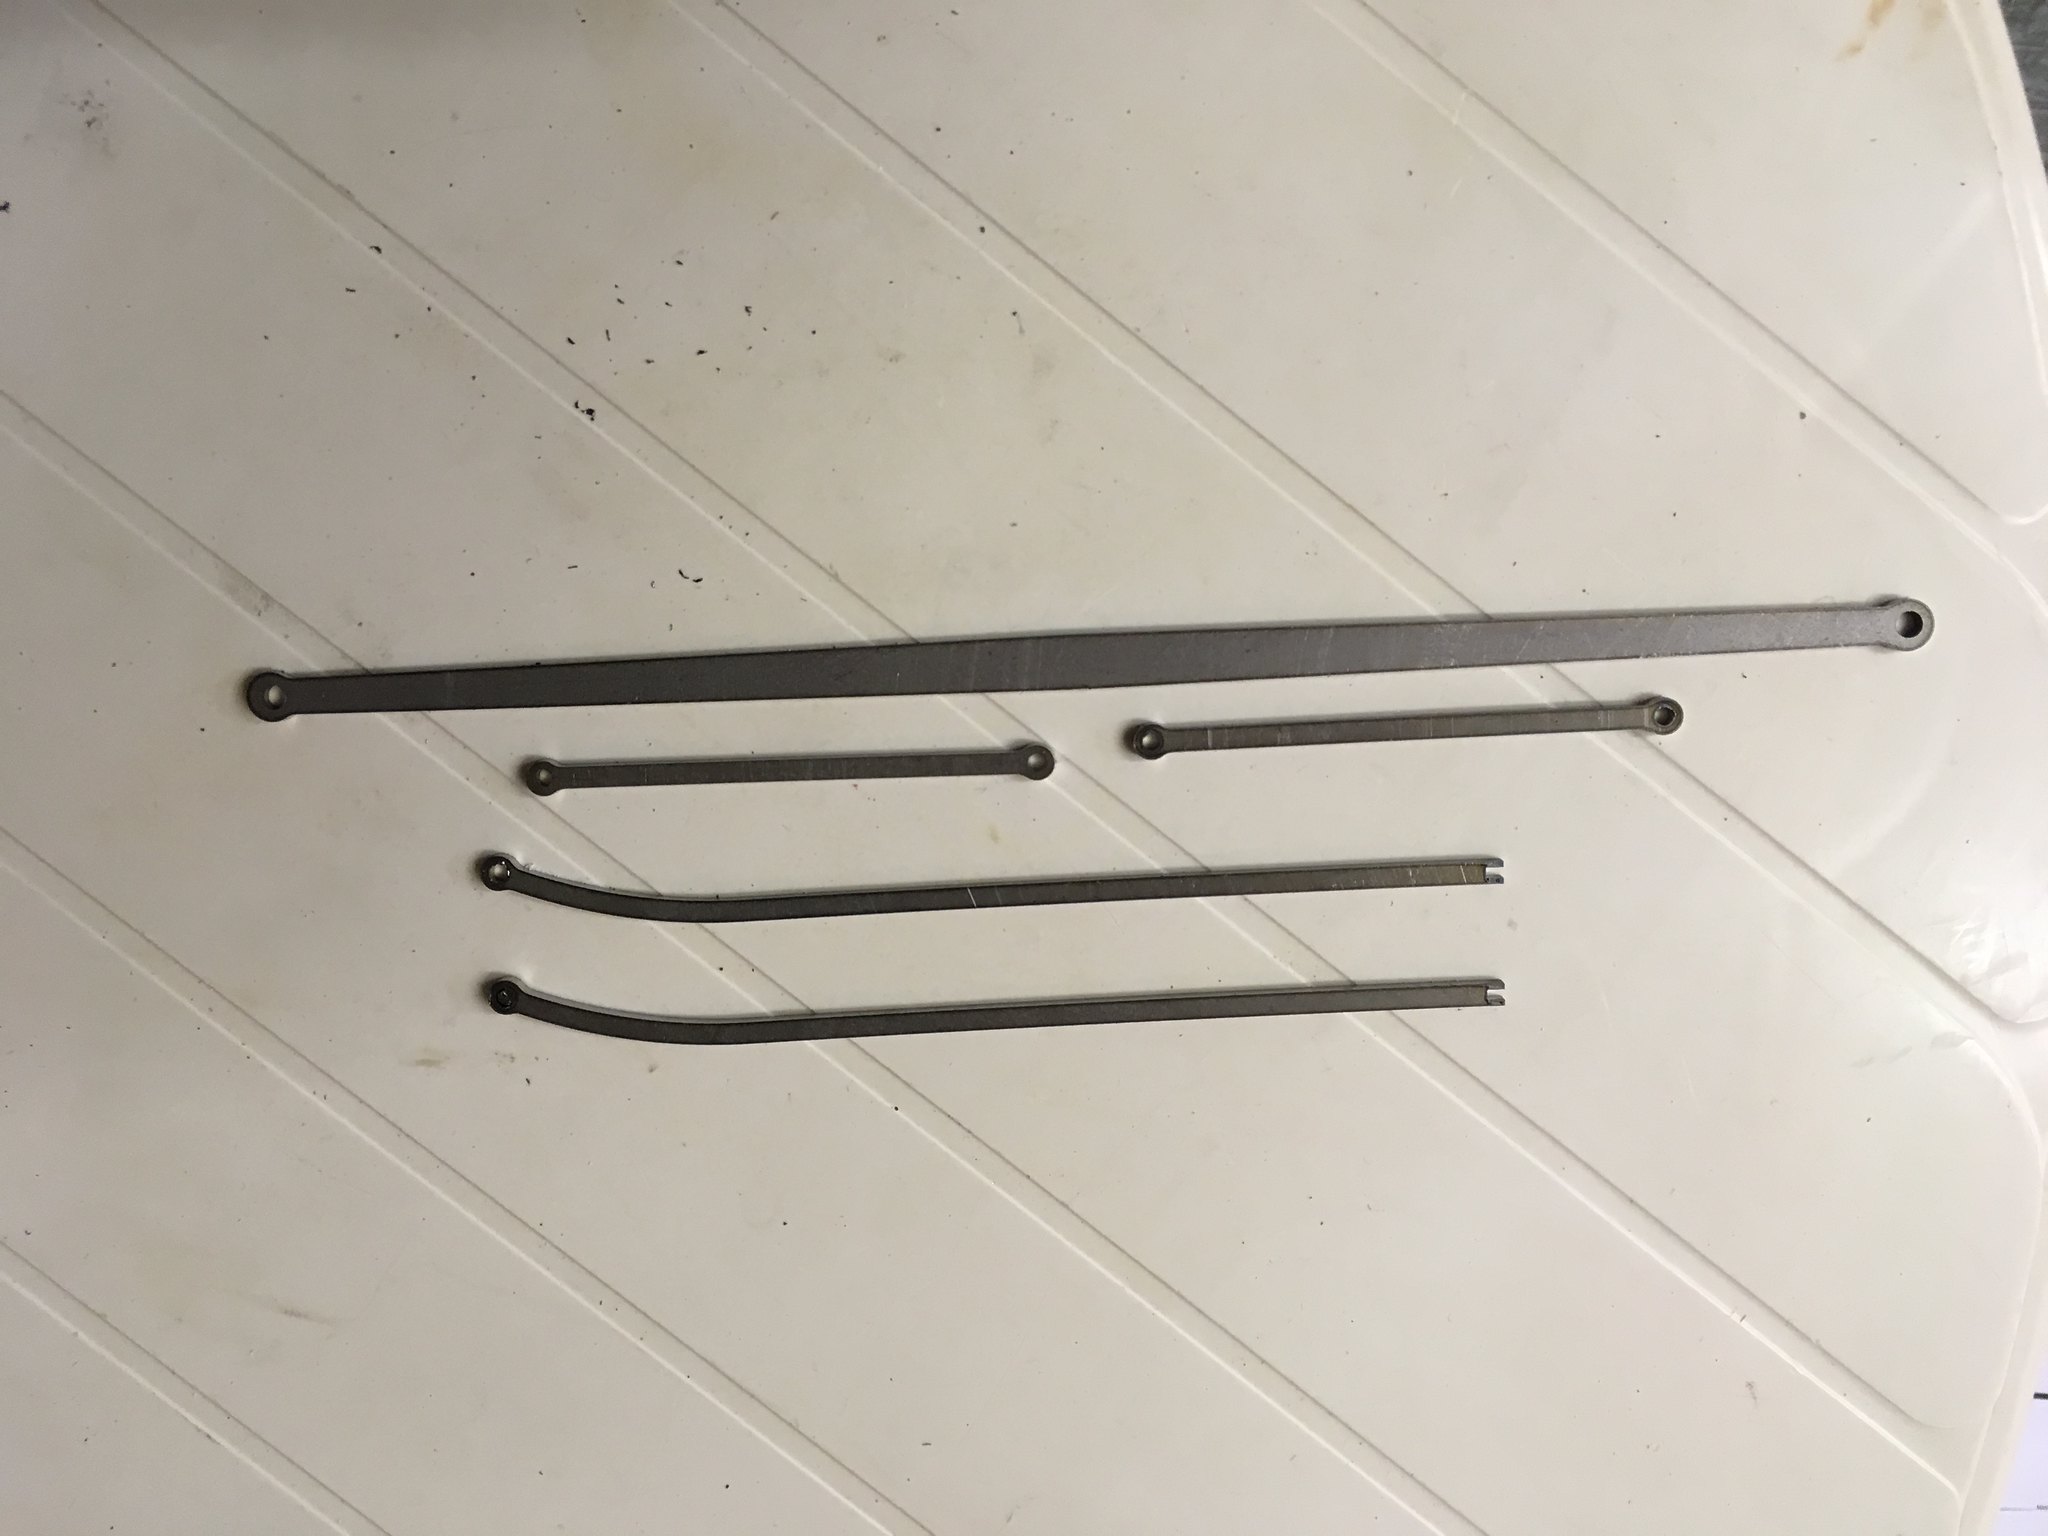 IMG_0019 IMG_0019 by Dave Smith, on Flickr Tender Frames 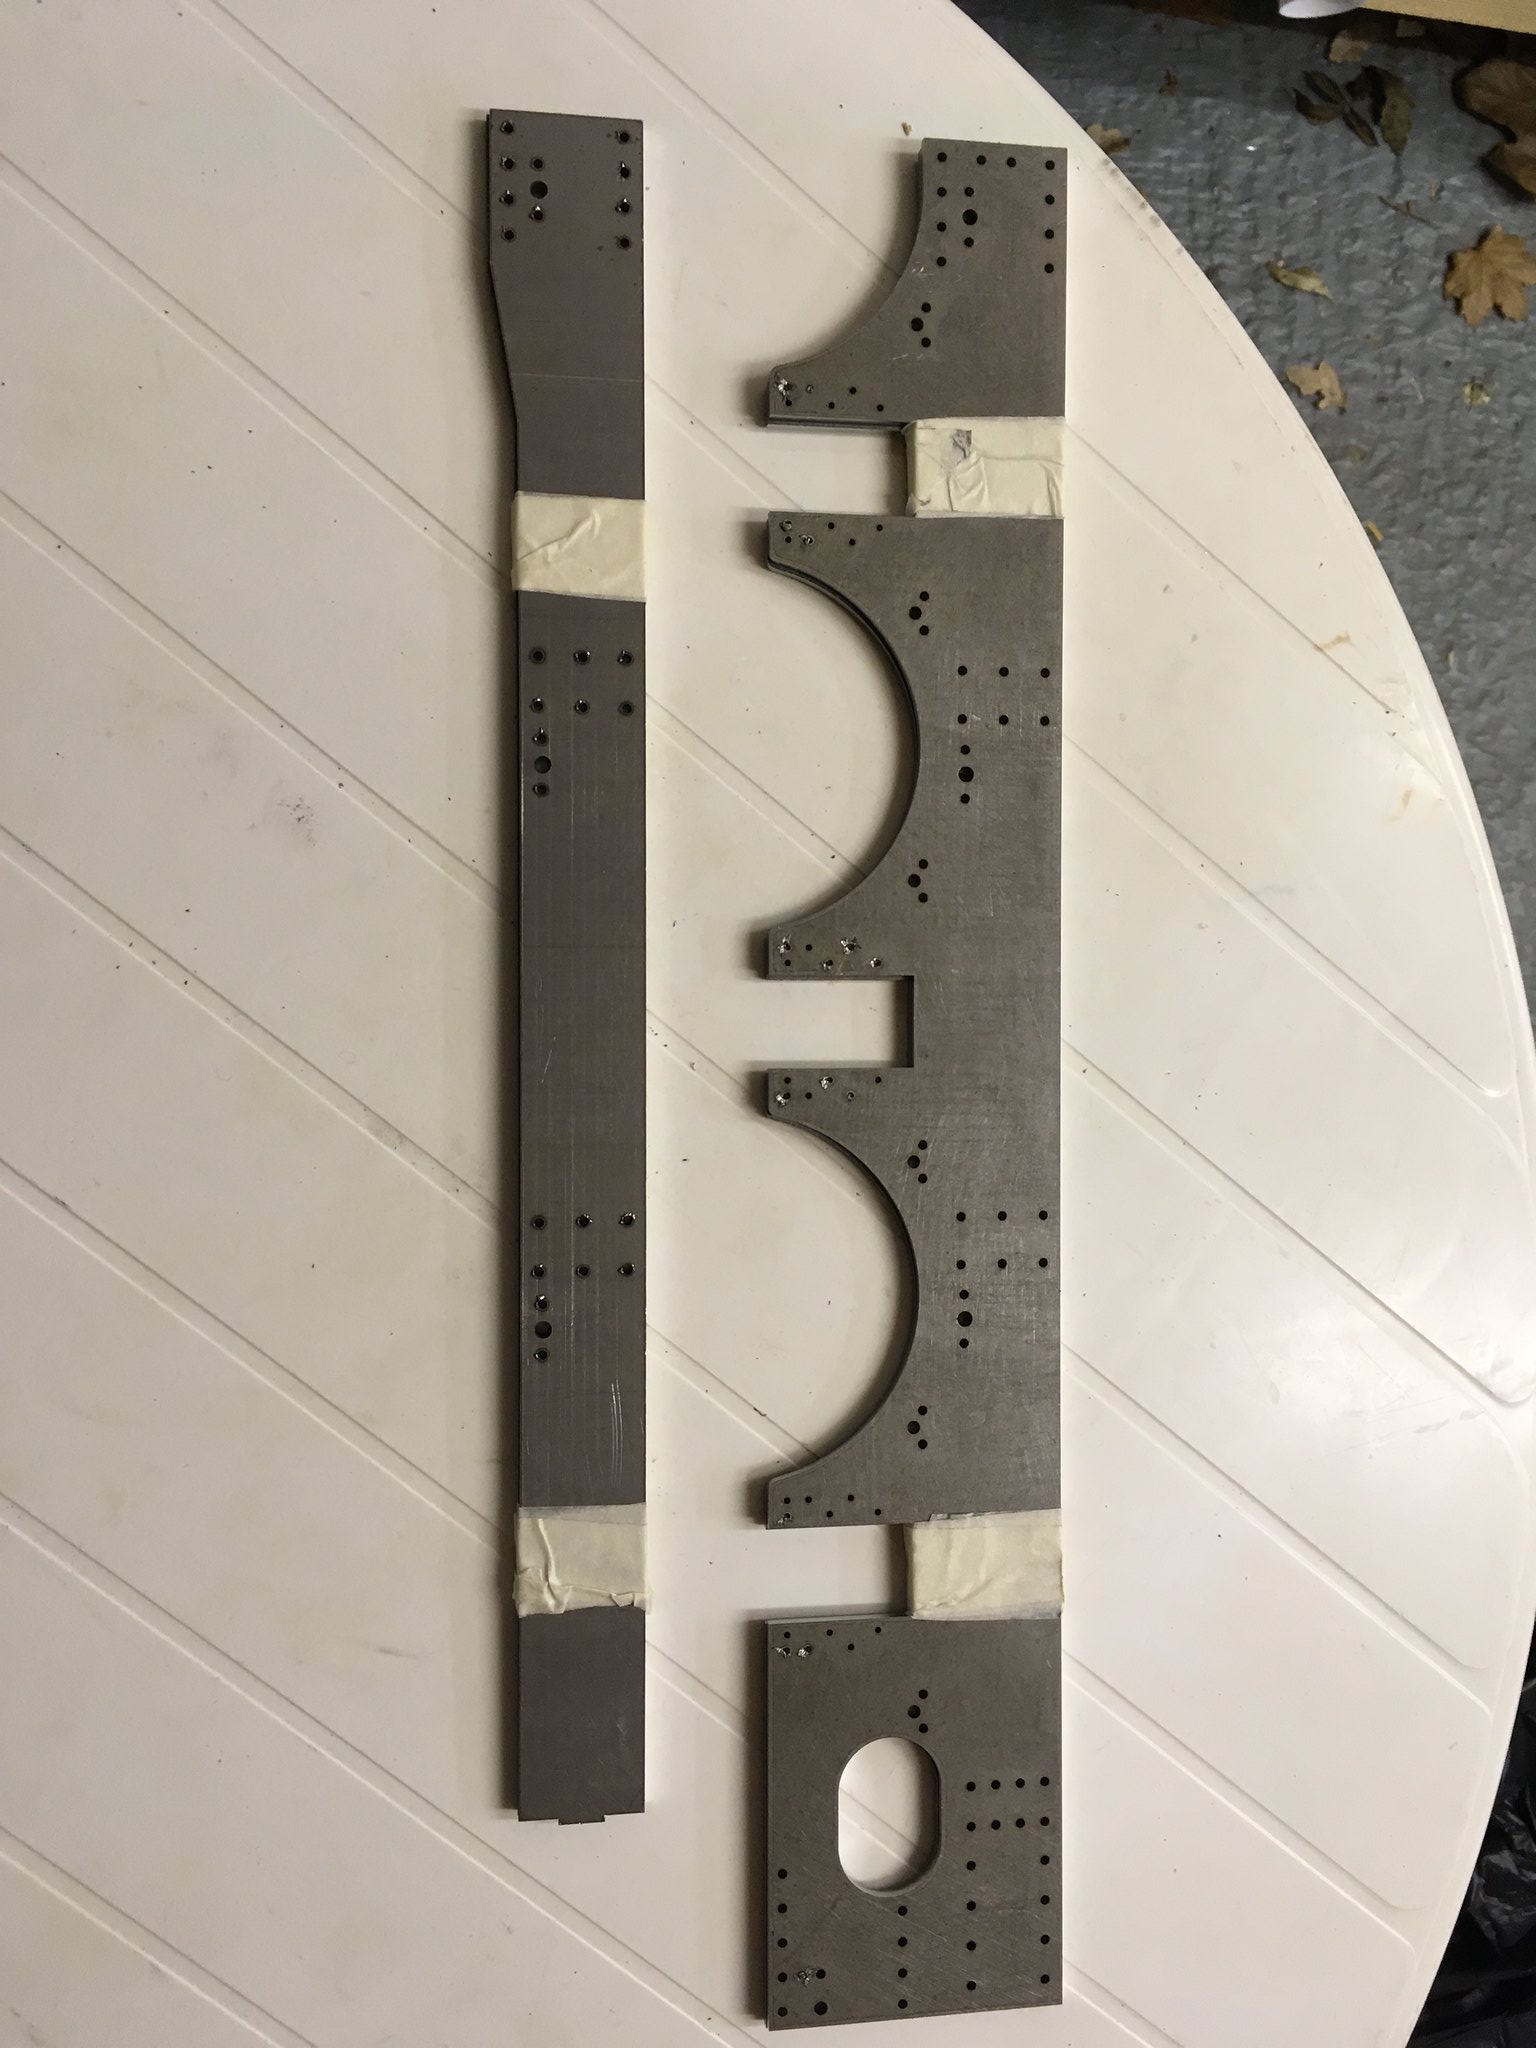 IMG_0029 IMG_0029 by Dave Smith, on Flickr Loco Frames and detail. 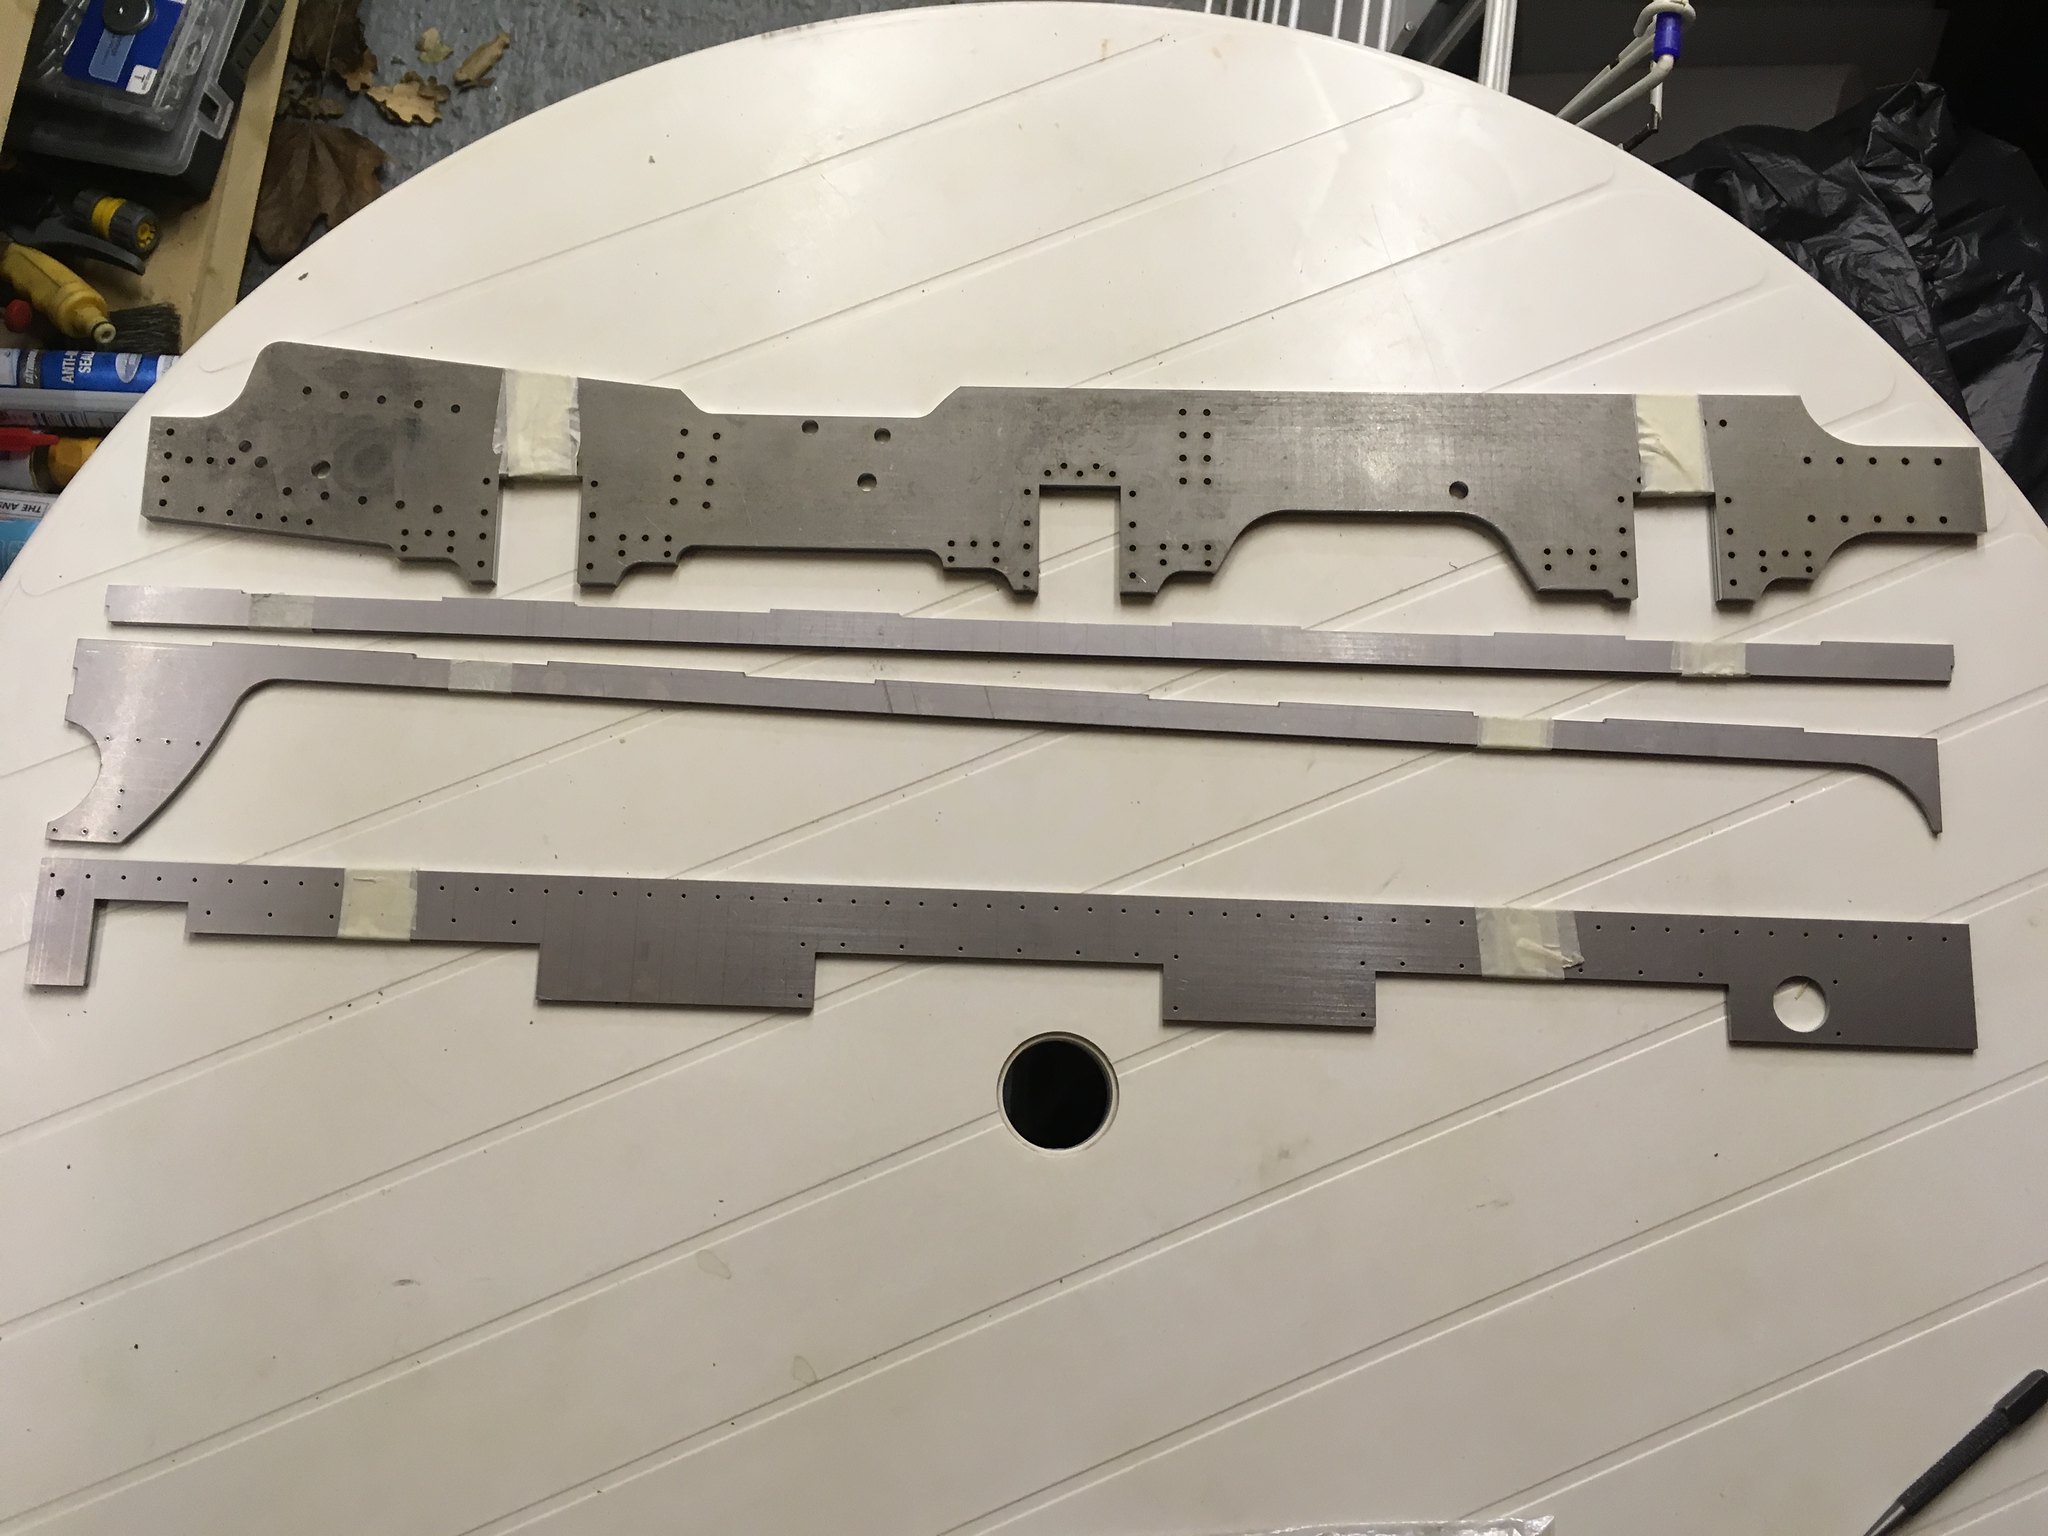 IMG_0030 IMG_0030 by Dave Smith, on Flickr 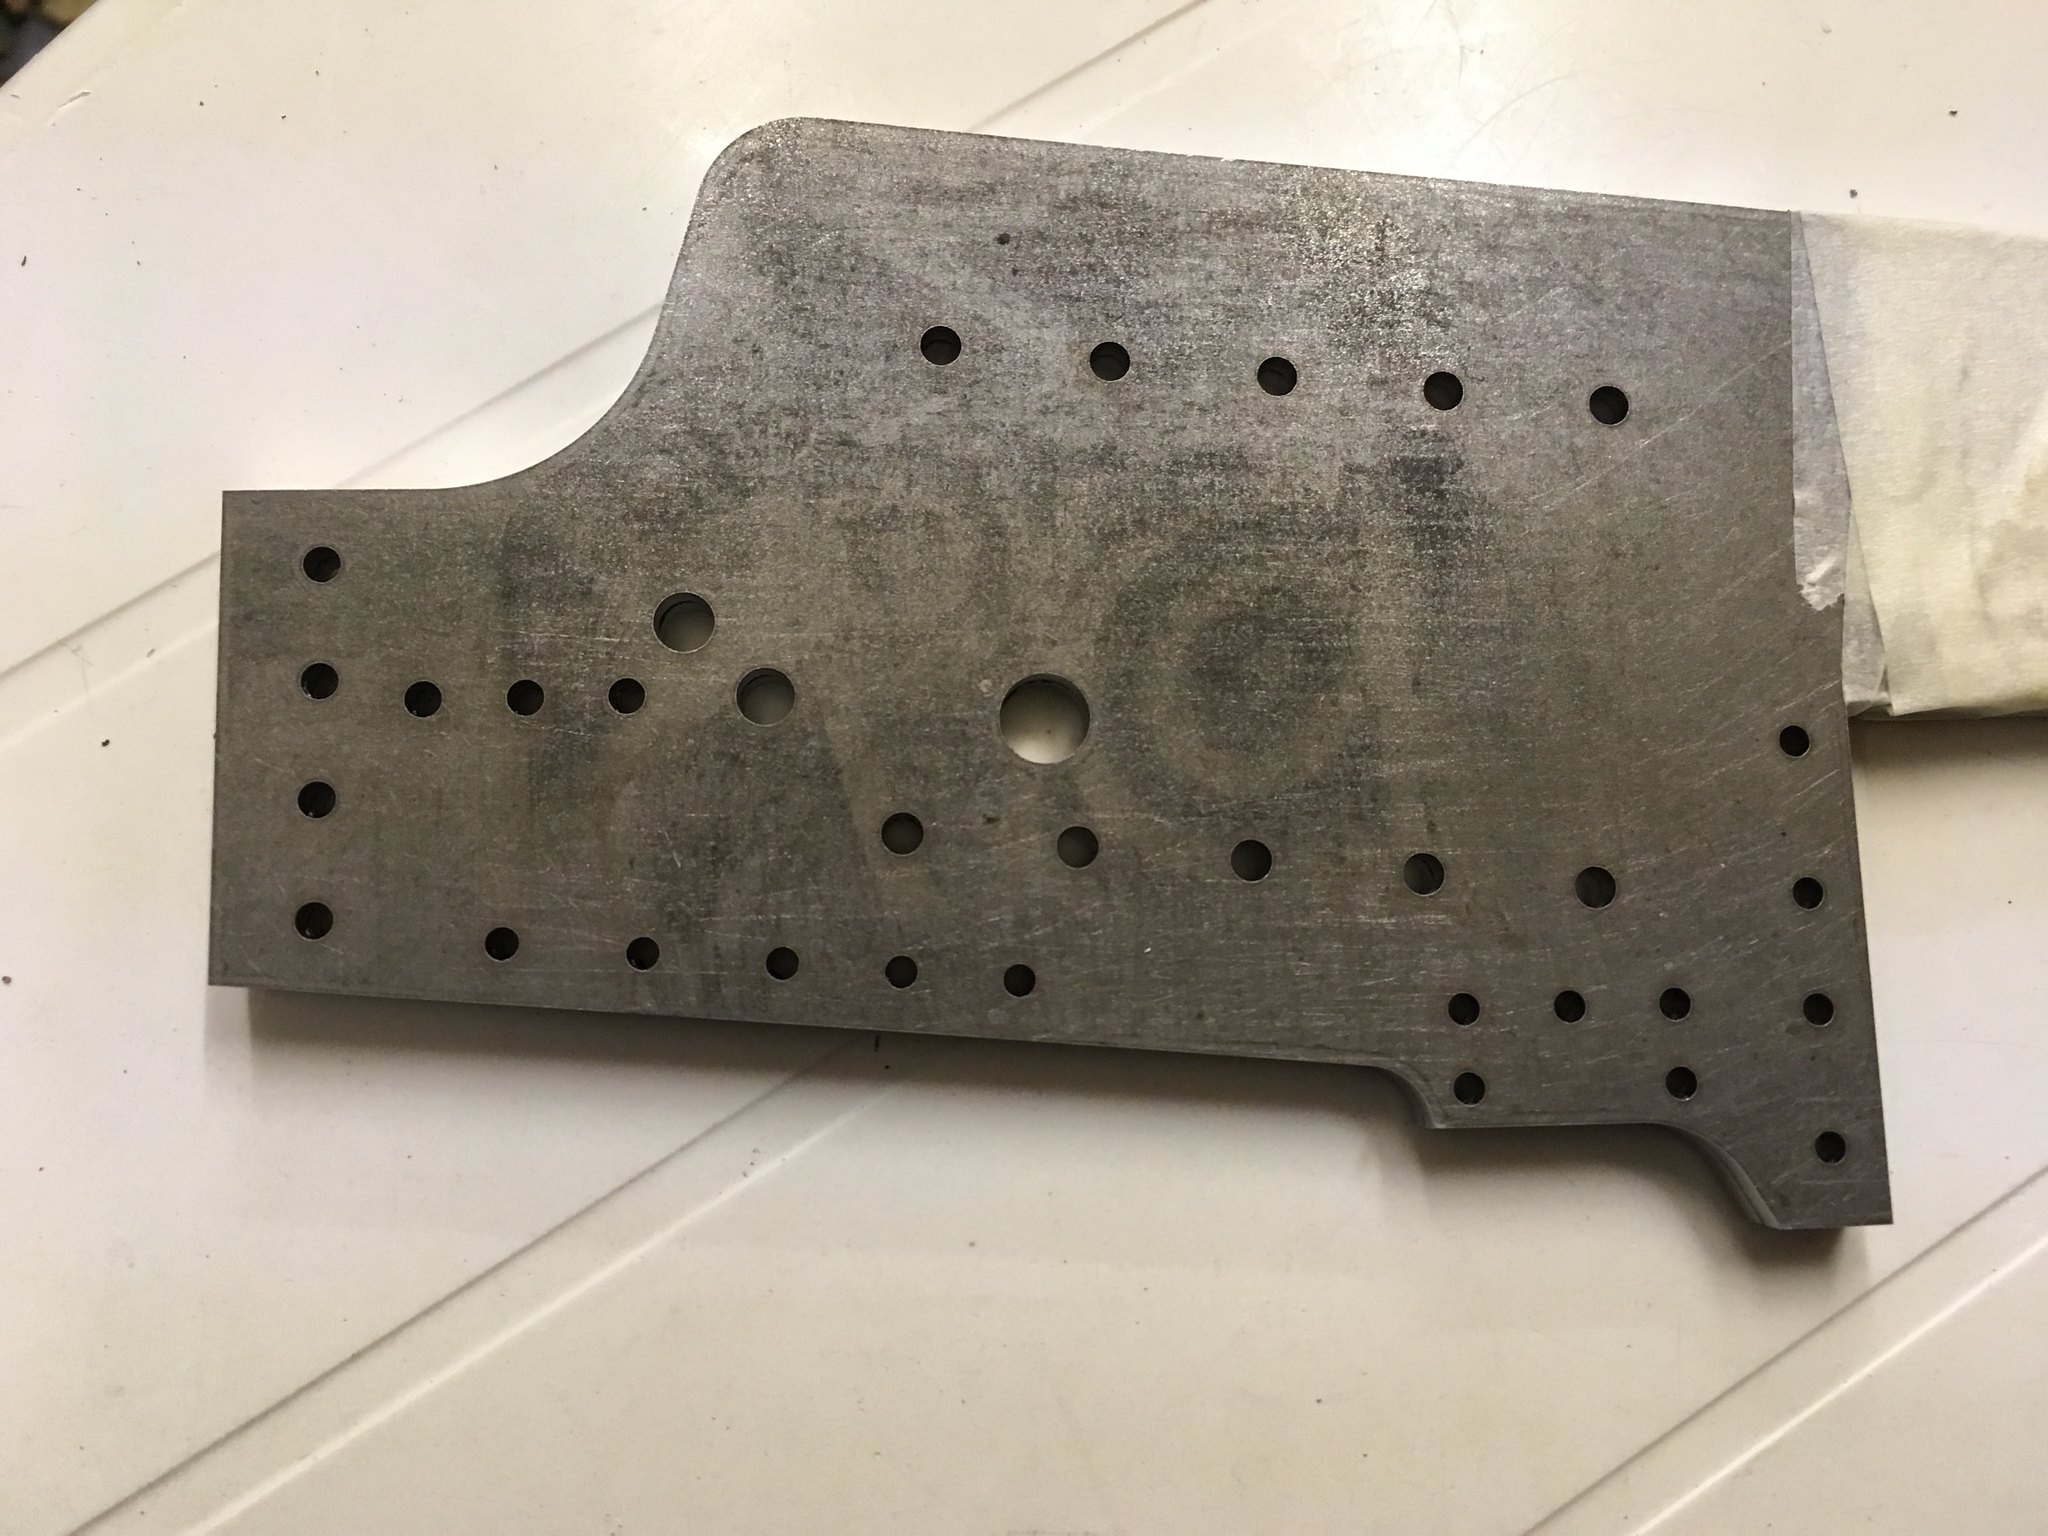 IMG_0032 IMG_0032 by Dave Smith, on Flickr And so it goes on I have another 2 or 3 bags of bits I have not sorted yet. I think I will in time honoured fashion start on the tender first. The frame has been designed for a fairly quick build but I do need to an oxy/propane set first as some parts need brazing. I intend where possible to silicone bronze braze on the steel parts, as it is significantly cheaper than using silver soldering. |
|
kipford
Statesman
  Building a Don Young 5" Gauge Aspinall Class 27
Posts: 575 
|
Post by kipford on Jan 15, 2018 20:02:51 GMT
pent a couple of hours this afternoon, deburring all the holes in the buffer beams and tender frames, part of the deal with them being gratius is that they come straight off the laser so there is often a little bit blow through on one side, plus there is the odd cusp where the beam starts and stops which needs to be removed. Anyway I could not resist doing a quick trial assembly. I need a few more 3/32" Clecko pins as most of mine are 1/8". So here are a couple of pictures of what the tender chassis will look like minus the drag box. 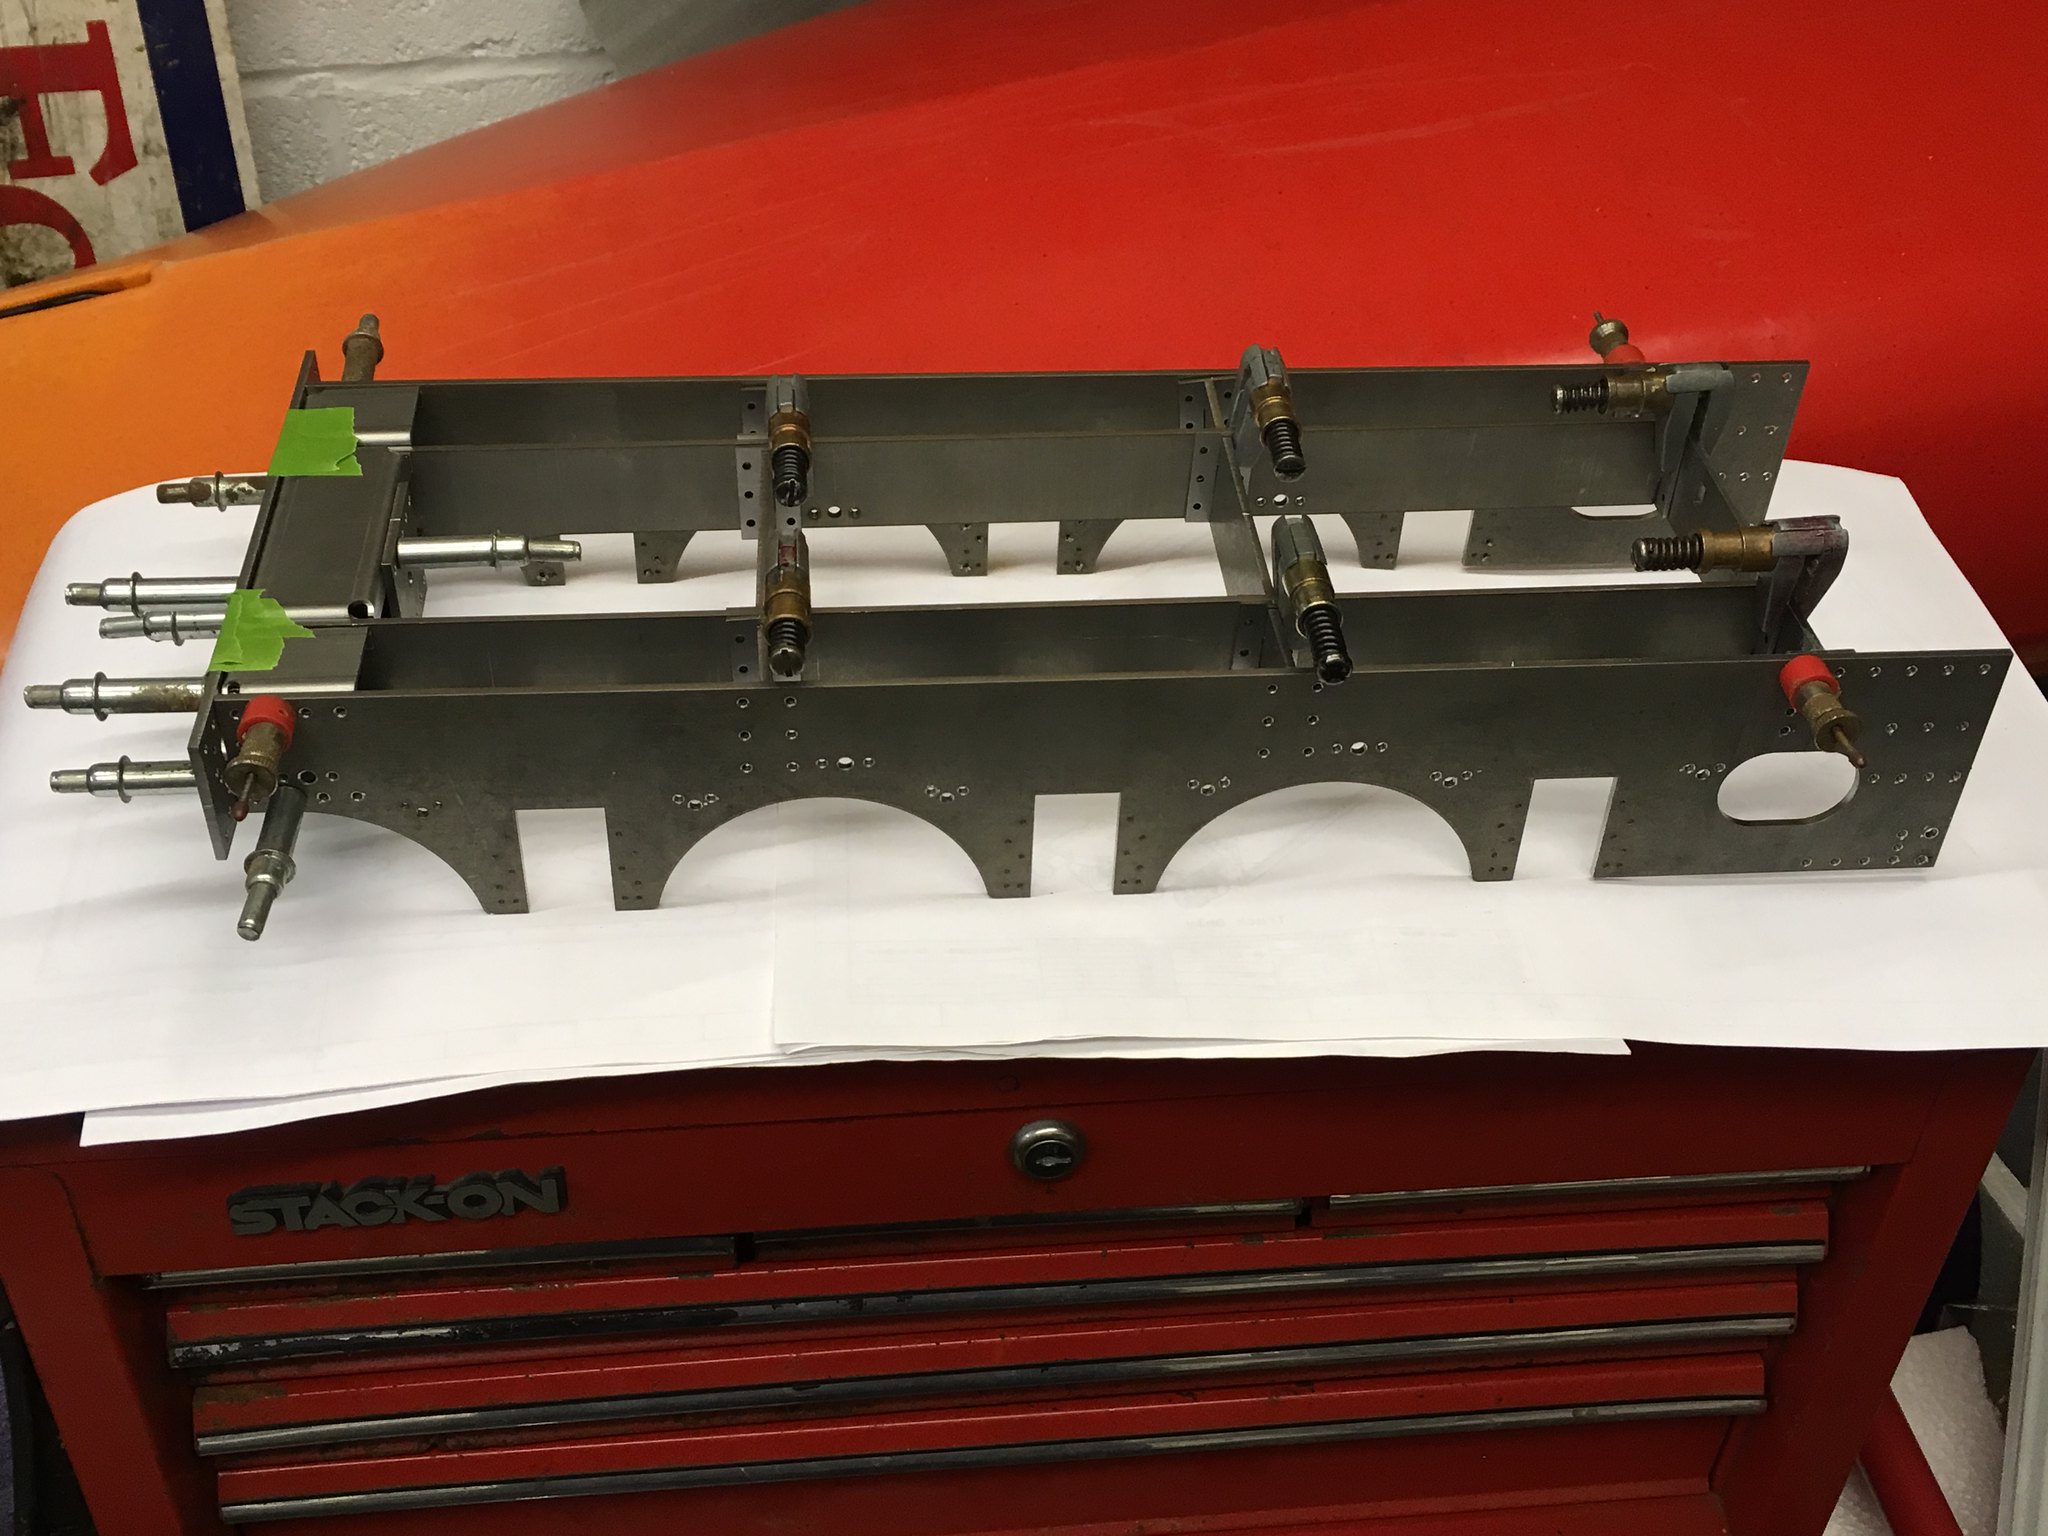 IMG_0035 IMG_0035 by Dave Smith, on Flickr 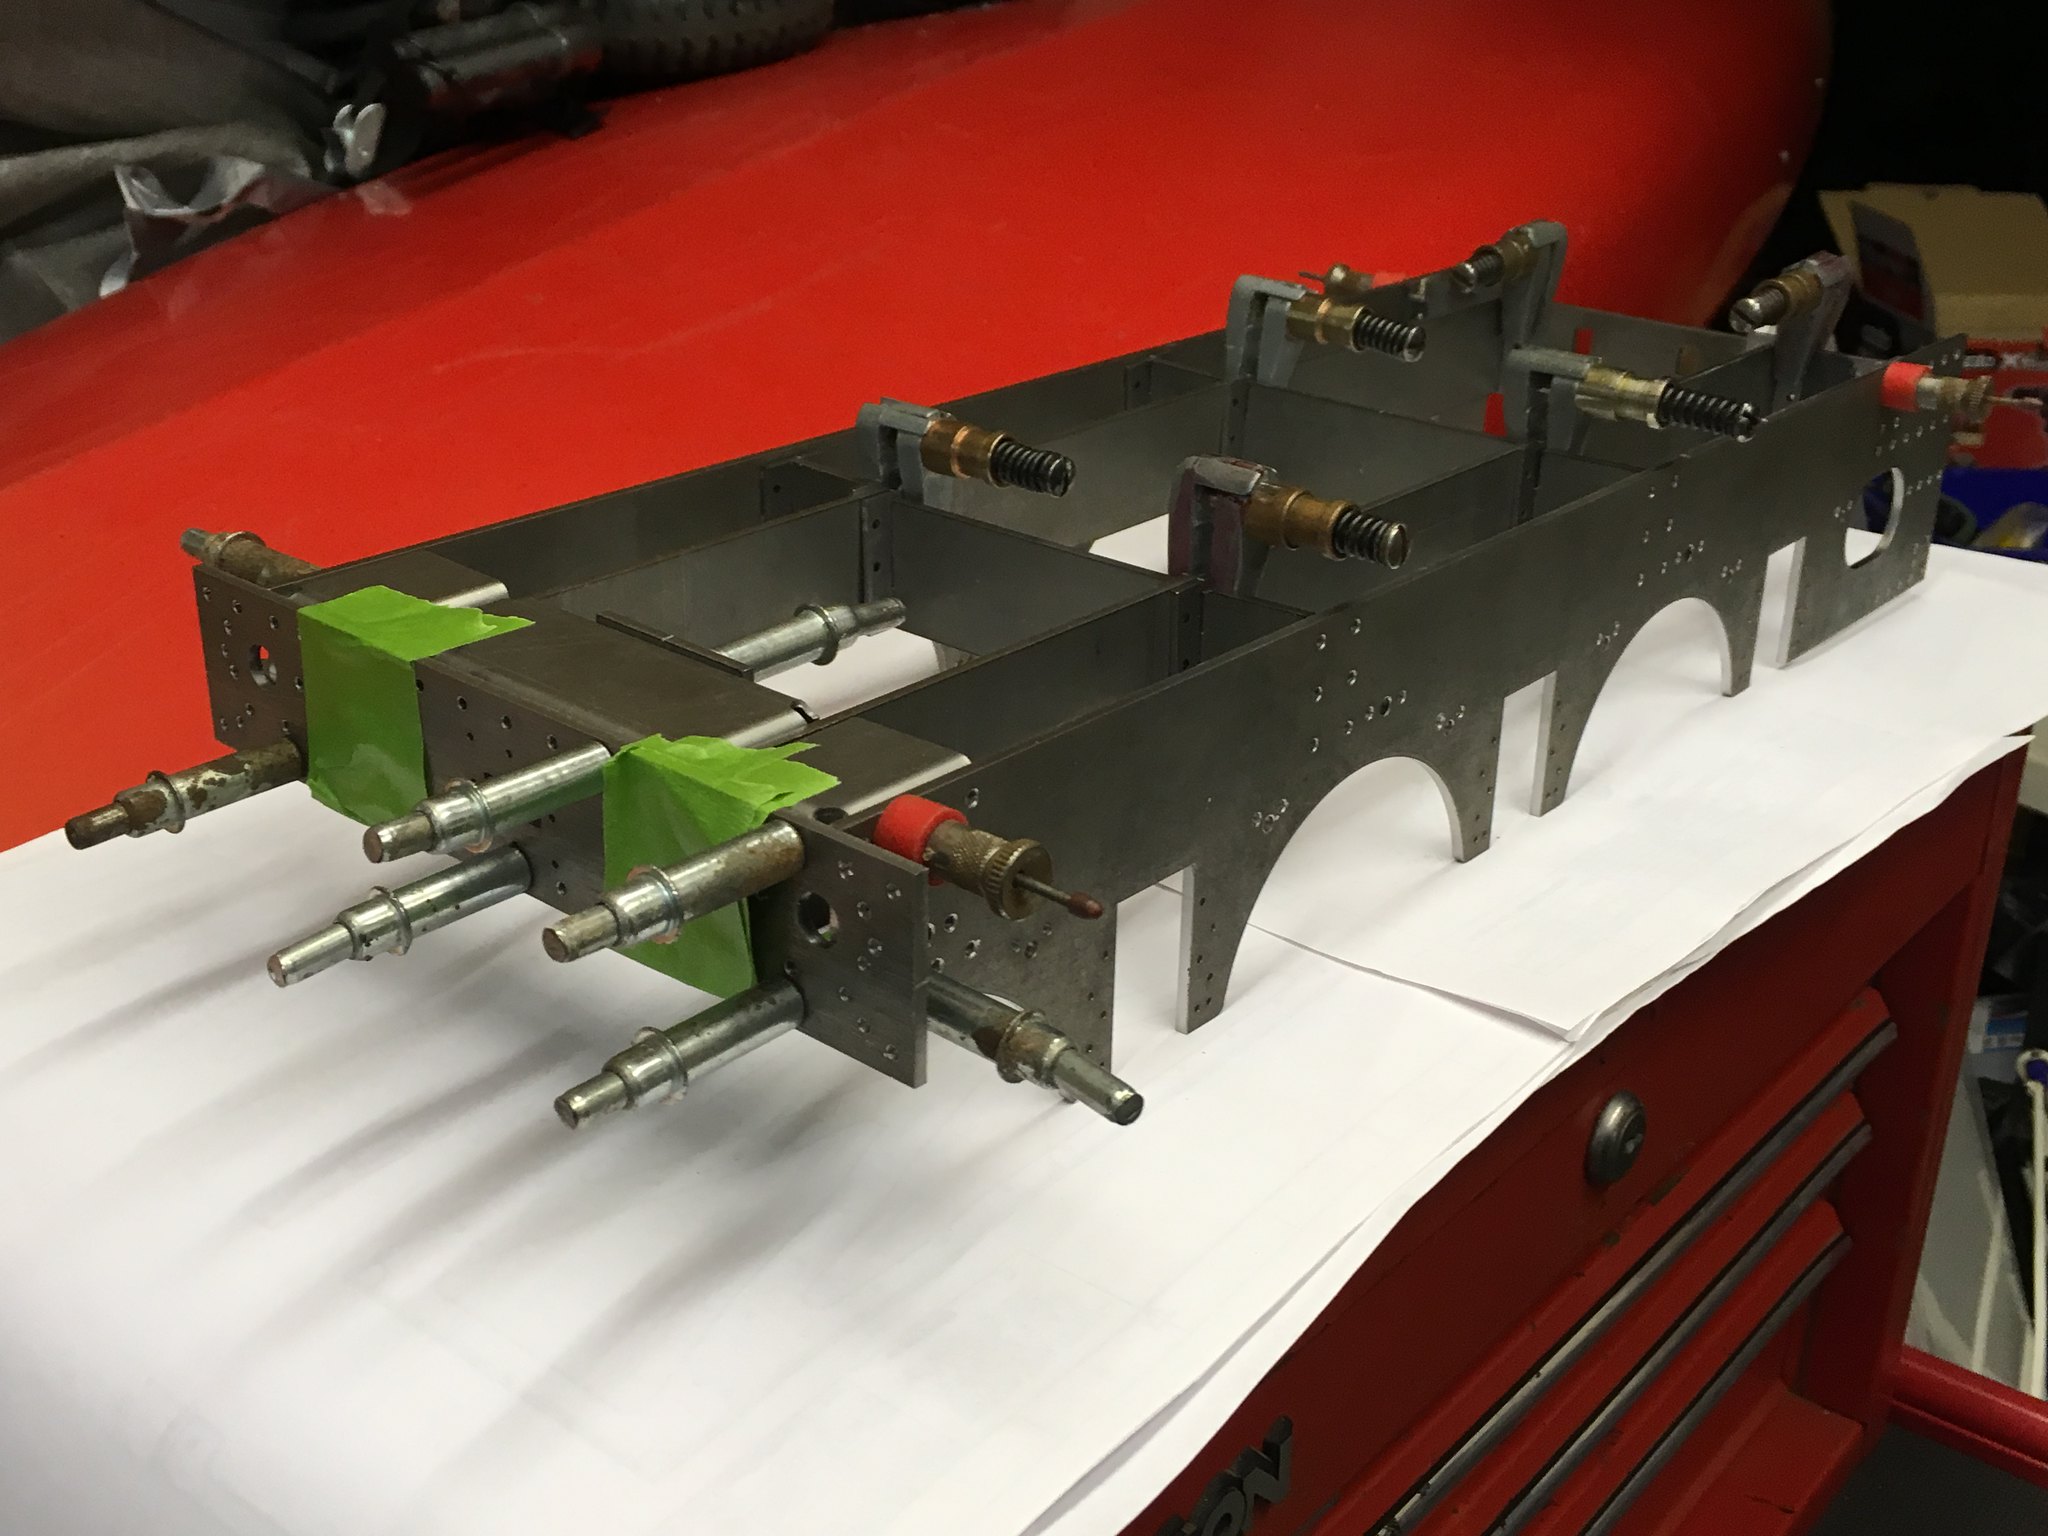 IMG_0034 IMG_0034 by Dave Smith, on Flickr 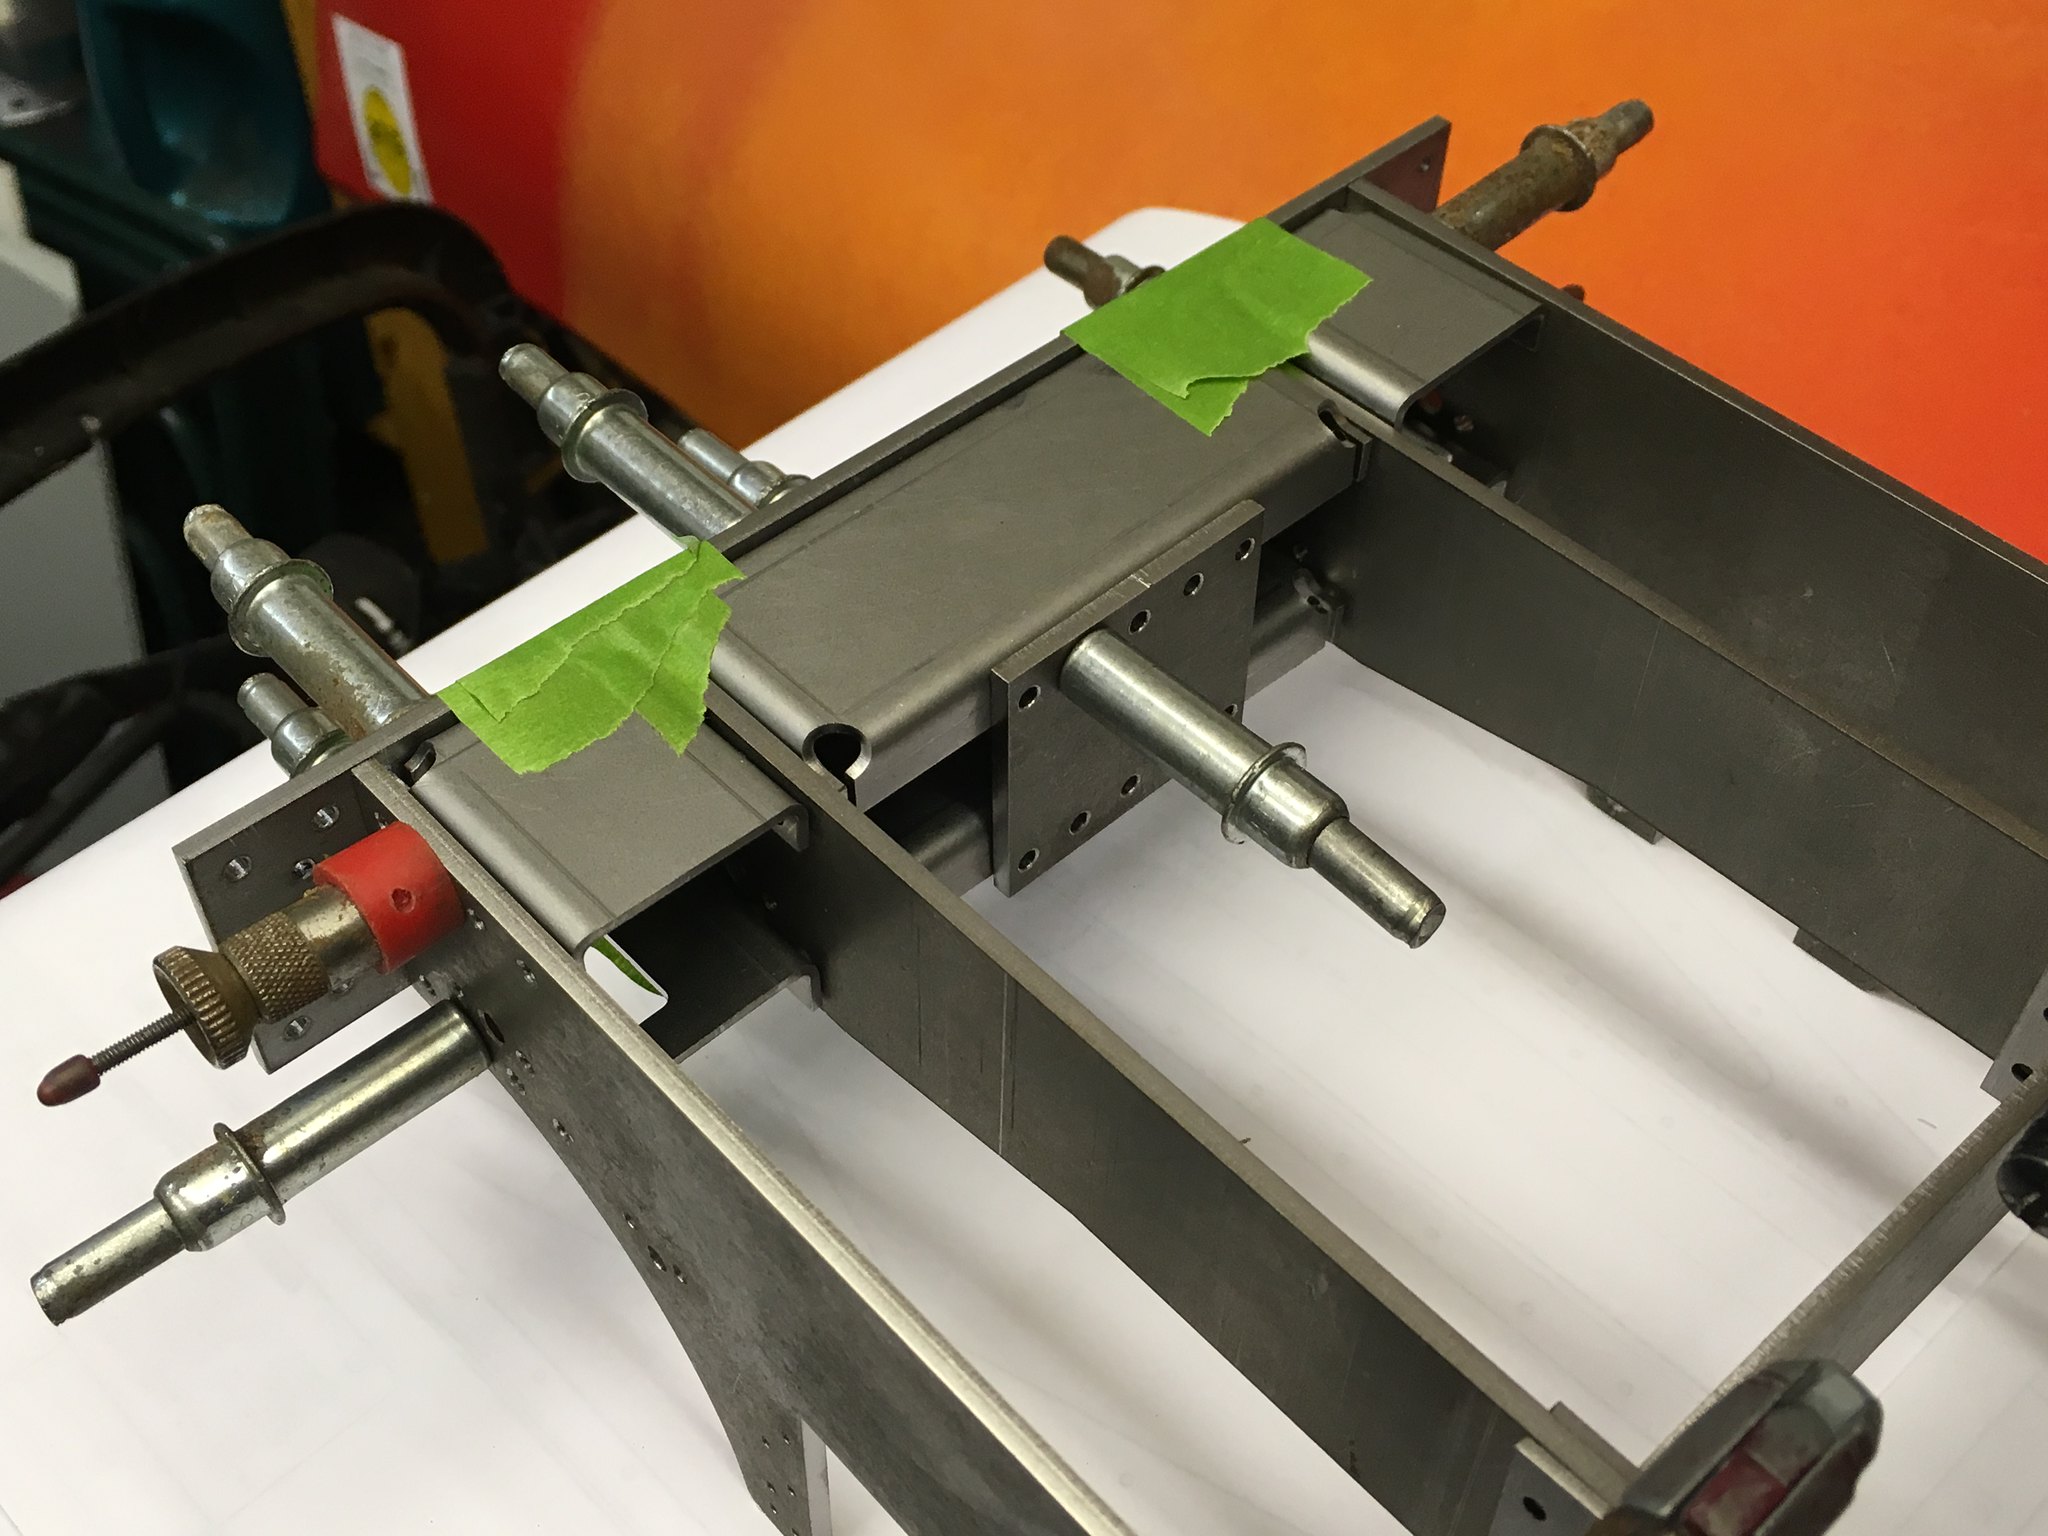 IMG_0036 IMG_0036 by Dave Smith, on Flickr 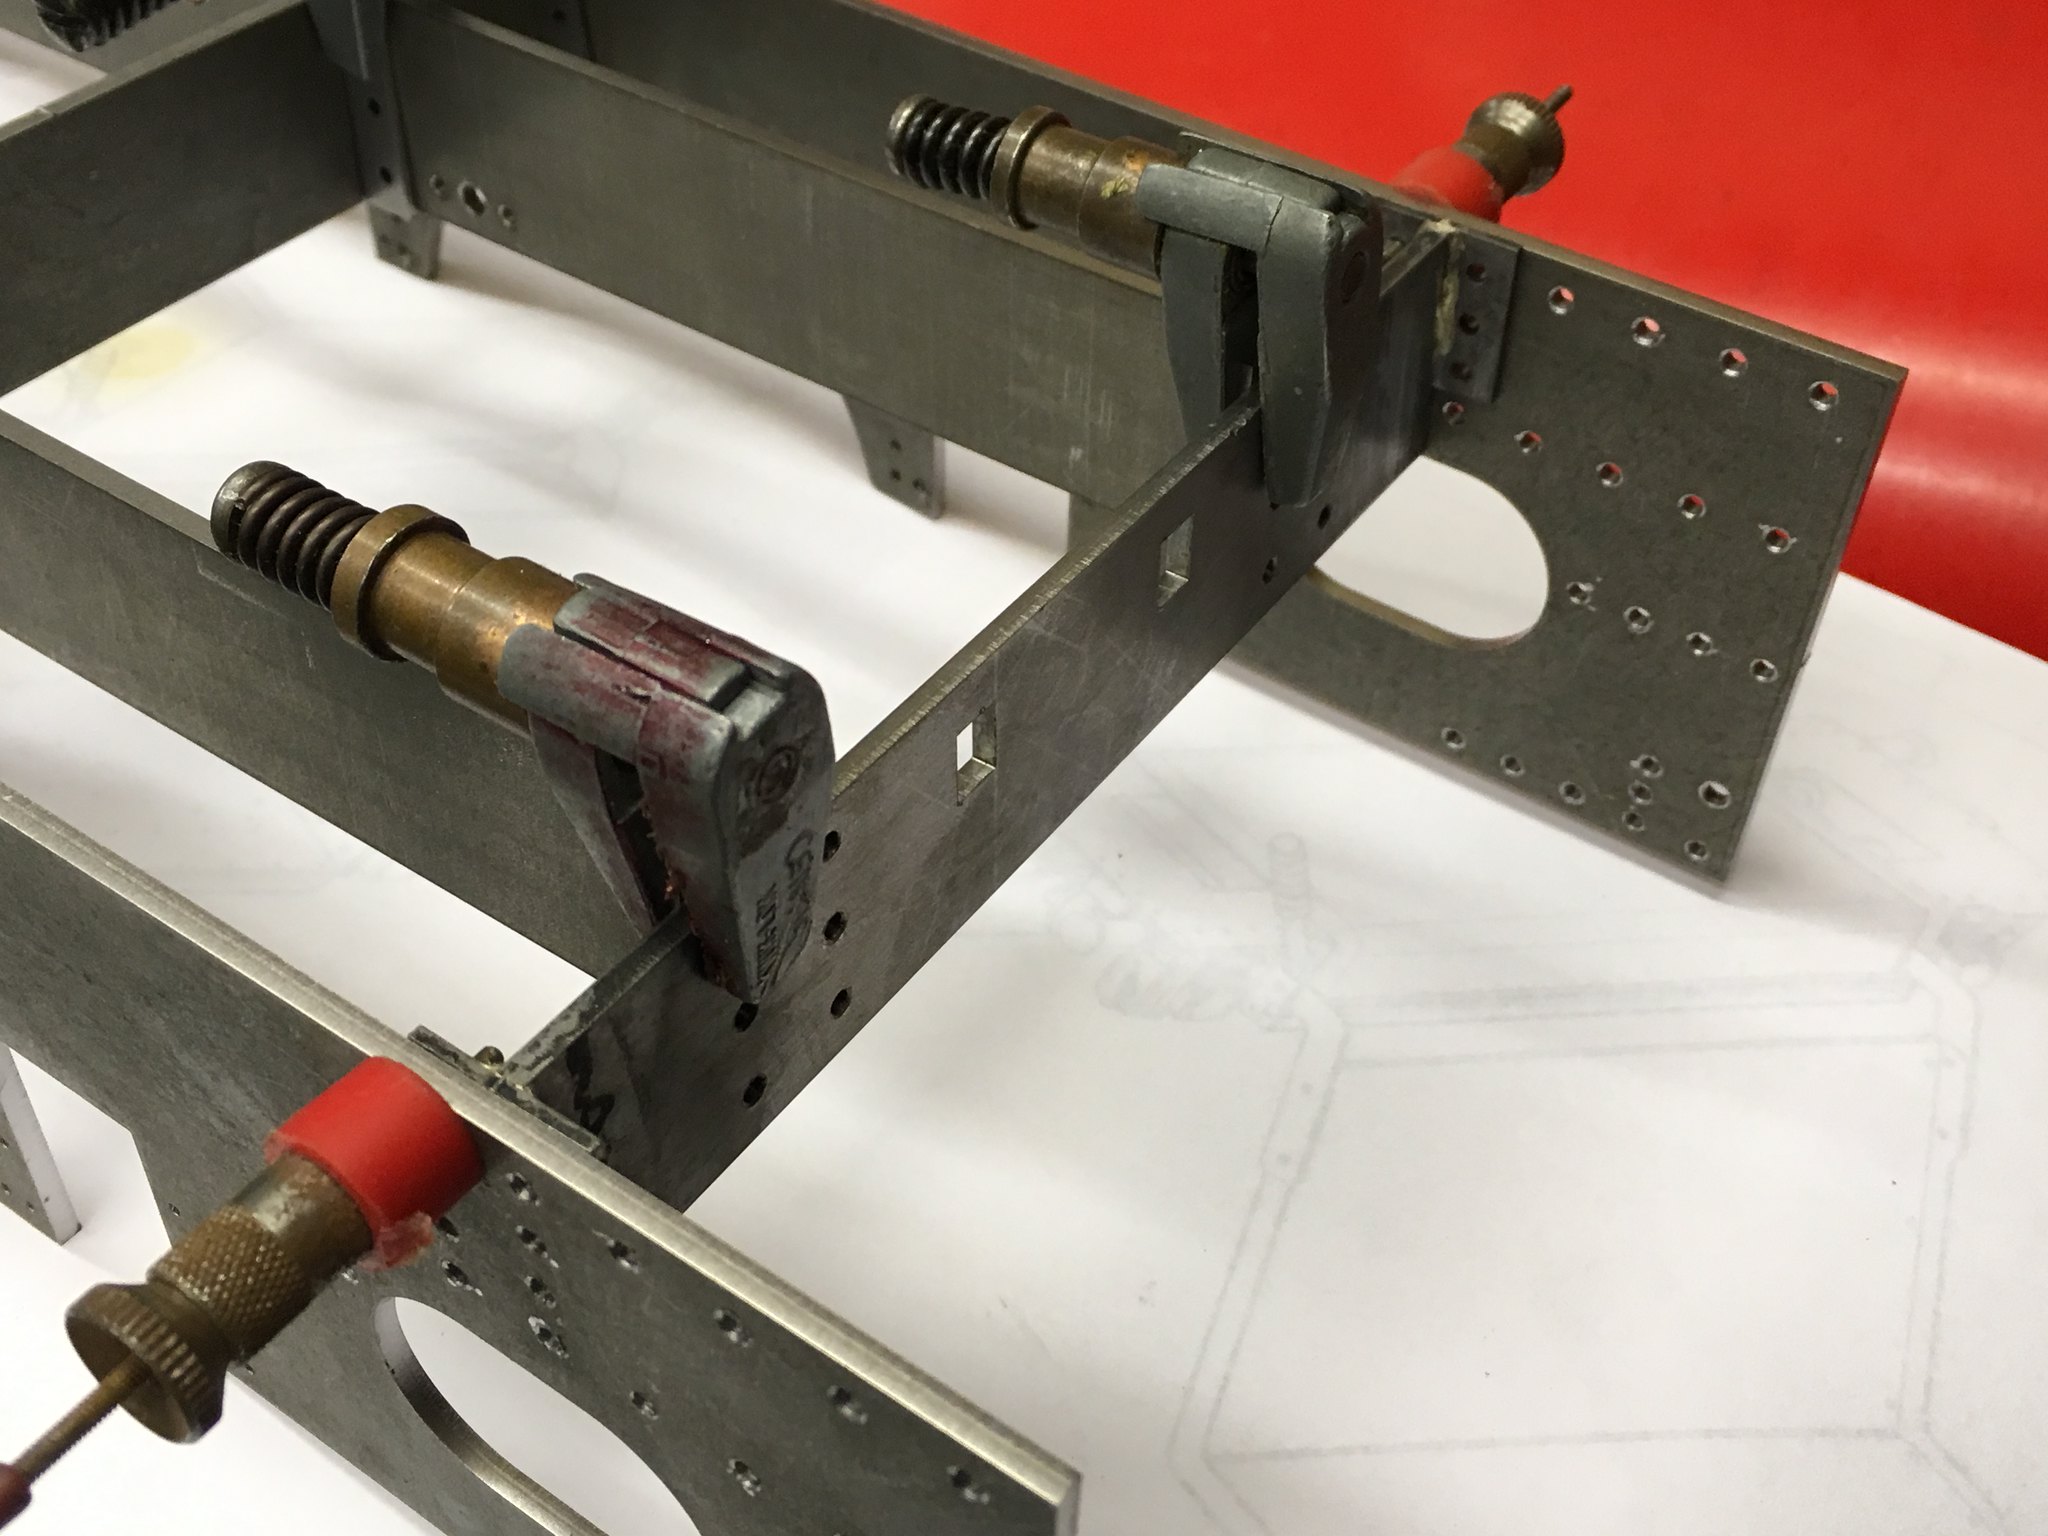 IMG_0037 IMG_0037 by Dave Smith, on Flickr Dave |
|
pault
Elder Statesman
  
Posts: 1,500
|
Post by pault on Jan 20, 2018 14:28:30 GMT
I look forward to seeing this build progress. No. 1300 was the first full size steam loco that I ever fired. Back in 1982 I fired it for some days on the demonstration line at Steamtown Carnforth. When I say fired it was hardly a challenge, under a mile end to end and 20 mins or so stopped at each end with just two coaches. 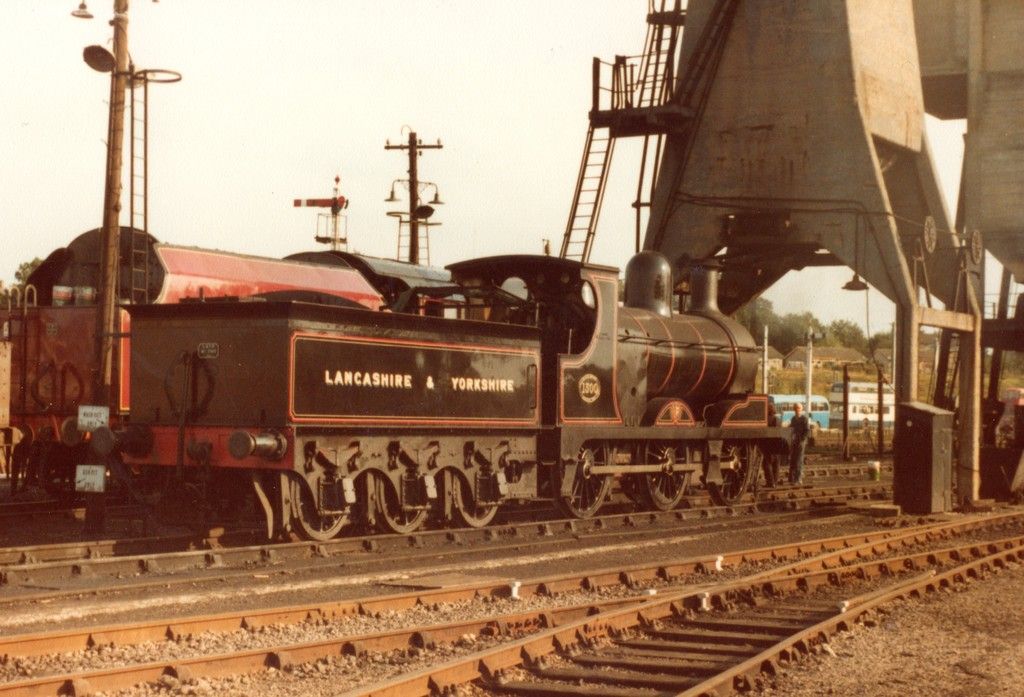 |
|