|
|
Post by Roger on Nov 28, 2015 19:48:00 GMT
I used THK for the X&Y leadscrews, they were the only ones that had flanges small enough. Not cheap, but very nice quality. From memory, the pair cost me about £900
|
|
|
|
Post by Doug on Nov 29, 2015 0:44:41 GMT
The z axis, soon the Yaxis and the bearing sets on all the axis are THK they have good quality kit and it works very well. To be honest I haven't yet found a really bad ballscrew manufacturer most do what they say on the tin. Obviously the larger ones are more robust and don't suffer damage during collisions. My x axis one is a cheap Chinese one so its a bit of an unknown, however currently I am using threaded rod and plastic antibacklash nuts so pretty much anything will be an improvement. And the new ballscrew will be held by another THK thrust bearing block so it has a chance of doing well.
|
|
|
|
Post by Roger on Nov 29, 2015 8:30:35 GMT
I used THK for the X&Y leadscrews, they were the only ones that had flanges small enough. Not cheap, but very nice quality. From memory, the pair cost me about £900 And to think I'm buying a whole milling machine for less than that! Frightening. Saying that, back in 1996, our Bridgeport VMC460 cost us just over forty grand... Steve Indeed, and the mill I converted only cost £800, but that could only cut straight lines... |
|
|
|
Post by Roger on Nov 29, 2015 8:35:49 GMT
The z axis, soon the Yaxis and the bearing sets on all the axis are THK they have good quality kit and it works very well. To be honest I haven't yet found a really bad ballscrew manufacturer most do what they say on the tin. Obviously the larger ones are more robust and don't suffer damage during collisions. My x axis one is a cheap Chinese one so its a bit of an unknown, however currently I am using threaded rod and plastic antibacklash nuts so pretty much anything will be an improvement. And the new ballscrew will be held by another THK thrust bearing block so it has a chance of doing well. I think the accuracy depends on whether the ballscrews are the rolled or ground type. I've only ever used ground types, I believe the others are significantly cheaper. I wasn't really on a budget when I converted mine, I fitted what I fancied because I'd always wanted a CNC mill and I could afford it at the time. It's going to transform the machine accuracy, I think you're going to be delighted with it. |
|
|
|
Post by Doug on Nov 29, 2015 19:16:25 GMT
Started to make the parts for the ballscrew conversion. this is the current plate that has two deep groove ball bearings in opposition to each other. 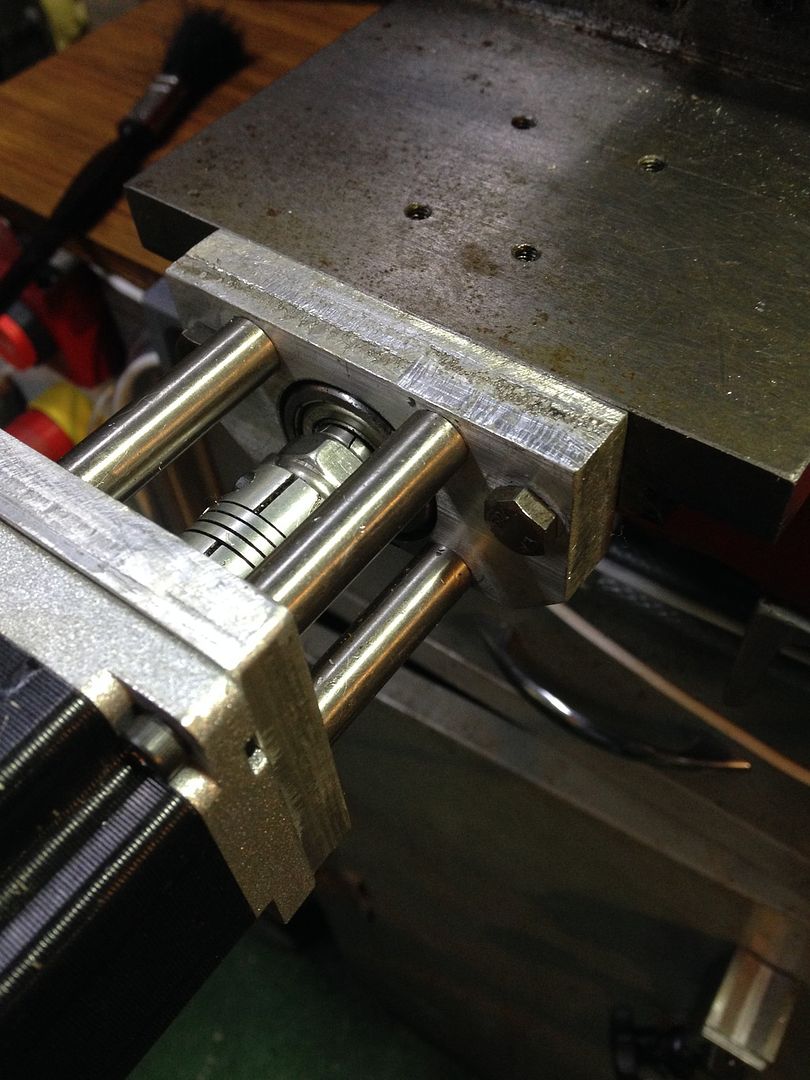 As I found with the 3D model the new bearing block needed a bit of a trim 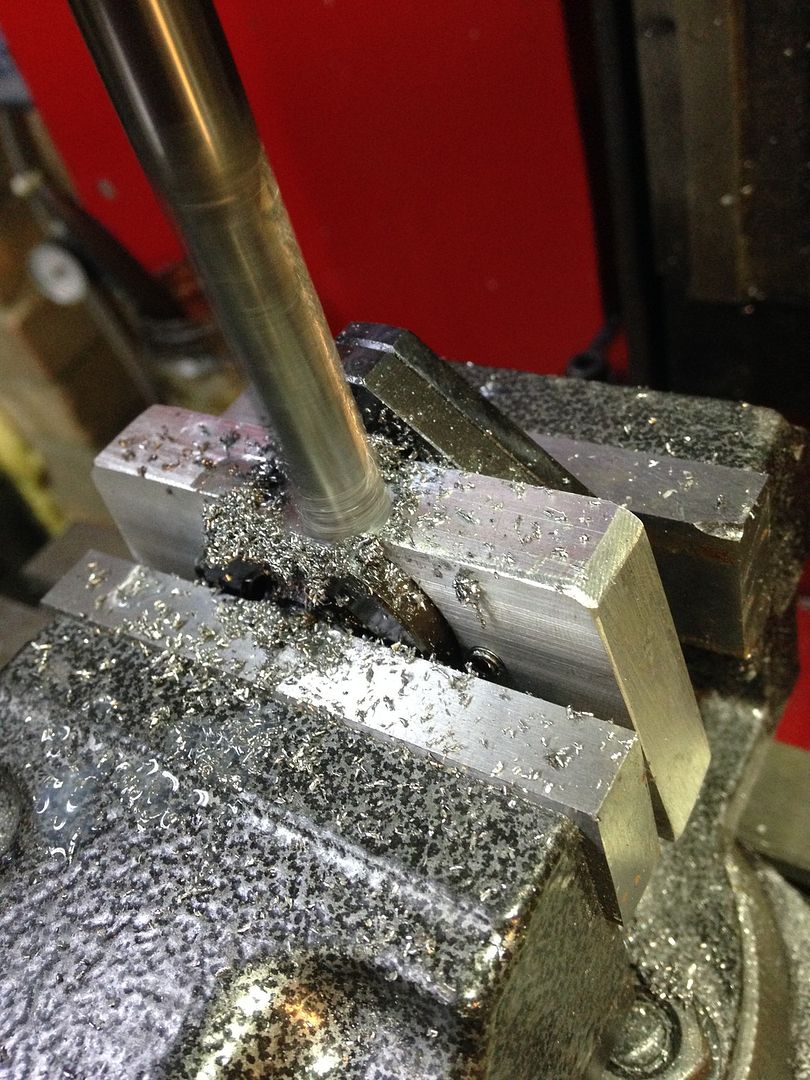 The mill is so much more capable since the stiffening braces were added. And the final bit made and fitted to the ballscrew just the ball nut mounting block to make next 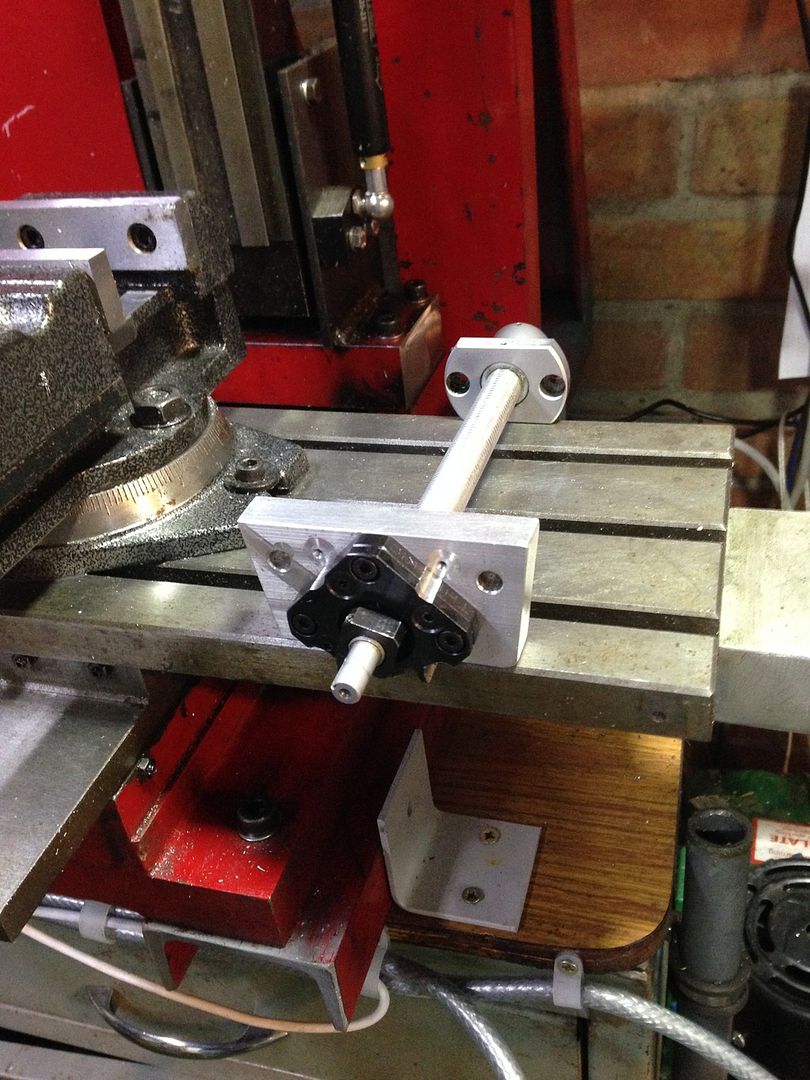 |
|
|
|
Post by Doug on Dec 31, 2015 15:40:13 GMT
Well it's been a bit of a task getting this job finished I have been fighting some very heavy work demands and lately some health issues but finally got it completed, the results have been very good indeed. i had to alter the bearing plate and ball nut to get it to fit and also some mods to the ball nut bracket most of the clearances are less than 1mm so I am pretty happy it all works. 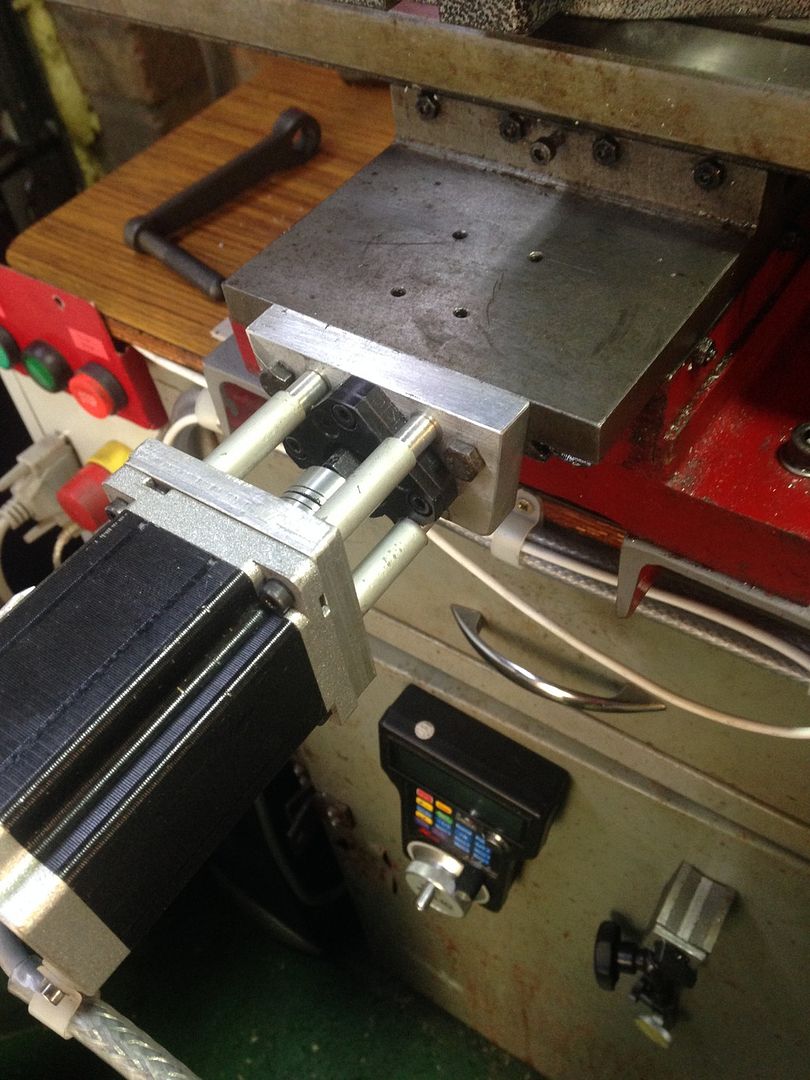 The resulting backlash is very low and it will be infinitely more robust comparing the Delrin nuts to the ballscrew. Hopefully my x axis will show up soon and I can get it fitted. I also need to revisit the z axis backlash although it is belt driven which is most of the issue there. I do intend to alter the ratio on the z axis to a 15/40 pulley which should give me more torque and allow me to tighten the gib strip up to reduce chatter. 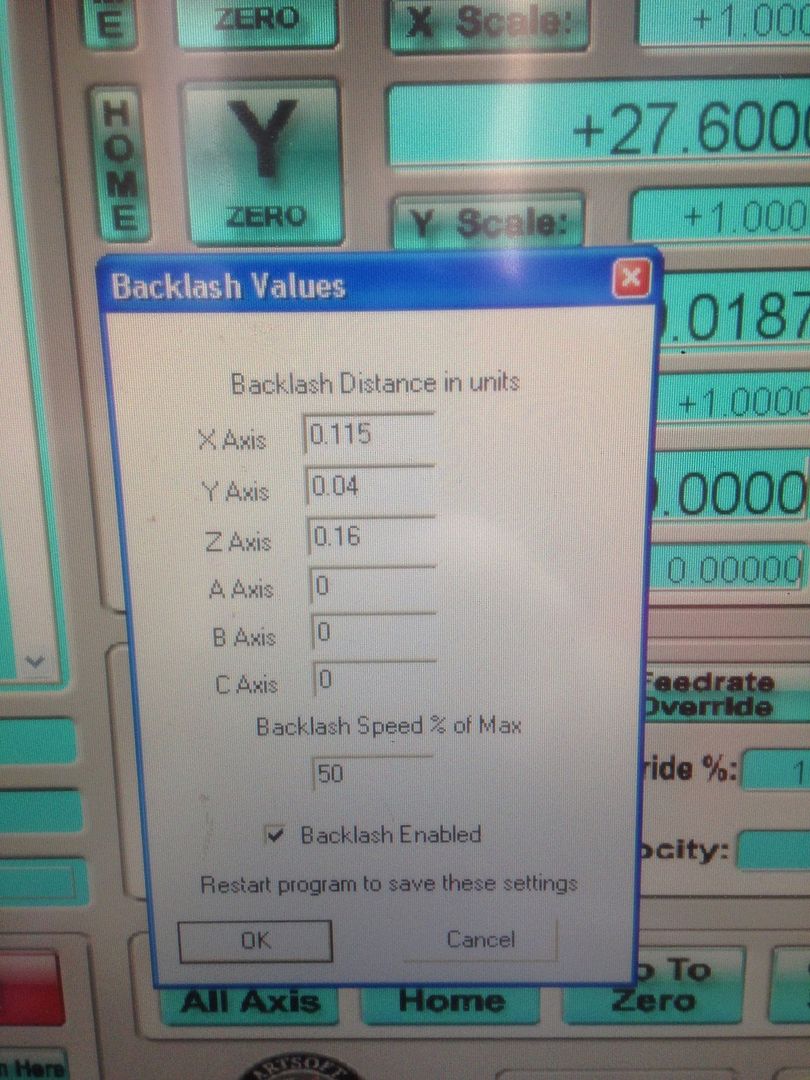 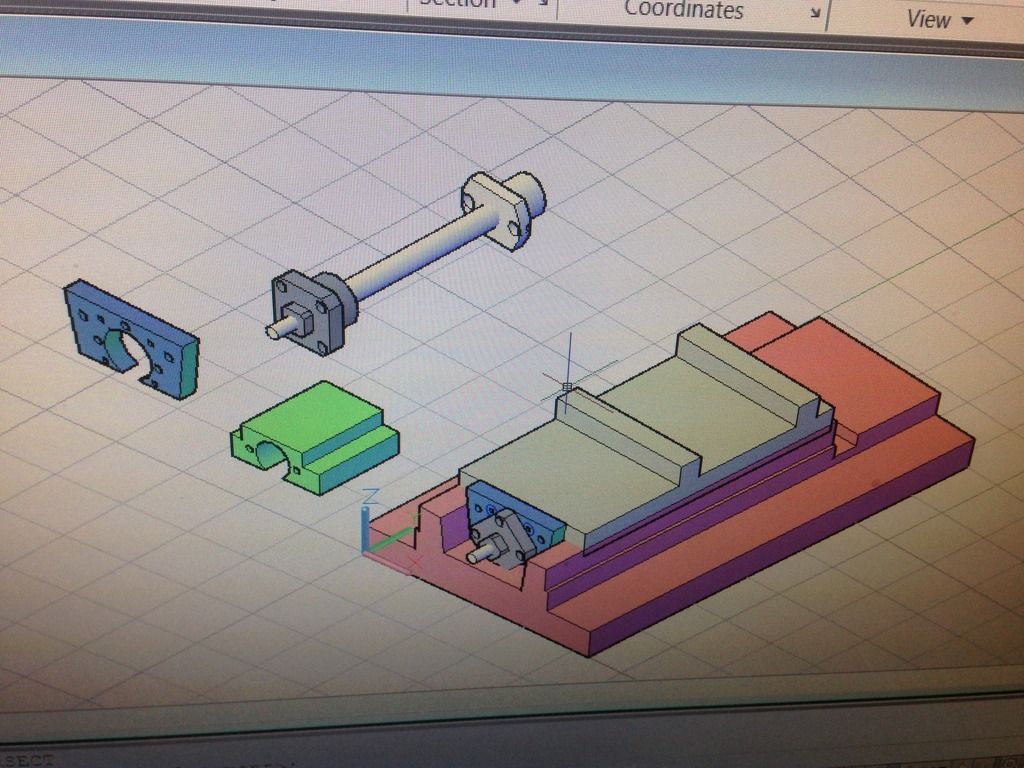 |
|
|
|
Post by Roger on Jan 3, 2016 14:17:12 GMT
That's a cracking job Doug, and excellent results. I'm not sure as to the best way to set up the backlash, I couldn't make sense of the figures I ended up with compared to the amount of backlash, but it repeats brilliantly now it's set.
I do like those thrust bearings, they're very compact. I'm sure this is going to feel like a completely different machine once they modifications are complete. I'm certain it's worth the effort and expense.
|
|
|
|
Post by Doug on Jan 3, 2016 15:58:30 GMT
That's a cracking job Doug, and excellent results. I'm not sure as to the best way to set up the backlash, I couldn't make sense of the figures I ended up with compared to the amount of backlash, but it repeats brilliantly now it's set. I do like those thrust bearings, they're very compact. I'm sure this is going to feel like a completely different machine once they modifications are complete. I'm certain it's worth the effort and expense. Thanks I am pretty sure that's the hardest bit done the y axis has very limited space and I only managed to get it done with the 3D model without which it would have been very difficult indeed. The x axis looks to be a doddle in comparison (if my new ballscrew ever shows up) I agree it will transform the mill, although the Delrin nuts work they are not very robust and require a lot of constant adjustments to keep any sort of accuracy. Not great for making tiny model steam parts as small errors show up a lot. Your valve making has inspired me on to greater things and I am now looking to make all my parts instead of buying anymore castings. this skill will be essential for building my Bulleid loco as there are no parts in 2.5" |
|
|
|
Post by Doug on Jan 6, 2016 20:48:24 GMT
The x axis ballscrew has arrived I had to chase the M10x1 thread and reduce the shoulder dia was 10.12mm now a much more reasonable 9.95mm and a nice fit. 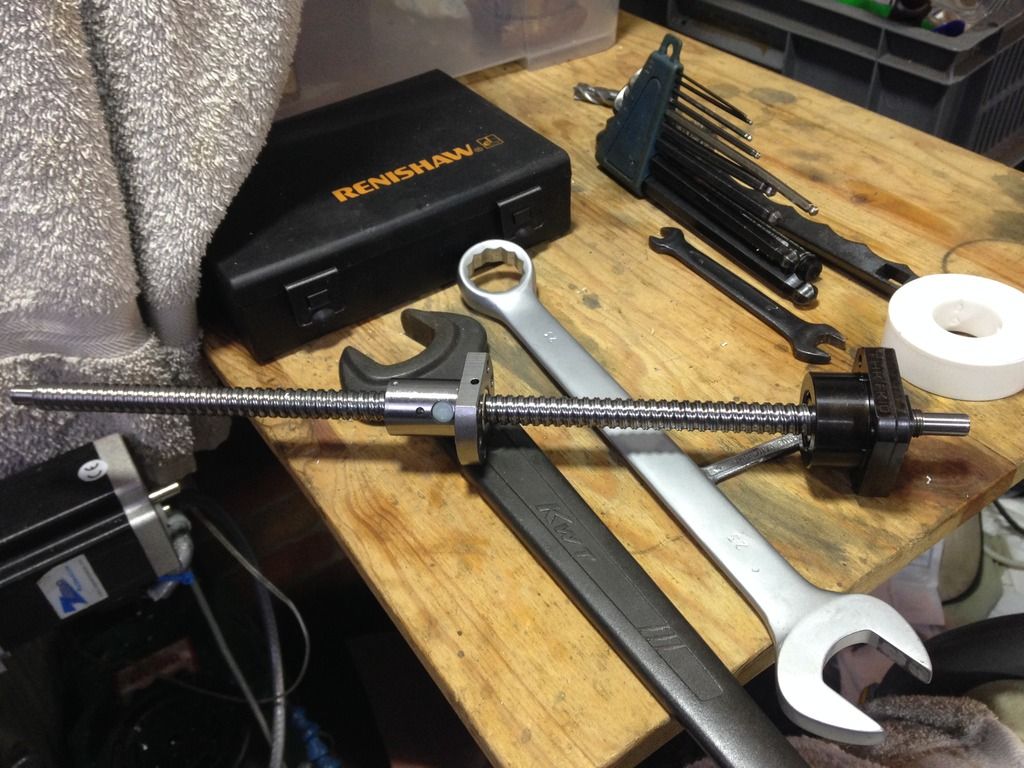 Looking forward to getting this fitted. |
|
|
|
Post by Doug on Feb 7, 2016 10:11:00 GMT
Making slow but steady progress and nearly finished the X axis 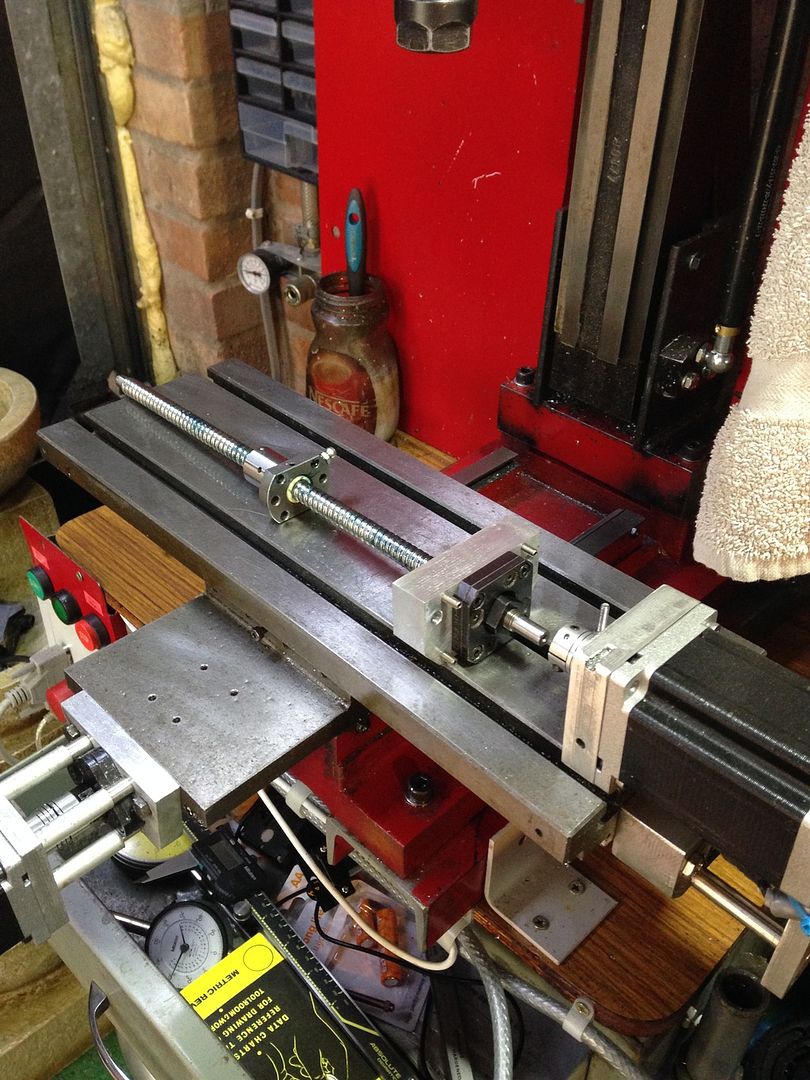 Got four posts to make and the ball nut plate and I can fit it all |
|
|
|
Post by Doug on Feb 22, 2016 7:26:34 GMT
the new ballscrew assembly is getting much closer to being finished 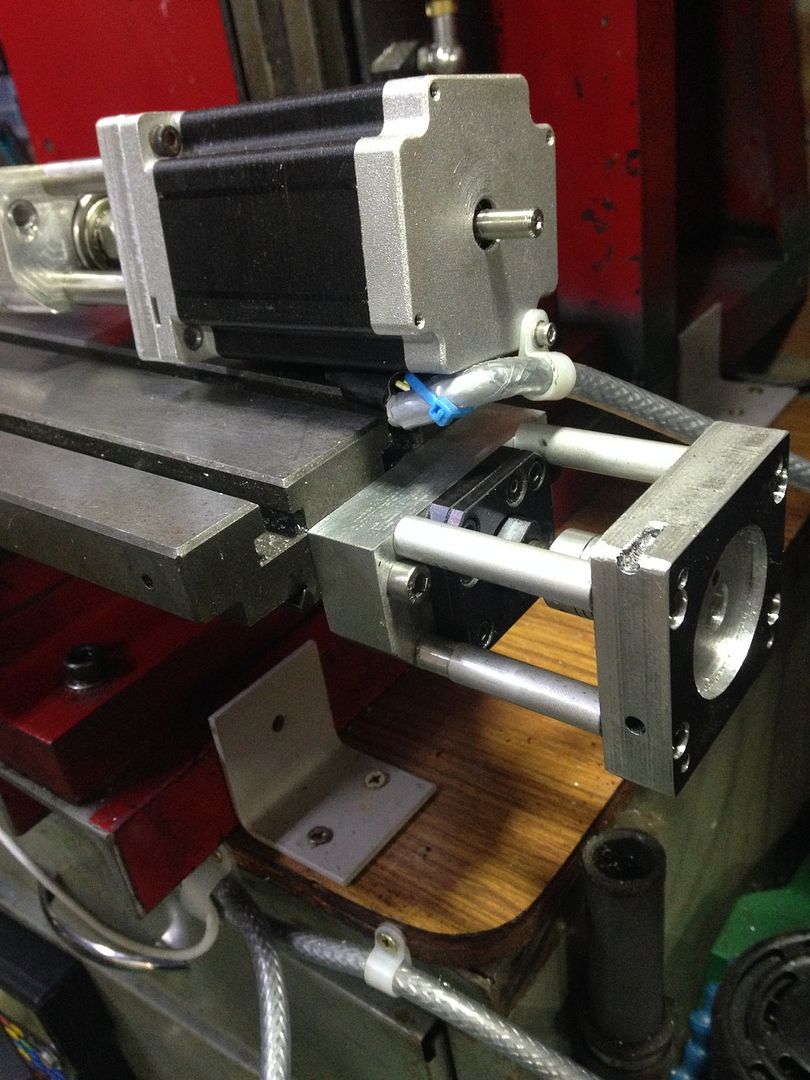 its a bit cosy underneath and i had to cut down the ballnut flange to get clearance but just one piece to make and its all done. 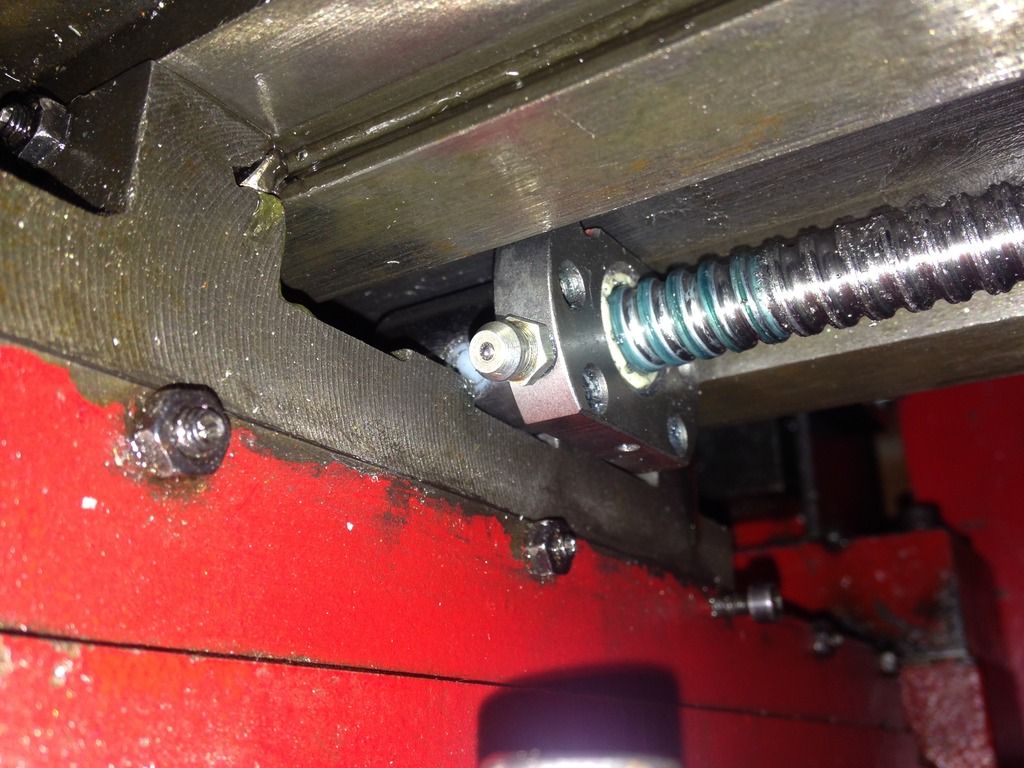 |
|
|
|
Post by Roger on Feb 22, 2016 8:45:49 GMT
HI Doug,
I think it's tight in that place on all traditional machine designs, mine certainly was. I had to do exactly the same thing with mine. Thank goodness for those compact THK ballnuts though, they were the only ones I could find that even came close to fitting.
I had to make the ball nut housing and just nip it up lightly, then run the table over the full travel to centre it. I then carefully dismantled the table again so I could tighten the bolts on the housing. Fiddly, but there was no way to gain access to the bolts once it was assembled. It seemed to work well enough.
I'm looking forward to seeing this up and running, it's going to make such a difference.
|
|
|
|
Post by Doug on Feb 22, 2016 9:39:11 GMT
Hi Roger yes not far to go now just the ballnut plate and I am home and dry. when i took the old lead screw off for this test it was very loose, something that showed up during the motor plate machining (recess was not very round) looking forward to the repeatability this will afford. I desperatly want to get on with my speedy build but jobs keep comming up all the time. I simply refuse to make a start on my boiler untill i have the chassis all complete.
I really want to get some CNC turning setup on the mill too so the balscrews should help no end with this as well.
|
|
|
|
Post by Doug on May 9, 2017 22:46:04 GMT
Quite a bit of progress lately. I have added a mist coolant system 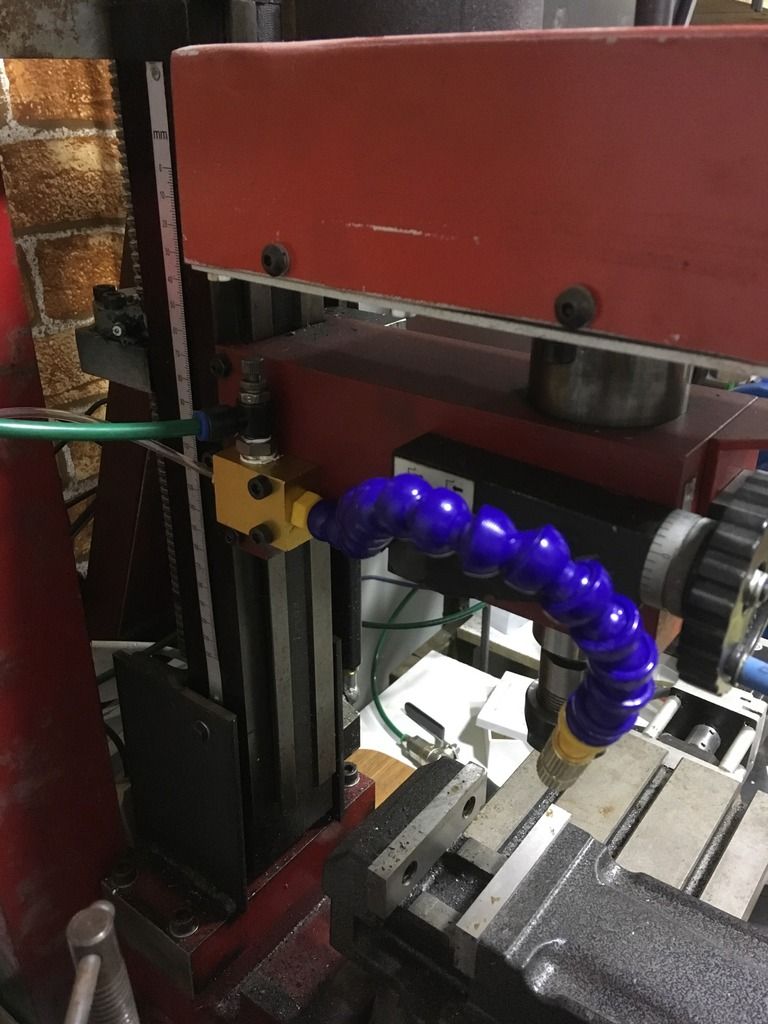 I also looked at finally finishing the rotary table so I have 4 axis to play with, I tried directly driving the table first and found it didn't have enough torque to overcome the tight spots on the worm and wheel. 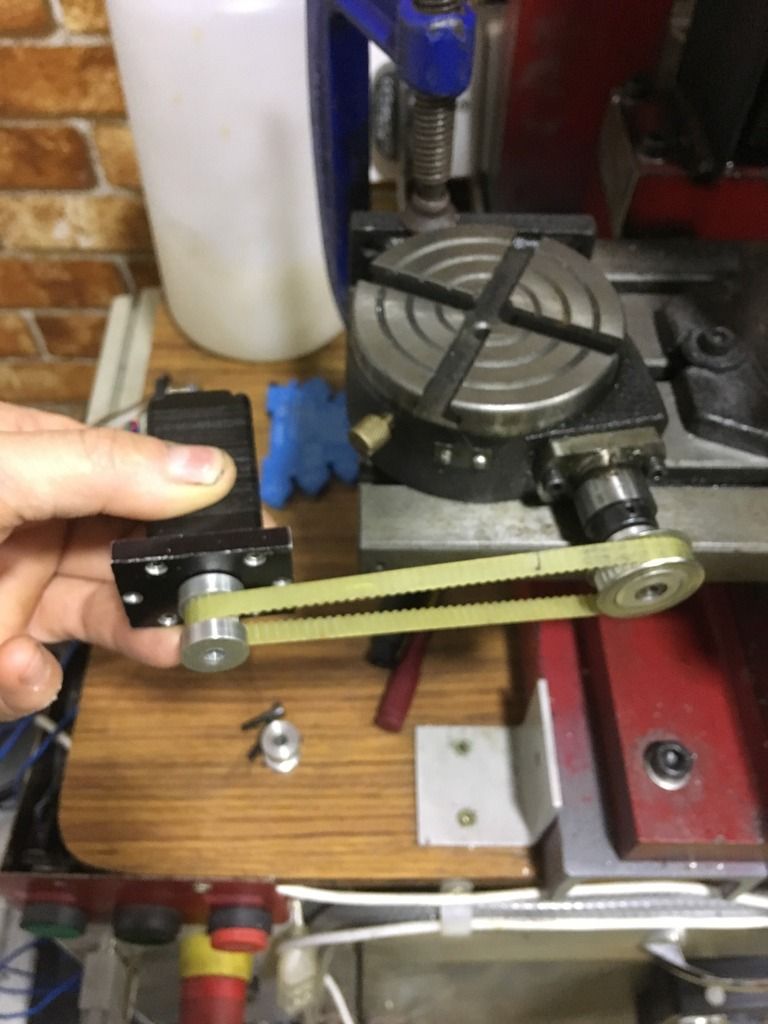 I settled on a 2:1 ratio 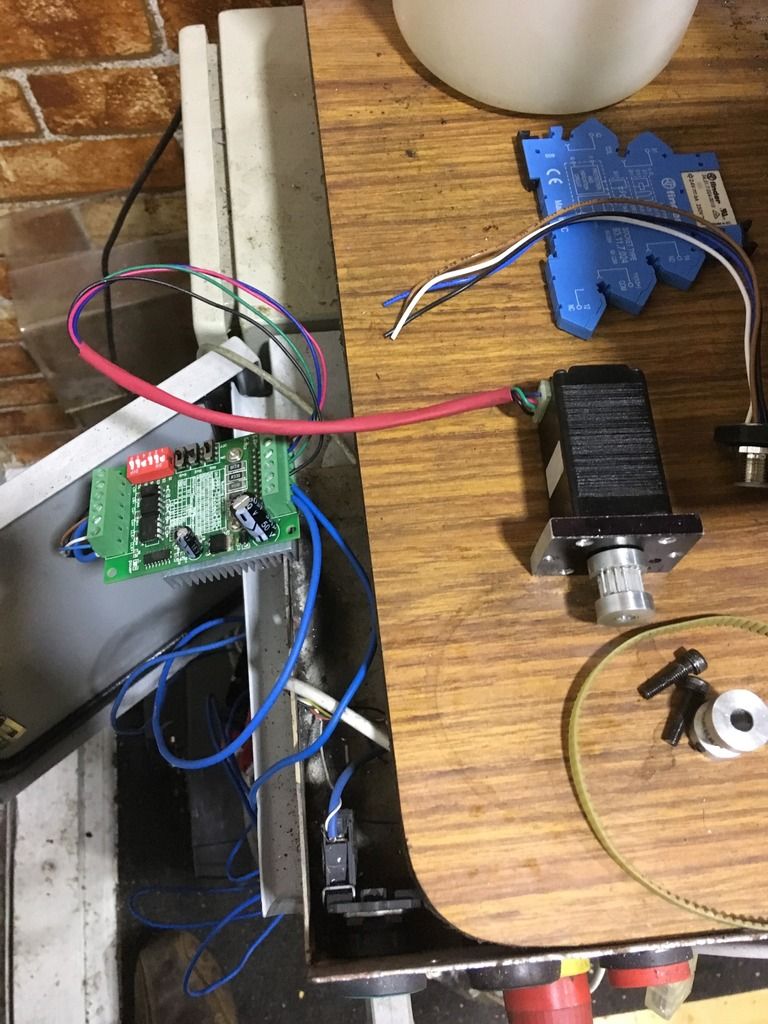 And some nice CNC brackets for mounting the motor. 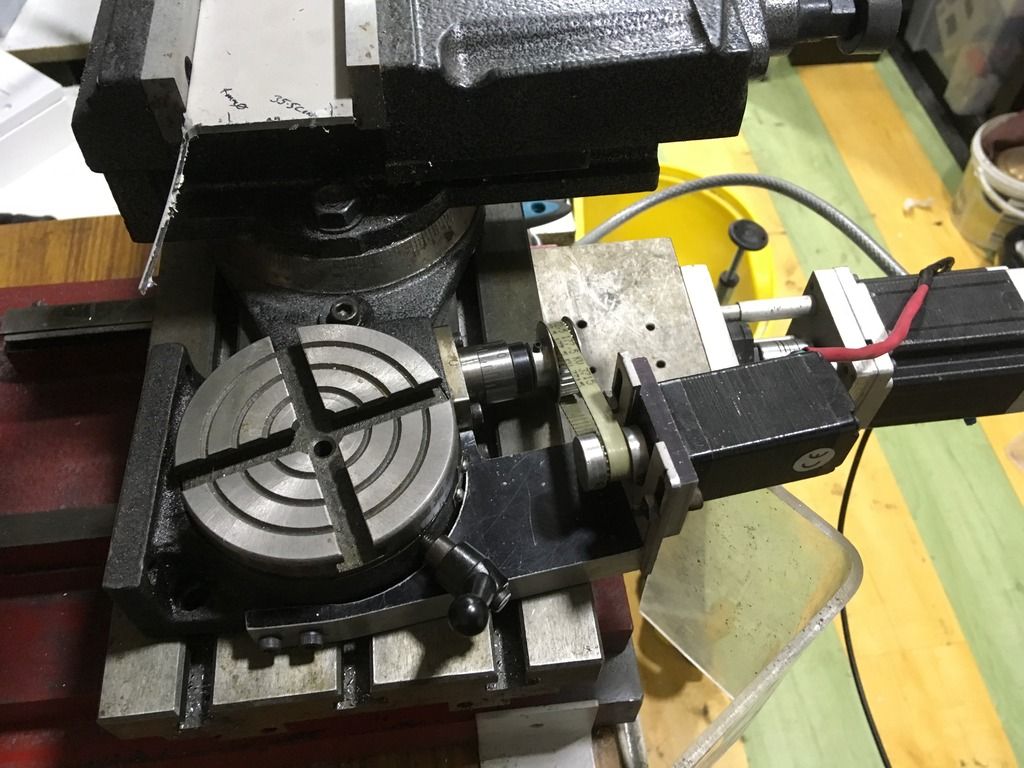 Next upgrade is the spindle motor, I have a 3 phase 4500rpm motor and drive to fit 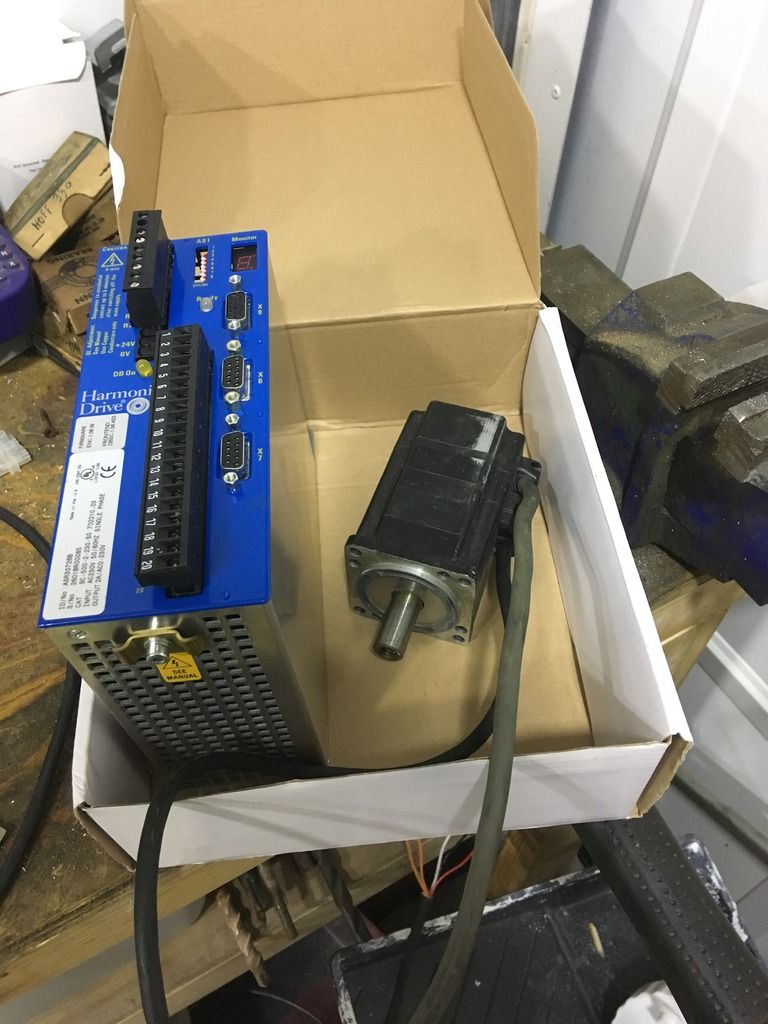 Got to bench test it then look at fitting it. I may also add a bigger pulley to the z axis ballscrew to increase the available torque so I can stiffen up the gib a bit more. |
|
jools
E-xcellent poster
  
Posts: 200
|
Post by jools on Aug 9, 2017 1:34:19 GMT
Hi Doug
I read this thread with great interest, especially as I have owned an SX3 Sieg for a few years now, but not really tested its capabilities in any great depth, and having no great previous milling experience (other than first year general engineering at college in the mid 70's) I have accomplished some basic machining tasks for my classic race bikes with good results.
As you have experience of the X3 mill now - how does it lend itself to a CNC refit based on your X1 experience ?
PS any chance of getting copies of the photos corrupted by PB recent issues? |
|
|
|
Post by Doug on Aug 9, 2017 12:15:03 GMT
Hi Doug
I read this thread with great interest, especially as I have owned an SX3 Sieg for a few years now, but not really tested its capabilities in any great depth, and having no great previous milling experience (other than first year general engineering at college in the mid 70's) I have accomplished some basic machining tasks for my classic race bikes with good results.
As you have experience of the X3 mill now - how does it lend itself to a CNC refit based on your X1 experience ?
PS any chance of getting copies of the photos corrupted by PB recent issues? Hi I found the X3 to be a perfect little mill albeit in need of a full strip down and rebuild (the build quality is generally poor) once the mill has been "blueprinted " it is as capable as a Bridgeport and you can take very heavy cuts with complete confidence. The design lends itself very well indeed to conversion to CNC. If I had more cash available when I started I would have done the X3 instead. I am now too invested in my little mill to bother redoing another one as I can do all I want\ need to on mine. The photos are now all gone I only have access to thumb nails. My laptop got stolen from work which had the originals and the ones on Photobucket show the same message when you try to view them full size. Sorry. There is a very good write up in model engineering workshop (I think) about converting the X3 to CNC which would make the process very simple. All the best Doug |
|
jools
E-xcellent poster
  
Posts: 200
|
Post by jools on Aug 9, 2017 22:20:38 GMT
|
|
|
|
Post by Doug on Dec 10, 2017 13:49:51 GMT
|
|
|
|
Post by Doug on Dec 17, 2017 14:23:37 GMT
I have been busy using the upgraded A axis and making some tools for work, it has been very good indeed in that I have had my first trial at 3D machining the first attempt was a bit rough, literally then I looked a Roger’s build thread and followed his example of two programs one to rough and one to finish pass the part.
Worked very well so I can see myself making a lot of 3D parts in the coming months. Photos to follow soon.
|
|
|
|
Post by Doug on Dec 24, 2017 17:29:04 GMT
|
|