|
|
Post by Cro on May 19, 2020 14:16:06 GMT
Afternoon All, Whilst I have a quick break at work waiting for some parts to arrive I thought I'd post a plea for help. I have acquired a very nicely made part built City of Truro chassis and I'm looking for any and all info I can gather on the full size and I know we have a lot of GWR fans here so I thought I'd ask if anyone has any details/photos/works drawings if they would be kind enough to share? I know it has had two rebuilds in recent time but I don't know if there is an online source for photos for when it was being worked on? A background project right now whilst I sort other things but I wanted to gather as much info and data as I can for when I am ready to start. Here are a few photos to wet your appetites.  Untitled Untitled by Adam Cro, on Flickr  Untitled Untitled by Adam Cro, on Flickr  Untitled Untitled by Adam Cro, on Flickr  Untitled Untitled by Adam Cro, on Flickr I have a tender kit on order from Polly which I've seen a few of now and are lovely and I am waiting on prices for a boiler kit from Paul at Southern Boilers that I am happy to stitch together but to allow me to focus on other things I am happy to source part done. Paul does a great job on "scale" appearance boilers so I wanted to make sure I got the best for this loco and made it look spot on. Thanks for your help! Adam |
|
|
|
Post by Deleted on May 19, 2020 14:53:47 GMT
Is it still in York? if so perhaps a day trip armed with camera might help. I'm sure that I saw it there in 2016...mind you the way my memory works it could be anywhere...  Pete |
|
|
|
Post by RGR 60130 on May 19, 2020 14:54:26 GMT
Adam,
An interesting model that looks good. The thing I noticed was the wheel spokes. The drivers have very slim spokes which I might associate with Clarkson castings whereas the tender wheels seem to have heavier spokes, maybe from another source. Then again that may be quite true to scale, I know bu**er all about these GWR types!
Reg
|
|
stevep
Elder Statesman
  
Posts: 1,073
|
Post by stevep on May 19, 2020 14:57:25 GMT
Adam,
Send me a PM with your e-mail address, and I'll send you a couple of pics I took of 3440 when she visited Norchard Steam Centre (Forest of Dean). They're not terribly good, but you never know, they might just have some of the detail you need.
|
|
|
|
Post by Cro on May 19, 2020 16:48:25 GMT
Pete,
I had planned to go visit when up at Gilling in August but I fear that may no longer be happening.
Reg, like you I know not a lot about GWR but will learn as I go, the lovely thing on this is the steel tyres fitted to the driving wheels and the beautifully machined crank axle.
Steve, will do thanks!
Adam
|
|
|
|
Post by steamer5 on May 19, 2020 18:32:19 GMT
Hi Adam,
I have I think a complete set of drawings for City, the model
I’ll check them out tonight & let you know what I have.
The gent that got me into this game had built one. Spent many happy hours driving her.
Cheers Kerrin
|
|
|
|
Post by Cro on May 19, 2020 19:30:36 GMT
Hi Kerrin, thanks for the offer but I have the full set of drawings in 5” but I'm looking for works drawings to up the details.
Thanks,
Adam
|
|
|
|
Post by hunslet on May 19, 2020 19:57:25 GMT
|
|
|
|
Post by Cro on May 19, 2020 20:08:17 GMT
What a beauty!
|
|
jma1009
Elder Statesman
  
Posts: 5,917
|
Post by jma1009 on May 19, 2020 21:00:30 GMT
Hi Adam,
I have a short book on just 'City of Truro'. I will dig it out tomorrow and let you have the details - you might be able to get a cheap copy off Abe books.
Similarly, O S Nock did a book on GWR 4-4-0 locos, and you might be able to get a secondhand copy from Abe books, and it includes lots of copies of the GWR drawing office drawings. I thought I had a copy, but apparently not anymore, though I do have a lot of photocopies from it (though these are for the 'Duke' class).
There are lots of pics of 'City of Truro' littered through Keith Wilson's 'Dukedog/Bulldog' series in ME circa 1982.
Another source is Jim Russell's 2 part volumes on GWR locos.
(A very old senior colleague of mine when I was on the railways worked on 'City of Truro' when it went to Caerphilly Works in the late 1950s for a repair following a mishap in Llanelli).
Cheers,
Julian
|
|
|
|
Post by Cro on May 19, 2020 21:09:55 GMT
Thanks Julian, I have one book but need to check if that’s any of the ones mentioned above. Any info is of great help.
Any odd GWR related drawings are also useful to pick up odd details.
Adam
|
|
|
|
Post by 92220 on May 20, 2020 8:03:05 GMT
Hi Adam.
That looks like the beginnings of a very nice model!! I will email you a copy of my Livery Data Sheet for City of Truro. The NRM used it to do the lining out of City of Truro when Tony Filby was in charge. Somewhere I have a copy of the drawing register at Didcot, showing all their archived GWR drawings. I will see if I can find it and send you a copy of that too.
Bob.
|
|
|
|
Post by steamer5 on May 20, 2020 8:22:29 GMT
Hi Adam,
No problem! Looking forward to the build log already!
The guy that brought it thought he was a gun on valve setting......I don’t think it has run since!
I’ve got a set of bronze cylinders for her somewhere too. old Stan had 2 sets cast just incase back in the day.
Cheers Kerrin
|
|
|
|
Post by Cro on May 20, 2020 9:37:48 GMT
I’ve got a set of bronze cylinders for her somewhere too. old Stan had 2 sets cast just incase back in the day. Cheers Kerrin Drawings and a cylinder block, sounds like we may have 2 City's being built then!! Thanks Bob, I keep meaning to reply to your last email, we'll have a catch up when I hear from you again! Adam |
|
jma1009
Elder Statesman
  
Posts: 5,917
|
Post by jma1009 on May 20, 2020 22:49:22 GMT
The book I have on 'City of Truro' is 'City of Truro a Locomotive Legend' edited by Nigel Harris and published by Silver Link Publishing Limited, ISBN 0-947971-96-3. 1985 and 1992 (mine is the second edition from 1992)
|
|
|
|
Post by Cro on Oct 6, 2020 8:57:15 GMT
Morning all, Some progress is being made on the City in the late hours of an evening after working through other jobs. I decided that with this project if I can buy things in/work out favours then it will to help speed things up and allow me to keep working away at other jobs in the workshop. For example I have a flanged boiler kit on order from Southern Boilers, machined cranks and rods from Mike in NZ and just before lock down I ordered a tender kit from Polly Models to suit. After emails back and forward I felt we had agreed on the version and style but with lockdown and the closing of their workshop the order was on hold. Skip forward to July and after some chasing the tender kit arrived. 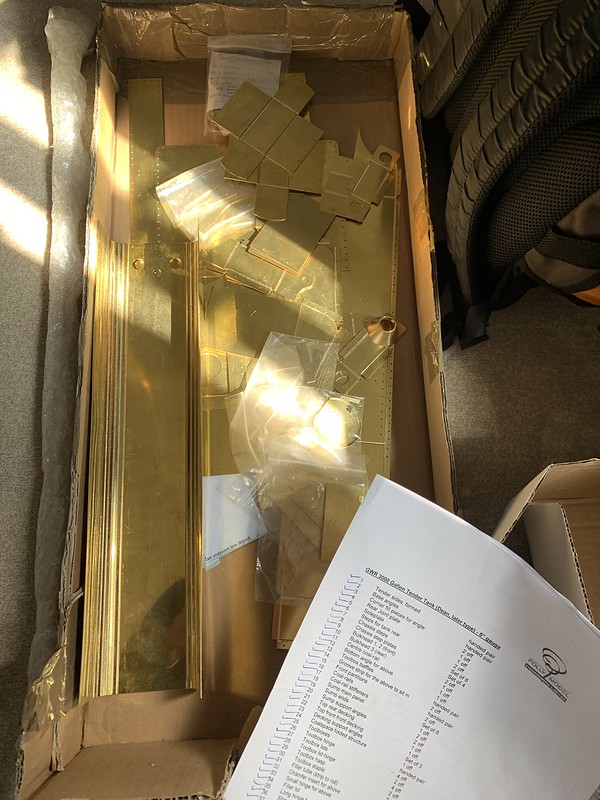 Untitled Untitled by Adam Cro, on Flickr  Untitled Untitled by Adam Cro, on Flickr All CNC router cut with Rivet holes, score lines for bending and even CNC bent for the radius flared edges and corners on the two halves of the tank. Sadly only 1 A4 sheet of instructions are supplied to tell you which way to bend 1 item otherwise the rest is guess work including where the 200 odd M1.6 dome head screws and nuts are used. 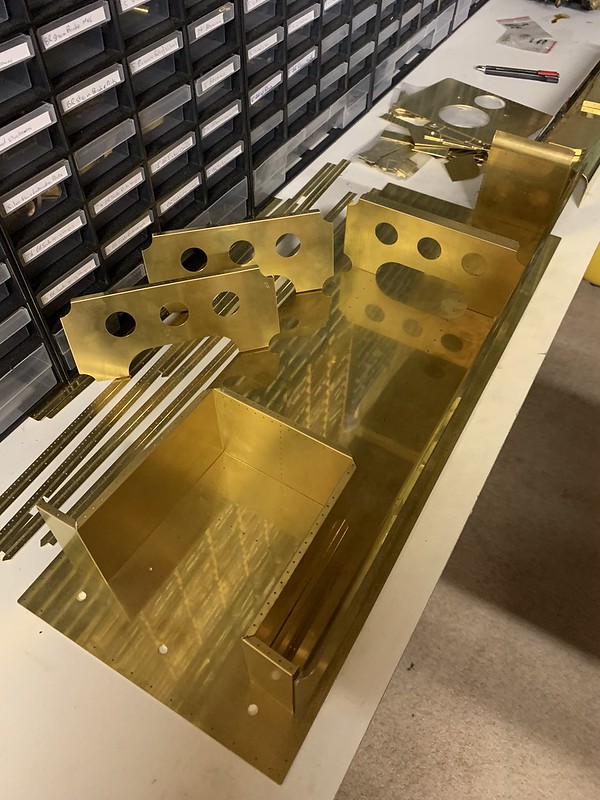 Untitled Untitled by Adam Cro, on Flickr After an hour or so of laying things out and just bending them it became fairly obvious what went where in most cases but a few questions off to Polly cleared it all up whilst also opening up some questions and highlighting a few prototypical errors in their design requiring replacements - damn!  Untitled Untitled by Adam Cro, on Flickr So things went on hold and now a few months later after the first box of replacements was sent to the wrong address whilst I was chasing for a month a new box arrived and I have not wasted any time! Started with the filler tube, originally they supplied one too short so once rolled it had a gap. Now its too long but at least it can be made to fit, it also has the angled fill in piece which doesn't quite sit as flush as required so once soldered a lot of careful filing is required to get the flush look.  Untitled Untitled by Adam Cro, on Flickr 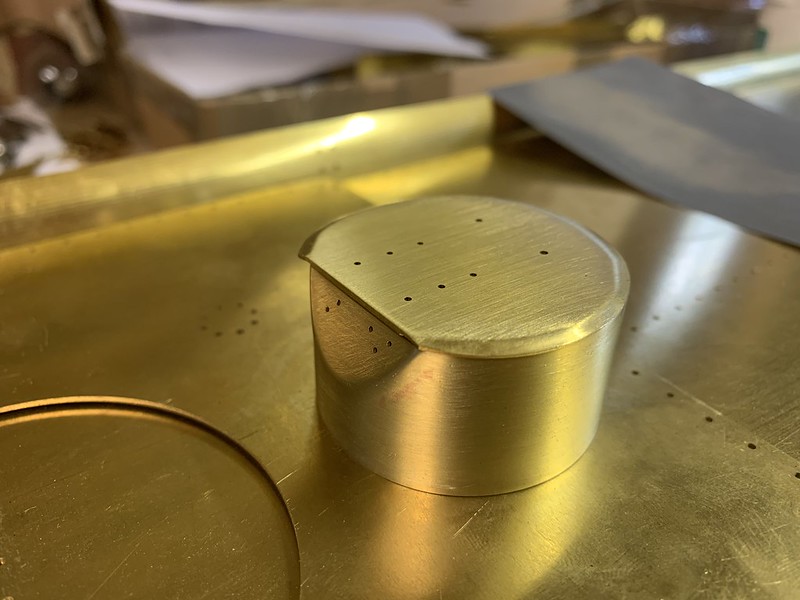 Untitled Untitled by Adam Cro, on Flickr Once most parts were formed it was time to start some assembly. Turns out the M1.6 dome head screws are simply for dry assembly to help hold it all together, the head profile doesn't match that of the supplied rivets so I won't leave any in and only use them during assembly whilst riveting or in most cases using my little arbour press to squeeze the rivet heads in. The big problem with the kit compared to the prototype is that City of Turro's current tender as I am modelling her has a fully flush rivetted tender meaning I have a lot of countersinking to do but its paying off so far. Using a pair of cutters the rivets cut off just proud and ends up flush once pressed in with a small amount of work required to flat them all back. 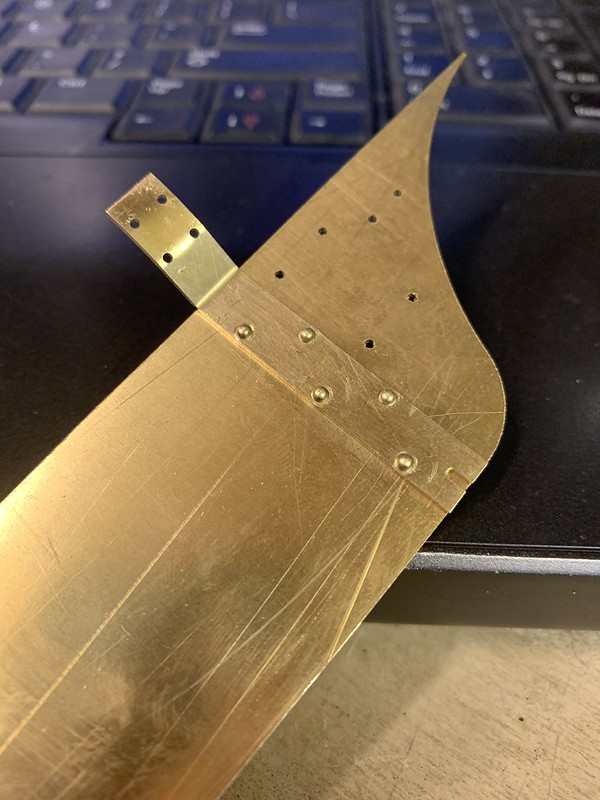 Untitled Untitled by Adam Cro, on Flickr 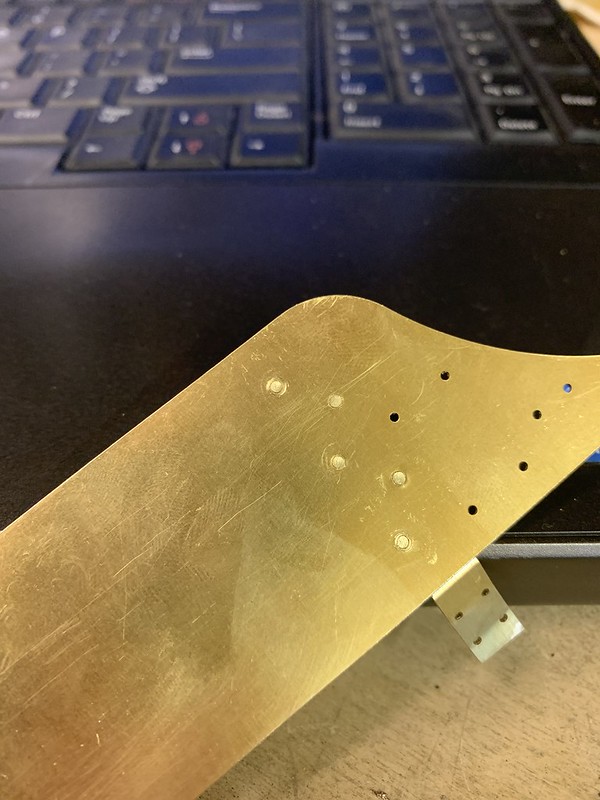 Untitled Untitled by Adam Cro, on Flickr A quick look at it all assembled and pleased with progress so far.  Untitled Untitled by Adam Cro, on Flickr Next up was to fold the long angles that run the length of the body and wrap around the rear, not having an long angle I could clamp this between some 1" ply left over from my new workbench did the trick.  Untitled Untitled by Adam Cro, on Flickr 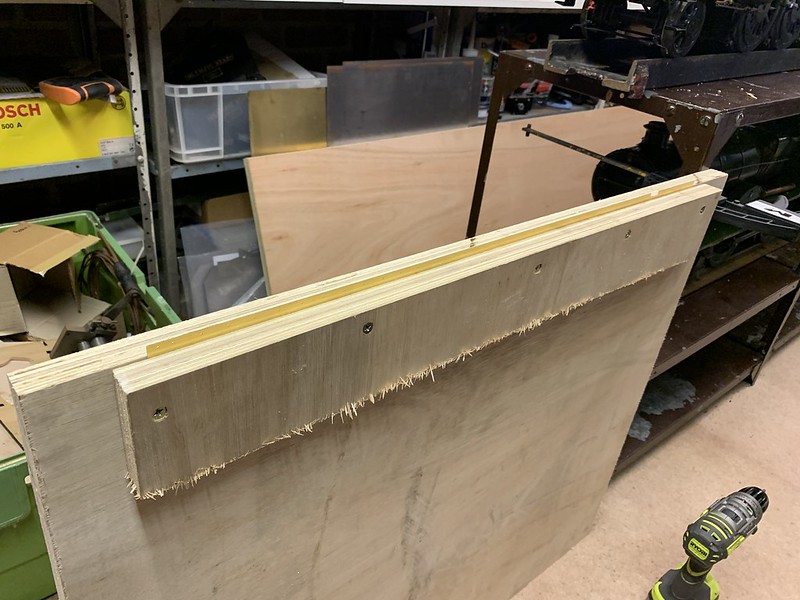 Untitled Untitled by Adam Cro, on Flickr All that was left to do was sit infrom the laptop for a few hours squeezing rivets....oh joy. One side was finished around 00:30 this morning, the other side tonight! 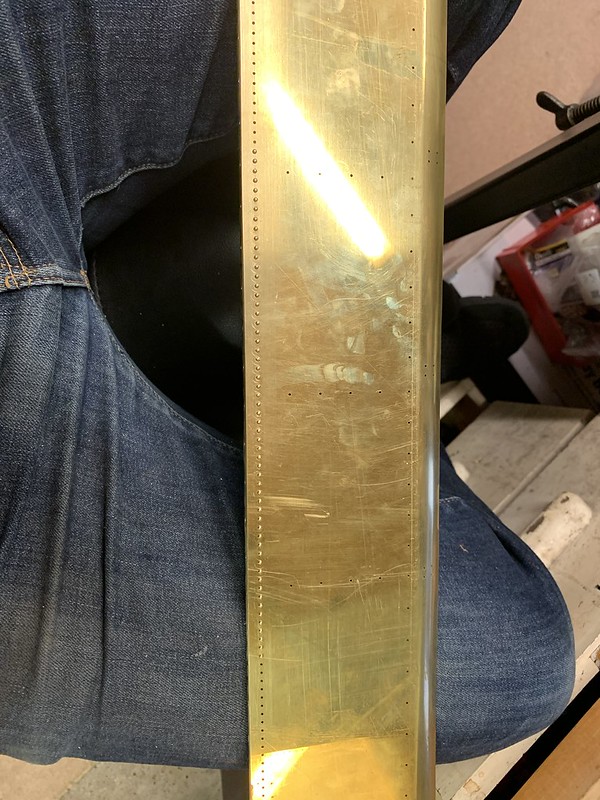 Untitled Untitled by Adam Cro, on Flickr Sorry its a bit long but hope its interesting. Adam |
|
44767
Statesman
 
Posts: 538
|
Post by 44767 on Oct 6, 2020 10:36:49 GMT
A nice little side project to get on with! I got the poke in the ribs about the cranks, thanks!
|
|
|
|
Post by Cro on Oct 6, 2020 11:32:08 GMT
A nice little side project to get on with! I got the poke in the ribs about the cranks, thanks! No rush at all you know that - I need to save some pennies first. |
|
|
|
Post by Cro on Oct 13, 2020 21:44:55 GMT
Some progress photos from the weekend. All of the side angles inside and outside and now in place and all that is left is the long task of rubbing back all the heads to get it all flush (invisible). 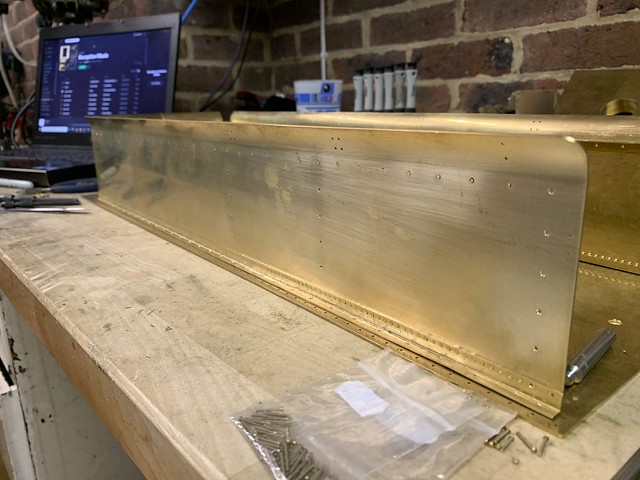 Untitled Untitled by Adam Cro, on Flickr I have also joined the two halves together at the rear. 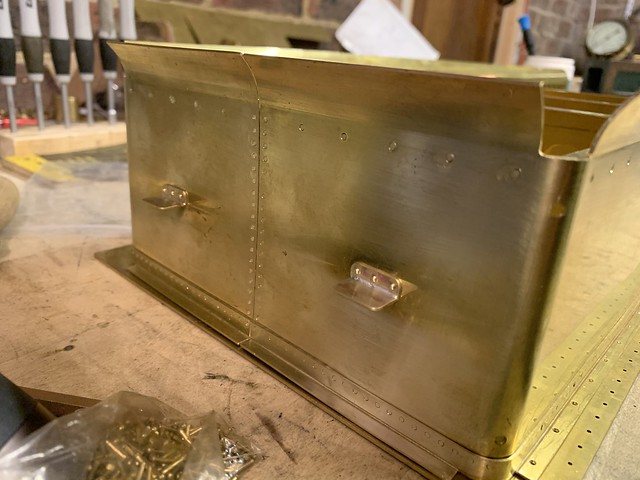 Untitled Untitled by Adam Cro, on Flickr 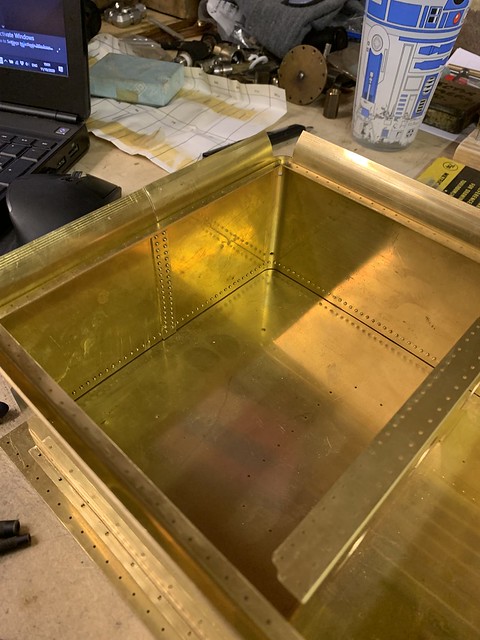 Untitled Untitled by Adam Cro, on Flickr And the last job was to secure the baffles in place. I actually fitted them to one side before putting the two halves together. All I have left is to rivet them to the second side when I can persuade my lovely assistant to come give me a hand. 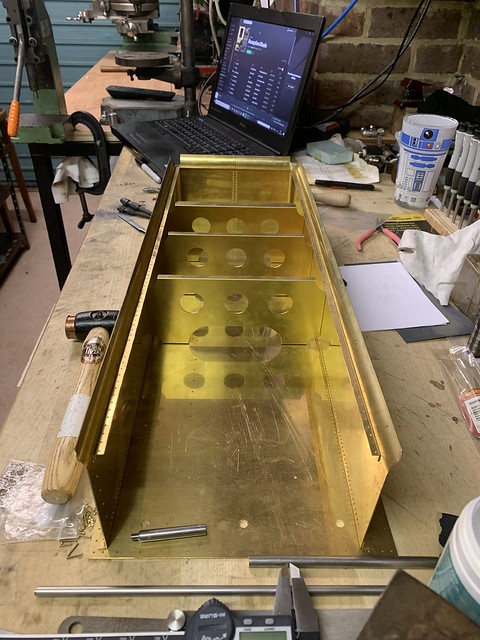 Untitled Untitled by Adam Cro, on Flickr A quick dry assembly of everything to date gives an idea of the finished look.  Untitled Untitled by Adam Cro, on Flickr I have a dome on order from a spinning company I found which will be split either side of the rear coal rail. The tool boxes need soldering together, lids rolling and hinges making. There are no details for a firing iron shelf so that all needs to be fabricated and added in plus little details like lifting links, air inlets and so on before I think about getting the top plate on permanently. I also need to look at the cab floor height as this has an impact on the coal space which also contains boxes around the water valves and the sand boxes which I'm not sure if they sit on the sole plate or the coal plate level as the kit has no fixing points for these. Back on making fittings for the time being though, vacuum brakes are the order of the day! Adam |
|
JonL
Elder Statesman
   WWSME (Wiltshire)
Posts: 2,988
|
Post by JonL on Oct 13, 2020 21:52:09 GMT
Beautiful. Top work Adam.
|
|