|
|
Post by NSWGR Steambuff on Jul 11, 2014 9:29:20 GMT
As I stated earlier, when I first got the part set of castings, they came with a partly built tender frame and tender bogies. All were showing very obvious signs of having sat around near the coast for twenty years or more, and needed a lot of cleaning up. Pic attached is an example of the condition as it arrived. Whilst pulling it all apart I discovered 4 broken off 5BA taps, all 4 axles were too short and had to be re-made plus many other problems. I am slowly working through it all and getting it sorted. 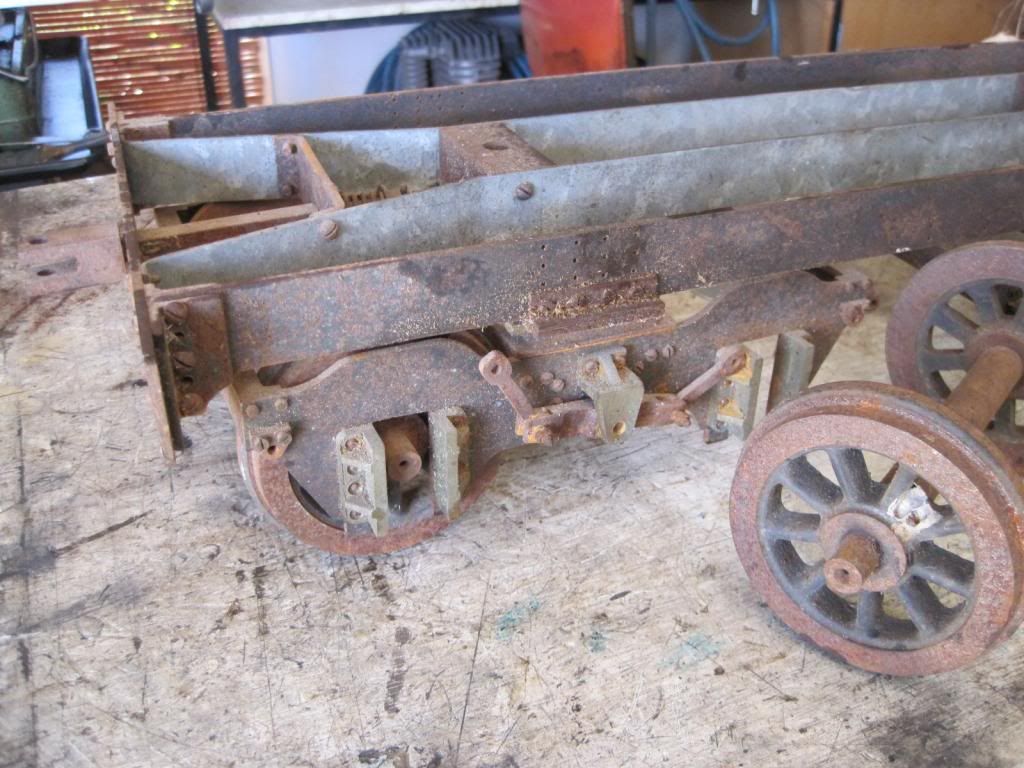 More up to date progress pics to follow. Cheers, Ned |
|
|
|
Post by Shawki Shlemon on Jul 11, 2014 9:48:29 GMT
Hi Ned , for starter I don't use steel for springs as you mention , I use spring steel , actually you can buy spring steel leafs ( strips ) to the required width and thickness in soft or hard state from your preferred supplier , they all supply that . I generally boost the suspension on tender because I sit on it for driving , that is the reason to see the thick leaves .If they are properly formed and tight in the buckle , they shouldn't go out of alignment even though sometimes are not perfect .
|
|
|
|
Post by Jim on Jul 11, 2014 23:00:47 GMT
Hi Ned,
I guess you're familiar with the series "Pamela", C32 class Construction' by the late Mike Wilmot that ran in the early issues of AME?
If not it could be well worth getting the relevant back issues.
Jim
|
|
|
|
Post by NSWGR Steambuff on Jul 12, 2014 7:48:03 GMT
Thanks Jim,
I have a couple of the issues containing that series and will chase up the rest. Apparently the series was never finished according to the people at AME because of the author's untimely passing.
Edit: Sorry Jim, in answer to your earlier question on whether I will do one of the named locomotives, the answer is I don't know yet. A good friend of mine in Brisbane has a copy of Ron Preston's "STANDARDS IN STEAM - THE 32 CLASS" which is out of print, so I can borrow his and do a bit more research
Ned
|
|
|
|
Post by Jim on Jul 12, 2014 8:24:28 GMT
From memory which is always a risk, I think Hunter and Hawkesbury were two named 32's that come to mind. I have always thought the Edwardian intertwined NSWGR initials always looked nice on the side of sandbox/splasher above the centre driving wheel.
Looking forward to seeing more photos.
Jim
|
|
|
|
Post by Shawki Shlemon on Jul 12, 2014 11:10:04 GMT
In the book 32 class which I have a copy somewhere there is information on sizes of a lot of things including the boiler , if you scale down the size of boiler barrel to 5" gauge that is 1.0625" / 1 foot as the rest of the engine is scaled to, you will discover that the barrel required should be 5.060" diameter and not 5.25" as in the plans . I asked the designer the question for doing this , his answer was I quote " it seemed to be a good idea at the time " . I used 5" barrel for my engine , this is just for your information .
|
|
|
|
Post by GeorgeRay on Jul 12, 2014 18:51:36 GMT
Remembering that the boiler diameter quoted is always that of the actual boiler not the size over the cladding which adds something like 3 to 4 inches in full size. Model lagging is comparatively often much thinner than full size.  George Ray |
|
Deeja
Seasoned Member

Posts: 131
|
Post by Deeja on Jul 13, 2014 6:36:05 GMT
Ned,
Keep it up, they make a good loco. See my avatar for a pic of mine. Nice to drive and plenty powerful enough. Look foward to sseing some more photos as you progress.
I made the tender springs one leaf at a time from spring steel strip and heat treated, coil springs on the loco.
Deeja
|
|
|
|
Post by Shawki Shlemon on Jul 13, 2014 9:31:29 GMT
Thanks for that George , but I am comparing actual to actual in my thread . I agree with Deeja that the engine no matter what boiler size you use it will end up a fine engine .It is worth the effort Ned .
|
|
|
|
Post by NSWGR Steambuff on Jul 13, 2014 23:05:57 GMT
Ned, Keep it up, they make a good loco. See my avatar for a pic of mine. Nice to drive and plenty powerful enough. Look foward to sseing some more photos as you progress. I made the tender springs one leaf at a time from spring steel strip and heat treated, coil springs on the loco. Deeja Deeja, Thanks for the info. What size spring steel strip did you use and where were you able to source it?? SO far, these springs are causing me the biggest heartache. I've no problem with coil springs as I make my own, but trying to get these infernal leaf springs to look good and still be functional seems to be my stumbling block. I get the impression from reading other build forums that the tufnol material mentioned in the plans is not successful, so I thought a good compromise might be to use thicker, and therefore fewer leaves for both ease of construction and serviceability. Any other info greatly appreciated. Cheers, Ned |
|
|
|
Post by Deleted on Jul 14, 2014 7:53:44 GMT
Hi Ned
Why not do a mix of steel and tufnol until you get the right spring movement, I did this for my tender, works well and keeps the correct leaf spring thickness, if you haven't seen mine you'll find details on page 18 of my Doncaster build. This wasn't my idea, just what others have done and found to work well, I was happy to follow suite..
Cheers
Pete
|
|
|
|
Post by NSWGR Steambuff on Jul 14, 2014 21:25:16 GMT
Pete,
I tracked down your build - very impressive. I am still very new to loco building, obviously. Looks like I might re-visit the spring steel and tufnol idea. Finding the right size spring steel in my area has proven to be akin to finding rocking-horse dung. Thanks for your input.
Ned
|
|
|
|
Post by NSWGR Steambuff on Oct 2, 2014 7:34:21 GMT
Well, it is now approaching 4 months since I ordered the laser-cut frames and there is still no sign of them.That is one of the main reasons I have not posted any photos yet, as all I have is a pile of parts.
I haven't been idle though, having got the tender on it's wheels and all the brake rigging stuff done. I decided to go with castings for the tender springs, (now that I have discovered they are available ---supposedly---) but like the elusive frames, they haven't arrived after months of waiting.
I have done a lot of the valve gear and eccentrics, the motion plates, all the frame spacers, buffers, buffer beams, brake cylinder, weigh shaft, wheels and axles, most of the leading truck,and lots of other little pieces. The list of little pieces seems unending.
I do have a couple of questions though.
Is there good workable alternative to using taper pins? They are called for on the plans for the weigh shaft and crosshead and elsewhere, and I don't have taper reamers of the correct size. I don't know about elsewhere, but they are not a cheap item here in Australia.
The other question is whether drawn LG2 gun metal is a suitable substitute for phosphor bronze in say the brake cylinder piston? I have some PB, but it is 1" solid round and some of the PB parts in the plans would result in a lot of wastage, but I also have a length of drawn LG2 bronze @ 5/8 round so could use that if it is suitable.
I mentioned before that I have never built a locomotive before, and never having had a good look at one, especially a C32, I am finding interpreting the plans a bit of a challenge. For example, the crosshead keeps jumping out at me, but each time I try to figure out how to do it, I drift off and make something that is a bit easier, but the time will come when I will have to attack it.
Hope the questions are not too dumb. Cheers, Ned
|
|
|
|
Post by ejparrott on Oct 2, 2014 9:08:08 GMT
There isn't really an alternative for taper pins in most instances, depends exactly what you're looking at?
LG2 would be fine for a steam brake piston in my opinion.
We still like to see piles of parts you know!
|
|
|
|
Post by NSWGR Steambuff on Oct 3, 2014 2:16:49 GMT
Thanks EJP, I'll have to get busy with the camera.
There was one other question I mean't to ask.
I am thinking of using 'O' ring seals in the steam brake cylinder and also the axle driven water feed pump. Is there a particular O ring material to suit each purpose?
Cheers
Ned
|
|
|
|
Post by ejparrott on Oct 3, 2014 8:44:22 GMT
The water pump will be fine with what ever you have, the steam brake cylinder...well....all O rings exposed to steam should have Viton O rings, and I still would use them. But to be perfectly honest, for the amount of use most people give them, any ring would probably do. Silicone and neoprene O rings don't like prolonged exposure to steam at all. The club's Scot though, just has a couple of shallow grooves and no O rings. Yes it leaks a bit, but it still works just fine. I have been contemplating fitting an O ring to it, but I have to be careful it doesn't just lock the wheels up in any case!
|
|
|
|
Post by NSWGR Steambuff on Nov 3, 2014 22:19:56 GMT
I finally got around to posting some photos of my pile of bits and pieces I have made whist waiting for the laser-cut frames to arrive. I would really appreciate any advice from those who have built this loco as to how you went about making the splashers/sand boxes. Photos of progress so far. 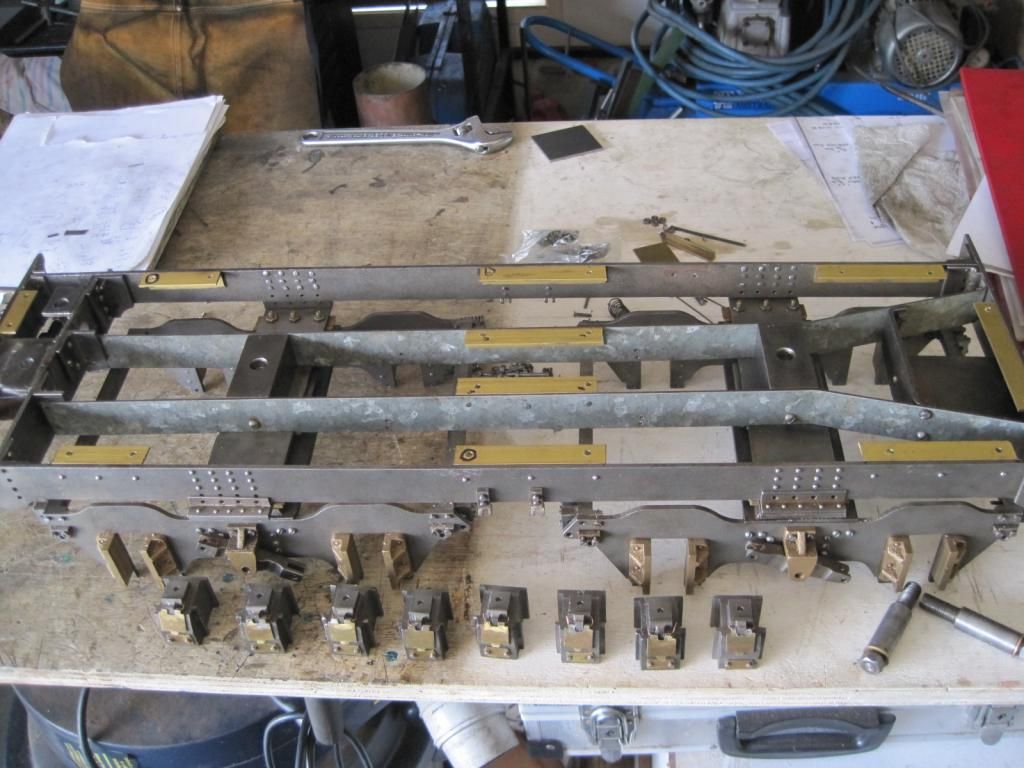 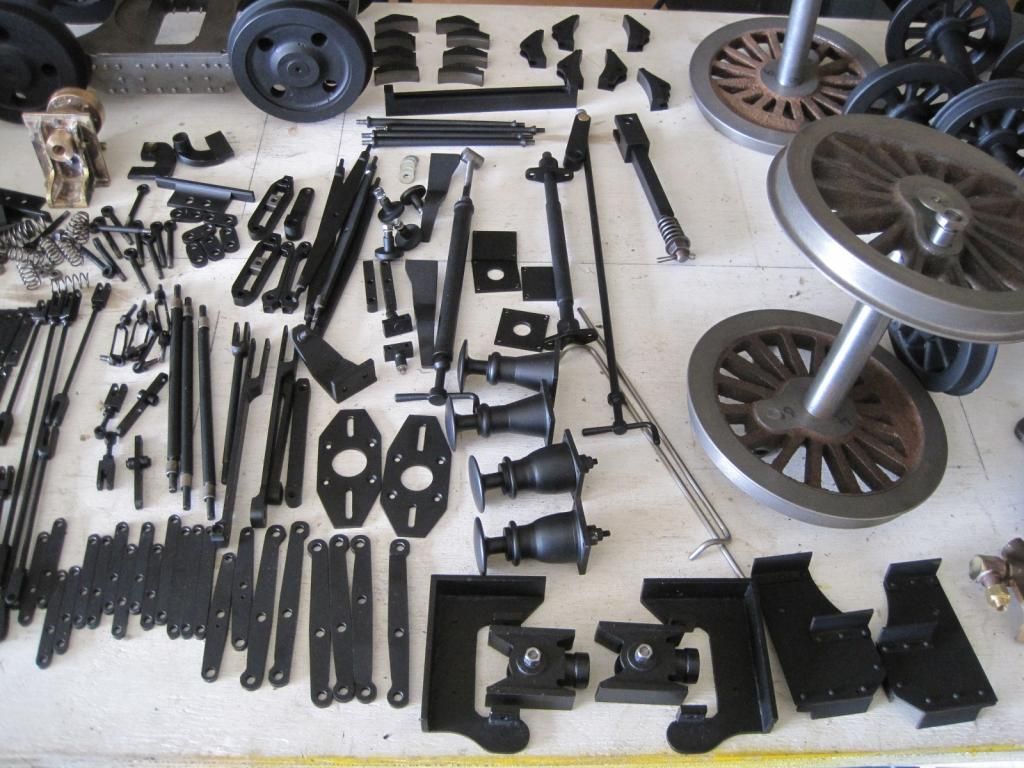 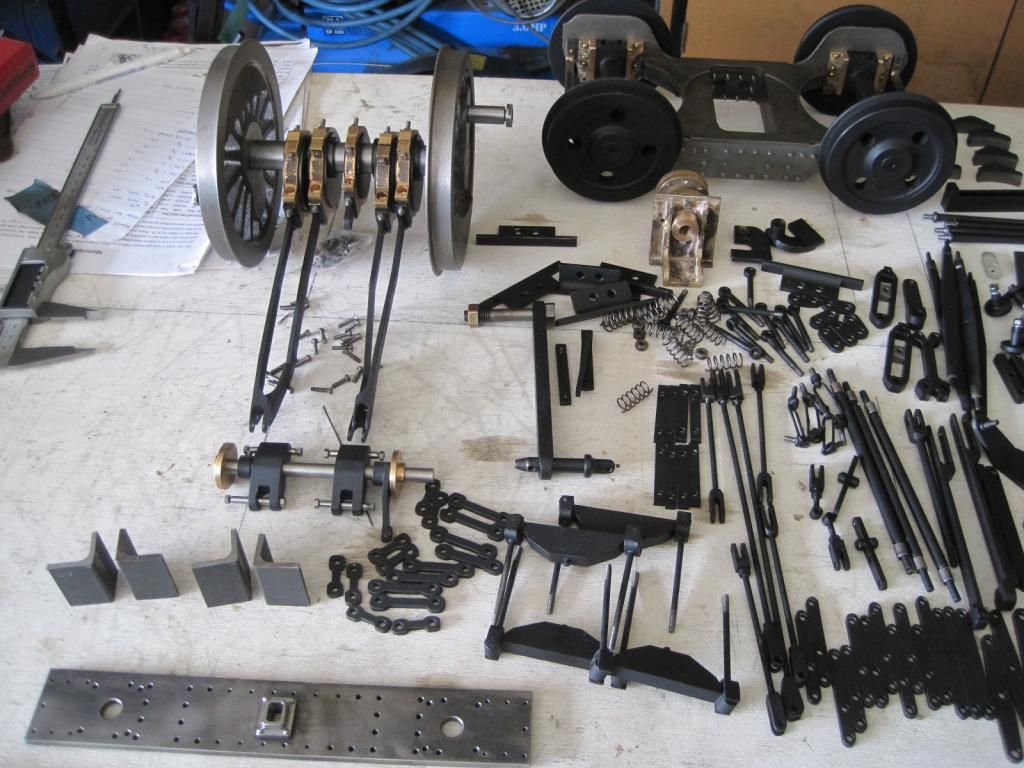 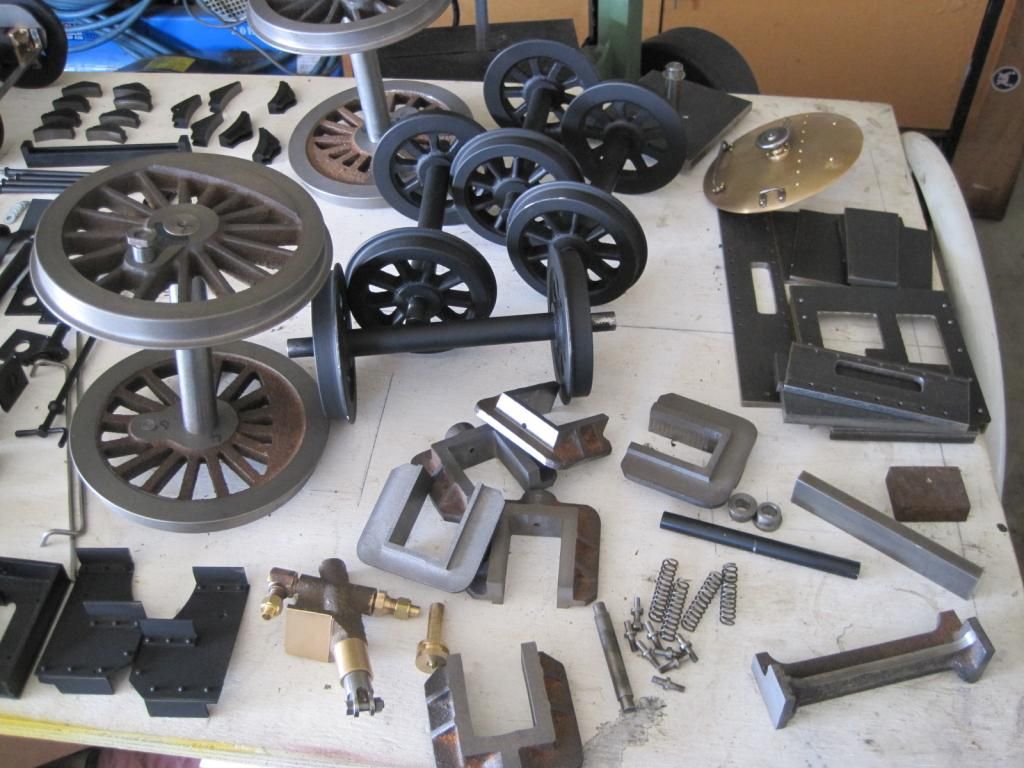 Would you believe my frames arrived yesterday after being ordered 5 months ago? I hope to get the base for the tender sorted out in the next week or so, and then get on with building up the frames. Cheers, Ned |
|
|
|
Post by Rob on Nov 3, 2014 23:03:54 GMT
Wow, that's a lot of bits, you'll have a blast seeing that coming together!
I'd love to see some photos of the assembly!
|
|
|
|
Post by Jim on Nov 4, 2014 17:54:35 GMT
You should be very proud of your work so far Ned, you've done a great job there and as others have said please keep posting photos of your progress.
Jim
|
|
|
|
Post by Shawki Shlemon on Nov 5, 2014 8:51:51 GMT
|
|